Mixing Old & New: Close to My Heart Celebrate Today and Shimelle's Glitter Girl!

Hello there, friends! I have to say, I am pretty good at purging my supplies, but I do hold onto a few cherished collections, like any that my friend Shimelle has created with American Crafts! I still have products going back to her first collection!

CTMH-Meghann-Andrew-Close-to-My-Heart-Celebrate-Today-Collection-Birthday-Pockets-05.jpg

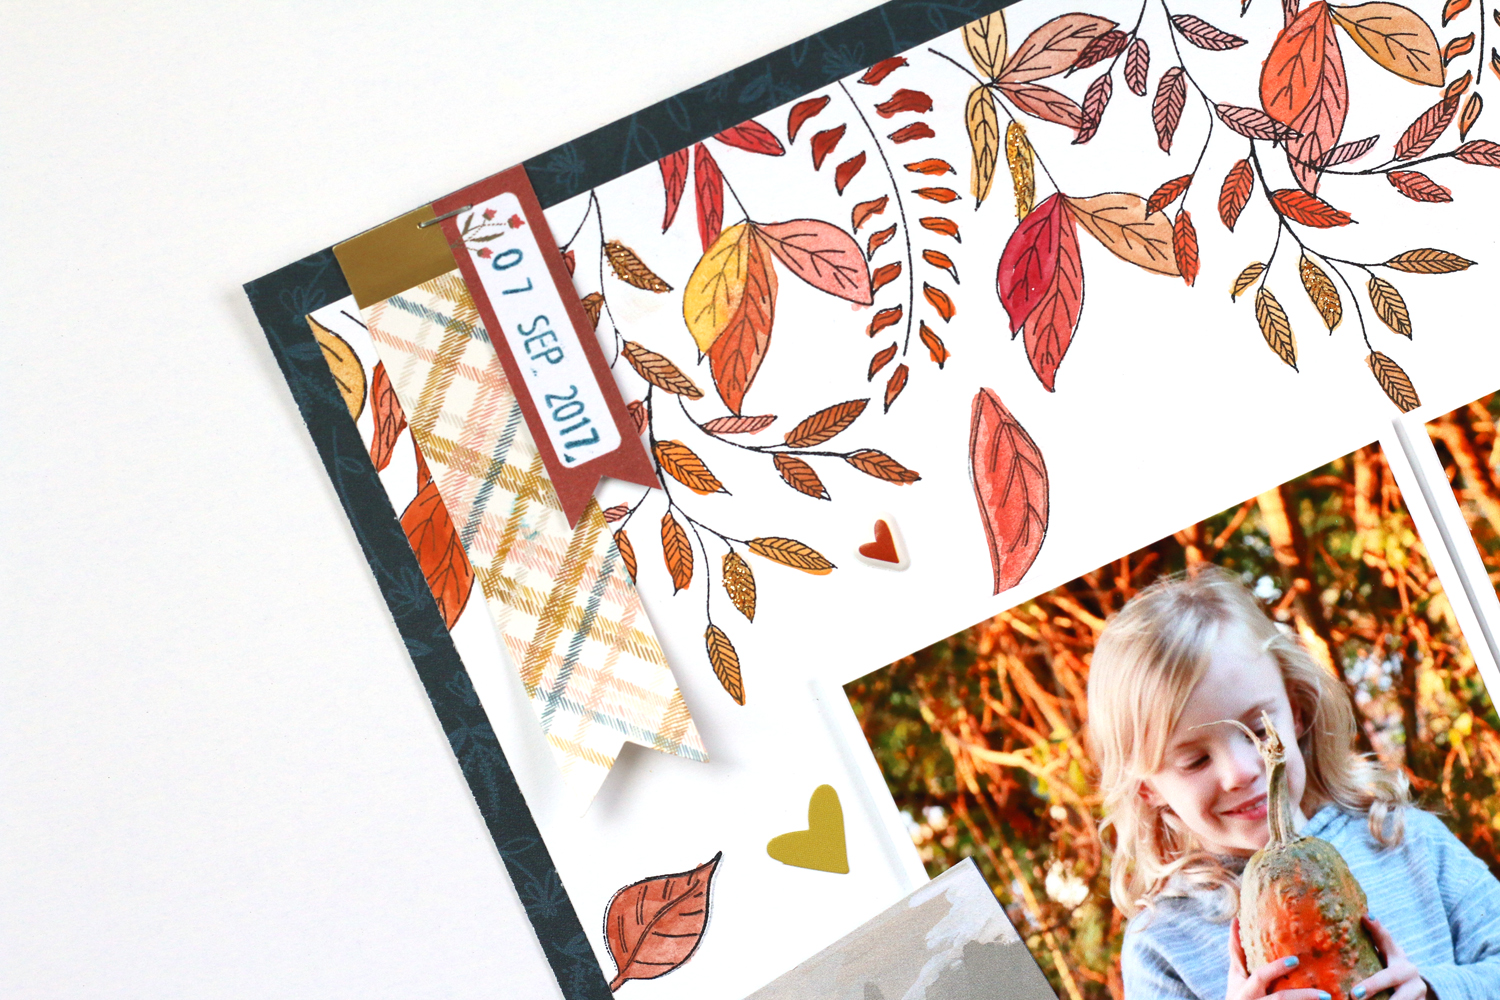
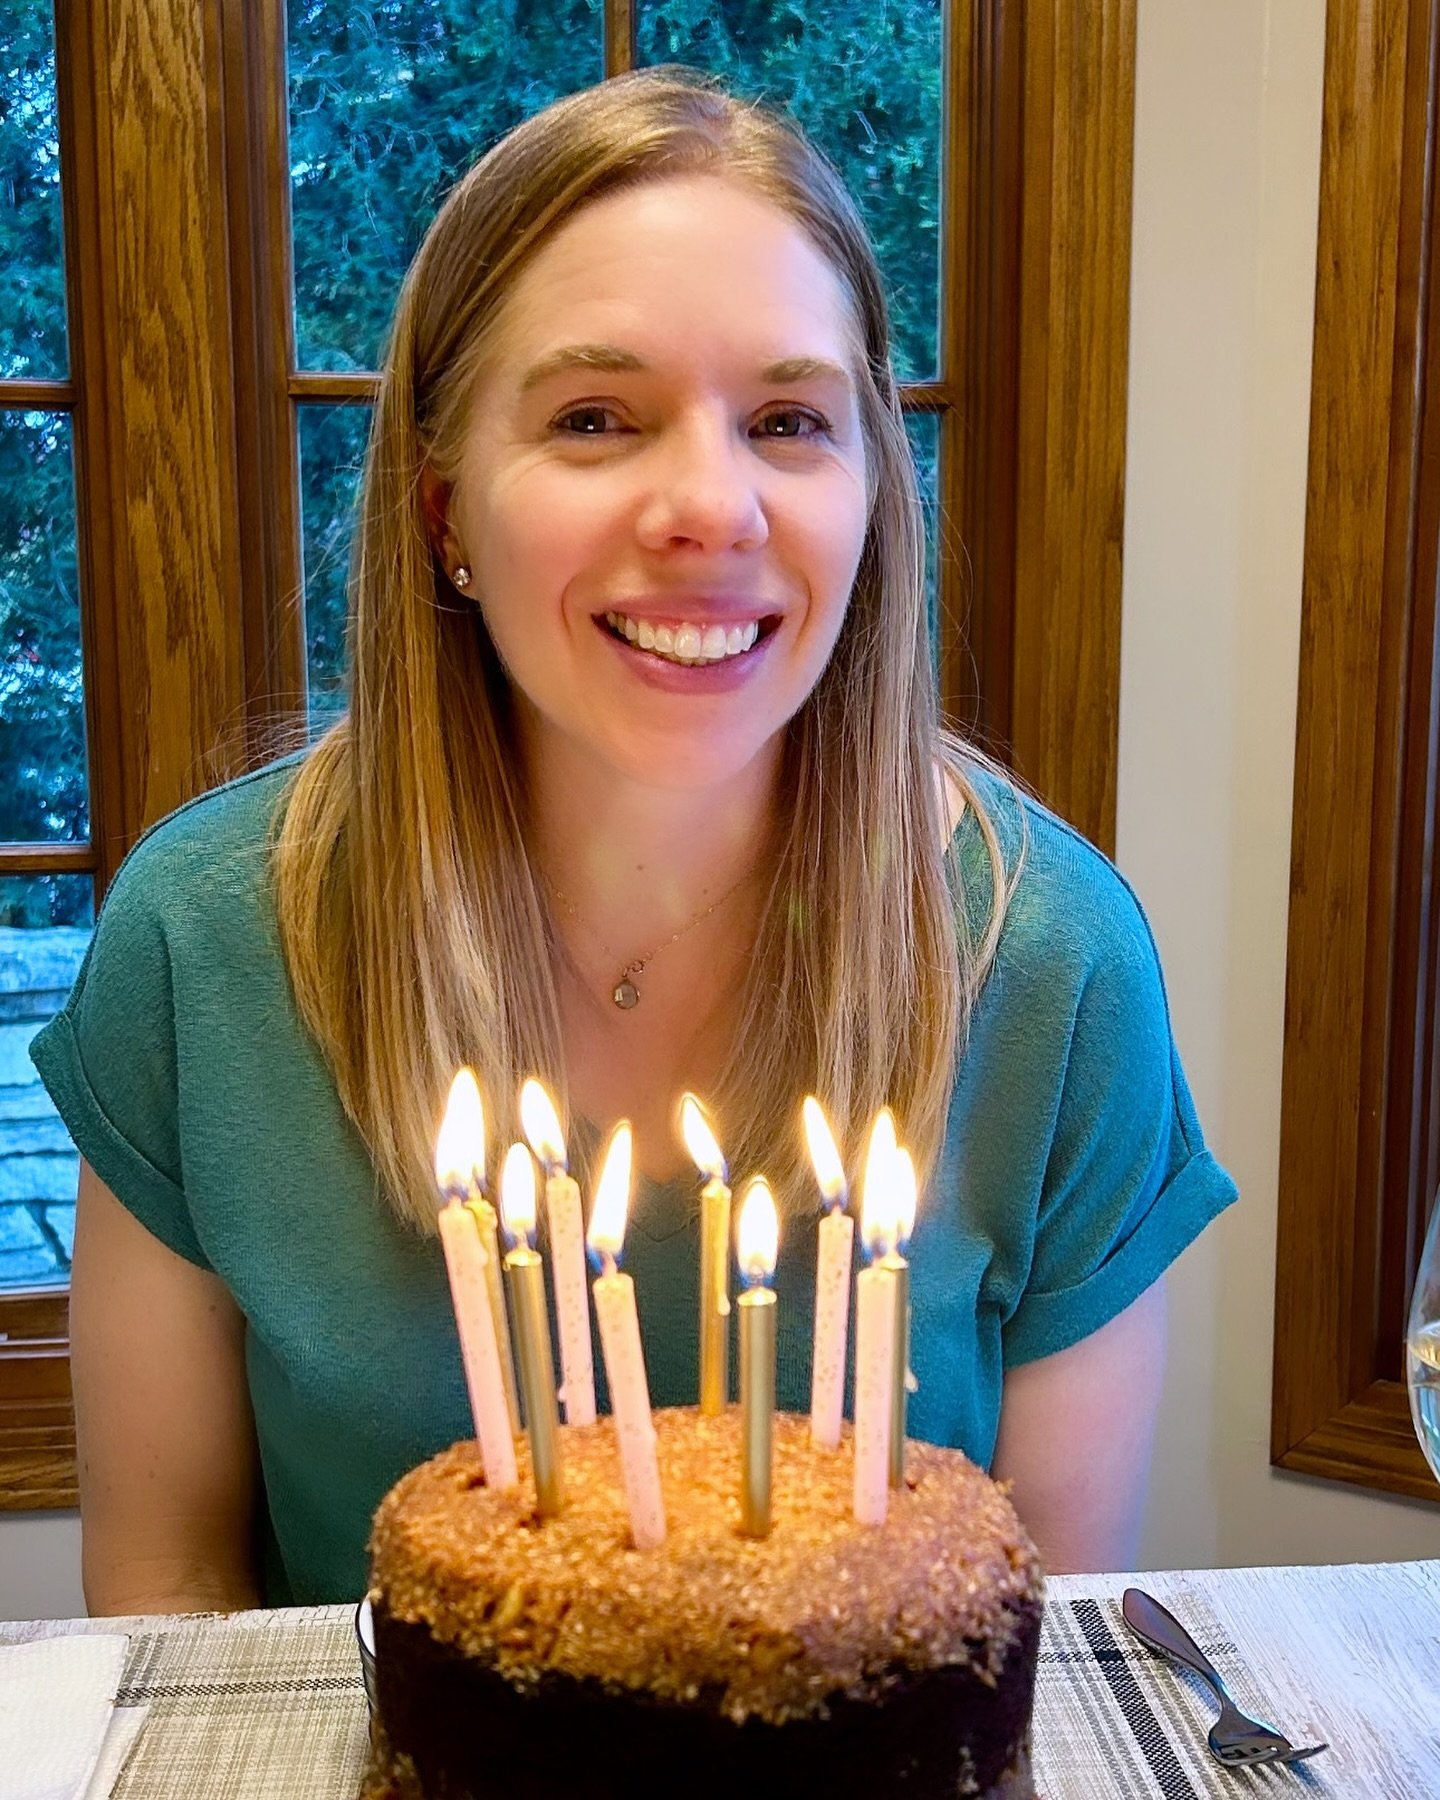
I recently received the beautiful Celebrate Today collection from Close to My Heart*, and when I saw the gorgeous colors in their Picture My Life cards, I knew I had to use them to document my daughter’s 7th birthday party, and add a few magical elements from Shimelle’s Glitter Girl collection! The combination of the old and new from my stash worked perfectly together. Take a look:

CTMH-Meghann-Andrew-Close-to-My-Heart-Celebrate-Today-Collection-Birthday-Pockets-03.jpg

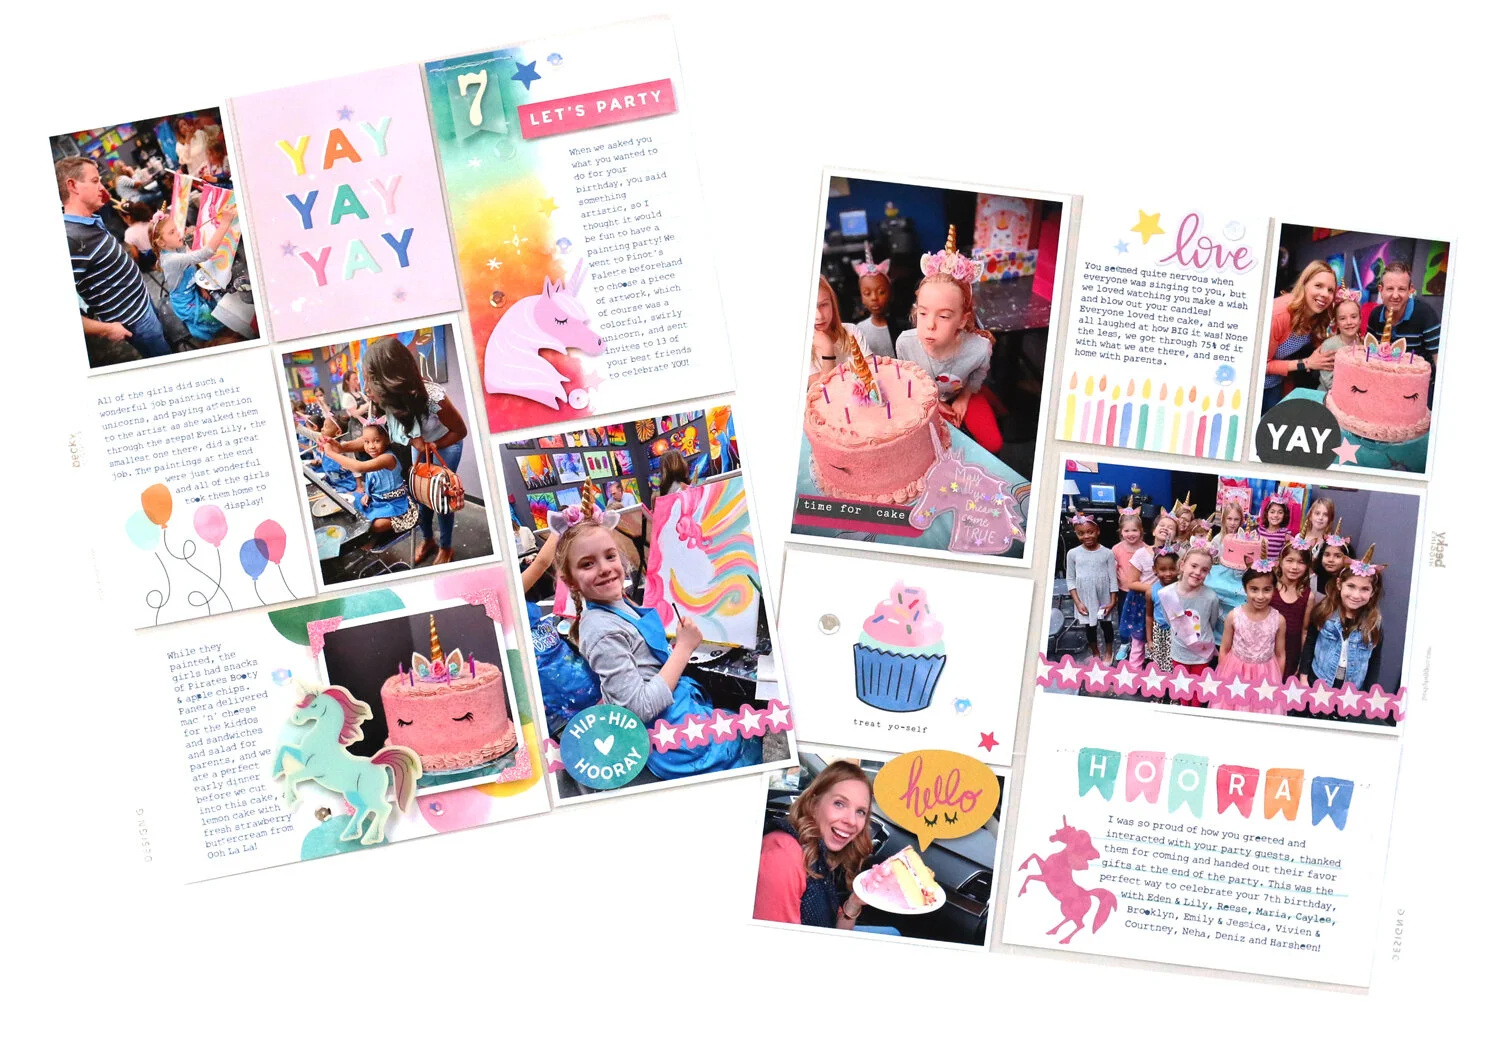
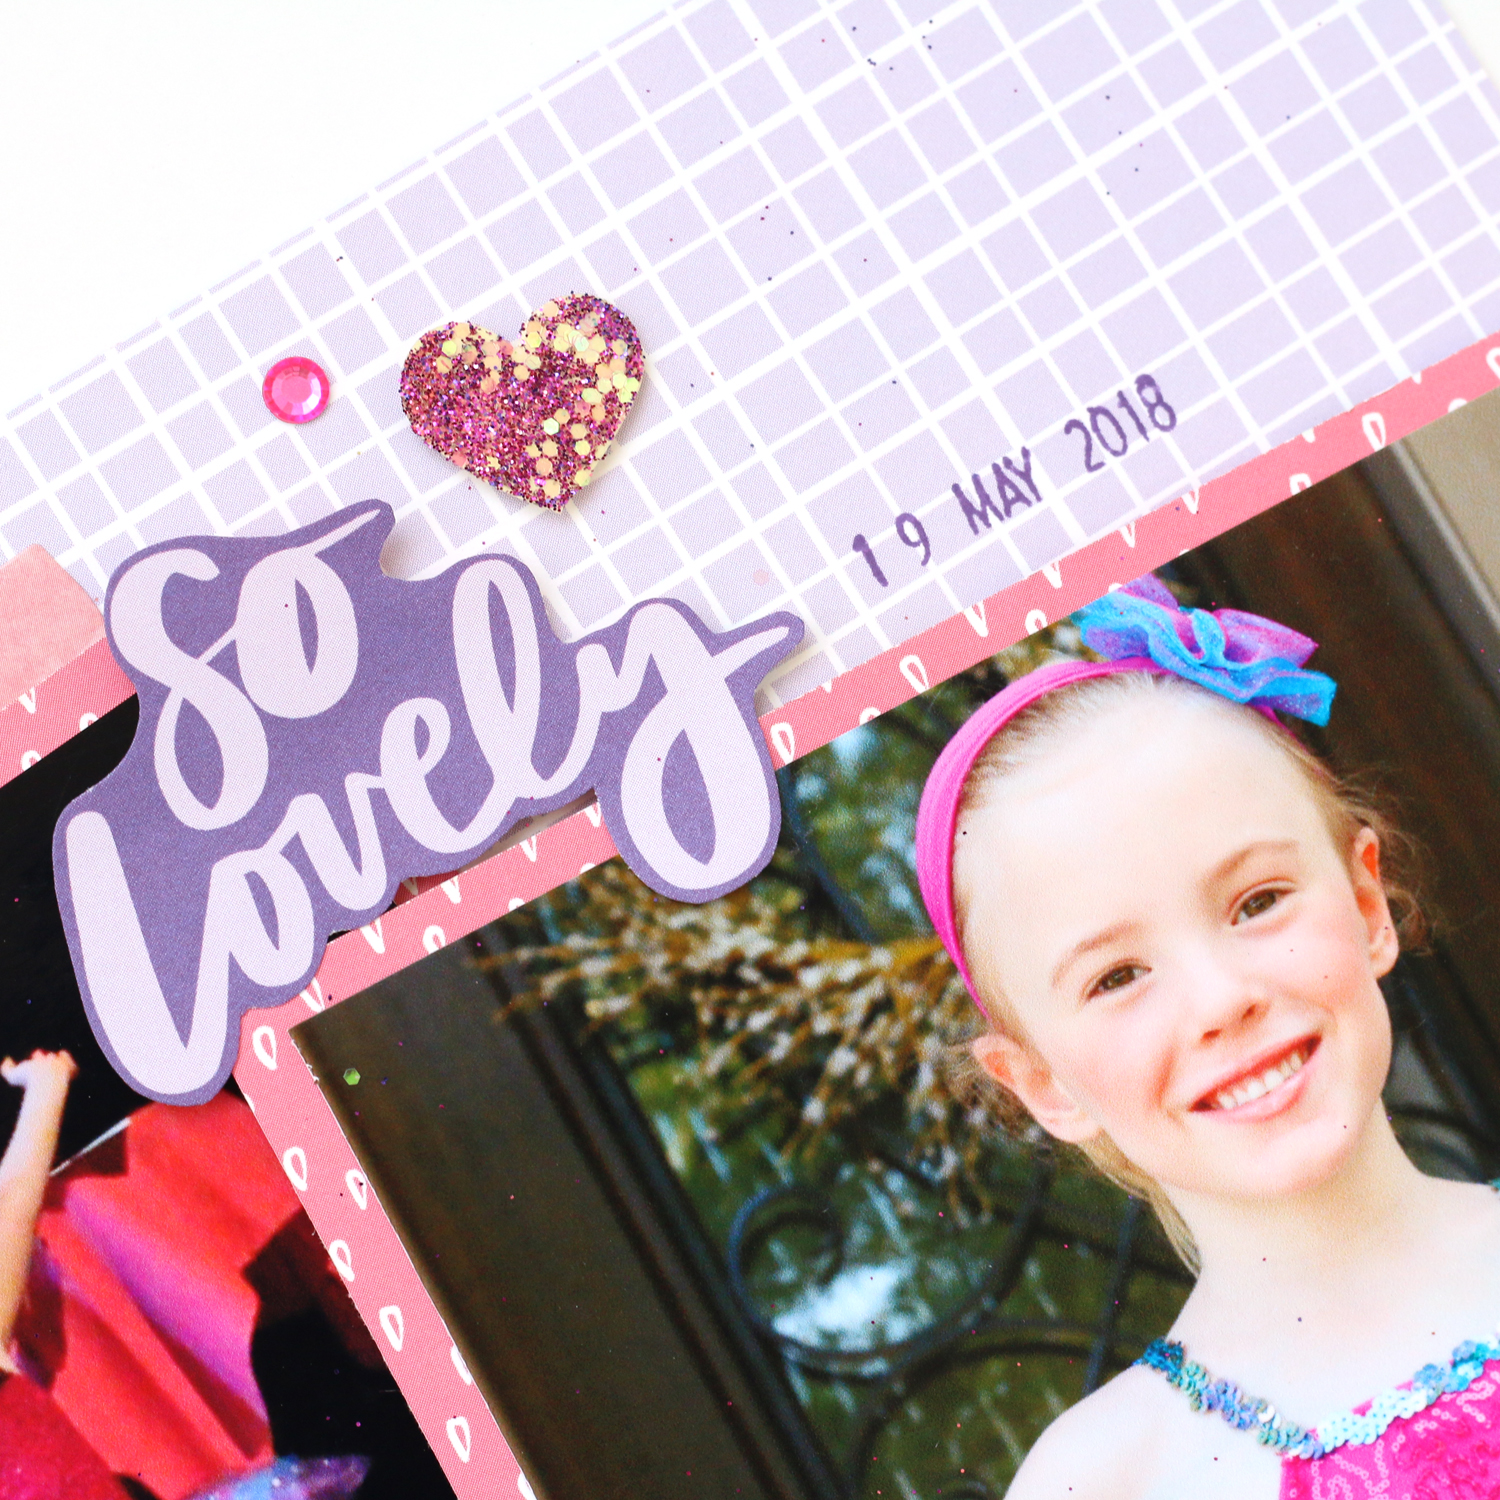
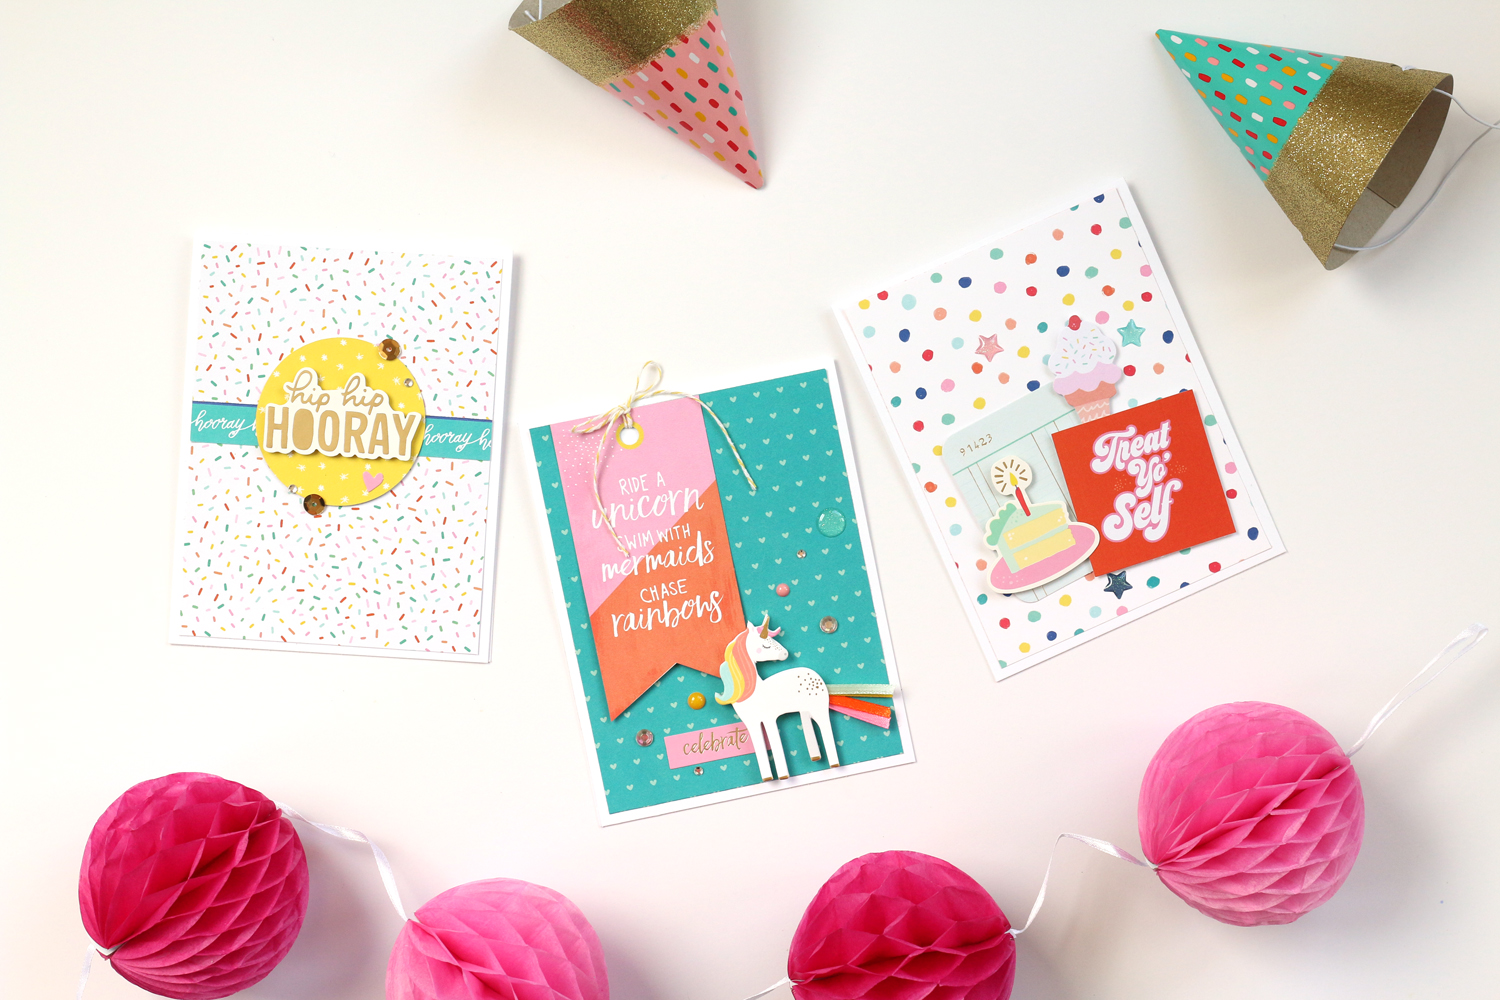
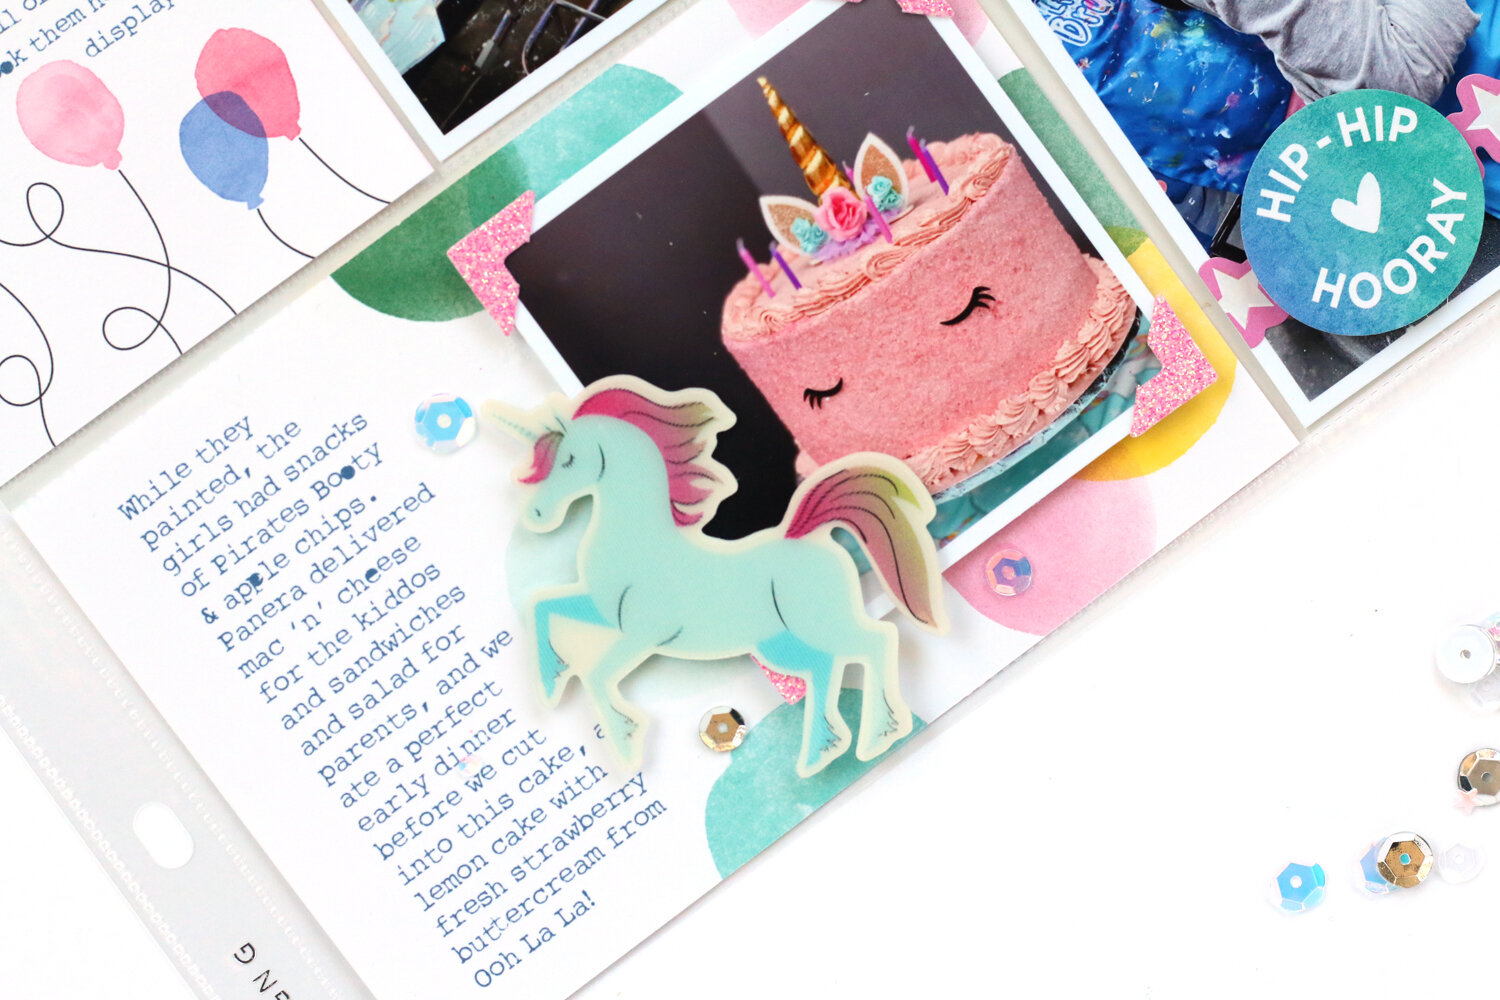
All of the colors! The gorgeous Picture My Life cards provided the perfect mix of colors to stand up against my colorful photos from my daughter’s painting birthday party. I absolutely loved the colorful, watercolored elements on the cards, and used them to fill pockets and back smaller photos to record the day.

CTMH-Meghann-Andrew-Close-to-My-Heart-Celebrate-Today-Collection-Birthday-Pockets-01.jpg

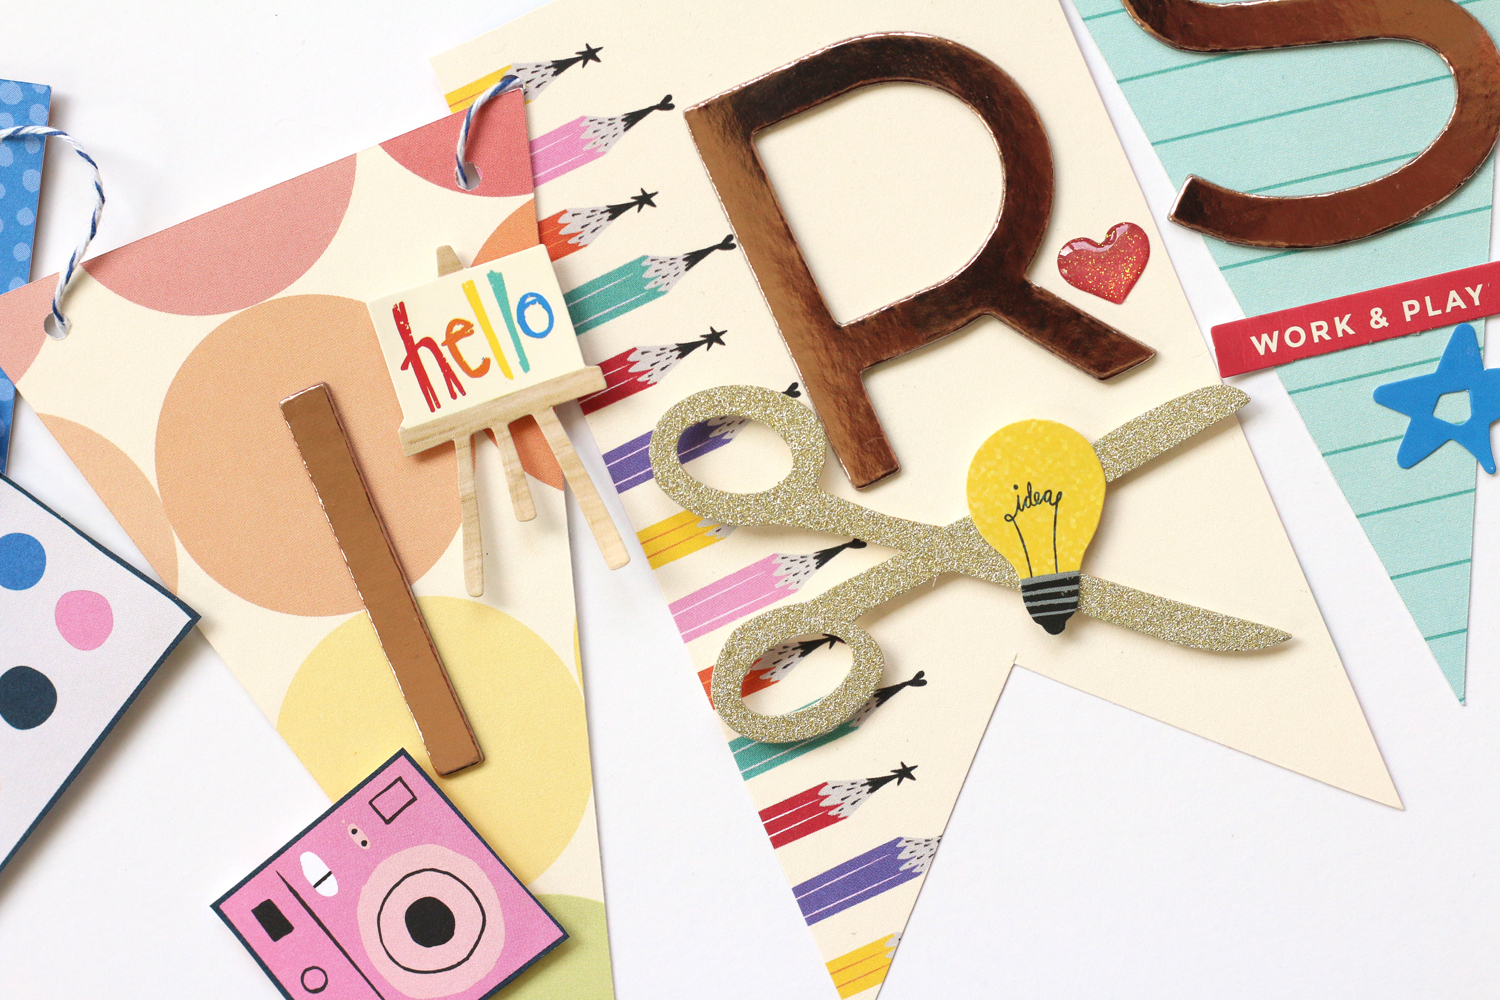
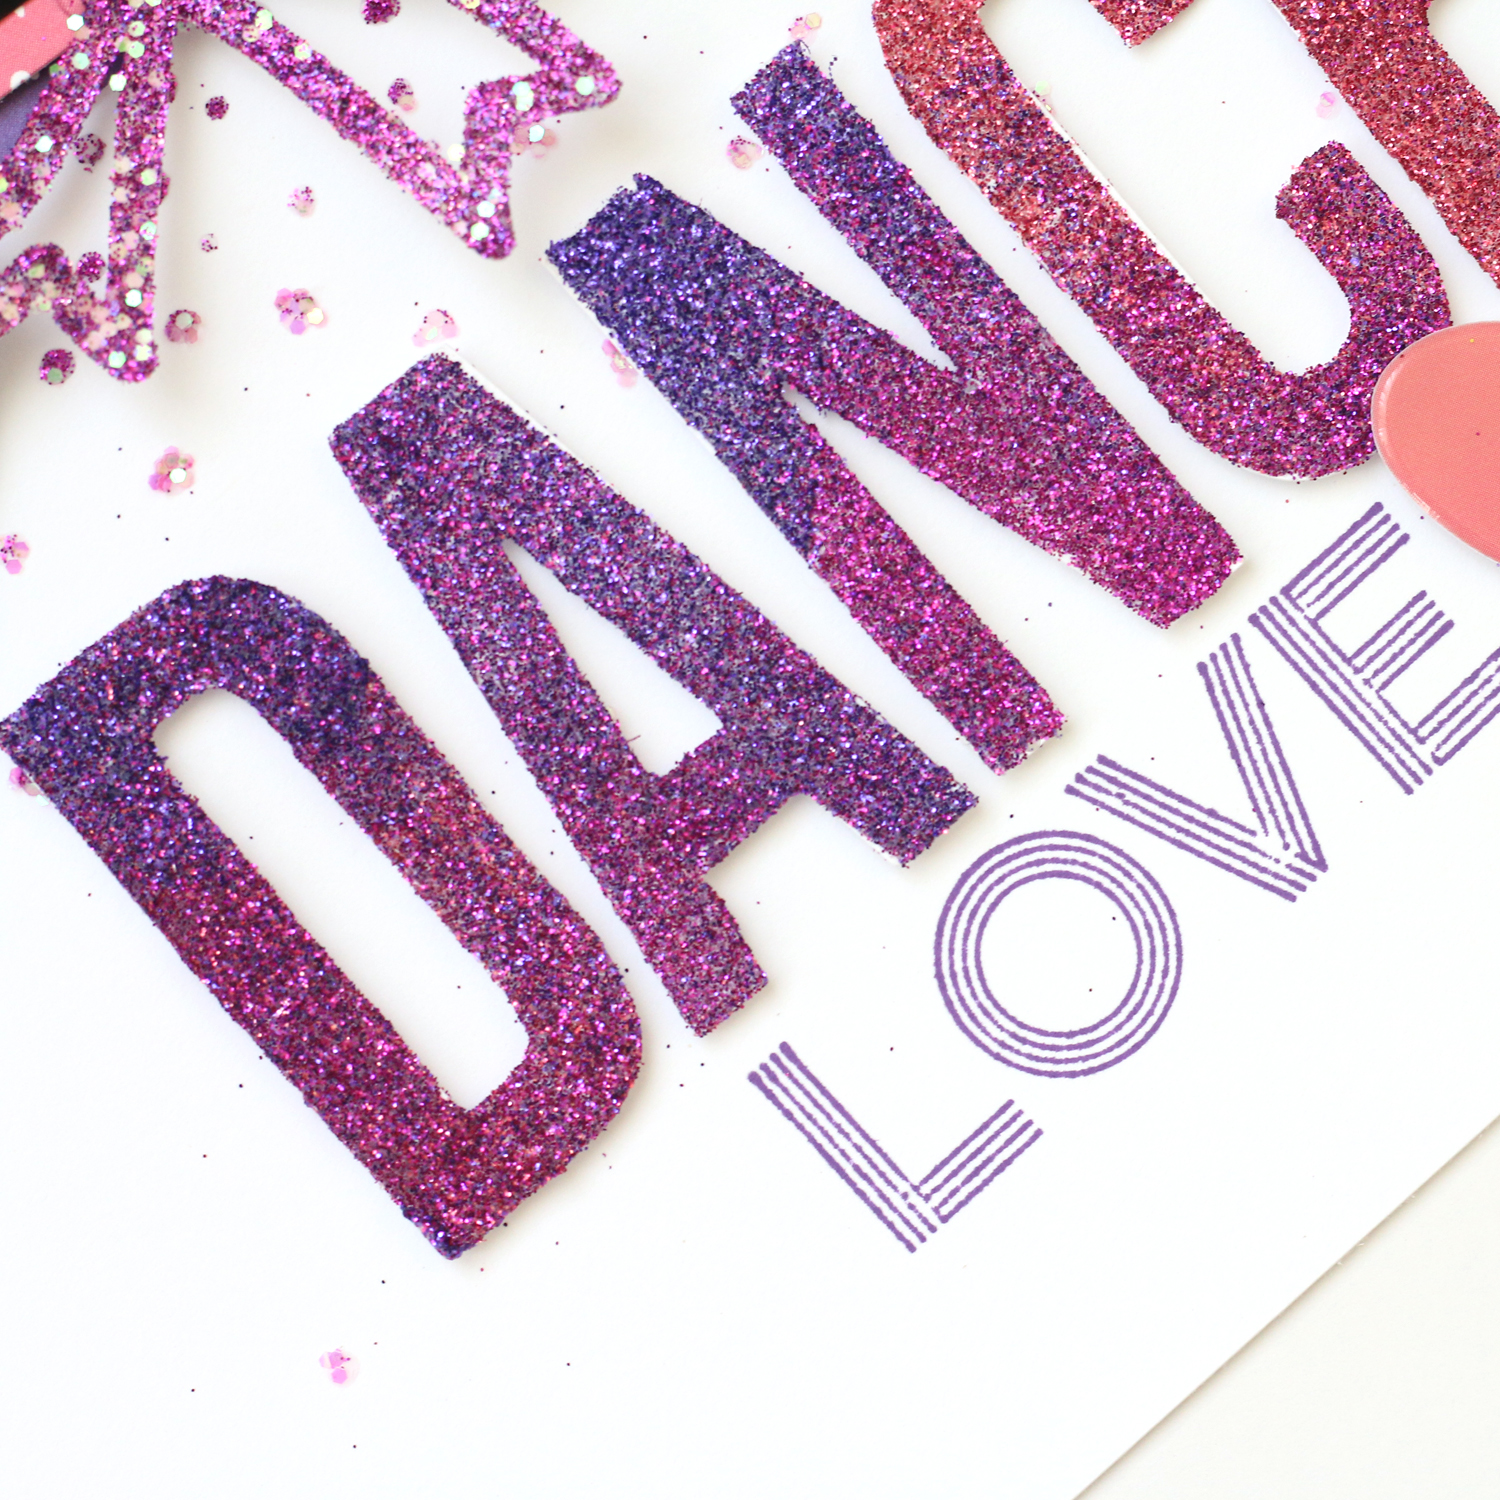
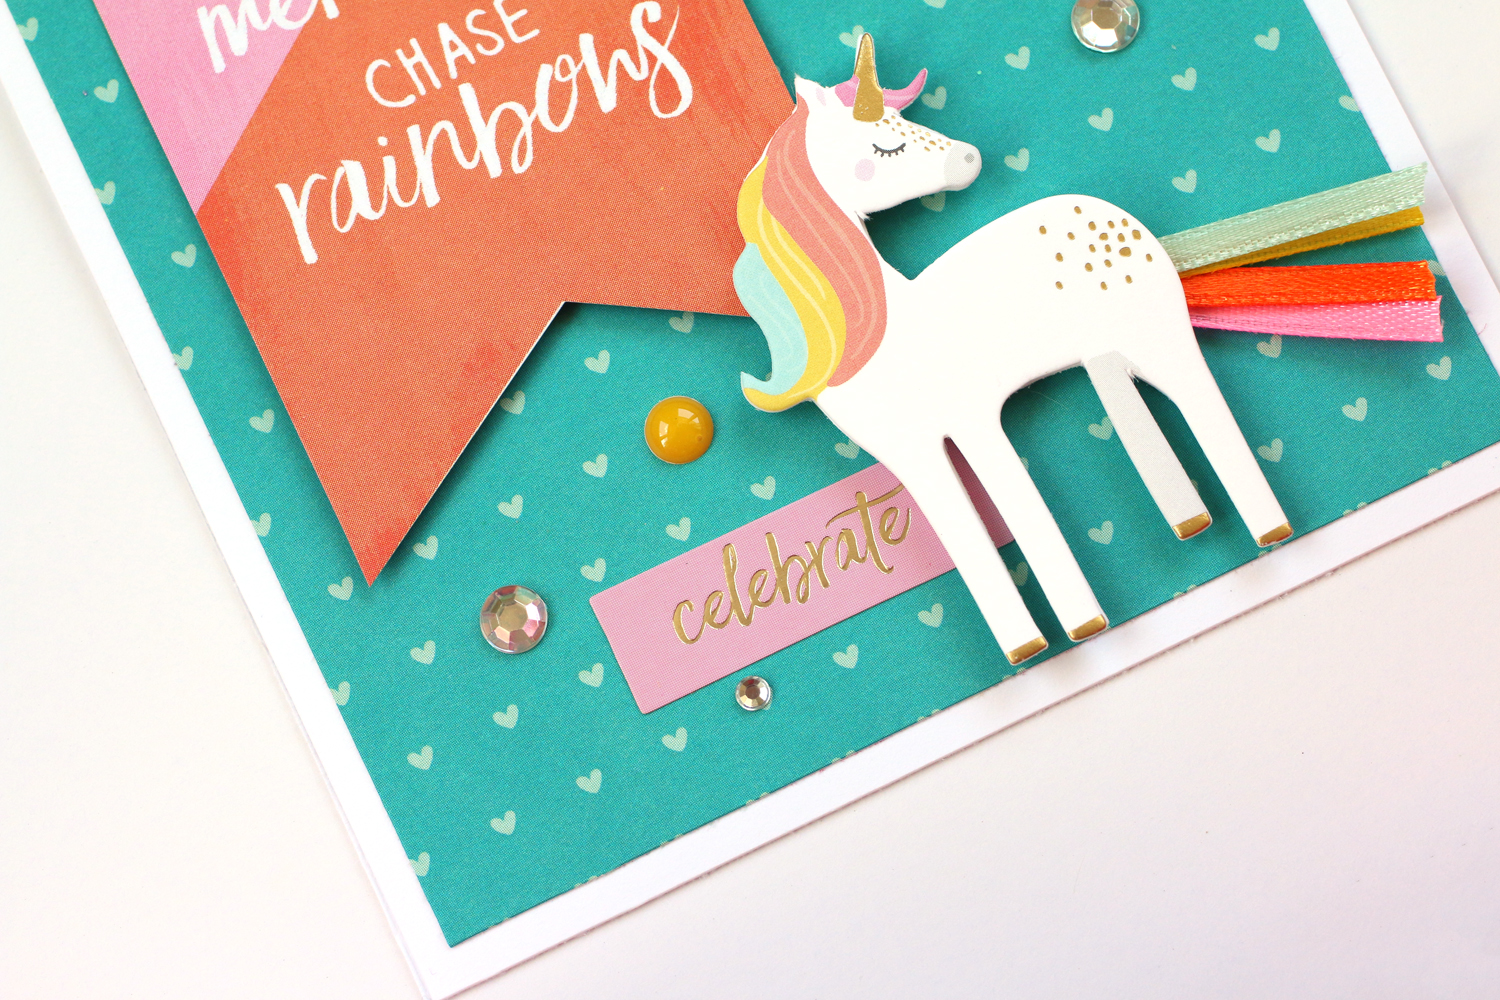
Because of all of that gorgeous color, not much embellishment was needed! I simply added coordinating stickers from the Celebrate Today collection and die cuts and stickers from the Glitter Girl collection, to add the magical unicorns, border stickers and script words.

CTMH-Meghann-Andrew-Close-to-My-Heart-Celebrate-Today-Collection-Birthday-Pockets-02.jpg

Just a few colorful stars from the Celebrate Today stickers sheet and pretty silver sequins were the only small embellishments I needed to complete my pages!

Watch how this pocket page layout came together in this quick process video:

I am so pleased that I had the Glitter Girl collection still on hand to use alongside the Celebrate Today Picture My Life cards from Close to My Heart. I hope this pocket page encourages you to mix your new stash with older product to create beautiful things! Thanks so much for stopping by today, and happy creating!

CTMH-Meghann-Andrew-Close-to-My-Heart-Celebrate-Today-Collection-Birthday-Pockets-07.jpg

American Crafts + Damask Love Wild Card: Hana Road

I recently received the Damask Love Wild Card collection* from American Crafts, exclusive to JoAnn Crafts! This collection certainly has a tropical feel which is perfect for summer memories, and, with just a few AC products, I had a great time documenting a beautiful day in Hawaii with it. Take a look!

AmericanCrafts_MeghannAndrew_HanaRoad_01.jpg

Supplies | Wild Card collection: Paper project pad, stickers; Vicki Boutin Color Kaleidoscope: 12” x 12” mixed media paper pad, texture paste; Sparkle City collection: foam Thickers; Head in the Clouds collection: enamel dots

This layout was all about COLOR, and getting that Hawaiian vibe on the page. I started by printing my photos at 3” x 3” and arranged them in a handy grid on a spare sheet of white cardstock. Instead of painting my own background, I started out with a sheet of the Color Kaleidoscope 12” x 12” mixed media paper pad to get all of these colorful, painted splots on the page without the mess!

AmericanCrafts_MeghannAndrew_HanaRoad_02.jpg

I knew that I wanted my title to be about our long day trip to Hana, and I found a great font called Sharkines to cut the word from papers in the Wild Card collection project pad. I cut each letter out twice using different papers, and layered them for a colorful look. In the corner, I added fussy-cut leaves from the Toucan Do It paper in the project pad, then topped them with a toucan sticker from the Wild Card stickers. For the second word in my title, I used the Sparkle City foam Thickers to add a pop of blue.

AmericanCrafts_MeghannAndrew_HanaRoad_04.jpg

Adding my journaling on a pocket card with a nice yellow outline added a bright pop of color and helped to balance the title on the opposite side. I also added another toucan from the Wild Card stickers to the base of the card, facing toward my photos. Do you see that sparkle at the base of my card? I added that with the amazing Color Kaleidoscope chunky texture paste, brushed directly onto the mixed media background paper on top of the paint splatters. It provided the perfect amount of sparkle!

AmericanCrafts_MeghannAndrew_HanaRoad_05.jpg

In the upper right corner, I wanted to balance those big leaves from the bottom left corner and continue that diagonal line through my photos. I used fussy-cut leaves, and Wild Card stickers to create the corner. The pineapple was the perfect touch! I finished it with a fussy-cut sun cut from the So Fresh paper in the project pad.

AmericanCrafts_MeghannAndrew_HanaRoad_03.jpg

To finish off the page with a few different textures, I added some older Crate Paper brads from my stash and Head in the Clouds enamel dots.

AmericanCrafts_MeghannAndrew_HanaRoad_06.jpg

I hope you love this page as much as I do! I feel like it perfectly captures the aloha spirit! If you have your own tropical adventure to record, I highly recommend the Damask Love Wild Card collection, which is on sale at JoAnn Crafts! Mahalo and happy creating, friends!

*Clicking these links will take you to the JoAnn Crafts & Scrapbook.com shops, and when you purchase, I receive a small percentage of the sale. It doesn't cost you any extra, it’s just a way to say “thanks for inspiring me!”

Let The Sun Shine In Layout + Process Video

Hello, friends! I’m excited to be back home creating after a long, relaxing holiday weekend, and today I have a colorful page to share with you that combines two of my favorite new collections from American Crafts—Vicki Boutin's Color Kaleidoscope and the Sparkle City collection—all inspired by my daughter’s umbrella.

AmericanCrafts_MeghannAndrew_LetTheSunShine_01.jpg

Supplies | Color Kaleidoscope collection: Kaleidoscope paper, Beyond Words paper, Paper Hearts paper, Flight of Fancy paper, ephemera die cuts, sticker book, puffy sticker phrases, small puffy sticker sheet; Sparkle City collection: 6" x 8" paper pad, cardstock stickers, sticker book, chipboard stickers, glitter enamel dots

The background Kaleidoscope paper provided the perfect place to color-block embellishments and other fussy-cut papers around its colorful rays, which helped me to tell the story of a grumpy girl whose mood was brightened by her colorful new umbrella.

AmericanCrafts_MeghannAndrew_LetTheSunShine_02.jpg

The Sparkle City collection’s 6" x 8" paper pad provided the perfect title for this page, “Let the Sun Shine In,” which I added to the center of the Color Kaleidoscope ephemera die cut frame.

AmericanCrafts_MeghannAndrew_LetTheSunShine_03.jpg

I loved joining the colorful elements from these beautiful collections to get this story in my album. Watch my process video below to see how I pulled it all together:

You can find all of the products I used to create this page at the gallery links below.

*Clicking these links will take you to the Scrapbook.com shop, and when you purchase I receive a percentage of your sale. It does not cost you any extra, it is just a way for you to say, "thanks for inspiring me!

What To Do With All Of That Washi?

Happy Friday, friends! I’m always trying to think of other ways to use my growing stash of washi tape, and in a creative way. Today I have a new layout to share with you that makes the most of your favorite washi rolls, to create a frame for your page!

AmericanCrafts_MeghannAndrew_Enjoy_01.jpg

 Supplies* | Saturday Afternoon collection: Afternoon Clips paper, Afternoon Roses paper, cardstock stickers, foam and cardstock phrase stickers, wood stickers, layered stickers, washi tape, rotary date stamp; It’s All Good collection: washi tape

This layout is not for the pattern faint-at-heart! I took advantage of all of these glorious colors and patterns to document a lovely day at an English garden, and a favorite photo of my girl and I. I was so excited to see that the washi tapes from the Saturday Afternoon and It’s All Good collections from American Crafts worked so well together to create a frame for my page.

AmericanCrafts_MeghannAndrew_Enjoy_02.jpg

I cut my Afternoon Roses background paper to 8-1/2” x 11”, then took a piece of Coconut Swirl cardstock, and cut it to the same size. Using my paper trimmer, I slowly cut the center of the white cardstock page out to create a frame with 1-1/2” on all sides. (Tip: Don’t worry if you accidentally cut too far into your frame—the washi tape will cover up any cutting imperfections!) Once my frame was cut, I started adding washi tape at the square corners, using the same Saturday Afternoon washi tape pink floral at each corner. I then added pieces of washi horizontally on the left side of the frame, filling up the entire side before I peeled the frame off of my desktop and folded the washi edges around the back side of the frame.

AmericanCrafts_MeghannAndrew_Enjoy_03.jpg

I moved over to the right side of the frame, adding washi tape in the same pattern that I used on the left side. Then I moved to the top and bottom, adding the washi tape vertically. (Tip: if you need to trim a piece of washi, put it in place on the frame, overlapping the other washi tape piece to remain, then gently trim with a craft knife and ruler so that you only go through the top layer of washi tape before lifing off the excess tape.) Once my frame was finished, I adhered it using dimensional adhesive to the soft yellow Afternoon Roses background paper.

AmericanCrafts_MeghannAndrew_Enjoy_04.jpg

To help my photo stand out against all of the color and pattern, I backed it with a 4.5” x 6.5” piece of Coconut Swirl cardstock before adding it to the Afternoon Roses background, leaving more room below my photo. I added my journaling about this lovely day spent touring a beautiful English home onto a journaling card from the Afternoon Clips paper, and adhered that at an angle on the bottom left corner of my layout. The base was the perfect place to add my title, a simple “enjoy” word taken from the Saturday Afternoon foam and cardstock stickers. I also layered the beautiful “life is a collection of moments” wood veneer piece overtop of my title. I love the dimension that this adds!

AmericanCrafts_MeghannAndrew_Enjoy_05.jpg

To balance that heavy title corner, I wanted to create a visual triangle of embellishment in two other corners. In addition to the pretty florals found in the Saturday Afternoon collection, I also added the green Wellington boots, shiny metallic hearts and the cutest yellow wood veneer camera in the top corner! 

AmericanCrafts_MeghannAndrew_Enjoy_06.jpg

Last, I added a journaling tag cut from the Afternoon Clips paper, which I added my date to using the Saturday Afternoon rotary date stamp, then topped this pretty grouping with the “enjoy the little things” cardstock sticker

This technique is a great way to showcase a favorite photo, and use some of your washi tape stash at the same time! If you try it out, share on Instagram and tag me @meghannandrew! I’d love to see! Thanks so much for stopping by, and be sure to check out the products I used to create this layout at the gallery below. Happy creating!


*Clicking these links will take you to the Scrapbook.com shop, and when you purchase, I receive a small percentage of the sale. It doesn't cost you any extra, so thanks so much for your support!

Easy Circus Party Prep with Big Top Dreams!

Hey friends! I was so excited to guest design for Pebbles, Inc. this week, and when they asked me to create some party details with the Big Top Dreams collection*, I was ALL FOR IT! You know I love to throw a party, and when I have a cute collection to craft it with, the task is easy! Your party-goers will never know how easy it really was, though!

Pebbles_MeghannAndrew_BigTopParty_01.jpg

This party set-up may look over the top, but little touches go a long way! Let’s take a look at how you can “WOW!” your invitees with your crafty prowess, starting with their invitations!

Customized invitations, meaning, each one is different, make your friends feel special right from the start! To do this quickly and easily, I stick to the same formula for each one. I started these single-sided A2 cards by printing the details of the celebration on one side each piece of smooth, white cardstock. Next, I grabbed an embossing folder with a frame design, to add a textural element to the cards, and ran each one through my die cutting machine.

Pebbles_MeghannAndrew_BigTopParty_02.jpg

On each invitation I added a piece of patterned paper to fit inside my embossed frame, a phrase ephemera die cut with a mini staple at the top, an icon ephemera at the base, along with a small phrase sticker from the sticker book, three gold puffy star stickers, three rhinestones, and a few extra accent stickers. By adding the same elements to each card and keeping to a similar design, I saved myself time by not re-creating the wheel on each invitation, but made each one individual and special.

Pebbles_MeghannAndrew_BigTopParty_06.jpg

Adding pieces to your party decor that pack a big punch go a long way. Red and white striped party fans add a lot of color to your walls, and rolls of burlap provide great texture, and a good neural to all of the color found in the Big Top Dreams collection. A banner of folded, colorful baking cups topped with ephemera accents is an easy and simple handmade decoration to create in just minutes!

Pebbles_MeghannAndrew_BigTopParty_07.jpg

Your treats can also double as decor for your party and carry your big top theme all of the way to the refreshments, too! Plain milk bottles full of juice can be dressed up with a few simple layers of die cut patterned paper circles, an icon ephemera piece, cardstock star and a puffy letter initial—just to add a bit of personalization for each guest—and arranging them in a pyramid on your refreshment table makes them look like the classic carnival game.

Pebbles_MeghannAndrew_BigTopParty_08.jpg

Don’t forget to send your guests home with a little treat to remember your party by, or feed their elephant! A lovely, layered tag on a goody bag full of in-shell peanuts or kettle corn is the perfect treat! When I create tags for favor bags, I always remember to layer, layer, layer, and just like my invitations, I follow the same equation for each goody bag tag.

Pebbles_MeghannAndrew_BigTopParty_03.jpg

On these, I started with two layers of patterned paper, cut into banner shapes and a sentiment cut from the Best Day Ever patterned paper. I adhered each of these layers with an adhesive foam tab and stapled the top. Next, I added an icon ephemera piece, a cardstock or puffy accent sticker, a gold puffy star sticker, and a gold cardstock heart. Adhering these layered tags to a colorful treat bag will provide that final, lasting detail for your guests! 

Pebbles_MeghannAndrew_BigTopParty_04.jpg

Your party may be “the greatest show" for your friends this summer, and using the Big Top Dreams collection will make it easy and amazing! Thanks so much for stopping by! Be sure to check out the product I used to create this party setup in the gallery below! If you’re interested in seeing more crafty party and celebration decor that I have created, click “celebrating life” in the right sidebar! Happy creating!

*Clicking these links will take you to the Scrapbook.com shop, and when you purchase, I receive a small percentage of the sale. It doesn't cost you any extra, so thanks so much for your support!

American Crafts Saturday Afternoon Collection: Live a Life You Love

Hey there! I’m here to share a brand new layout with you today, using the beautiful, latest collaboration between 1Canoe2 and American Crafts, Saturday Afternoon*. I grew up in the countryside of Kentucky, and this collection just feels like going home to me!

AmericanCrafts_MeghannAndrew_LiveALifeYouLove_01.jpg

The beautiful naturalistic colors and images evoked the outdoors, and I decided to document my daughter’s first experience holding a turtle, that my brother had found while mowing. The excitement on her face said it all, and I wanted to include three different photos to capture the moment.

AmericanCrafts_MeghannAndrew_LiveALifeYouLove_03.jpg

Printing these photos at 2” x 3” meant that I could fit a column of them on the left side, and accent with a triangle of embellishment around them. To add some color to my background, I used the amazing Vicki Boutin art crayons, which are still a staple in my mixed-media arsenal!

AmericanCrafts_MeghannAndrew_LiveALifeYouLove_07.jpg

It doesn’t get much better than that Mason jar of sweet iced tea for me! These products just scream “summer in the south!” but the beautiful colors and hand-painted patterns can be used for any type of project! Check out the process video that I created here, to see how this layout came together:

Thanks so much for checking out my new layout and video! I hope you’ll subscribe to my feed so that you don’t miss any new videos from me. Happy creating!

*Clicking these links will take you to the Scrapbook.com shop, and when you purchase, I receive a small percentage of the sale. It doesn't cost you any extra, so thanks so much for your support!

American Crafts Journal Studio Notebook: Sun's Out, Fun's Out!

I’m still working on the traveler’s notebook project that records my daughter’s favorite memories from 2018, and today I’m here to share May’s installment with you! This fun traveler’s notebook spread, created with the American Crafts Journal Studio* and Amy Tangerine Stay Sweet collection, records a wonderful Memorial Day weekend spent in Kentucky with my family.

AmericanCrafts_MeghannAndrew_SunsOutFunsOutTN_01.jpg

Supplies | Journal Studio collection: Watercolor Stripe journal kit, Hello journal insert, Amy Tan sticker book, Amy Tan sticker book, Journal Studio sticker book, Good Vibes Only gel pens; Stay Sweet collection: Summer Love paper, 6” x 8” paper pad, ephemera pack, sticker book, mini puffy stickers, epoxy heart stickers, washi tape, rotary phrase stamp, watercolor set; Other: Dear Lizzy clothespins (I like to keep my notebooks open with these when photographing)

These little spreads are really growing on me, and I am loving creating them with similar products each month. I typically start with some of the Journal Studio products that work perfectly with anything I wish to document, then I match those with a current AC collection. The Stay Sweet collection, with it’s summer vibe and bright, fun colors worked perfectly for this start-of-summer spread.

After my photos were printed and layered with papers from the 6” x 8” paper pad, including that fun popsicle print, I chose my title, “sun’s out, fun’s out,” which I cut from the Summer Love paper. This bold, fun strip of my title brought my left and right sides together right away.

AmericanCrafts_MeghannAndrew_SunsOutFunsOutTN_03.jpg

Above that title, I added my photos, which I topped with an ephemera popsicle, camera and fun fish, which was perfect to use with the photo of my daughter jumping off of the boat into the river.

AmericanCrafts_MeghannAndrew_SunsOutFunsOutTN_04.jpg

Before I adhered my fish down, I added a bit of turquoise watercolor paint from the amazing travel watercolor set. I just can’t get enough of this compact paint set! I also added some splatters on the right side using the water brush included in the set. The “wow” sticker from the Journal Studio sticker book coordinated perfectly with the yellow found in the Stay Sweet collection, and was perfect for adding to the corner of my photo.

AmericanCrafts_MeghannAndrew_SunsOutFunsOutTN_05.jpg

The final touches that I added were two strips of washi tape at the top of my photo. The popsicle washi tape matched the pattern on the left side, again tying the two sides together. On top of the striped washi, I added the stickers “family” and “memories” from the Amy Tan sticker book, then stamped “sweet” using the Stay Sweet rotary phrase stamp.

AmericanCrafts_MeghannAndrew_SunsOutFunsOutTN_07.jpg

That’s another fun memory documented for my daughter in such a fun and easy way using Journal Studio and the Amy Tangerine Stay Sweet collection! Thanks so much for stopping by. Be sure to check out the products that I used in the Scrapbook.com gallery below! Happy creating!

American Crafts & Shimelle's Sparkle City: A Delightful, Wonderful Day

I am so excited about my friend Shimelle’s latest collection for American Crafts: Sparkle City! This fun and energetic collection features everything from cityscapes to cotton candy, and a beautiful range of color and graphics. Today, I’m so happy to share my first project using this fabulous collection:

AmericanCrafts_MeghannAndrew_WonderfulDay_01.jpg

Supplies* | Sparkle City collection: Polka Dot Pansy paper (351357), Traffic Jam paper (351353), Stay Super paper (351325), Fairy Lights paper (351355), Perfect Day paper (351356), cardstock and lenticular shapes (351333), rub-ons (351364), chipboard stickers (351331), foil foam phrase stickers (351328), foam and cardstock letter stickers (351329), washi tape spools (351337), acrylic stamps (351336); Head in the Clouds collection: Fairy Tale photos paper (349480), chipboard stickers (349469), cardstock stickers (349467), journaling pad (349471), sticker book (349473)

This layout documents my daughter and Shimelle’s Wonder Boy enjoying a fabulous day together in London, and I had fun matching the energy and happiness in the photos with the elements in Sparkle City. I began with layers of patterned paper to create my layout background, then moved on to embellishment. The best part? Sparkle City coordinates beautifully with Shimelle’s last collection, Head in the Clouds, so I was able to combine both collections to create something wonderful!

AmericanCrafts_MeghannAndrew_WonderfulDay_02.jpg

My title, created with chipboard and foam Thickers, was housed on the yellow strip of patterned paper to help it to stand out below my photos. The happy strip of washi tape added below helps to add color and interest.

AmericanCrafts_MeghannAndrew_WonderfulDay_07.jpg

Guess what? Rub-ons are back, and this collection has a fabulous set of rub-ons that go on like butter! I added the “have fun” rub-on to the Head in the Clouds journaling pad paper, then flanked it with the “important” stamp and fussy cut camera. I also LOVED using the Sparkle City stamp set to add stamped black stars around my page.

AmericanCrafts_MeghannAndrew_WonderfulDay_03.jpg

This little corner is the perfect example of how perfectly Sparkle City coordinates with Head in the Clouds! Here I used the Head in the Clouds “everyday adventurers” chipboard and fussy-cut teal camera alongside the red camera and bird die cuts from Sparkle City. This little corner makes my heart so happy!

I’d love for you to watch how this layout came together in my process video:

Be sure to watch the Scrapbook.com* store’s incoming new items each week to find the Sparkle City collection added to the “new products” section of the shop, and click “notify me” so that you can be one of the first to create something beautiful with it! Thanks for watching, and happy creating!

*Clicking these links will take you to the Scrapbook.com shop, and when you purchase, I receive a small percentage of the sale. It doesn't cost you any extra, so thanks so much for your support!

New Year Cards with American Crafts Sticker Books!

Hello there! 2019 is just around the corner, and today I’m here to share my first ever New Year cards with you. Yes, I said it! I’ve never made New Year greeting cards before, but when I received the new American Crafts All the Holidays cardmaking sticker book* and combined it with a few papers and embellishments, it was the perfect opportunity to change that!

Supplies | All the Holidays cardmaking sticker book, Vicki Boutin sticker book, Field Notes collection chipboard stickers, Field Notes collection washi tape, Bling sticker rhinestones, Shine On 6x6 paper pad, Shine On Forest paper, AC primaries cardstock

I fell in love with the large black and silver circle stickers that say, “Happy New Year!” and I decided to create a trio of cards to give to friends to wish them a happy new year.

My first two cards were created using the smaller silver, “Happy New Year!” stickers, and started off by layering colorful cardstock with neutral patterned paper from the Amy Tangerine Shine On collection. From there, I chose the colorful watercolor Field Notes collection washi tape, which set my color scheme for my three cards—purple, pink, orange, yellow and green.

The Vicki Boutin sticker book, my favorite sticker book in my growing collection, helped me to embellish with the year in colorful numbers, stars and arrows that say, “create magic,” and “time for some fun.” New Year cards wouldn’t be complete without some bling, so I added a few pink, purple and silver Bling sticker rhinestones.

I wanted to use the largest, “Happy New Year” circle for my third card, and with a sentiment so large, not much else was needed on the card. The colorful watercolor Field Notes collection washi tape created the perfect background, and after the sentiment sticker was added with dimensional adhesive, I added the large rhinestones to complete this quick and simple, but festive card.

You can find all of the products that I used to create these cards in the gallery below—it’s still a new year for as long as it takes to remember to write “2019,” so order today to send your own handmade new year greetings!

I’m excited to send these cards off to wish my loved ones a happy new year! I’d like to say the same to you, my lovely blog readers. I am wishing each and every one of you the best that life can bring in 2019! Happy creating!

*Clicking these links will take you to the Scrapbook.com shop, and when you purchase, I receive a small percentage of the sale. It doesn't cost you any extra, so thanks so much for your suppor

American Crafts Head in the Clouds Collection: Pixie Perfect

The brand new Head in the Clouds collection* by Shimelle and American Crafts is right up my alley, and as soon as it landed on my doorstep, I made the time to create a brand new layout using it! This whimsical, magical and fantastic collection is perfect for my princess and unicorn-loving little girl, and I know it’s going to help me document a lot of memories!

MeghannAndrew_AmericanCrafts_PixiePerfect_01.jpg

My daughter’s first meet and greet with Tinkerbell was perfect for this collection! The beautiful floral patterns and natural details in the embellishments gave the Pixie Hollow feel to this layout that I was looking for!

MeghannAndrew_AmericanCrafts_PixiePerfect_02.jpg

I created three different embellishment groupings on this page, filled with stamped leaves, fussy-cut elements from the Head in the Clouds patterned papers, stickers and die cut ephemera.

MeghannAndrew_AmericanCrafts_PixiePerfect_04.jpg

My title is one of my favorite parts about this layout, as I LOVE the green banner that I fussy-cut from patterned paper to place it on! It also gave the perfect element to rest my photos on.

MeghannAndrew_AmericanCrafts_PixiePerfect_03.jpg

I just had so much fun making this page, and there’s a process video to prove it! Watch below to see how it all came together:


To find all of the products that I used to create this collection, click the links in the gallery below to head directly to the Scrapbook.com and Elle’s Studio shops. Thanks so much for watching, and happy creating with this gorgeous collection!

*Clicking these links will take you to the Scrapbook.com shop, and when you purchase, I receive a small percentage of the sale. It doesn't cost you any extra, so thanks so much for your support!

Documenting Autumn with American Crafts

AmericanCrafts_MeghannAndrew_LovelyDay_02.jpg

Hello there! It’s finally October—my favorite month of the year! That means I can decorate to my heart’s content, drink hot drinks and stamp ALL OF THE LEAVES; even if it is still 100 degrees where I live!

Recently I received a new package of goodies from American Crafts, and it included the brand new Goldenrod collection* from 1Canoe2, as well as some fantastic new Kelly Creates stamps, and I was inspired to document a favorite photo of my daughter last fall, taken after she picked squash from my dad’s pumpkin patch!

AmericanCrafts_MeghannAndrew_LovelyDay_01.jpg

The beautiful sunset hues in the Goldenrod collection matched the gold hues in my photos perfectly, so I set out to choose the best patterns to show off my photo. I created a dark frame around the edge using the b-side of the Pink Tile paper first, then added a smooth white cardstock background, perfect for stamping!

AmericanCrafts_MeghannAndrew_LovelyDay_04.jpg

Let’s just talk about this Kelly Creates floral stamp set for a second, which is ONLY $3.49! What a bargain!

I used three of the leaf designs on the set to create a curtain at the top of my white cardstock, stamping them with permanent black ink so that I could color them in using the Vicki Boutin watercolor set, in hues to coordinate with the colors in my photos and give the layout an autumnal feel. Once my paint was completely dry, I added a bit of sparkle using a gold glitter Moxy glitter glue from the Jewel Thief set—a mess-free way to add some sparkle!

AmericanCrafts_MeghannAndrew_LovelyDay_03.jpg

Next I added my photos, sized at 3” x 3” and framed with a white border, using dimensional adhesive. To the left, I had just enough space to add the “these are the days we dream about, when the sunlight paints us gold,” card from the Goldenrod 6” x 6” paper pad. It was the perfect sentiment for these photos, as the sunset was lighting up the tree behind my daughter in brilliant gold hues.

AmericanCrafts_MeghannAndrew_LovelyDay_05.jpg

At the base of my page, I added a banner from the b-side of the Pink Tile paper to create a shelf for my photos and add contrast for my title, created with the beautiful Goldenrod Thickers. Below my title, washi and a gold manufacturer’s strip began a series of lines: the bold “making memories” sticker from the Goldenrod cardstock sticker sheet above, and my journaling added in strips below, all set on the gorgeous plaid b-side of the Sweet Strawberries paper—which might be my favorite from the collection! I had to add a few more leaves to my title block, so I stamped, painted and fussy cut three out, combining them with heart stickers from the collection.

AmericanCrafts_MeghannAndrew_LovelyDay_06.jpg

I can’t tell you how happy this layout makes me, and the creative process was so fun using the beautiful Kelly Creates floral stamp and Goldenrod collection! Grab a PSL and these autumnal supplies, and start documenting your fall memories! Be sure to check out all of the product I used on this layout in the affiliate gallery below:

*Clicking these links will take you to the Scrapbook.com shop, and when you purchase, I receive a small percentage of the sale. It doesn't cost you any extra, so thanks so much for your support!

Documenting Change with American Crafts Field Notes Collection

I’ve had a really cool photo taken of myself in front of a mural wall for years, just sitting with my printed photos. Then the Field Notes collection* came to my desk, and the perfect product married with the photo to tell a story about change in my life, and I’m excited to share this new 8-1/2” x 11” layout with you today!

AmericanCrafts_MeghannAndrew_Changing_01.jpg

The colors in my photo could not have been more perfect with the bold and saturated colors in the Field Notes collection, and the phrases found in the Field Notes embellishments fit my subject perfectly: change in my life. This was a subject that I don’t think I could have journaled about when the photo was taken in 2015, but today, I’m embracing change, and pushing myself to be better in all aspects of my life.

AmericanCrafts_MeghannAndrew_Changing_03.jpg

While I was putting this layout together, I created a short process video all about the design decisions that I made! I’d love for you to grab a cuppa and watch how the product and my story came together on this fun page.

The Field Notes collection provided so many fun patterns and embellishments on this layout, and the best thing about it is that the colors and subjects in it are so varied that I could use it again and again with completely different results! Check out the gallery links to Scrapbook.com below where you can find all of the product I used to create this page. Thanks so much for stopping by, and happy creating this weekend!

*Clicking these links will take you to the Scrapbook.com shop, and when you purchase, I receive a small percentage of the sale. It doesn't cost you any extra, so thanks so much for your support!

American Crafts Shine On Summer Memories Mini Album

AmericanCrafts_MeghannAndrew_Summer2018Mini_03.jpg

Hello there! Recently I was assigned a task of documenting summer memories for the American Crafts blog. I looked around my new stash of the Shine On collection* and wondered, "Should I create a layout? a mini album?" Then, I came across this adorable card kit, perfect for sending handwritten greetings in the mail, and I came up with a wonderful idea.

The camera card in the Shine On collection card kit was the first thing I picked up, and realized that it would be the perfect mini album cover! I began by choosing four different Shine On patterned papers to create my pages, and cut them down to 10" x 3-1/4", so that they would fit inside the card. I then scored them in half and put them inside the camera. 

Next, I used my Crop-a-Dile to punch two holes at the top and bottom on the fold line of the card, punching through all of the layers of patterned paper, too. I grabbed some neutral baker's twine, threaded with an embroidery needle, and pulled it twice through my holes, finishing it off with a bow to create a binding edge. To make it extra special, I also tied a Sunshine and Good Times tassel to my baker's twine.

AmericanCrafts_MeghannAndrew_Summer2018Mini_02.jpg

Now my album was ready for photos! I printed photos at 3" x 3" from my top 10 or so best memories from our summer of 2018—the best of the best, like my Dad's birthday dinner, my brother's wedding, and our trip to the U.K. I adhered them straight onto the patterned paper using tape runner—I didn't want any extra bulk in this album. Around the photos, I used the journaling tags from the Shine On ephemera pack and cardstock stickers to add a few words about the memories on each photo.

AmericanCrafts_MeghannAndrew_Summer2018Mini_05.jpg

The More of This paper includes a full sheet of 3" x 3" journaling and filler cards, and was perfect for adding this "about us" journaling card to this page. My favorite ever date stamp, from Shimelle's first collection with AC added the date to each page, too.

AmericanCrafts_MeghannAndrew_Summer2018Mini_08.jpg

Thin stickers added some extra interest, like the little hearts from the Shine On sticker book and washi tape strips, placed directly on my photos—like I did here on top of the photo of my Lizzy jumping off of a boat into the river.

AmericanCrafts_MeghannAndrew_Summer2018Mini_10.jpg

On my final page, I had to add one of my favorite ever photos from the summer—and amazingly, I'm in it! It's a rare find around here! I finished off this page with the bitty and adorable Shine On puffy heart stickers!

To keep the album closed, I added the teal "love" Shine On binder clip to the right side, and my title— "Summer" from the Shine On sticker book and "2018" from the numbers on the kraft cardstock stickers, along with a couple of puffy heart stickers to finish it off!

AmericanCrafts_MeghannAndrew_Summer2018Mini_01.jpg

I LOVE, love the way this little mini album turned out. I'm sure that the other cards in the Shine On collection card kit , especially the flower and the "love" cards, would also made darling mini album covers. I hope you'll give this project a try! You can shop all of the product I used in my mini though the gallery below, which will take you to the Shine On product ON SALE at Scrapbook.com! Thanks so much for your support!

*Clicking these links will take you to the Scrapbook.com shop, and when you purchase, I receive a small percentage of the sale. It doesn't cost you any extra, so thanks so much for your support!

American Crafts Shine On Collection Layout + Process Video: "Weekend View"

AmericanCrafts_MeghannAndrew_WeekendView_02.jpg

Happy Friday! Who's glad that the weekend is finally here? Today I'm excited to share a brand-spankin' new layout with you that is all about weekend fun on a girl's trip to New Orleans, created with the new Shine On collection* from American Crafts and Amy Tangerine!

Supplies | American Crafts: The Good Life paper ("weekend" circle), Surrounded by Love paper (hearts), Even Out paper (border strips), Alive paper (pink and black pattern), Three Sides paper (black and white), Remember paper (camera), 6" x 6" paper pad, Twilight foam alphabet Thickers, ephemera die-cuts, chipboard accent Thickers, mini inflated hearts, sticker book, 6" ruler stencil, Detail Doodlers pens; Elle's Studio: Mini Dated Stamp, July 2018 Kit

I wanted to create a layout with circles, as I was inspired by this layout featured on @mefunscrapt's Instagram feed, and realized that it had been a LONG time since I had cut out circles! I started grabbing Shine On 12" x 12" and 6" x 6" patterned papers, and used my old Creative Memories circle cutter to cut them out. The "weekend" circle from The Good Life paper was the paper that inspired my title, and I found the Kraft tag in the ephemera die-cuts to add the word "view" using the Twilight foam alphabet Thickers 

AmericanCrafts_MeghannAndrew_WeekendView_03.jpg

What originally began as a two-photo page, turned into a one-photo layout, since I could not cover up the photo-bomber on the second photo well enough, and it didn't add anything to the story, and editing the number of photos actually left me with more space for a cute journaling tag from the Elle's Studio July 2018 Kit anyway! I topped this with a fussy-cut camera, another circle of paper and the cutest pink mini inflated heart!

AmericanCrafts_MeghannAndrew_WeekendView_04.jpg

Who is looking for a fun and functional tool for their stash? This Shine On 6" ruler stencil was super fun to use with the Detail Doodlers pen to add the cute little arrows to my layout at each corner. I know that I'm going to use the heck out of this stencil. It has so many cute icons on it! 

AmericanCrafts_MeghannAndrew_WeekendView_05.jpg

I went completely "off the cuff" with this layout, and filmed a process video while creating it! In it, you'll see how I struggled to cover up that photo-bomber, the other ways I tried to make my title work, as well as how I added my typed journaling to my journaling tag, leaving room for that cute camera. Take a look at how it all came together: 

You can shop all of the product I used on this page at the links below, and psssst! The Shine On collection is currently ON SALE! I hope you'll document your big weekend adventures using the fun Shine On collection! Happy creating! 

*Clicking these links will take you to the Scrapbook.com shop, and when you purchase, I receive a small percentage of the sale. It doesn't cost you any extra, so thanks so much for your support!

Back to School Photo Banner with the Box of Crayons Collection!

Hey there! We're just a few days away from the start of a new school year! For the past couple of years, I have taken my daughter's photograph before her first days of preschool and pre-Kindergarten on our doorstep to mark the occasion. This year, I decided to create a prop—a first day banner— to show how special this day really is, using the Box of Crayons collection* from American Crafts.

AmericanCrafts_MeghannAndrew_FirstDayBanner_01.jpg

Supplies | Box of Crayons collection: Make Something paper, All the Things paper, Cut Here paper, Treat Yourself paper, All Change paper, In the Frame paper, Countdown paper, In the Sky paper, ephemera cardstock die-cuts, alpha sticker book, sticker book, accent and phrase stickers, glitter enamel dots; Star Gazer collection: Rose gold foil Thickers; Stickers and Bling collection: glitter stickers

This cute banner was simple to put together! First, grab 8 different patterns from the Box of Crayons collection. (You can see the exact papers I used in my gallery below!) Cut a banner from each paper, sized around 5" high and 3" wide, either by hand or with a die-cutting machine and software. Next, punch holes at the top left and right sides of each banner.

AmericanCrafts_MeghannAndrew_FirstDayBanner_05.jpg

In between the 5th and 6th banner, add the crayon journaling card from the Box of Crayons cardstock die-cuts, punching holes in it, too. Attach all of the banners with baker's twine, then start the fun part: embellishing! On the crayon card, add small, black glitter alphas for " grade" and the date, with the fun, rainbow stickers from the Box of Crayons alphabet sticker folder spelling out the grade.

AmericanCrafts_MeghannAndrew_FirstDayBanner_06.jpg

On each banner, place a chipboard letter from the Star Gazer rose gold foil Thickers, which are big enough to stand out on the banner, and add a bit of shine. From there, it's all about adding some fun! Fussy-cut several elements from one piece of patterned paper: Make Something. This single piece of paper includes cute elements like the watercolor set and brush, camera, large easel and the "yay" circle.

After the fussy-cutting, grab the Box of Crayons ephemera pack (those glitter scissors!), cardstock stickers and the awesome sticker and washi book to add to the cuteness! The enamel dots also add a different texture and a bit more sparkle! 

AmericanCrafts_MeghannAndrew_FirstDayBanner_10.jpg

I can't wait to take my daughter's first day photo this year with this cute banner! I hope you'll give this fun project a try too! Check out the product I used to create it in the gallery below, and thanks so much for stopping by! 

*Clicking these links will take you to the Scrapbook.com shop, and when you purchase, I receive a small percentage of the sale. It doesn't cost you any extra, so thanks so much for your support!

American Crafts Moxy Glitter Collection: Dance Love

Recently, American Crafts sent me a big box of glitter—and not just any glitter, but their new Moxy collection*! 

MeghannAndrew_AmericanCrafts_DanceLove_01.jpg

Supplies | Moxy Collection: Blossom Extra Fine Glitter, Amethyst Extra Fine Glitter, Lip Gloss Extra Fine Glitter, Cosmic Glimmer 24-pack, Double-Sided Stickers; Sunshine and Good Times collection: Flower Power paper, Yesss Please paper, Major Heart Eyes paper, Ephemera Die-Cut Shapes, Let’s Dance Phrase Thickers, Wood-Mounted Stamp Set; Other: Adhesive Rhinestones, Adhesive Rhinestones, Vicki Boutin All the Good Things Phrase Stickers (343889)

Let me just start by saying that I am not typically a "glitter girl," but I loved creating this page! Because of the colors in the photos, I grabbed the Sunshine and Good Times collection to begin my page layers with the purple and pink patterned papers that I used on the top half of my 8-1/2" x 11" layout and to mat my photos. I also fussy-cut the "so lovely" phrase from the Yesss Please patterned paper.

Now here's where the fun really started! Below my photo, I started adding glitter by using the fine tipped Moxy white glue to add a shower of dots from the manufacturer's strip of hearts down to the title, creating an ombre effect by starting with dark purple at the top and ending with pink at the bottom. 

MeghannAndrew_AmericanCrafts_DanceLove_03.jpg

While my background was drying, I created the "dance" die-cut word on Silhouette, using my favorite sans-serif font, Bebas Neue. After cutting the letters from smooth cardstock, I covered them with double-sided tape using my permanent tape runner, being sure that the adhesive went all the way to the edges. Then, in my glitter tray, I added portions of three different colors of fine glitter: Blossom, Amethyst and Lip Gloss, shaking the tray slightly to get them to run into each other. I carefully placed each letter face-down in the glitter, pressing slightly on the back to be sure that the glitter stuck to the adhesive. The double-sided tape gave a very consistent coverage and didn't require any drying time at all! Afterward, I grabbed the bow and two hearts from the die-cut double-sided stickers and put it in the tray, covering them with the leftover glitter—a great way to not waste any of that gorgeous glitter!

MeghannAndrew_AmericanCrafts_DanceLove_05.jpg

I adhered these glitter letters with dimensional adhesive to the base of my layout. Next, I grabbed the "love" stamp from the Sunshine and Good Times stamp set to finish off my title. A puffy heart from the Sunshine and Good Times puffy phrase stickers finished off the title with a bit of pink!

MeghannAndrew_AmericanCrafts_DanceLove_04.jpg

I really love the way this page turned out! My daughter's dance recital called for some sparkle on the page, and the Moxy collection helped me add those perfect, sparkly touches! Thanks so much for checking out my latest layout! To shop the Moxy collection, please click on the gallery links below for Scrapbook.com:

*Clicking these links will take you to the Scrapbook.com shop, and when you purchase, I receive a small percentage of the sale. It doesn't cost you any extra, so thanks so much for your support!

Super Cool Zoo: A New Layout + Process Video

Hey there! I got a bit crafty last week, and created what may just be my favorite layout of 2018. I know, that's saying a lot, but this layout, created mostly with the Box of Crayons collection* from my friend, Shimelle and American Crafts, really ticks all of the boxes for me:

MeghannAndrew_AmericanCrafts_SuperCoolZoo_01.jpg

Supplies | Box of Crayons 6 x 8 paper padCut Here patterned paper (manufacturer's strip), On a Roll patterned paperAll the Things patterned paperBox of Crayons ephemera die-cutsBox of Crayons chipboard ThickersBox of Crayons sticker and washi bookBox of Crayons rotary phrase stampBox of Crayons glitter enamel dotsBox of Crayons mini puffy stickersGlitter Girl teal glitter ThickersAmy Tan sticker book

So, what are those "essential layout" element boxes that require ticking, you ask? A fun title, created with different textures and fonts: Check. An interesting texture created with hand-stitching: Check. Bright color and fun patterns: Check. Lots of fun embellishments that highlight the photos: Check and check. 

MeghannAndrew_AmericanCrafts_SuperCoolZoo_03.jpg

Okay, let's talk titles. They're my jam. I have an entire, massive class devoted to them at Big Picture Classes. This title is just about my idea of a perfect title. It contains three different fun fonts for interest, it includes all of the colors found throughout the layout, and is created from three different mediums: glittery foam, transparent stickers and dimensional, smooth cardstock. In my book, it doesn't get much better than that!

MeghannAndrew_AmericanCrafts_SuperCoolZoo_02.jpg

This notepad-heart found in the Box of Crayons 6 x 8 paper pad caught my eye straight away when I started creating, but as I went on, the lack of a different color between the grid and the teal dot on the outside really started to bother me. Enter embroidery floss. By punching holes 1/4" all the way around the heart and adding a simple backstitched yellow frame, this heart, which holds the story of this day, became one of the main focal points of my layout.

MeghannAndrew_AmericanCrafts_SuperCoolZoo_04.jpg

Next on the list: bright colors and fun patterns. Well, if you've checked out the Box of Crayons collection, you can see that it's hard to stay away from either of these. I chose bright, yet simple patterns to frame two of the four images on my layout, and the big area of teal on the 6" x 8"
paper pad sheet gave a resting area for the eye, and also points out the importance of my journaling.

Do embellishments get any more fun than a toucan, flamingo and tiger? I think not, friends. These stickers and die-cuts were PERFECT for adding to this layout about visiting the San Diego Zoo, and the floral die-cuts, which framed my photos, gave it a wild, jungle-esque feel. 

How did it all come together, you ask? Well, you can see the full process in my video below:

You can find all of the product I used on this layout in the Scrapbook.com store, via the gallery at the bottom of this post.

Thanks so much for joining me today here on the blog! Question: What are the "essential layout" element boxes that you just HAVE to check when you create? I'd love to hear your thoughts in the comments! 

*Clicking these links will take you to the Scrapbook.com shop, and when you purchase, I receive a small percentage of the sale. It doesn't cost you any extra, so thanks so much for your support!

Birthday Greetings in a Hurry with American Crafts!

I don't know about you, but I typically realize that I've forgotten a birthday card right around the time I'm due to leave the house for a party. After that initial "oh sugar!" moment sets in, I typically grab the nearest cute paper crafting products that I have on hand to create a simple greeting, full of color and sparkle. I did this recently with the beautiful Stay Colorful collection* from American Crafts!

This collection is just full of bright colors and celebratory sayings, making it the perfect one to grab when you're short on time! I created three different cards quickly and easily:

Supplies | Mood Ring paper (yellow), Jive Talkin' paper ("hooray), 6" x 6" paper pad (sprinkles), cardstock stickers, self-adhesive sequins, rhinestone stickers

"Hip, hip, hooray!" is the perfect sentiment for a birthday card! This simple design looks like a million bucks when you use a colorful sprinkle background paper and back the sentiment with a bright yellow circle of color! To really focus the eye on the sentiment, I added the "hooray" manufacturer's strip behind the circle. Don't forget the sparkle! I added a few sticker sequins and rhinestones to dress it up.

MeghannAndrew_AmericanCrafts_BirthdayCards_04.jpg

Supplies | 8 Tracks paper (dots), 6" x 6" paper pad ("treat yo' self"), ephemera die-cutscardstock stickers, glitter enamel stars

What better day to "treat yo' self" than on your birthday? This little sentiment, cut from a sheet of patterned paper in the 6" x 6" paper pad was the perfect topper for a multi-colored polka dot, then accented with die-cut ephemera and sticker treats! 

Supplies | 6" x 6" paper pad (teal hearts), Jive Talkin' paper (banner), layered stickers (unicorn), cardstock stickers, enamel dotsrhinestone stickers

Birthdays should be magical, so why not add a magical creature to the card front? I loved adding this pretty ribbon-tailed unicorn to the card front, along with the "ride a unicorn" banner, cut from the Jive Talkin' paper. This card would be perfect for a special little girl! 

These three cards prove that you don't have to run by Target on your way to the birthday party! Create your own cards at home quickly and easily with the Stay Colorful collection from American Crafts, and "wow" that special birthday someone! Be sure to check out the product I used, via the gallery links to the Scrapbook.com store below:

(*All product links contained in this post are affiliate links. You don't pay any extra, but I get a small percentage of your sale! Thanks for your continued support of my YouTube feed and this blog!)

American Crafts Stay Colorful Collection: Swan Lake

MeghannAndrew_AmericanCrafts_SwanLake_03.jpg

A beautiful summer day spent on a lake on the south coast of England deserves an equally beautiful layout, and I created one using the Stay Colorful collection* from Dear Lizzy and American Crafts! 

MeghannAndrew_AmericanCrafts_SwanLake_01.jpg

Supplies | Stay Colorful collection: Bellbottom Blue paper, Jive Talkin' paper, 8 Tracks paper, 6" x 6" paper pad, cardstock accent and phrase stickers, washi tape book, ephemera die cut shapes, glitter chipboard Thickers, glitter clothespins, layered stickers; All the Good Things collection: phrase stickers; Shimelle Box of Crayons collection: alpha sticker folder; Shimelle Glitter Girl collection: glitter enamel dots, embellishment pack; Stickers and Bling collection: adhesive rhinestones 

I have to admit, I struggled with this layout at first. I had a general idea of how I wanted it to look, and what I was putting on paper just didn't match with what was in my mind. My break-through moment came when I added the flag embellishment from the layered stickers, which inspired me to create a column of colorful pennants against the left side of my page.  

MeghannAndrew_AmericanCrafts_SwanLake_04.jpg

Swans were the reason why I went with this collection! I loved the die-cut swan included in the ephemera die cut shapes and on the little cut-out included in the 6" x 6" paper pad, which I attached using a glitter clothespins. They were the perfect little embellishments for this fun layout. 

MeghannAndrew_AmericanCrafts_SwanLake_06.jpg

Ah, my title. I love looking at it! It's the perfect mix of glittery hand-drawn Thickers and little tile alphas, set on a pink pennant, which matches the ones throughout my layout. 

MeghannAndrew_AmericanCrafts_SwanLake_02.jpg

I'd love to show you how this layout came together in this process video! You can see my struggles and triumphs, all in 20 minutes, by watching the video below:

Be sure to check out all of the product used on this layout at Scrapbook.com via the gallery below! Thanks so much for stopping by and have a great weekend!

(*All product links contained in this post are affiliate links. You don't pay any extra, but I get a small percentage of your sale! Thanks for your continued support of my YouTube feed and this blog!) 

Box of Crayons Collection: Firefighter Lizzy

AmericanCrafts_MeghannAndrew_FirefighterLizzy_03.jpg

Hello there! Hopefully you've planned some crafty time this Memorial Day weekend! Today I'm kicking off this long, creative weekend a bit early, and I'm here to share a bit of colorful inspiration with you using the Box of Crayons collection from Shimelle and American Crafts!* 

AmericanCrafts_MeghannAndrew_FirefighterLizzy_01.jpg

Box of Crayons Collection Supplies | A New Thought patterned paper, Spell it Out patterned paper, On a Roll patterned paperjournaling 6 x 8 paper pad, Crayon Box alpha Thickers, cardstock stickerssticker and washi book, alpha sticker folder, ephemera die cuts, enamel dots with glitter, self-adhesive patches 

This fun and playful layout began by matching my photo to the yellow, black and white A New Thought patterned paper. Once I added the rainbow of colors using a manufacturer's strip, giving my photo a "shelf" to sit on, I opened up the door to adding more color on my page!

AmericanCrafts_MeghannAndrew_FirefighterLizzy_04.jpg

As is usually the case, my title is my favorite part of this layout. I loved combining the red tile alphas from the Box of Crayons alpha sticker folder with the Crayon Box alpha Thickers, and the addition of the "hello" self-adhesive patch just topped it off perfectly.

AmericanCrafts_MeghannAndrew_FirefighterLizzy_02.jpg

While creating this page, the space above my journaling just felt like it needed something "more." I was so excited to find the "e" on the Spell it Out patterned paper, which I cut a banner shape into before tucking it under my photo. It was the perfect addition to create the visual triangle of embellishment that I needed on this layout. 

Guess what? With all of that free time you have relaxing this weekend, you can also watch a process video of how this layout came together! Hooray! 

Thanks so much for watching! Be sure to find all of the product I've used on this layout in the product gallery below while it is ON SALE at Scrapbook.com! Happy creating!

(*All product links contained in this post are affiliate links. You don't pay any extra, but I get a small percentage of your sale! Thanks for your continued support of my YouTube feed and this blog!)