Tutorial Tuesday: Easter Egg Tree
/Last year, while shopping in a high-end home store in my area, I found the cutest Easter egg trees, standing about 8" tall, planted in little terra cotta pots, with a big price tag of about $40 each. And I thought:
I can totally make that.
And I totally did.

So today, I'd like to share how you can make them too, at a price of way less than $40.

First, gather your supplies. For each tree, you will need:
- Foam cone form: I used one 12" high, and one 9" high form, as I like the difference in height on my mantel, but they both fit snugly into the same pot.
- 22 gauge wire & wire cutters: Look in the floral department of your craft store for this.
- 3 different types of burlap ribbon: 4" wide wired burlap, 2-1/2" wide colored burlap, and 1" wide metallic burlap & scissors to cut them. I purchased all of my ribbon at Michaels. (Watch for ribbon to go on sale at this time of year.)
- Decorative foam eggs: I used about 20 eggs for the 12" cone tree, in two different sizes. The tallest egg was 2-1/4" and the smaller egg was 1-1/2". (This is your most expensive supply for this project. I picked mine up at Michaels in the Easter sales last year, which have already begun. Also look at JoAnn Crafts and World Market for different colored eggs.)
- 2 decorative pots: You will want to be sure that the bottom of your foam cone fits snugly at the top of the pot. (I bought one of these at a time, using a coupon at Michaels.)
- Hot glue gun and hot glue.
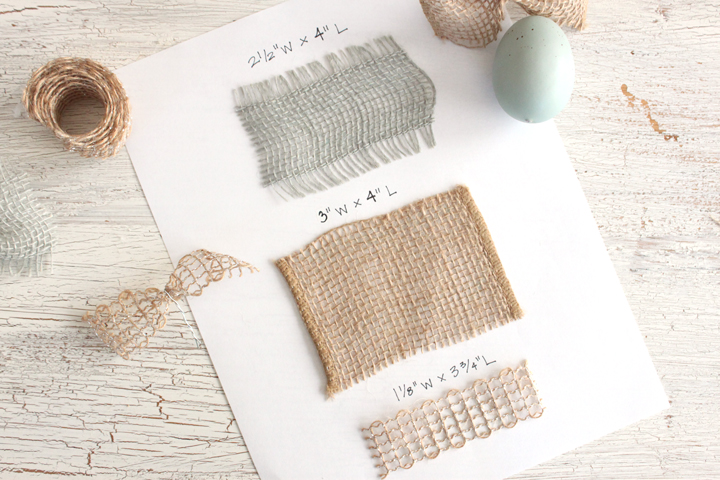
Now, cut your ribbon according to the photo above. To get a good jump-start on your tree, cut about a dozen pieces of each ribbon, then you can cut more from there so that you do not waste any of your ribbon.
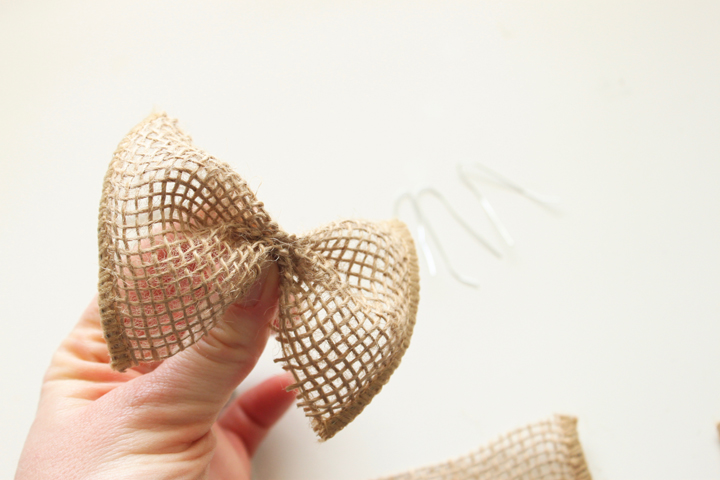
Cut the wire into 2-1/2" pieces, enough for the amount of ribbon you've already cut. Go ahead and bend the piece in half, like hairpins. Picking up a piece of ribbon, hold it in the center with your thumb and pointer finger, pinching the sides into the center to create a bow.
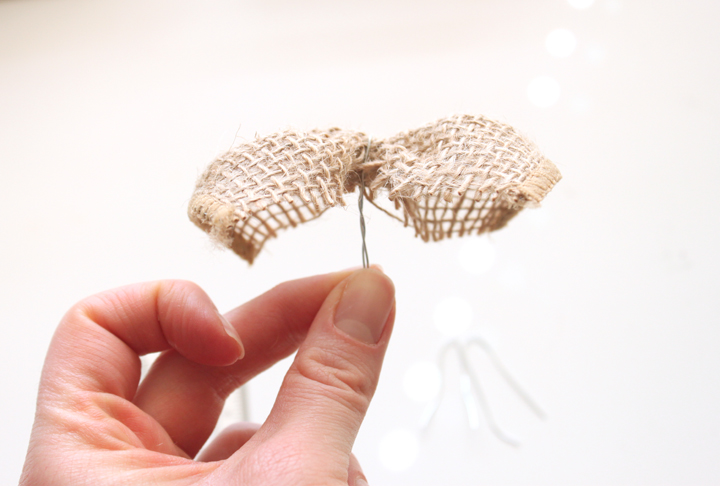
While holding the ribbon bow tightly between your fingers in one hand, carefully slide the wire hairpin over the front of the bow with your other hand and squeeze to keep the bow in place, twisting the wire tightly at the back side, then twisting the length of the wire over itself to create one wire leg to stick into your foam cone.
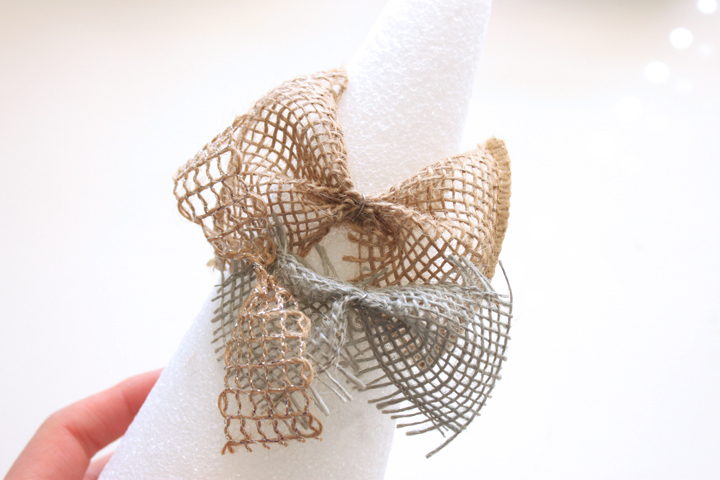
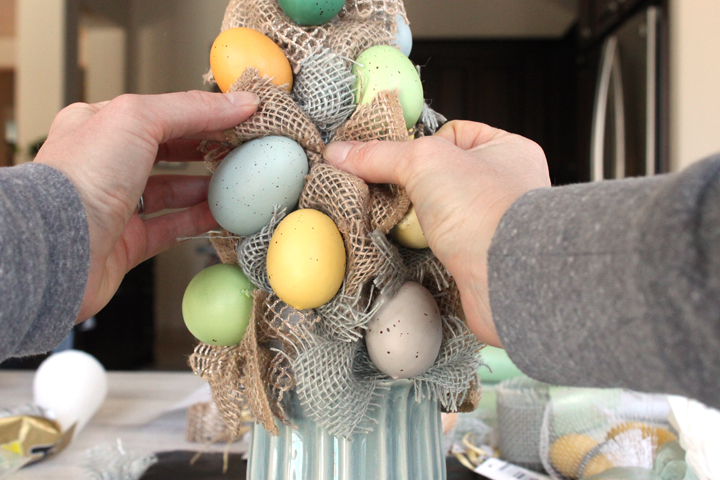
Once you've created several burlap bows, you can begin pushing the wire end into your form, making a triangular shape with three different bows, so that you leave a space in the middle for a decorative egg. After a while, this process can start to hurt your fingertips, so gloves can be handy for this part. Because of this, I can only complete one tree per day. I need to let my fingers rest afterward!
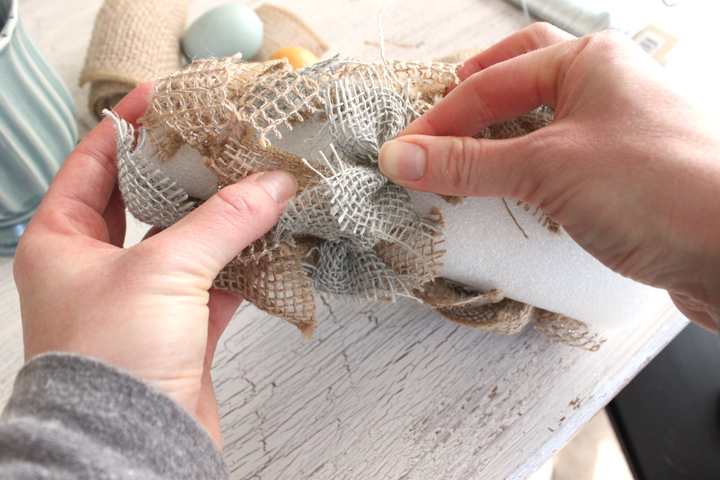
Use one of the bows from the first triangle to create another triangle, and then keep going until the entire cone is covered, from top to bottom.

Now, add a big daub of hot glue in the space between your ribbon bows, being sure not to attach your bow with the glue! Be aware of the colors that you are using, so that you don't put too much of the same colored egg in one space.
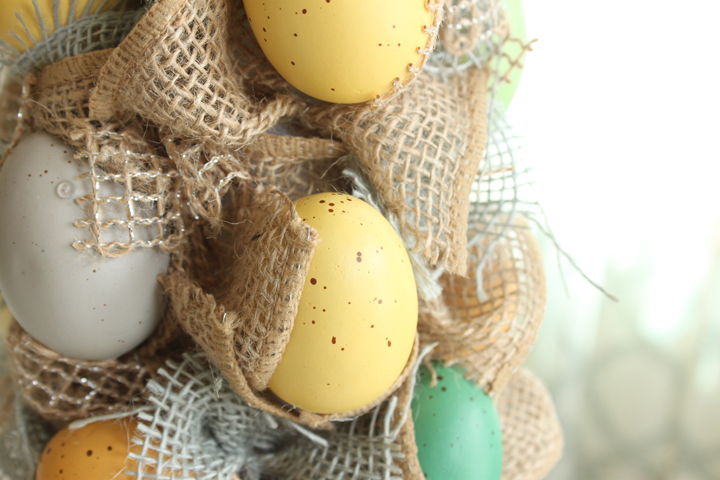
Once you have all of your eggs glued on, fill in any gaps where you may be able to see the styrofoam with additional ribbon bows. In this photo, you can see the styrofoam right underneath the yellow egg, so I definitely filled that piece in. The widest burlap ribbon takes up the most space, so I typically used it to fill in any gaps.
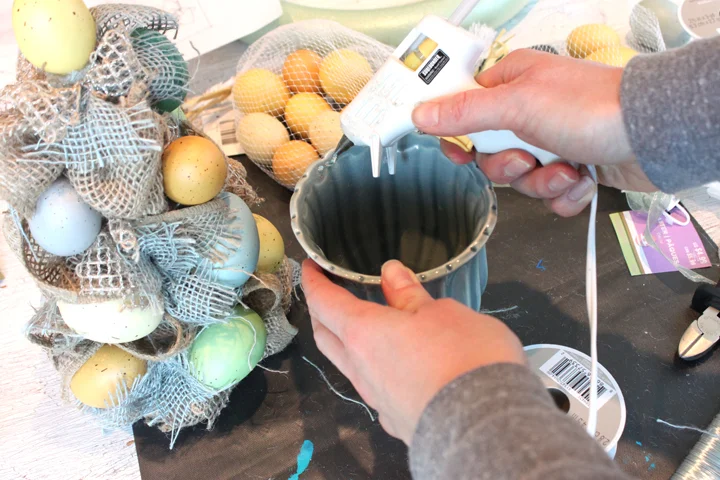
Now that your tree is finished, add a large amount of hot glue to the inside edge of the decorative pot you've chosen. Quickly set the base of the cone in your pot to adhere the tree to the pot, being sure not to trap any of your ribbon bow ends between the foam and the pot. I had a hard time doing this fast enough before my glue began to harden, so I ended up squirting daubs of glue to secure the tree once I had it in place on the pot.
Lastly, fluff your ribbon. You can bend the ends of your wired ribbon to give it a pretty bow appearance. Leave your tree as is, or add a few wired floral butterflies flying out of the tree, to add extra springy-ness!
This really is my favorite home decor DIY project to date. These egg trees look like they cost a fortune, and were picked up at an expensive store!
Thanks for stopping by, and please share your egg trees with me if you make one!