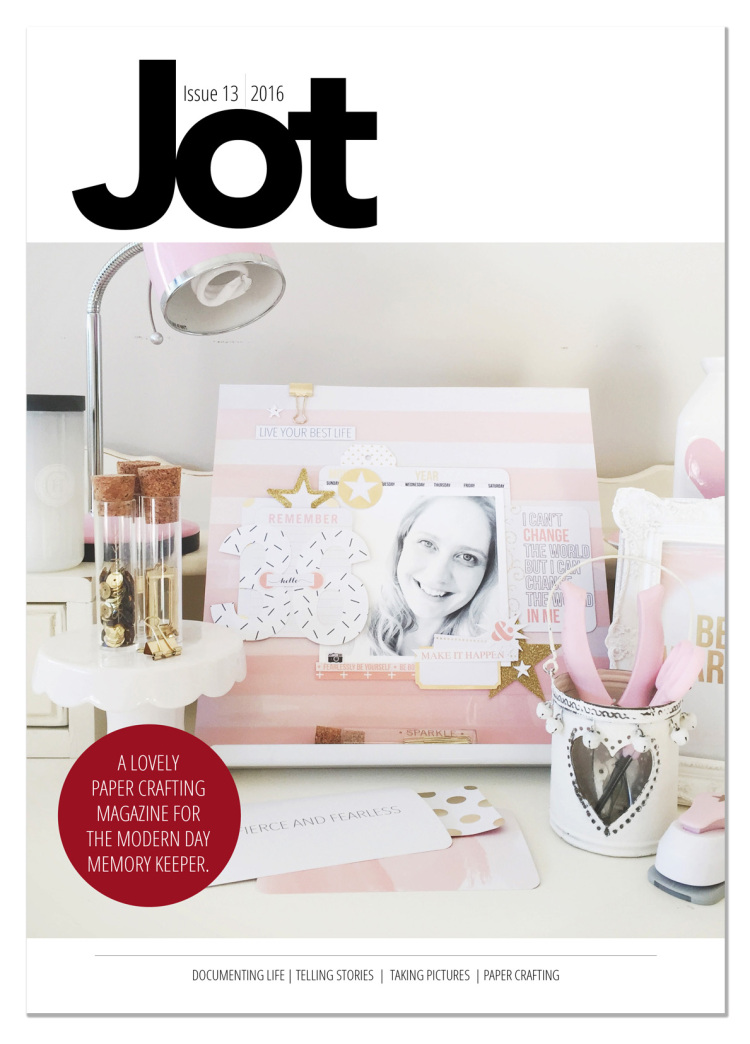
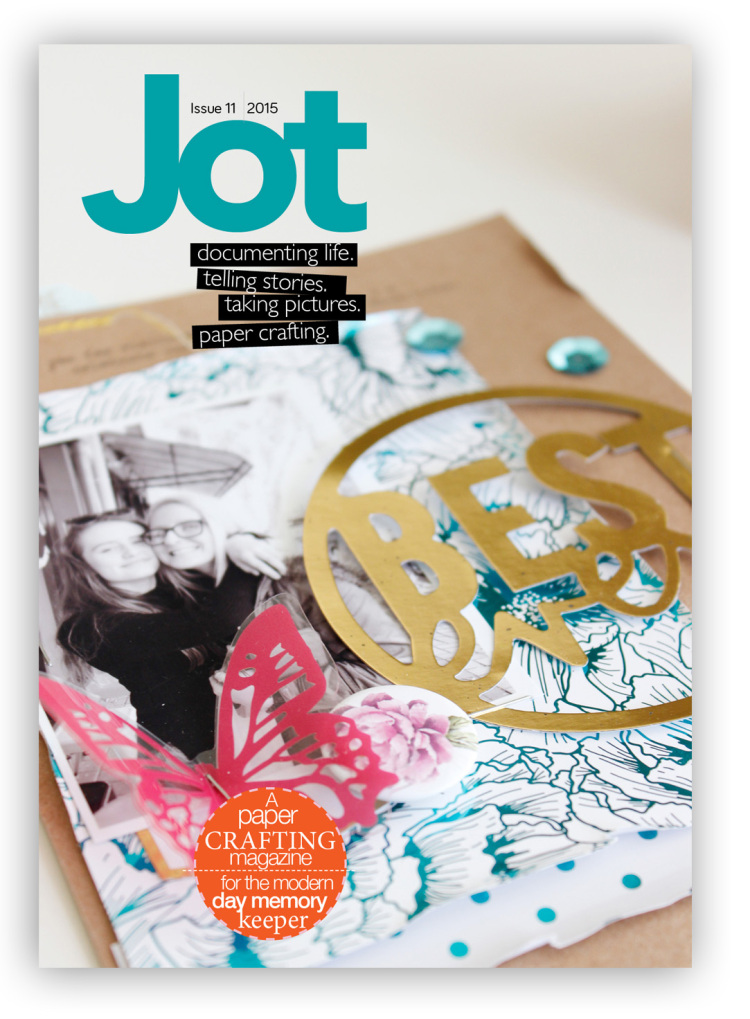
Jot Magazine Issue 15: Everyday Magic

Hi there! Jot Magazine Issue 15 has been out for almost two weeks now, and if you haven't checked it out, you won't want to miss all of the inspiration in store for you there! Today I'd like to share a layout I created for the first gallery in this issue, the Sparkle gallery! 

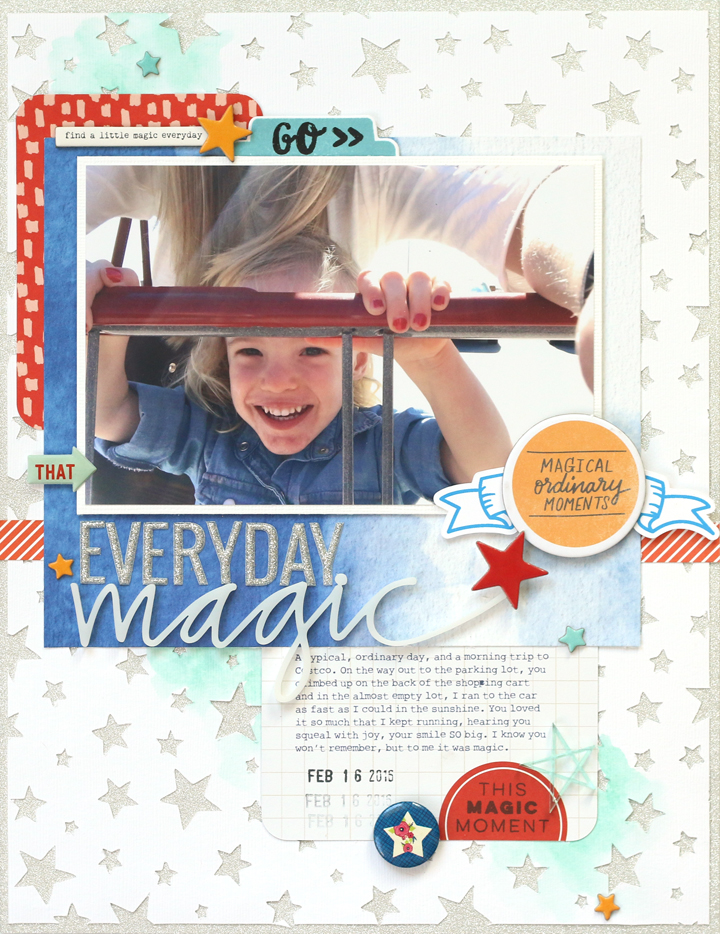
“Everyday Magic” Supplies | Cardstock: Bazzill. Patterned paper: Studio Calico. Journaling cards: Project Life. Stamps: Elle’s Studio, Studio Calico. Dies: Elle’s Studio. Embellishments: Ali Edwards, Studio Calico, Evalicious, Studio Calico, Color Cast Designs, Pink Paislee, American Crafts. Ink: Stampin’ Up, Tsukineko.

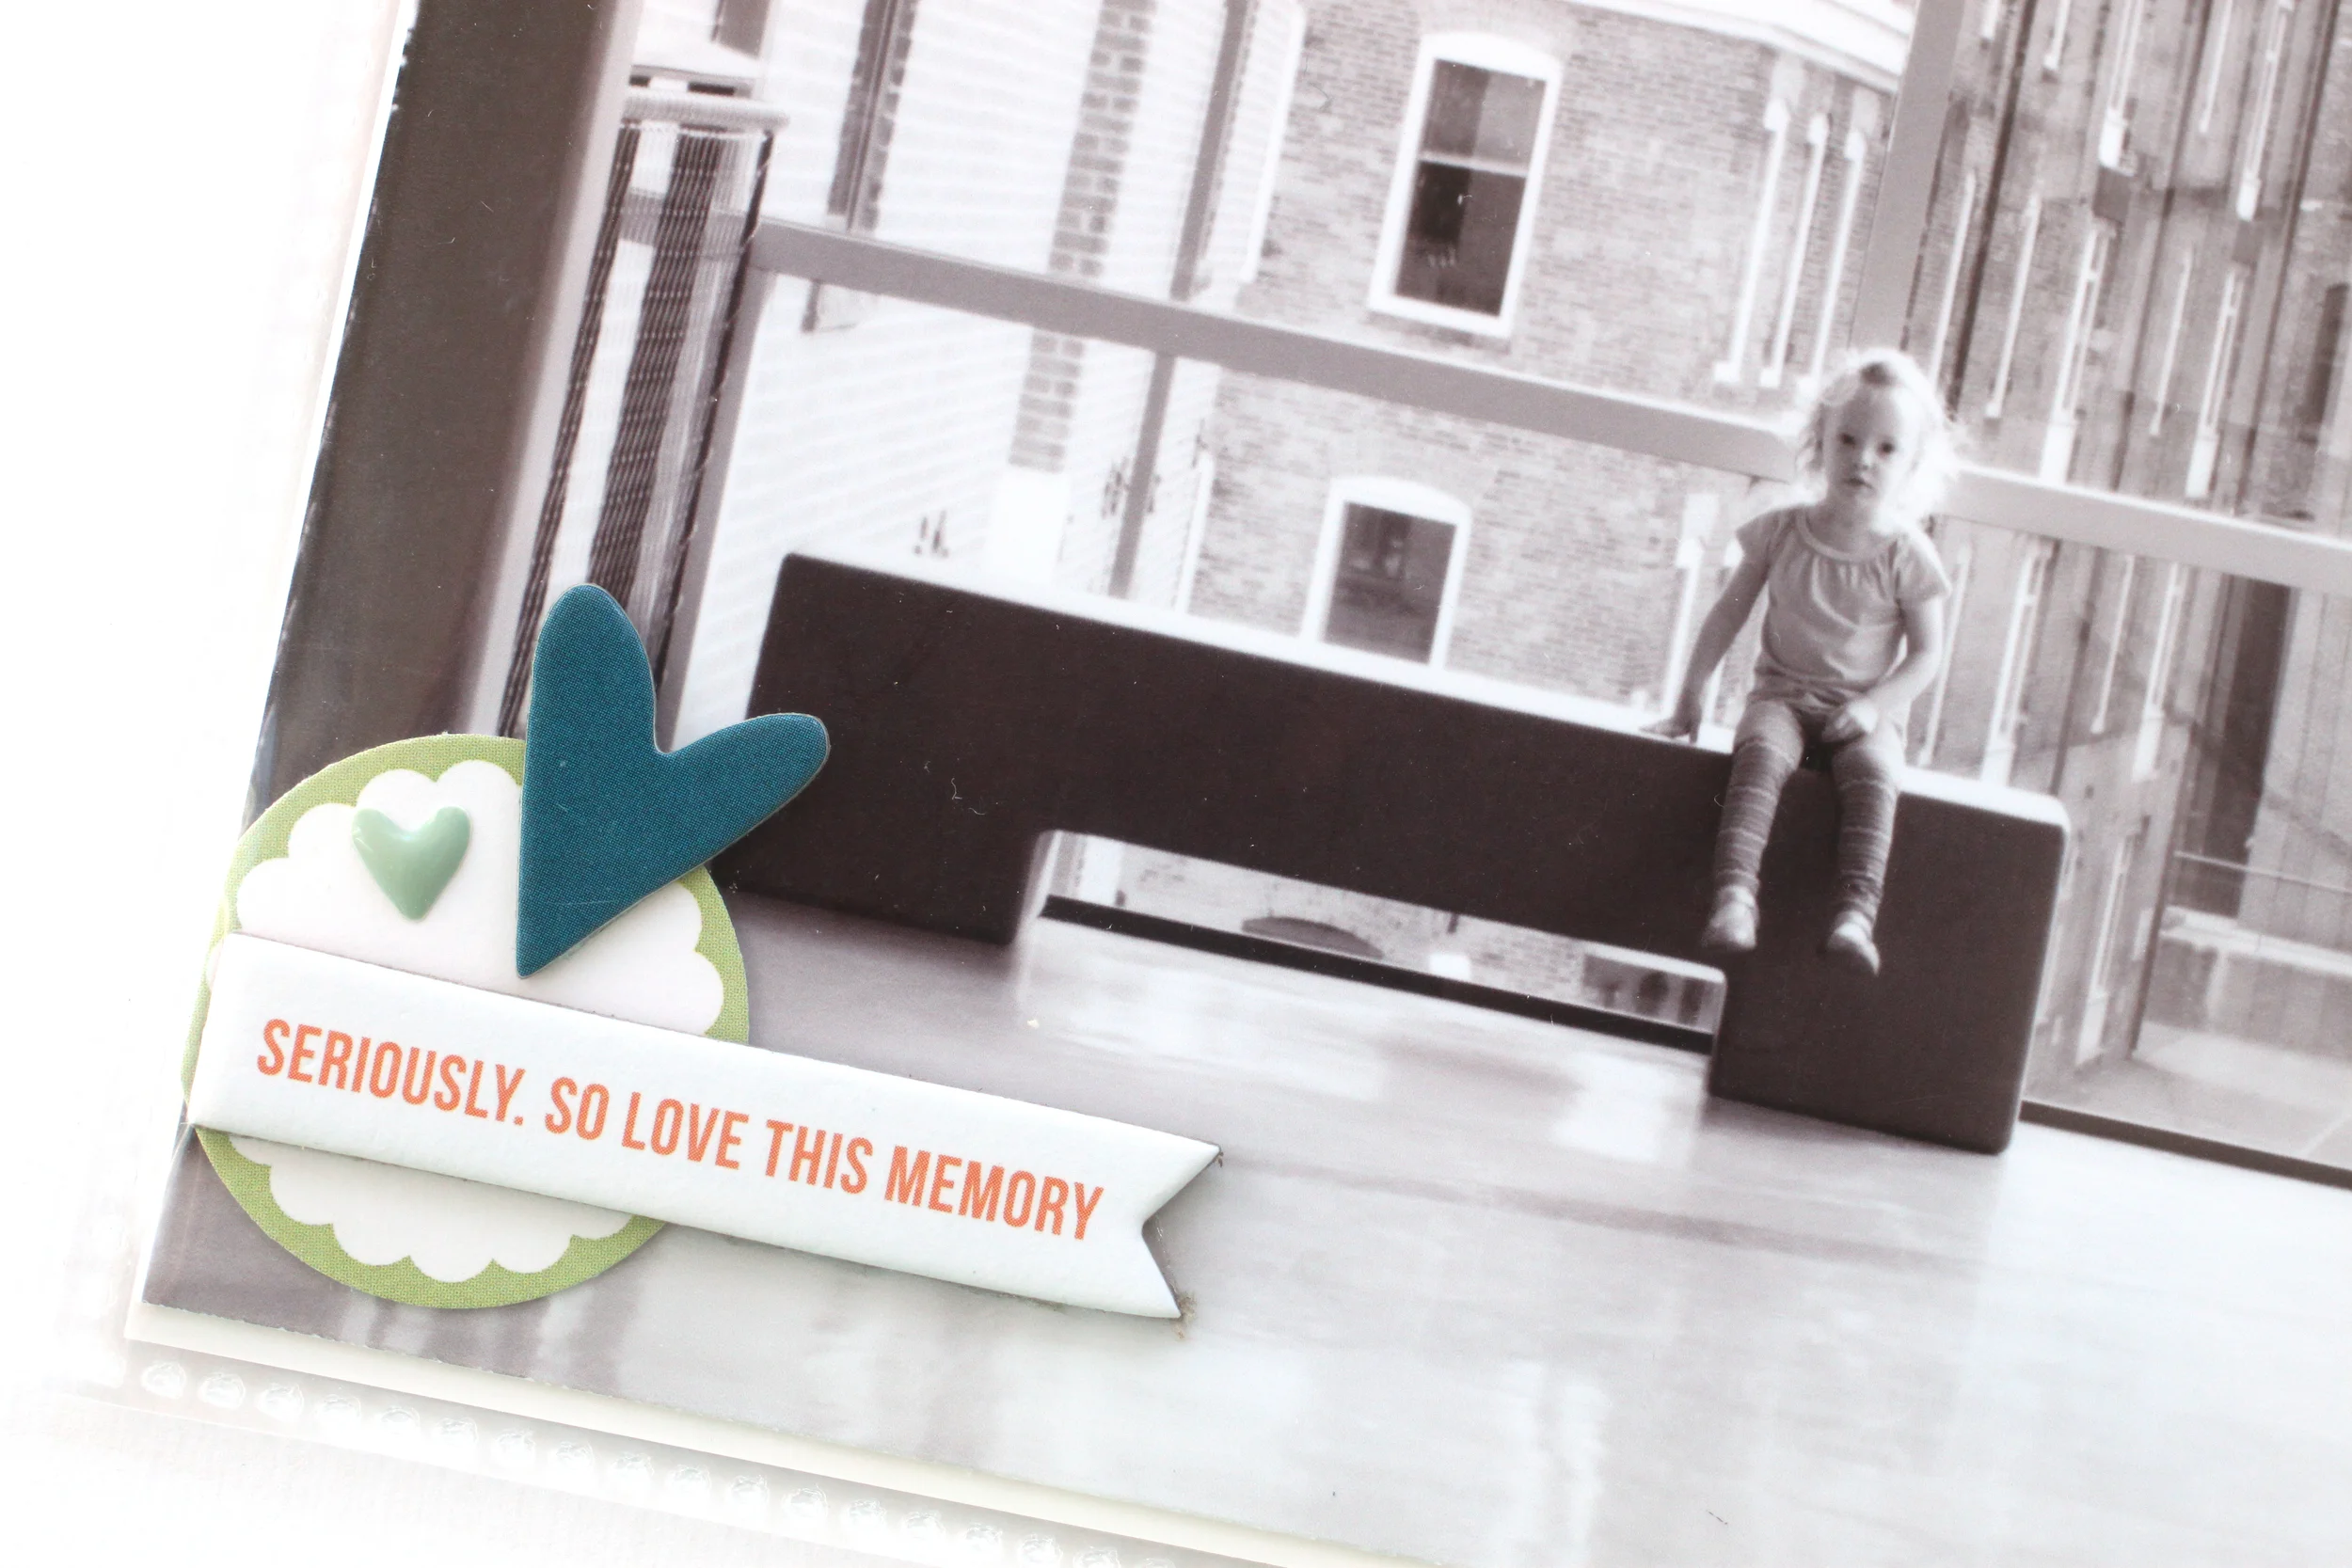
This layout was inspired by a beautiful moment I shared at my daughter doing an ordinary thing: pushing the shopping cart (or trolley for my British friends) from the store to the car, and since the parking lot was empty that morning, racing as fast as we could down the aisles. I was lucky enough to have my phone in my hand at the time to capture the moment.

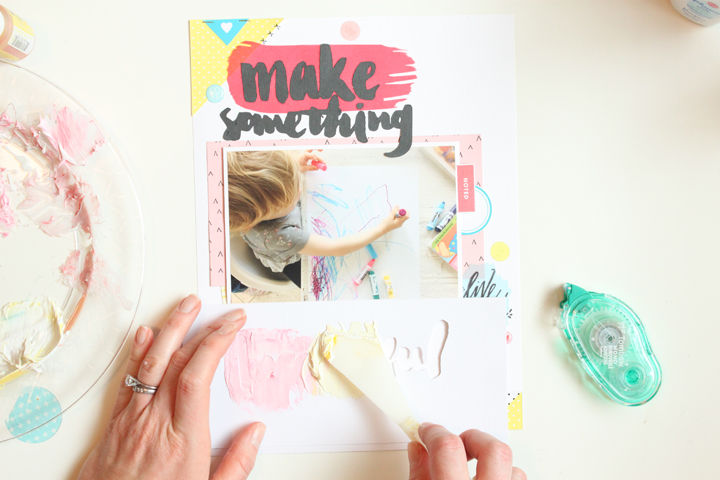
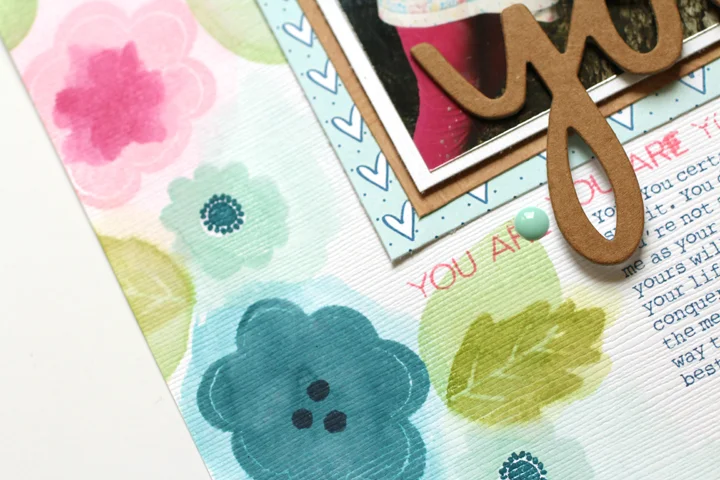
The beautiful star background cut file, created by Elle's Studio, was backed with silver POW! paper from American Crafts, cut from a sheet of white cardstock. To add a bit of color, I painted teal watercolor paint around where I would place my photo and journaling. I love the dreamy quality it gives my background.

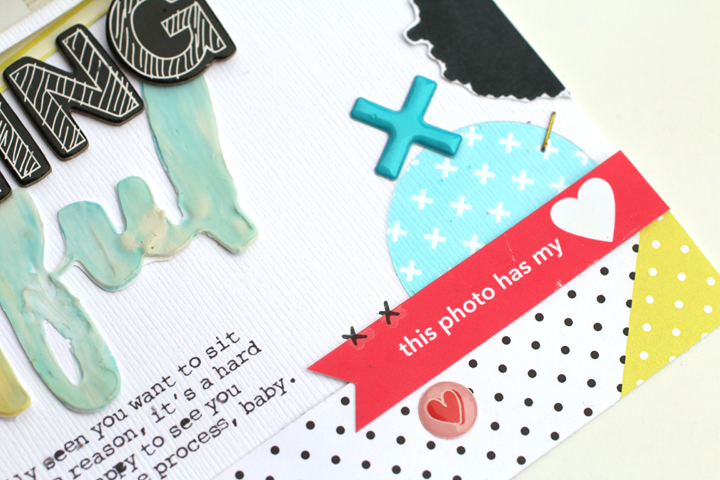
Next, I started layering. I pulled the gorgeous blue patterned paper from the Wink Wink scrapbook kit from Studio Calico. It had that gorgeous watercolor paper feel that I was looking for. To offset that dark blue, I chose reddish-orange cards from the Project Life Everyday Edition core kit (one of my favorites!), and my color scheme was nailed down. 

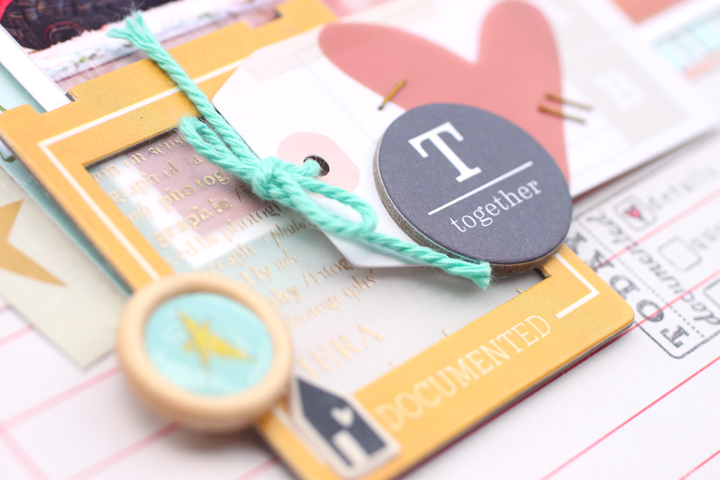
Although this was not a color scheme that I've used before, I found it quite easy to find embellishments in my stash to match. My title was created with a mix of Pink Paislee glitter alphas, that were a long-ago exclusive from Studio Calico, and the "magic" acrylic word, from the Ali Edwards Magic Story Kit, one of my favorites. I also used a few pieces of chipboard from this kit that were perfect for this story, especially the "magical ordinary moments" circle.

This could possibly be one of my favorite layouts of the year. Simple and so my style- documenting a magical moment with my little. 

Thanks for stopping by! Happy Monday! 

Jot Magazine September Mood Board

I am so excited to be the guest pinner for the Jot Magazine mood board this month! 

I am really loving sunset colors and aztec patterns right now, and this mood board certainly reflects that. My layout started with a photo of my daughter and goddaughters on a walk through  the woods.

InTheWoods_blog.jpg

Going through my stash, I began pulling patterned papers with the colors and patterns that reflected the mood board. My favorite image of the painted leaves, had to be used on my layout, so I grabbed a BlockWalla wood leaf stamp, along with my acrylic paints to fill in some of the spaces.

There is a lot of layering of colors and patterns on this page, and with all of the layers surrounding my photo, I kept my embellishment very simple, using a lot of old items from my stash, including this last piece of the Amy Tangerine fabric leaf border.

The Jot Girls projects inspired by this board are so amazing! Be sure to check them out and upload your own creation for a chance to win a fantastic prize! 

Jot Magazine July Mood Board

A new month brings a new mood board over at Jot Magazine, and this one, created by Kim Jeffress, will leave you feeling full of sunshine! 

I am a huge fan of yellow, so it was pretty easy to find supplies to create this layout based on the mood board. I started out with a photo that I knew would work perfectly, from Easter 2015, when my father and daughter were both wearing yellow for an Easter egg hunt.

Supplies | Crate Paper (woodgrain paper, bunting, ampersand & star die-cuts, tag, arrow, "thankful" and bird stickers, bow clip, fabric brad.) American Crafts (chipboard "today"). Carta Bella (background yellow geometric pager.) Studio Calico (yellow floral.) October Afternoon ("smiles" tag). Stampin' Up! (twine). Other: enamel dots.

In addition to the yellow and warm wood tones from the board, I also included a tiny bit of mint, which I introduced when I chose the large tag tucked behind my photo. 

I have been hoarding this October Afternoon 4" x 4" tag from the Daily Flash collection for ages, so it was about time to use it! 

Since the mood board included hanging bunting, I also added a bit in the top corner of my layout. I love all of the layering in this corner- with lots of different patterns and textures to keep it interesting! 

Be sure to check out the other Jot girls layouts on the mood board page, and upload your own creation using the mood board as inspiration to win a chance for the Jot girls to choose your layout this month! 

Jot Magazine Issue 14: Make Something Beautiful

Have you ever had a photo that you loved, so much, that you just held on to it until you had the perfect products to scrapbook it? Well, this was my photo, and when challenged with the "stencils" category in Jot Magazine issue 14, I finally pulled it out and got a bit messy to document it. Well, messy for me! 

Supplies | Cardstock: Bazzill Basics. Patterned paper: Studio Calico, Scraptastic Club. Stickers: American Crafts (alpha), Studio Calico (dots, crosses). Stamps: Scraptastic Club. Die-cut shapes: Studio Calico (blue circles), Scraptastic Club (red vellum brushstroke). Rub-ons: American Crafts. Digital files: Studio Calico. Die-cutting machine: Silhouette Cameo. Font: Rough Typewriter. Other: Golden modeling paste, Studio Calico spray ink, Project Life date stamp.

To create my title, I cut the word "beautiful" out with my Silhouette, using a freebie Studio Calico digital file that I received ages ago. Doing this isn't very tricky, if you have Photoshop. You can simply save the digital file as a PNG, erase whatever you don't want from the background, then save and drag the file into your Silhouette software to trace. 

After I cut the word "beautiful" from cardstock twice, I adhered the two pieces together, so that my stencil could be a bit thicker. I then adhered the stencil to my background cardstock using temporary adhesive, and colored three different spoonfuls of modeling paste with pink, yellow and teal spray ink, filling in my stencil and picking it up as soon as I was done. 

However, I wasn't too happy with the edges of my word. The stencil wasn't close enough to my background cardstock, causing some of the modeling paste to seep out from the edges. How did I fix this?

I didn't want to do it over again, especially since the stencil was a "one time use" item, so I just waited for it to dry, then cut the word out, cutting off the messy edges! I then adhered it to my new white background cardstock and finished off the page. Since I'm not the messiest scrapbooker, I opted to use vellum die-cuts and stamped ink blots instead of actually making them myself with ink! 

I absolutely love this colorful page, with a lot of white space, just like my daughter's artwork in the photo above. If you're like me, and are not a messy, mixed media scrapbooker, be brave and try this stencil technique this weekend! Also, be sure to check out the other awesome layouts in the stencil section of Jot Magazine issue 14

Have a great one, and happy creating! 

Jot Magazine: June Mood Board

The June mood board at Jot Magazine is live, and its neutral, natural feel will make you want to create instantly!

I felt like this mood board held so many creative possibilities. I started with a kraft, black and white palette, then added in tiny bits of dark green. Once i knew what I was documenting, my favorite homemade breakfast treat, I threw in a tiny bit of orange, too!

Supplies: Cardstock: Bazzill. Patterned paper: Studio Calico, Crate Paper. Project Life cards: Project Life (striped), Scraptastic Club (orange). Die cuts: Crate Paper (leaves), Pink Paislee (citrus). Chipboard: American Crafts (love, alphas), Crate Paper ("find what makes you happy.") Other: thread and enamel dots.

How will this mood board inspire you? Create your project based on it & post at the mood board post for a chance to win a bundle of scrapbooking supplies!

Jot Magazine Issue 13: 90 Days

The latest issue of Jot Magazine, Issue 13, included a numbers gallery, and today I'd like to share my numbers layout with you! 

90Days_blog.jpg

"90 Days" supplies | Cardstock: Bazzill. Patterned paper: Amy Tangerine Finder's Keepers (pink & orange stripe), Dear Lizzy for American Crafts (pink polka dot), Studio Calico (numbers vellum.) Embellishments: Project Life card, Amy Tangerine Finder's Keepers cardstock die-cuts, Finder's Keepers rub-ons, Amy Tangerine Stitched enamel dot shapes & Thickers, Mark Richards metal dots. Other: sequins.

When the idea of creating a layout around numbers came up, I immediately thought back to our time in the NICU. EVERYTHING in there is about numbers- the oxygen levels in my daughter's blood, her temperature, test results, etc. The other big number from our time there was 90, the number of days that we called the NICU our home, so I decided to make that number the focal point of my layout, die-cut the number with my Silhouette Cameo, and placed my photo inside the "0." I had the perfect vertical photo- me sitting at the side of the isolette, with my hand on my girl, probably only days after she had been born.

The font I chose, Bebas Neue, was tall and clean, so I decided to go with a vertical design on my layout, adding strips of patterned paper, vellum and washi along the left side of the 8-1/2" x 11" page. 

I knew I would want to write quite a bit about this photo, so I chose to type my journaling (in Rough Typewriter font) and print it onto a trimmed Project Life card. I placed this at the bottom left, along with a few simple embellishments from the Amy Tangerine Finder's Keepers cardstock die-cuts

Since I had quite a bit of weight on the left side of my page, I wanted to add a bit more to the center and the right, so I placed the word, "days" from the Amy Tangerine Stitched Thickers right below my die-cut numbers, and to the right of that, a cardstock die-cut flower group, which balanced the rub-on flowers at the top left of the page. 

Be sure to check out the rest of the numbers gallery in Issue 13 of Jot Magazine! 

Jot Magazine April Mood Board

I love the beginning of the month. It brings a fresh start to my goals, as well as a new mood board at the Jot Magazine blog. This month's board is simply stunning.

These colors are just what I love to use in my daily life anyway, so my layout came together quite quickly. 

"Watching" supplies | Paper: Bazzill Basics (cardstock), Studio Calico (pink, birds and red), Crate Paper (floral), October Afternoon (feathers); tags: Crate Paper; transparency: Studio Calico (bird); stamps: Elle's Studio; stickers: Studio Calico (hearts); thread: Stampin' Up!; kits: Arendal scrapbook kit and Brimfield scrapbook kit from Studio Calico. 

I recently picked up the Arendal and Brimfield scrapbook kits in the Studio Calico last call sale, and as soon as I saw the bird print in the Brimfield kit, I knew that I wanted to use it for this photo. The colors used in the bird patterned paper matched with the mood board perfectly, so I pulled other patterned papers that would match those colors, all with various patterns. I also grabbed my Crate Paper Wonder stash, because I knew the colors would line up, and the childlike sentiments would work for what I was documenting.  

You know that piece of patterned paper in your stash that you just keep using over and over again? Well, that is this single piece of feather patterned October Afternoon paper from the Daily Flash- Girl Talk collection. I have cut feathers out of it maybe a dozen times, and I still love using it on my pages.

All together, I loved this mood board, and loved creating this layout. Be sure to link up your creation inspired by the mood board to the mood board post by the end of the month for a chance to win an awesome prize! 

Jot Magazine March Mood Board

Chase those Monday blues away with the beautiful March mood board from Jot Magazine! 

I can't believe how gorgeous this board is! It reminds me of a warm, spring day, and I began my creative process by choosing a photo that gave me the same feel.

Supplies | Cardstock: Bazzill Basics Avalanche. Patterned paper: Scraptastic Kit Club, Crate Paper (woodgrain). Embellishment: Crate Paper ("wild spirit" chipboard, flower die-cuts & tag), American Crafts (kraft Thickers), Pink Paislee (arrow), Studio Calico (journaling spot), Stampin' Up! (twine), enamel dots. Other: Stampin' Up ink, Elle's Studio "you are" stamp.

I knew I wanted to use a watercolor technique to match the board, and decided to do a partial stamped, partial watercolor border along the left side of the layout. I was surprised how much I loved this process, as I typically don't do things so "loose."

The "wild spirit" chipboard piece was absolutely perfect for what I wanted to document on this layout- my daughter's fearless attitude toward life. I layered it on top of my photos and topped it with floral die-cuts and the Pink Paislee arrow. With the floral border on the left side of the page, I really didn't want to go far with embellishment.

I'm pretty excited about the way this layout came out- it is exactly how I envisioned it, and to me, it really captures the feel of the mood board. Watch out on my YouTube feed this week for a video on how I created my floral stamped/watercolored border, and be sure to upload your own project to the mood board page for a chance to win!

Products used in this project:

Jot Magazine Issue 13: Greatest Adventure

Jot Magazine Issue 13 is live, and it may just be the most beautiful issue yet! 

There are so many beautiful projects to inspire you in this issue, and today I'd like to share my favorite project that I submitted, from the Mothers gallery. I knew I wanted to journal about my own journey as a mother, and my friend, Donya Luana Photography, gave me the perfect photo in which to document.

"Greatest Adventure" supplies | Paper: Bazzill Basics avalanche cardstock, American Crafts (pink polka dot), Crate Paper (green grid), Carta Bella (green floral, yellow hearts). Embellishment: Carta Bella ("the best" & heart stickers), American Crafts (large floral sticker, small, and black foam alphabets), Crate Paper (metal clip, kraft alphabet & stitching rub-ons), Elle's Studio (yellow tag). Other: Studio Calico Stamp ("everyday").

I'm not completely sure how this color scheme came together, but it is definitely not one I have ever used before. I started with older papers from Carta Bella that I had in my stash, and wanted to use. Given that my photo was black and white, I could have started with any product! The yellow, geometric hearts were a must-use on this layout, and it felt entirely wrong to cut the paper horizontally, so I opted to cut the top edges of the heart out, framing the bottom of the layout. 

Once my papers were selected, I went through my stash to find pieces of embellishment that fit the color scheme. I wanted the layout to be quite bold, so I chose a contrasting black as my neutral. I love that this layout feels simple and graphic, yet feminine and detailed at the same time. That's a perfect combination in my mind! 

Be sure to check out Jot Magazine Issue 13 in its entirety to be amazed by the gorgeous inspiration provided by the Jot Girls, as well as contributing designers! 

Jot Magazine: Boston Pocket Page Spread

The next issue of Jot Magazine is due to release tomorrow, but before you have a brand-spankin' new issue to drool over (I've seen some of the projects from my DT members, and you will be so inspired!) I'm here to share a pocket-page spread from Issue 12 that may be my favorite in my 2015 album.

If you've ever had a look at my pocket pages before, you would see that I use a monthly format and the Collect App for my journaling. With this spread below, I'm documenting in more detail a trip that we took, so I tend to go with full-size photos and longer journaling. This isn't something that I can keep up with on a weekly, or monthly basis, but I love doing it for special events throughout the year when I have a lot of photos to document. 

Boston supplies | Ali Edwards Go Story Kit, Cards: Scraptastic Club ("today & days of the week); Embellishments: Scraptastic Club (labels), Pink Paislee (star, arrow & "itinerary"), Studio Calico (flair, chipboard hearts); Stamps: Elle's Studio ("love you and me" & cutlery), Scraptastic Club ("today's story").

This spread documents our trip to Boston in September, and I took cues from my photos when choosing my color scheme. It's quite photo-heavy, and embellishment light, which I prefer. I typically only embellish my filler cards and small amounts of the negative space in my photos. 

The Ali Edwards "Go" Story Kit was perfect for these photos- both in the color scheme and in the theme to document our long weekend away in a city that we loved. I also used a lot of labels to jot down specifics from my photos. I get coordinating labels with my Scraptastic Club kits each month, but you can also find some (for free!) from Kaitlin Sheaffer

Boston Right.jpg

To add embellishment to the "Go" kit, I used pieces from the Pink Paislee Atlas collection- it paired perfectly with the kit and worked well with the travel theme. 

Negative space in my photos were the perfect place to house small groupings of embellishment. This photo is one of my favorites from the entire trip, and printing it in black and white made it really stand out in the spread.

Be sure to check out the Jot Magazine home page tomorrow, when Issue 13 will be ready to peruse with a cup of coffee! You will be amazed at what the Jot Girls have in store for you! 

Jot Magazine February Mood Board: "You & Me Until Forever"

It's a new month, which means that Jot Magazine has a new, beautiful mood board to inspire you! 

Now, if you're not a purple kind of gal, don't be scared. I have to admit, that I was when I first saw this board, because I thought that I didn't have any of the purple tones in my stash. However, I was surprised to find quite a few items that bordered on purple that worked perfectly. 

"You & Me Until Forever" supplies | Cardstock: Bazzill Basics (avalanche). Patterned Paper: Scraptastic Club, Crate Paper. Embellishment: Simple Stories (chipboard heart, chipboard framebrad, heart die-cut, enamel dots), Heidi Swapp (transparent words, flower die-cut), Amy Tangerine for American Crafts (die-cut tag), Elle's Studio (stamps).

To create the layout, I used quite a few items from the Scraptastic Club Wednesday Night kit (sold out), which featured a lot of the Simple Stories "So Fancy" collection, which matched the mood board colors perfectly. I kept the layout simple, using pretty, feminine layers and just a bit of stamping. At this point, keeping things simple means that they are getting done, and I'm okay with that!

I love this tag from the Amy Tangerine Finder's Keepers collection, and feel like it was just waiting for this photo and this layout! 

My title, which I placed at the bottom of my layout, was made up of the "you and me" globe from the Simple Stories chipboard, and the Heidi Swapp transparent script, which I used because of the script saying in the mood board. I put them on top of two pieces of Crate Paper, the floral of which I am down to my last scraps.

Be sure to check out the other Jot Girl's creations and link up your own design, based on the mood board, to the Jot Magazine February mood board page to be entered to win a prize from Jot! 

Jot Magazine Issue 12: "I Should've Been..."

As I prep my project for Issue 13 of Jot Magazine, today I'm here to share a layout with you that was featured in the storytelling gallery of Jot Magazine issue 12. Our theme was, "when I grow up," and the phrase made me think of myself as a child, and what I didn't want to be when I grew up: A pianist. The photo used on the layout is me at age 7, taken by my piano teacher.

I don't have many regrets in life, but one of them is that I didn't continue taking piano through high school and into college. From the age of seven to fourteen, I went to weekly lessons, practicing for hours in between. The piano always came quite easy for me, and I wish I would have taken advantage of my natural ability. 

The yellow and white stripes on my background paper reminded me of the white keys on the piano, so I adhered black sharp and flat keys along the right side of the layout.

I couldn't quite pass up these chipboard alphas or fun patterned paper from the Crate Paper Wonder collection. I just love those big, skinny alphas! I paired them with the white script alpha from October Afternoon, so that I had a lot of contrast between the two fonts. Because my layout was 8-1/2" x 11", it was easy for me to print my journaling in the bottom left corner of my layout just under my title, once I knew where all of the other elements on the page would be placed.

A few child-like cardstock and chipboard embellishments from Crate Paper and Simple Stories were all I needed to finish off this page, which I wanted to focus more around the story, and how I now feel about giving up on something that I worked so hard on for seven years! 

Thanks for stopping by and be sure to check out all of Issue 12 today! It is full of inspiration! 

Jot Magazine: October Mood Board Layout

Happy October! Not only am I excited about cooler weather, Halloween and pumpkin everything, I'm also excited about the October mood board over on the Jot blog, which released yesterday! 

So many beautiful possibilities! When I first saw the board, I was a bit nervous, as I'm not much of a messy, mixed-media type of gal. I instead focused on the colors and themes from the board, and added "mixed-media looking" products, but in a non-messy way! 

Supplies | Paper: Crate Paper (grid), Fancy Pants (black text), Scraptastic Club (green text), Studio Calico (clouds), American Crafts (green strip). Embellishment: American Crafts (transparent photo overlay, chipboard hearts), My Mind's Eye ("world" rub-on, dashed heart rub-on, dark blue brads, map heart chipboard, gold heart sticker, gold dots), Studio Calico (black mini alpha), Pink Paislee (black "arrivals" chipboard), Scraptastic Club (flair, "hello" tag, "go, see, do" die-cut). Stamps: Scraptastic Club ("travel notes"), Stampin' Up! ("Watercolor Wash"). Other: Stampin' Up! (ink), Studio Calico (black mist), sewing machine.

After choosing the paper I would use for the layout, I pulled out my Watercolor Wash background stamp from Stampin' Up! and stamped it twice on my background grid paper, giving the appearance of a painted background without the mess. I had originally placed the painted black chipboard hearts on the layout and planned to watercolor with green paint inside of them, but once I moved the chipboard heart, I loved the look of the green watercolored hearts on their own! 

With the world map image in the mood board, I knew I wanted my layout to have a travel theme, but I didn't want it to be overly "travel," so I pulled papers and embellishment with subtle map prints, and travel words. The pale green and white graphic paper from Scraptastic Club is one of my favorite exclusive prints that I have received in my kits!

I also loved the contrast of having some black on the layout, especially the "arrivals" chipboard from Pink Paislee's Atlas collection.

Be sure to create your project using the mood board as a starting point by October 31st, and post to the Jot blog post to win a fabulous prize. The Jot Girls love seeing all of the beautiful project each month!

Jot Magaine Issue 11: Favorite Photo

Jot Magazine issue 11 is currently available and full of inspiration from the Jot Girls, as well as reader's submissions. Today I'm sharing with you one of my layouts featured in the magazine, showcasing one of my favorite photos from the summer.


Supplies | Cardstock: Bazzill. Patterned papers: Doodlebug Designs (polka dot vellum), Studio Calico (background), Heidi Swapp (yellow/grey polka dots), Crate Paper (floral). Journaling tags: Elle’s Studio (‘summer moments’, pink tag, ‘today’ date). Embellishment: Crate Paper (chipboard butterfly, ‘2 tag’), Simple Stories (yellow butterfly sticker, ‘i am simply me’ tag, enamel dots), Heidi Swapp (flair), My Mind’s Eye (yellow brad), American Crafts (mini staples, letter stickers). Other: Stampin’ Up! (die/embossing folder), Basic Grey (digital die cut butterfly), baker’s twine.

This photo is so special to me because it embodies my daughter at this age- big smile, wild hair (always!) and her favorite butterfly t-shirt. It was taken on our trip back home to Kentucky to see my parents this summer. 

The layout itself came together quite easily. As soon as I saw the Studio Calico background paper in my stash, I knew it would be perfect, as I wanted to incorporate bright yellow and pink on my layout, and the mixed-media texture on the patterned paper was an added bonus. I didn't even have to get my workspace dirty! I kept the yellow manufacturer's strip on the right side and decided to butt my photo mat, which included vellum, three different patterned papers and an Elle's Studio journaling tag, up to it.

The first embellishment that I added came about merely because it was laying on my desk in front of me - the big, grey butterfly die-cut from Basic Grey. I layered it onto a Heidi Swapp circular journaling card and topped it with an "embosslit" (embossed and die-cut) butterfly from Stampin' Up, and a Heidi Swapp "bliss" flair badge.

I added my title in a natural space that was created in the gap between my polka-dot vellum and patterned paper with grey Thickers. Tip: You can see here that my "Y" is cut in half- that's because I didn't have a "Y" left on the sheet, so I used an "I" and a "W" to make a "Y" for my title. To the right of my title, I added my handwritten journaling, and above this space, I placed three different, layered butterflies, using vellum, paper, and printed chipboard.

You closeup_blog.jpg

My third embellishment cluster, placed at the bottom right of my photo, included the "I am simply me" tag from Simple Stories, backed with a pink Elle's Studio tag, and topped with another layered butterfly. To the right of that I added a "2" tag from Crate Paper (my daughter's age) and below, the "today" tag from Elle's Studio, stamped with the date. A splattering of enamel dots, always a must for me, finished off the page.

Thanks so much for stopping by and checking out my layout! Be sure to download the entire Jot Magazine issue 11 to view so many beautiful projects!

Jot Magazine July Mood Board

The July mood board at Jot Magazine is live, and the beautiful board, created by Beshka Kueser, has the most beautiful color palette. 

I was so inspired by the color scheme- one that I had never created with before, that I created this layout.

Supplies | Patterned paper: American Crafts (teal dot, green ledger, '2' tag), Crate Paper (green tags), Studio Calico (floral), Doodlebug (pink dot vellum). Embellishments: Pebbles (gold alpha), Simple Stories (flower, heart & 'loving life' chipboard), Bella Boulevard (felt bow), American Crafts (heart puffy sticker, 'fabulous' die cut), Basic Grey (pennant chipboard), My Mind's Eye (twine). Other (enamel dots).

The photo of my daughter against an orange wall in Savannah was perfect for the color scheme, and I paired it with a wide range of teal, yellow and green product, with a tiny bit of pink thrown in for good measure.

She Is 2 closeup 2.jpg

As soon as I saw the photo, I knew I wanted to journal about how active and difficult that Lizzy is at the age of two. When I was taking her photo, I couldn't get her to sit still or look at the camera at all. This momma business is such a wild, beautiful ride. 

Be sure to link up your creation to the Jot Magazine blog using this beautiful inspiration board by the end of the month! 

Jot Magazine Issue 10: Story Telling

Today I'd like to share a layout with you that was featured in Jot Magazine's Issue 10, which released on June 1st. This celebratory 2nd birthday issue is jam packed with inspiration from my fellow design team members as well as readers. My layout, "Leg!" was featured in the "Story Telling" gallery and our assignment this month was to document funny sayings from our loved ones. Months ago, I snapped this photo of Lizzy and I playing ball by setting my DSLR camera on the floor and using the timer. As soon as I read the assignment, I knew this photo would be perfect to document an everyday activity here at our home.

Supplies | Cardstock: Bazzill. Patterned papers: Shimelle for American Crafts (ledger & pink dots), Studio Calico (letters), We R Memory Keepers (stars), Crate Paper (vellum); Embellishments: Heidi Swapp (letters & metal clip), Studio Calico (heart), Gossamer Blue (‘happy memories’ banner, ‘together’ chipboard), Crate Paper (tag, tab sticker), American Crafts (house puffy sticker, wooden flair, small stars & heart stickers), Simple Stories (chipboard frame); Stamp: Scraptastic Club; Other: Stampin’ Up! (ink & twine)

The story: One of Lizzy's favorite activities is playing ball, but she is very particular on how it will be played. She shouts, "leg!" whenever she wants to play, which means that you have to sit down on the floor wherever you are standing, and spread your legs so that she can pass the ball to you. She's a bit demanding, but still quite cute. 

How I created this layout: 

  1. I printed a 4"x6" photo and matted with a 4-1/2" x 6-1/2" piece of white cardstock. 
  2. Next I layered three different patterned papers at the upper half of a 12"x12" sheet of ledger patterned paper and adhered the photo to the top of the layers with dimensional adhesive.
  3. At the upper right-hand corner of the photo, I tucked a tab label behind the photo & add a 'love' sticker. To the right of the label, I added a metal clip and slid the 'happy memories' die-out label under it.
  4. At the bottom left-hand corner of the photo, I added a grouping of embellishment. I framed a piece of vellum in a chipboard frame, and added a tag on top, on which I stapled a transparent heart. On top of that, I added another chipboard element, the 'together' circle. On the left side of the frame I added a puffy sticker house and a wooden enamel button. The frame served as the base for all of the embellishment in this grouping.
  5. At the right bottom corner of the embellishment grouping, I added a 'today documented' stamp.
  6. At the bottom right-hand corner of the patterned paper grouping, I added a large title in transparent letters. Beneath it, I handwrote my journaling.
  7. To finish off my layout, I added three different groupings of small heart and star stickers.

Thanks for stopping by! Over the next couple of weeks, I will be sharing my Jot Issue 10 layouts here on my blog, but in the meantime, check out the full, FREE issue of Jot today!  

Jot Magazine March Mood Board

The Jot Magazine mood board has been posted for March, and its blue, teal, green and yellow color scheme will inspire you to create!

This month, I was so instantly inspired by the colors, I knew exactly what photo I wanted to document- a quayside photo from a beautiful French town that we visited in 2011, La Rochelle.

Supplies: Paper- Studio Calico (background), Shimelle for American Crafts (yellow, teal herringbone & 'Go Somewhere Lovely' cut), Elle's Studio (blue floral), Chickaniddy Crafts (teal heart); Embellishment- American Crafts (cork Thickers, Shimelle ticket die-cut, mini clothespins), Crate Paper (banner border), Elle's Studio (cork), October Afternoon (chipboard journaling card), Studio Calico (ribbon, enamel dots, 'enjoy every minute' stamp)

To create this layout, I used a lot of old product, and items that were sitting in my 'anything' bowl on my desk. That's the bowl that houses leftover pieces of ribbon, small pieces of die-cuts and embellishments that I don't feel like organizing in their correct place. Please remind me to get rid of that black hole for embellishments! 

The background patterned paper, from the February 2013 Studio Calico Front Row kit, was actually saved for the yellow diagonal stripe B-side, but when I saw the nautical images on this side of the paper, I knew it would be perfect for this photo. I added additional papers from the Shimelle collection 6x6 paper pad, along with a Shimelle die-cut tag and topped it all with a lot of older embellishments- DIY Shop Thickers by American Crafts, Elle's Studio cork, and October Afternoon mini alphas and chipboard. 

The mood board was so inspiring that my layout came together in about 30 minutes. Completed during nap time. Ultra score. Be sure to check out what the other Jot Girls created with the board and link up your own creation on the mood board page before the end of the month. 

Jot Magazine February Mood Board

Sometimes when I need help starting a layout, a mood board is just the thing I need to get my creative juices flowing. The mood boards on the Jot Magazine blog are always so beautiful, I can't look at them without envisioning a layout. This month's board is no exception!

smallFEBRUARYMOODBOARD.jpg

I was especially inspired by the color scheme, the square shapes of the cookies & pillows, as well as the bold, graphic font. Here's what I created.

Love the Details blog.jpg

'Love the Details' Supplies | Cardstock: American Crafts | Patterned paper: Crate Paper (black & white stripes, light pink floral, bows, vellum), American Crafts (hearts), Gossamer Blue (red & pink stripe) | Embellishments: Crate Paper (label & 'recorded' sticker, rub-ons, floral chipboard, tag), Pebbles (large gold letters), American Crafts (date stamp, black chipboard 'a'), Webster's Pages (small letter stickers), Heidi Swapp (chipboard heart) | Stamps: Scraptastic Club | Tools: Stampin' Up! (heart confetti punch) | Other: Ink & markers (Stampin' Up!), sequins, twine

Be sure to check out the amazing projects from the other Jot Girls over at the Jot blog and link up your own creation for a chance to win a prize!

Also, if you'd like to have your work featured in the upcoming Issue 9 of Jot Magazine, submit your projects today based on the submission themes. All details can be found in the link.

Thanks for stopping by and happy Monday!