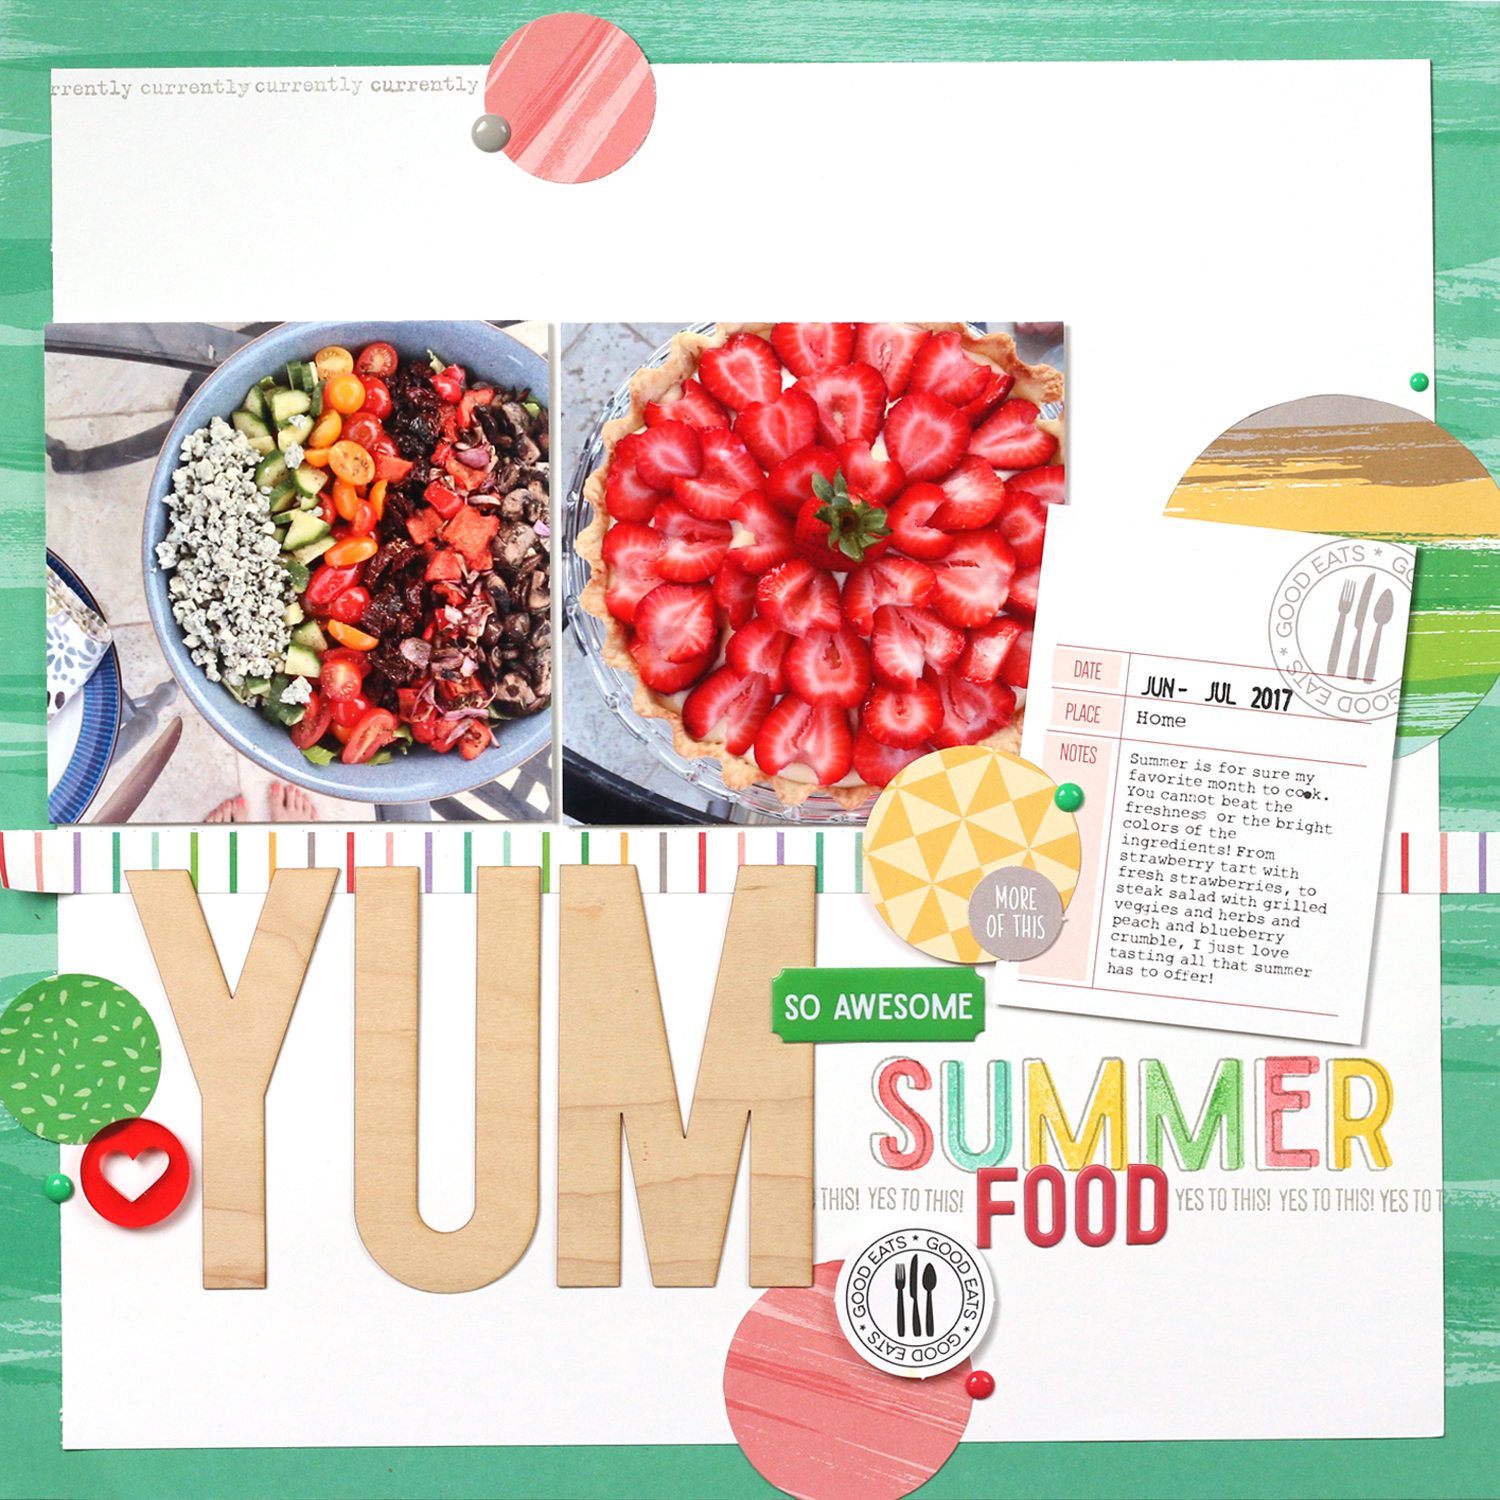
Making a Frame with Title Builder!

I wanted to find something new to do with my Title Builder products, instead of just creating a normal stamped title on my layout. When I looked at my photo on my 8-1/2" x 11" page, I almost immediately went to patterned paper to give it a frame, and then thought, "Why not use words from the Title Builder?" I'm so glad that I did this, and I'd like to share what I created with you—a mix of title and journaling that frames my photo! (*All product links are affiliate links. You don't pay any extra, but I get a small percentage of your sale! Thanks for your continued support!) 

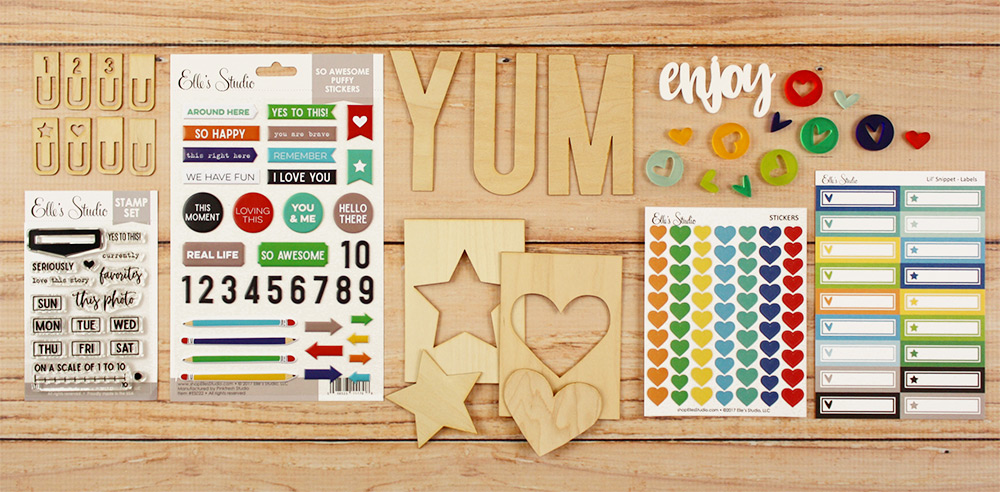
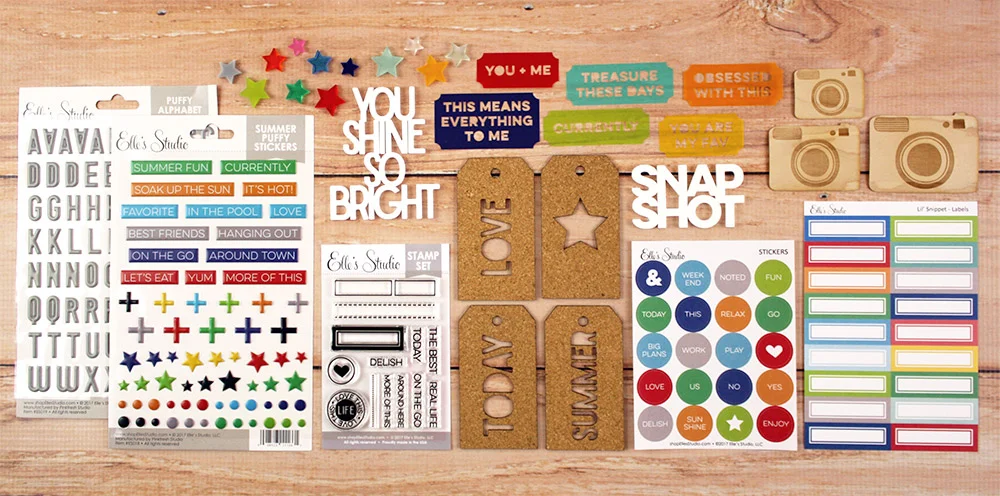
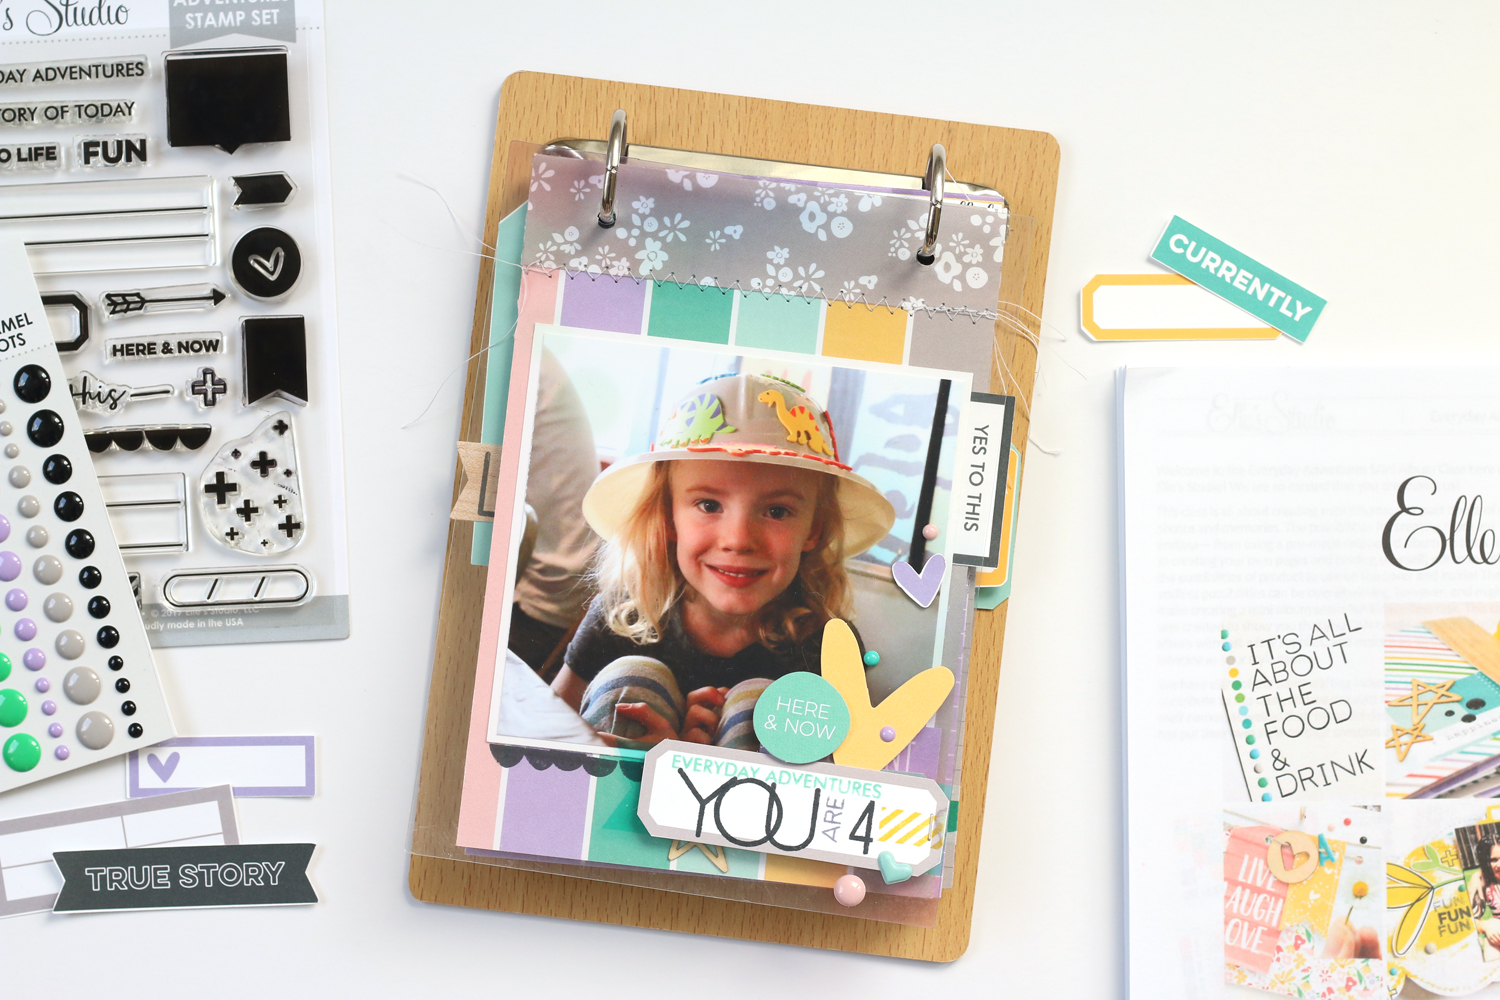
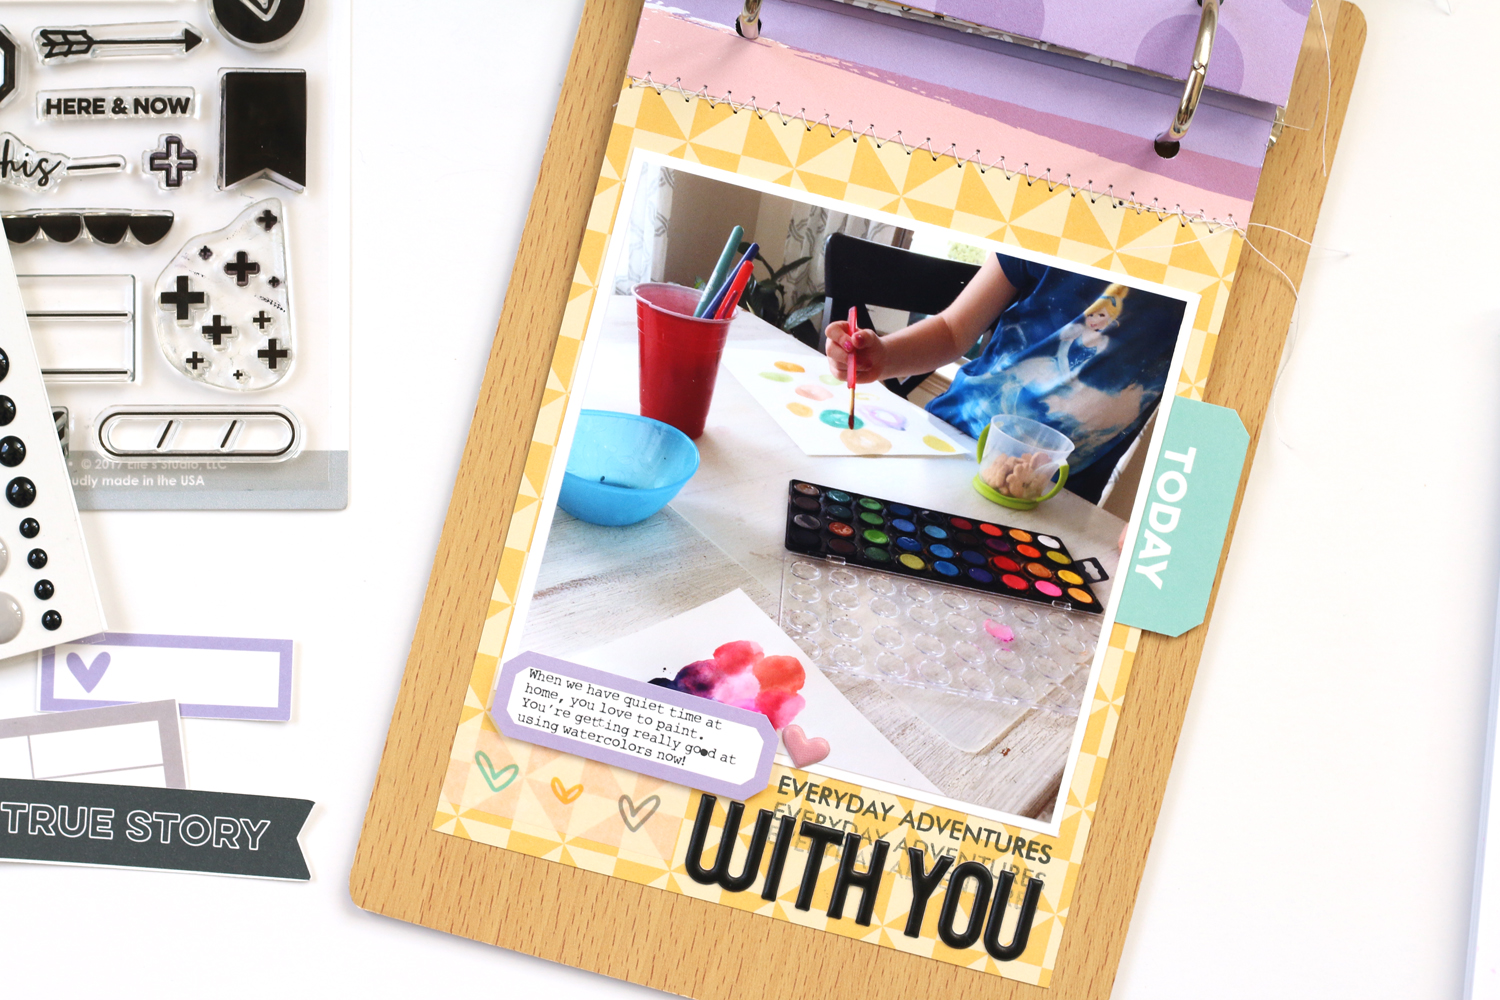
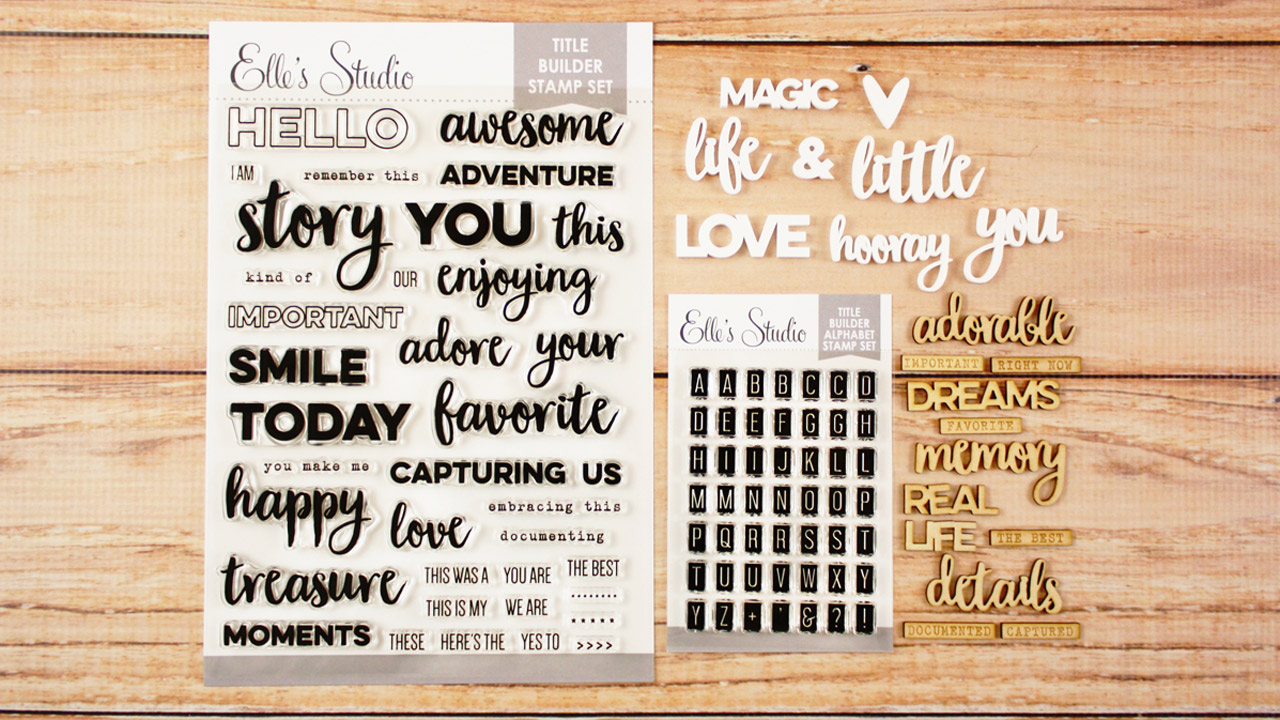
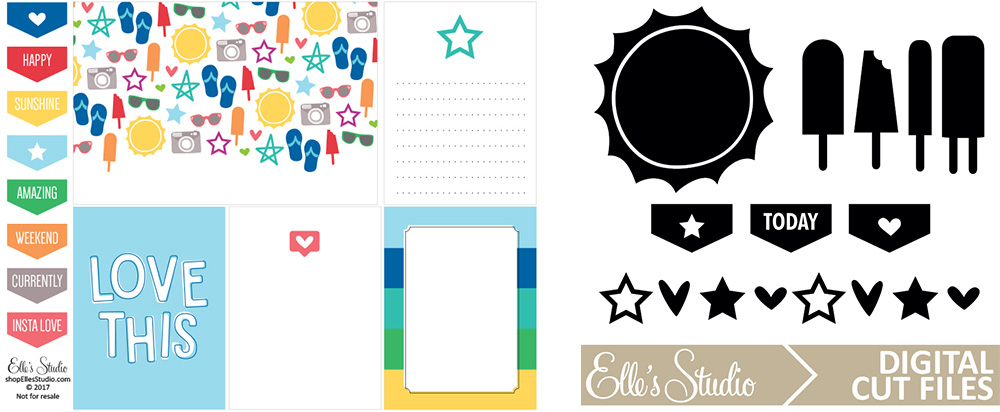
Supplies | August 2017 Kit, Tiny Heart Stickers, Title Builder Stamp, Title Builder Acrylic, Title Builder Alphabet StampTitle Builder Wood Veneer, Letter and Number Stickers - Pink, Happy Birthday StampLive Laugh Love 12" x 12" Paper Collection, Live Laugh Love Enamel Dots

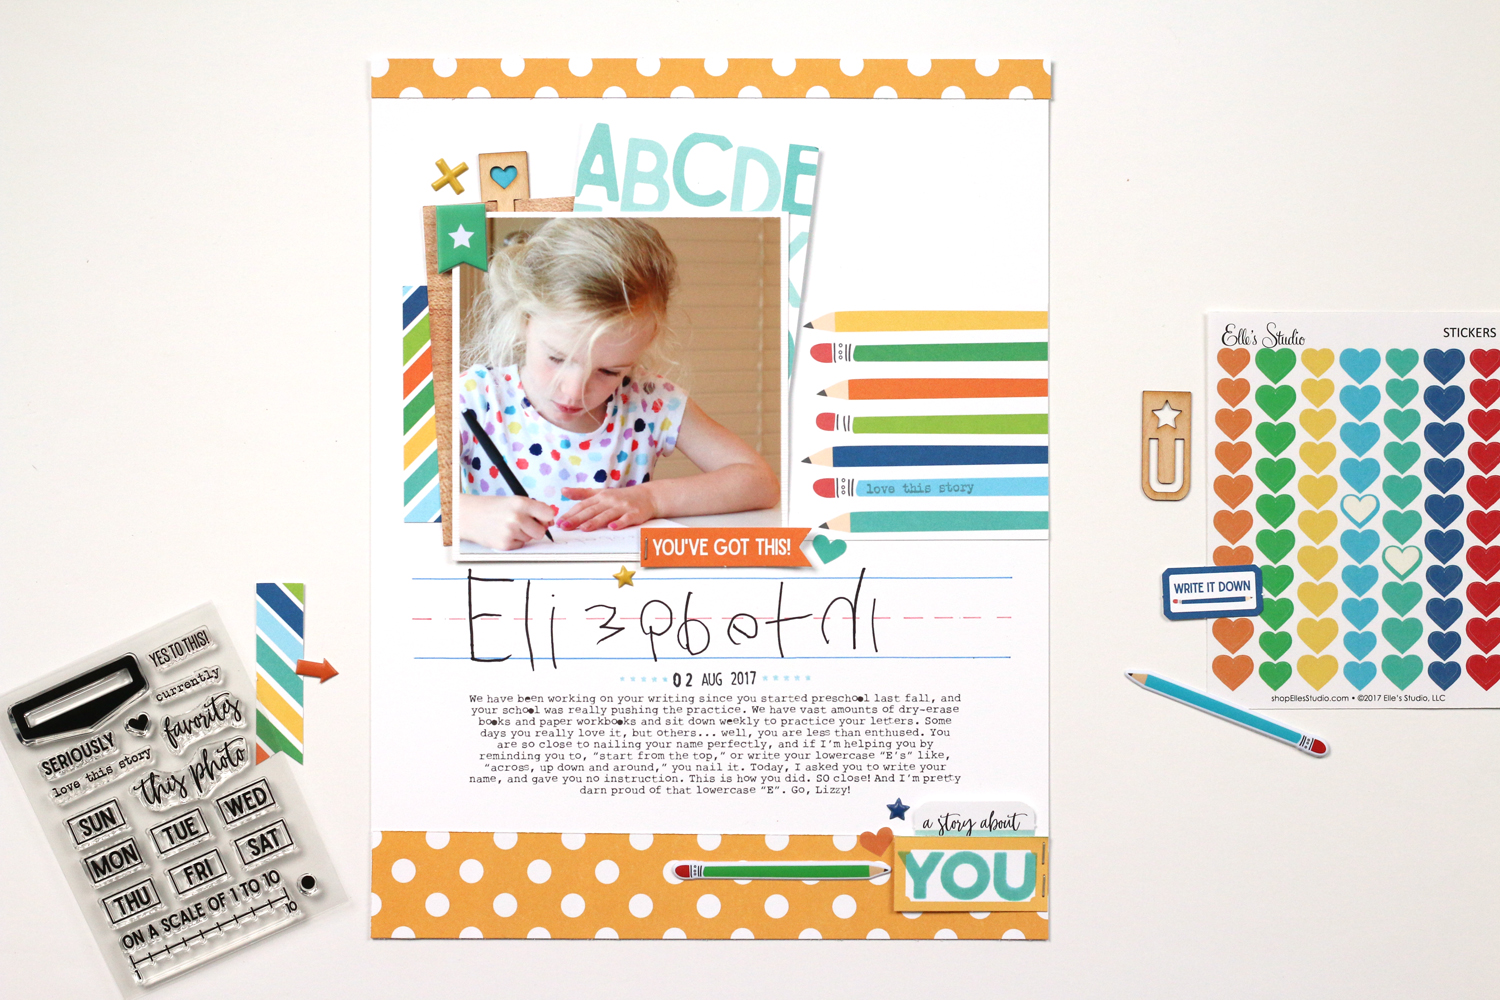
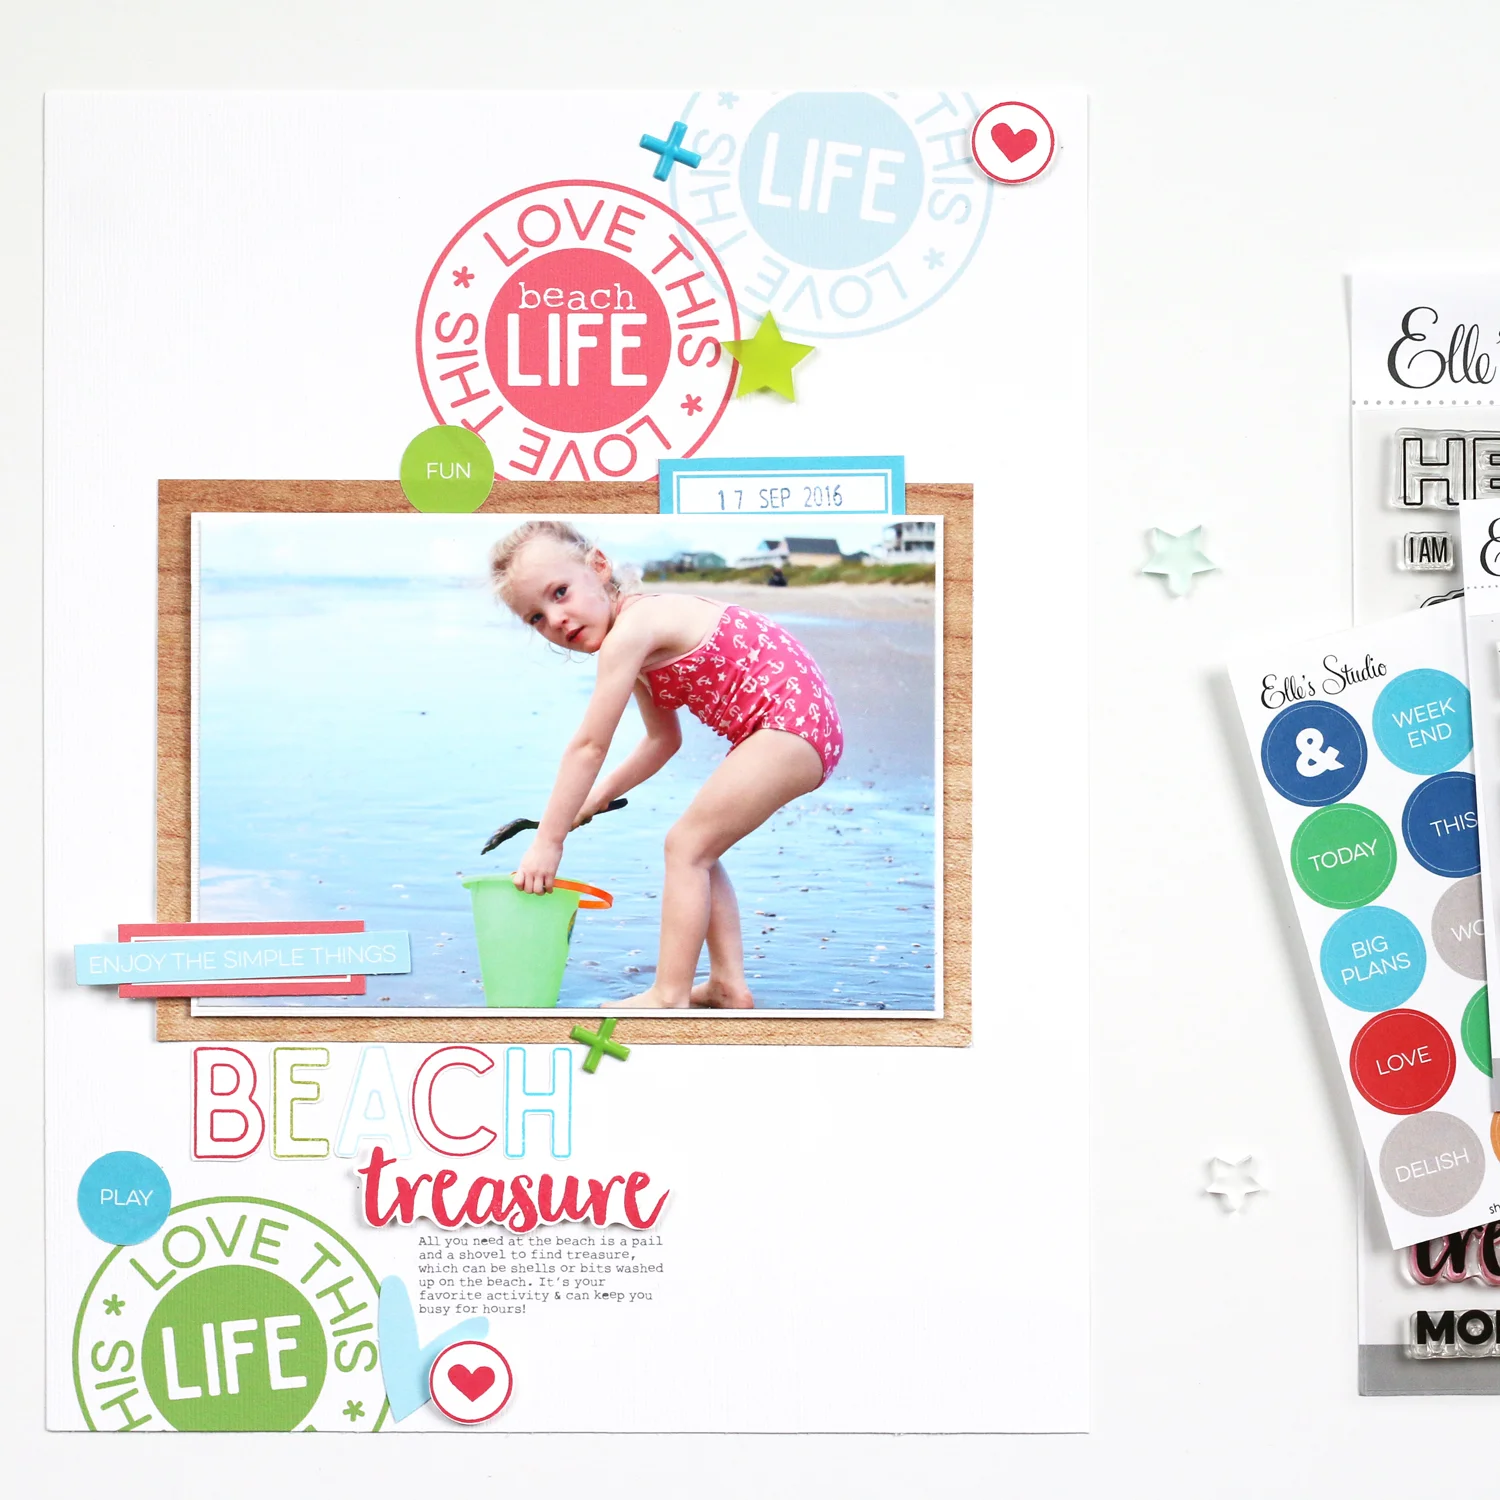
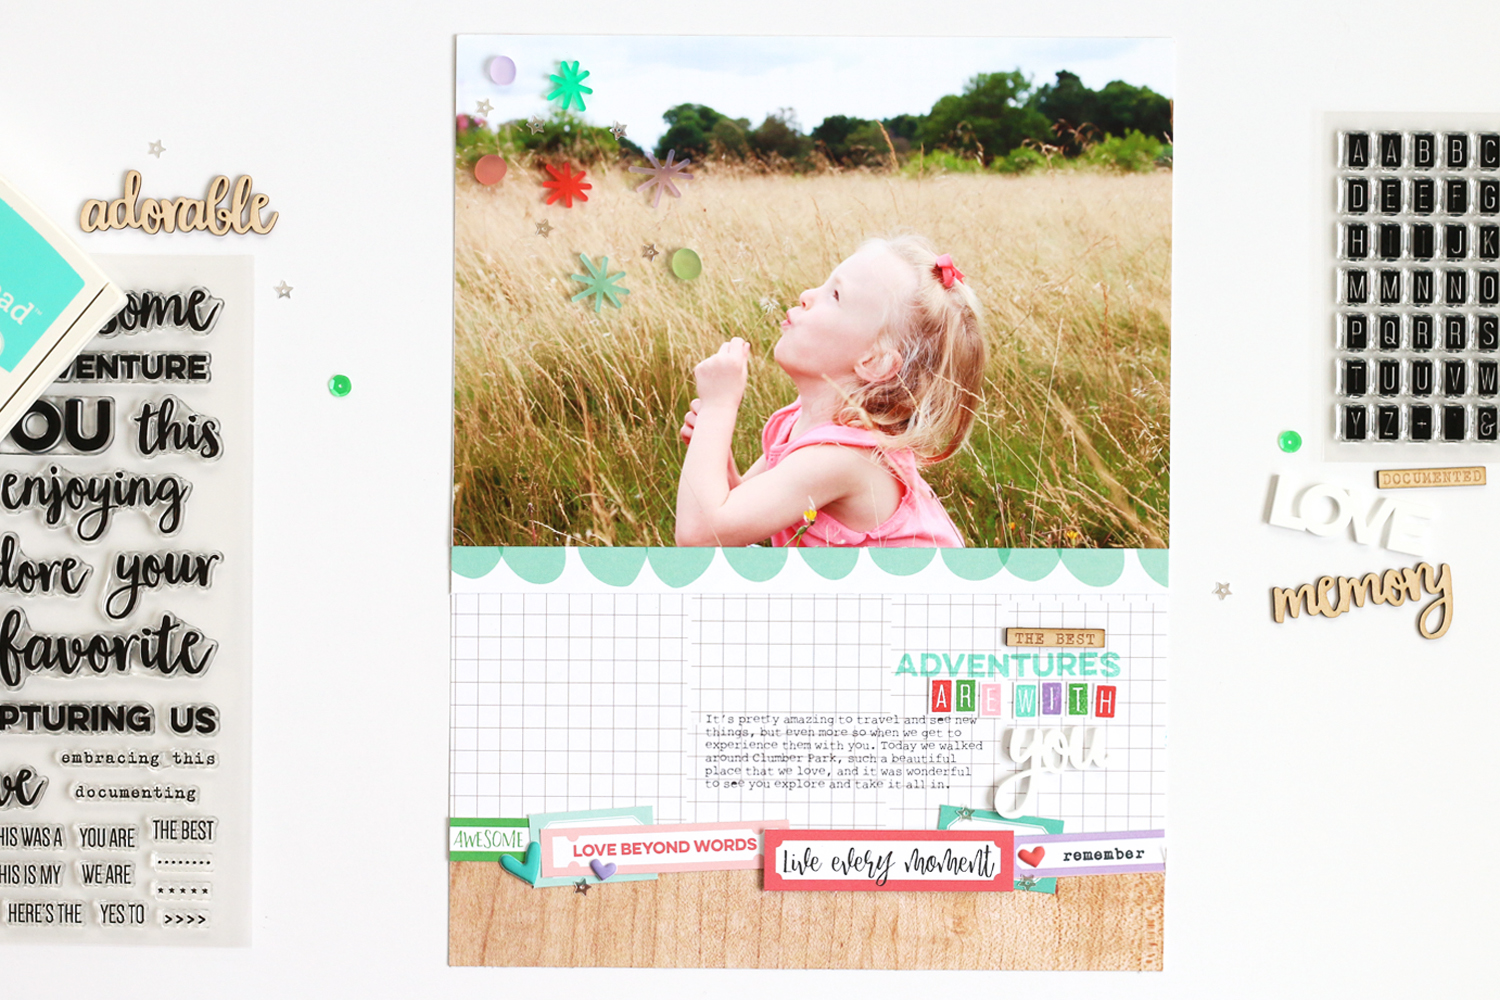
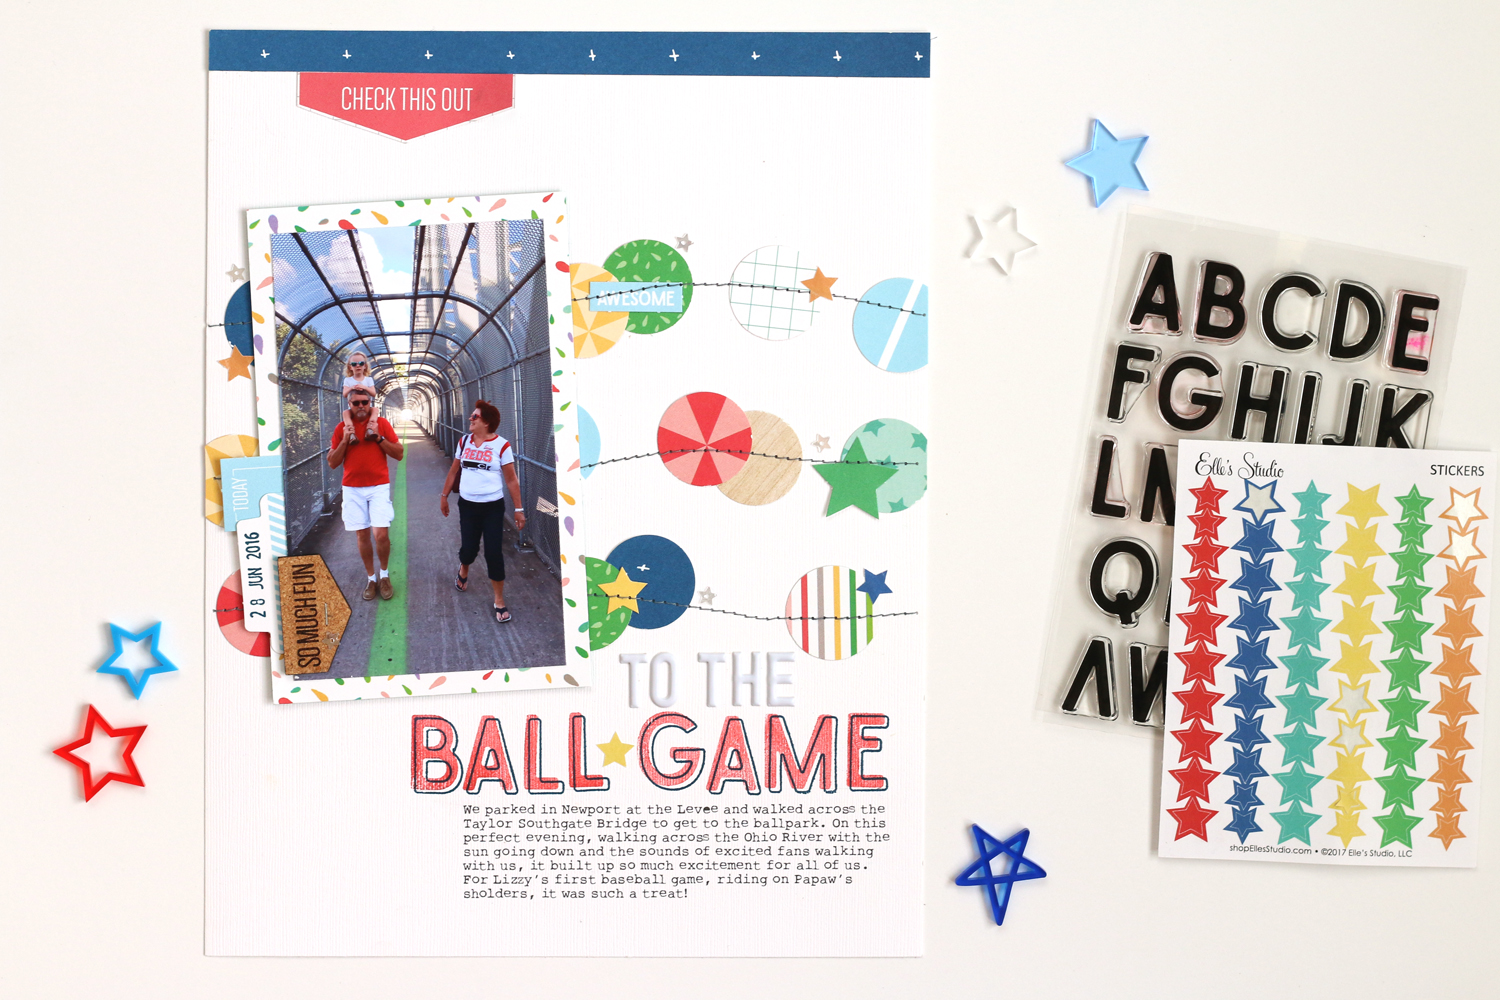
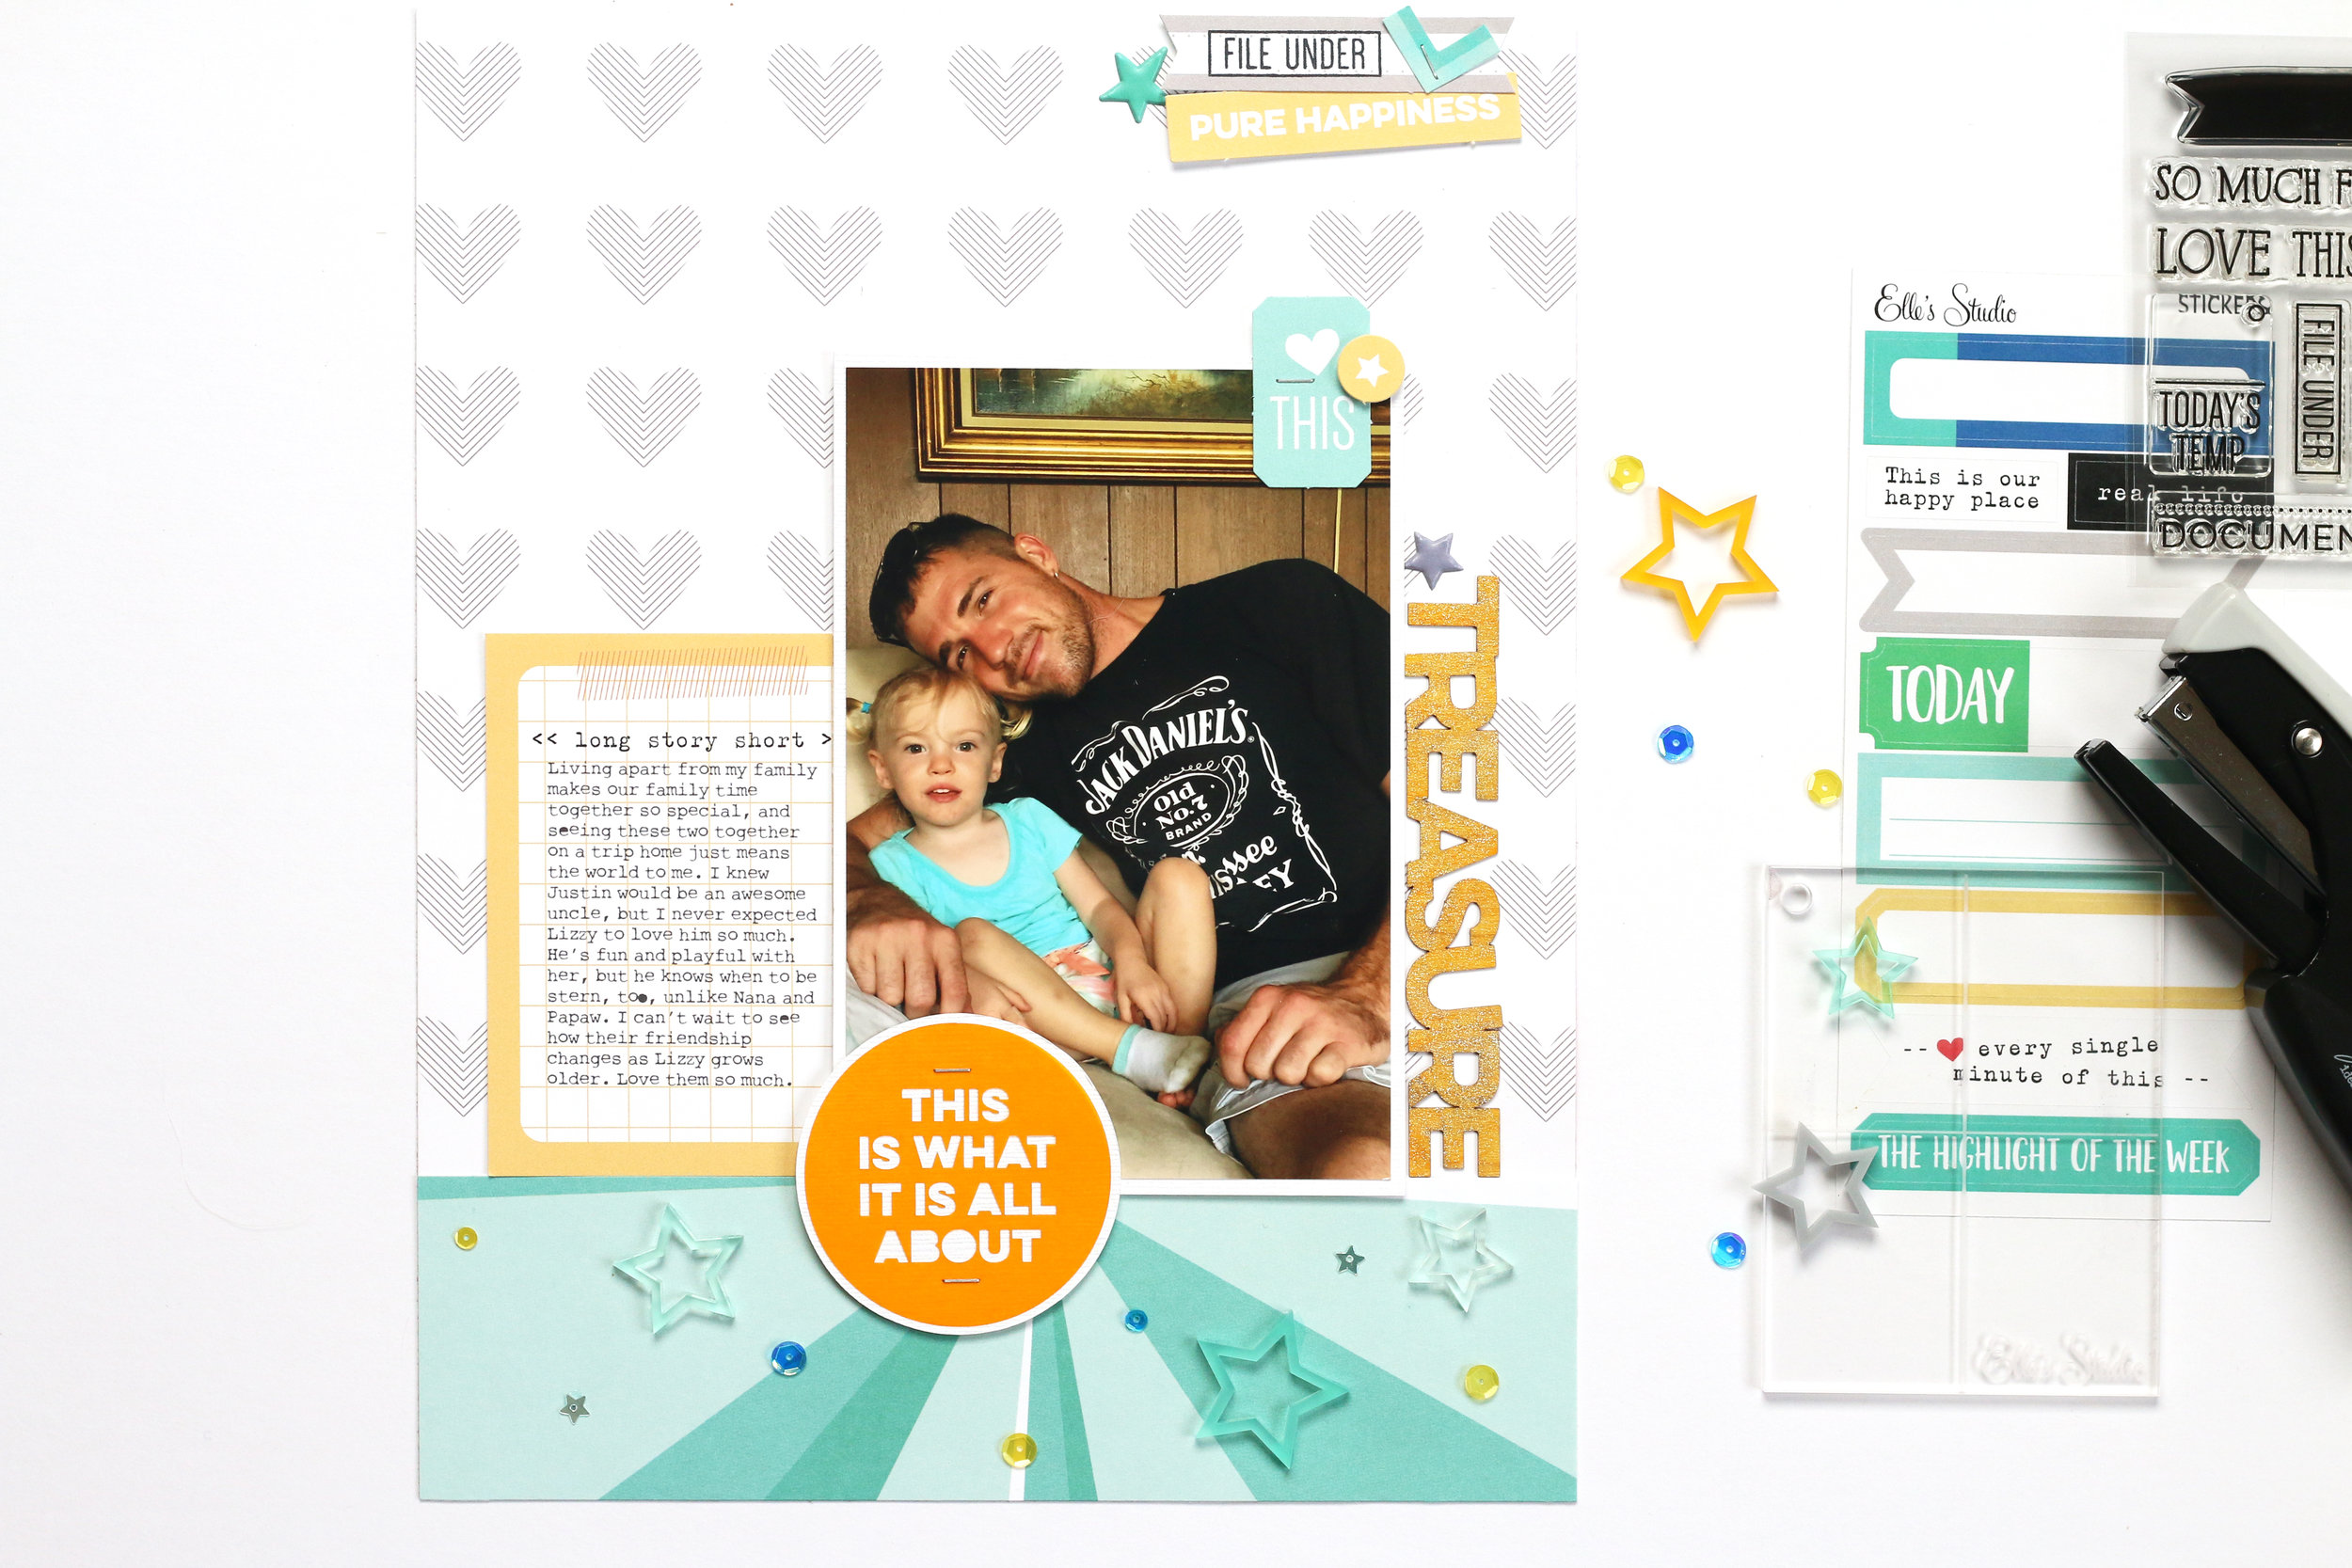
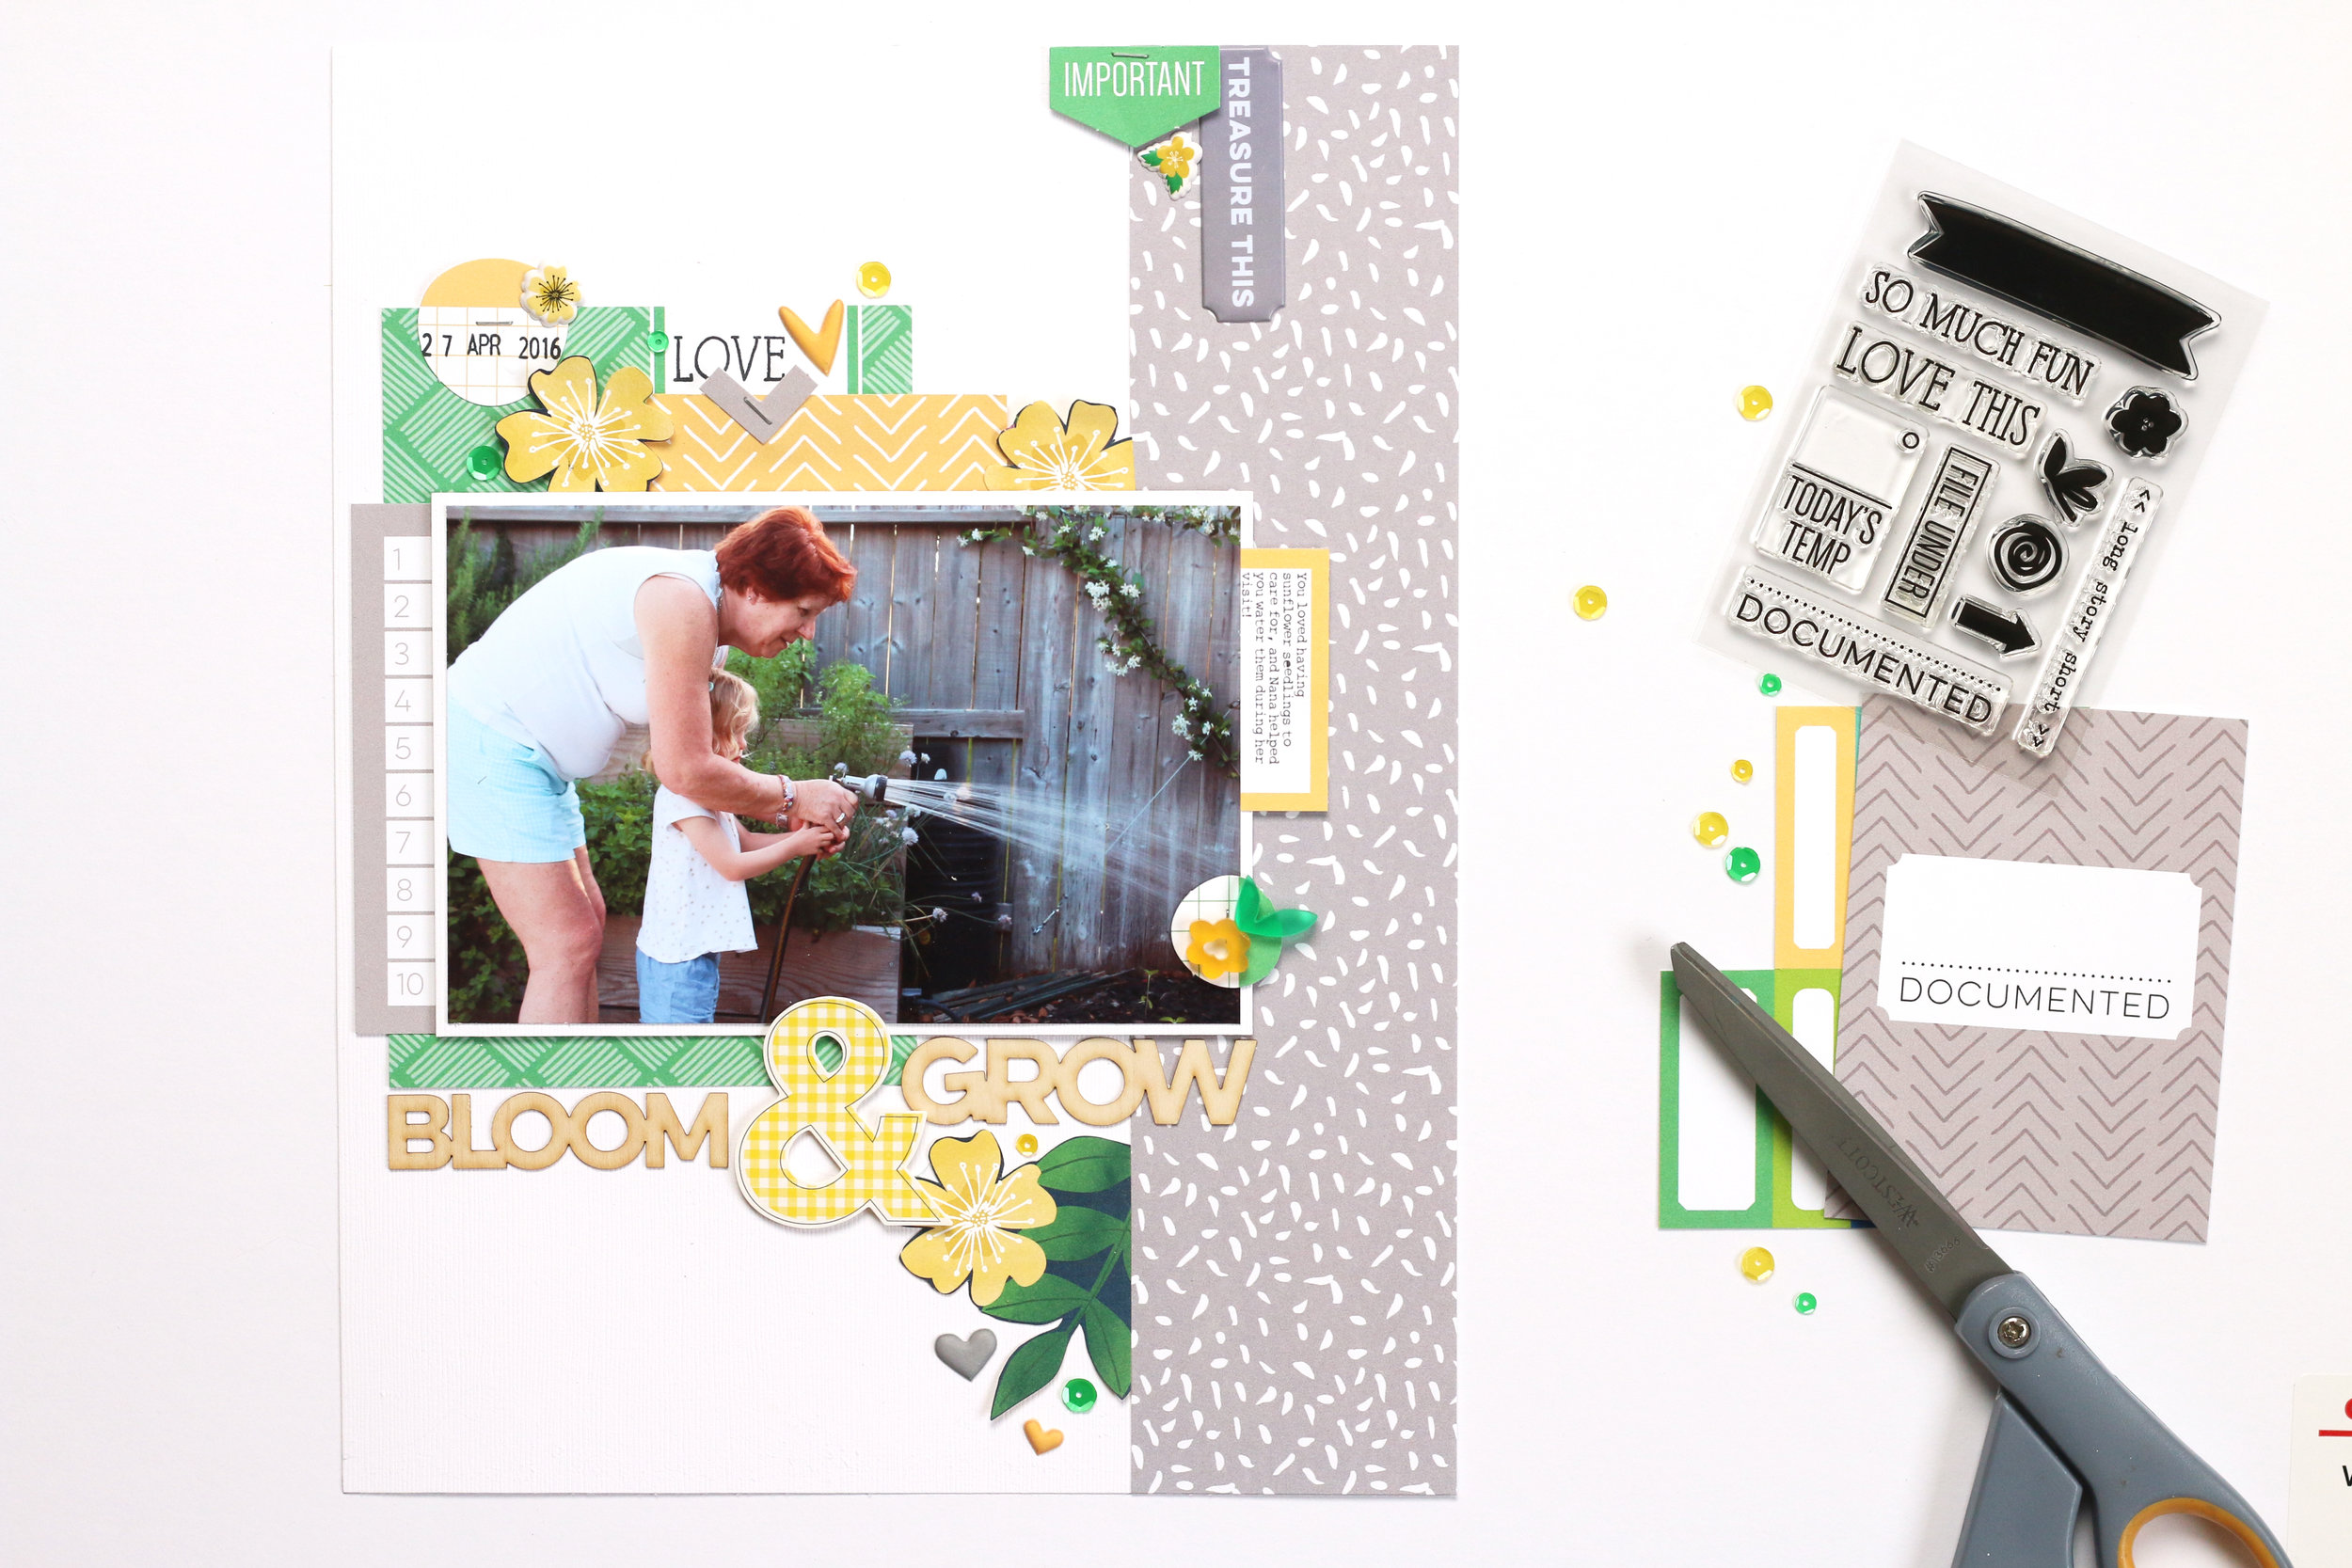
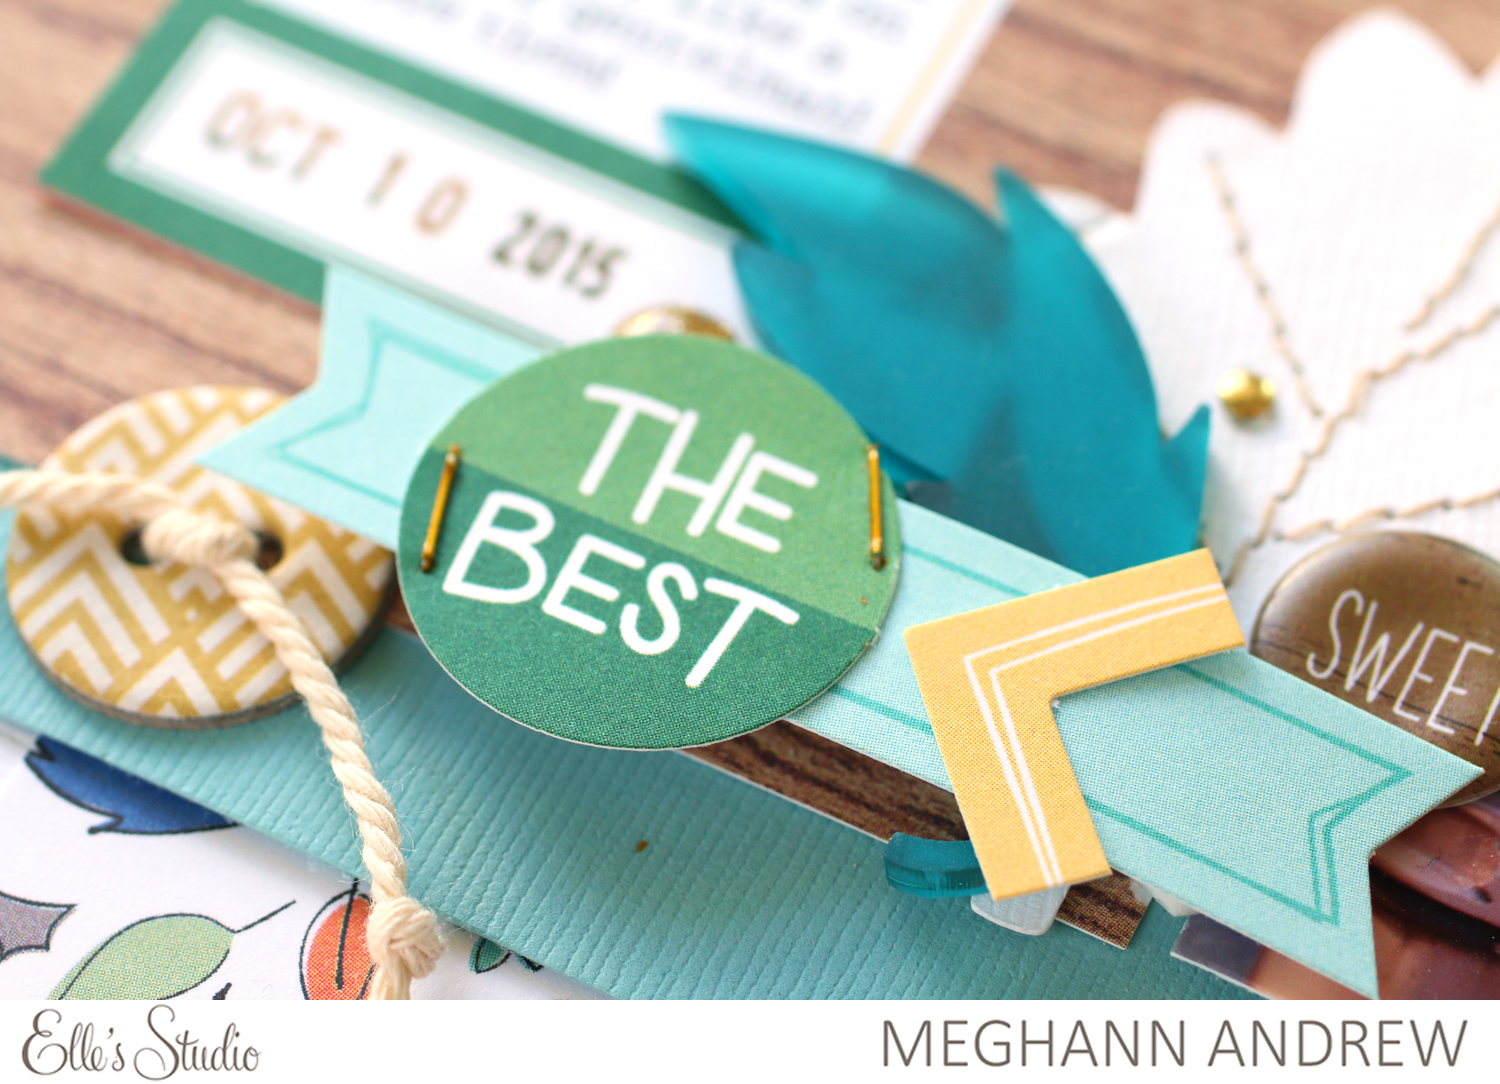
To get the spacing right, I put my photo down first and began by laying my word stamps from the Title Builder Stamp directly on the page. I changed the words around a bit to fit the spacing, and what I wanted to say about the photo. I then started to add the Title Builder Acrylic and Title Builder Wood Veneer pieces.

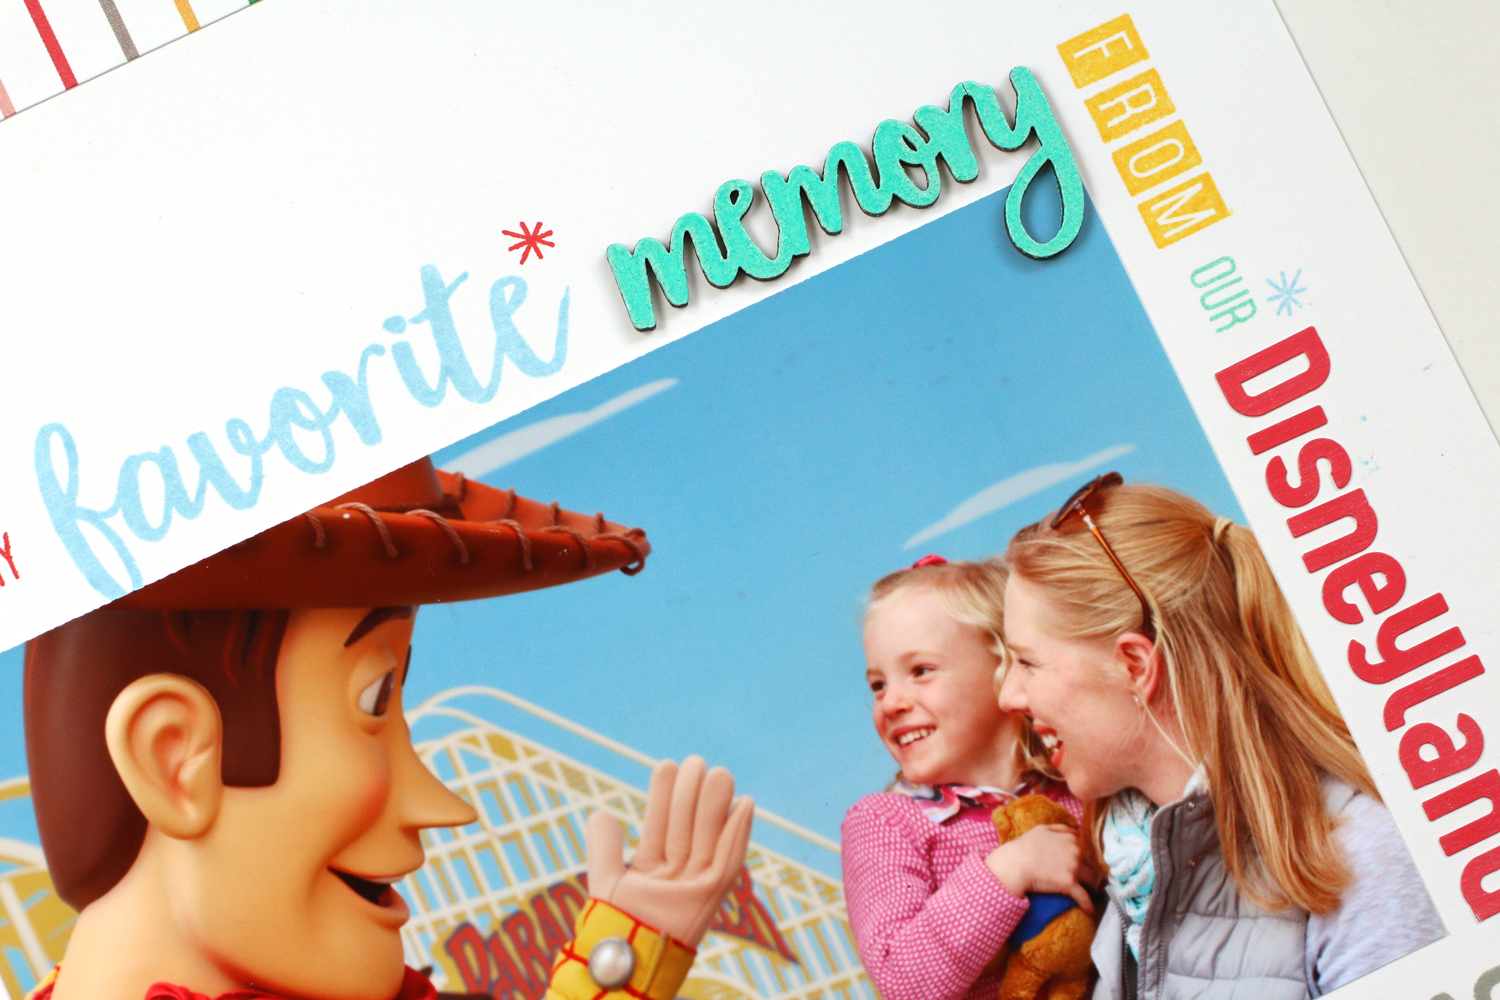
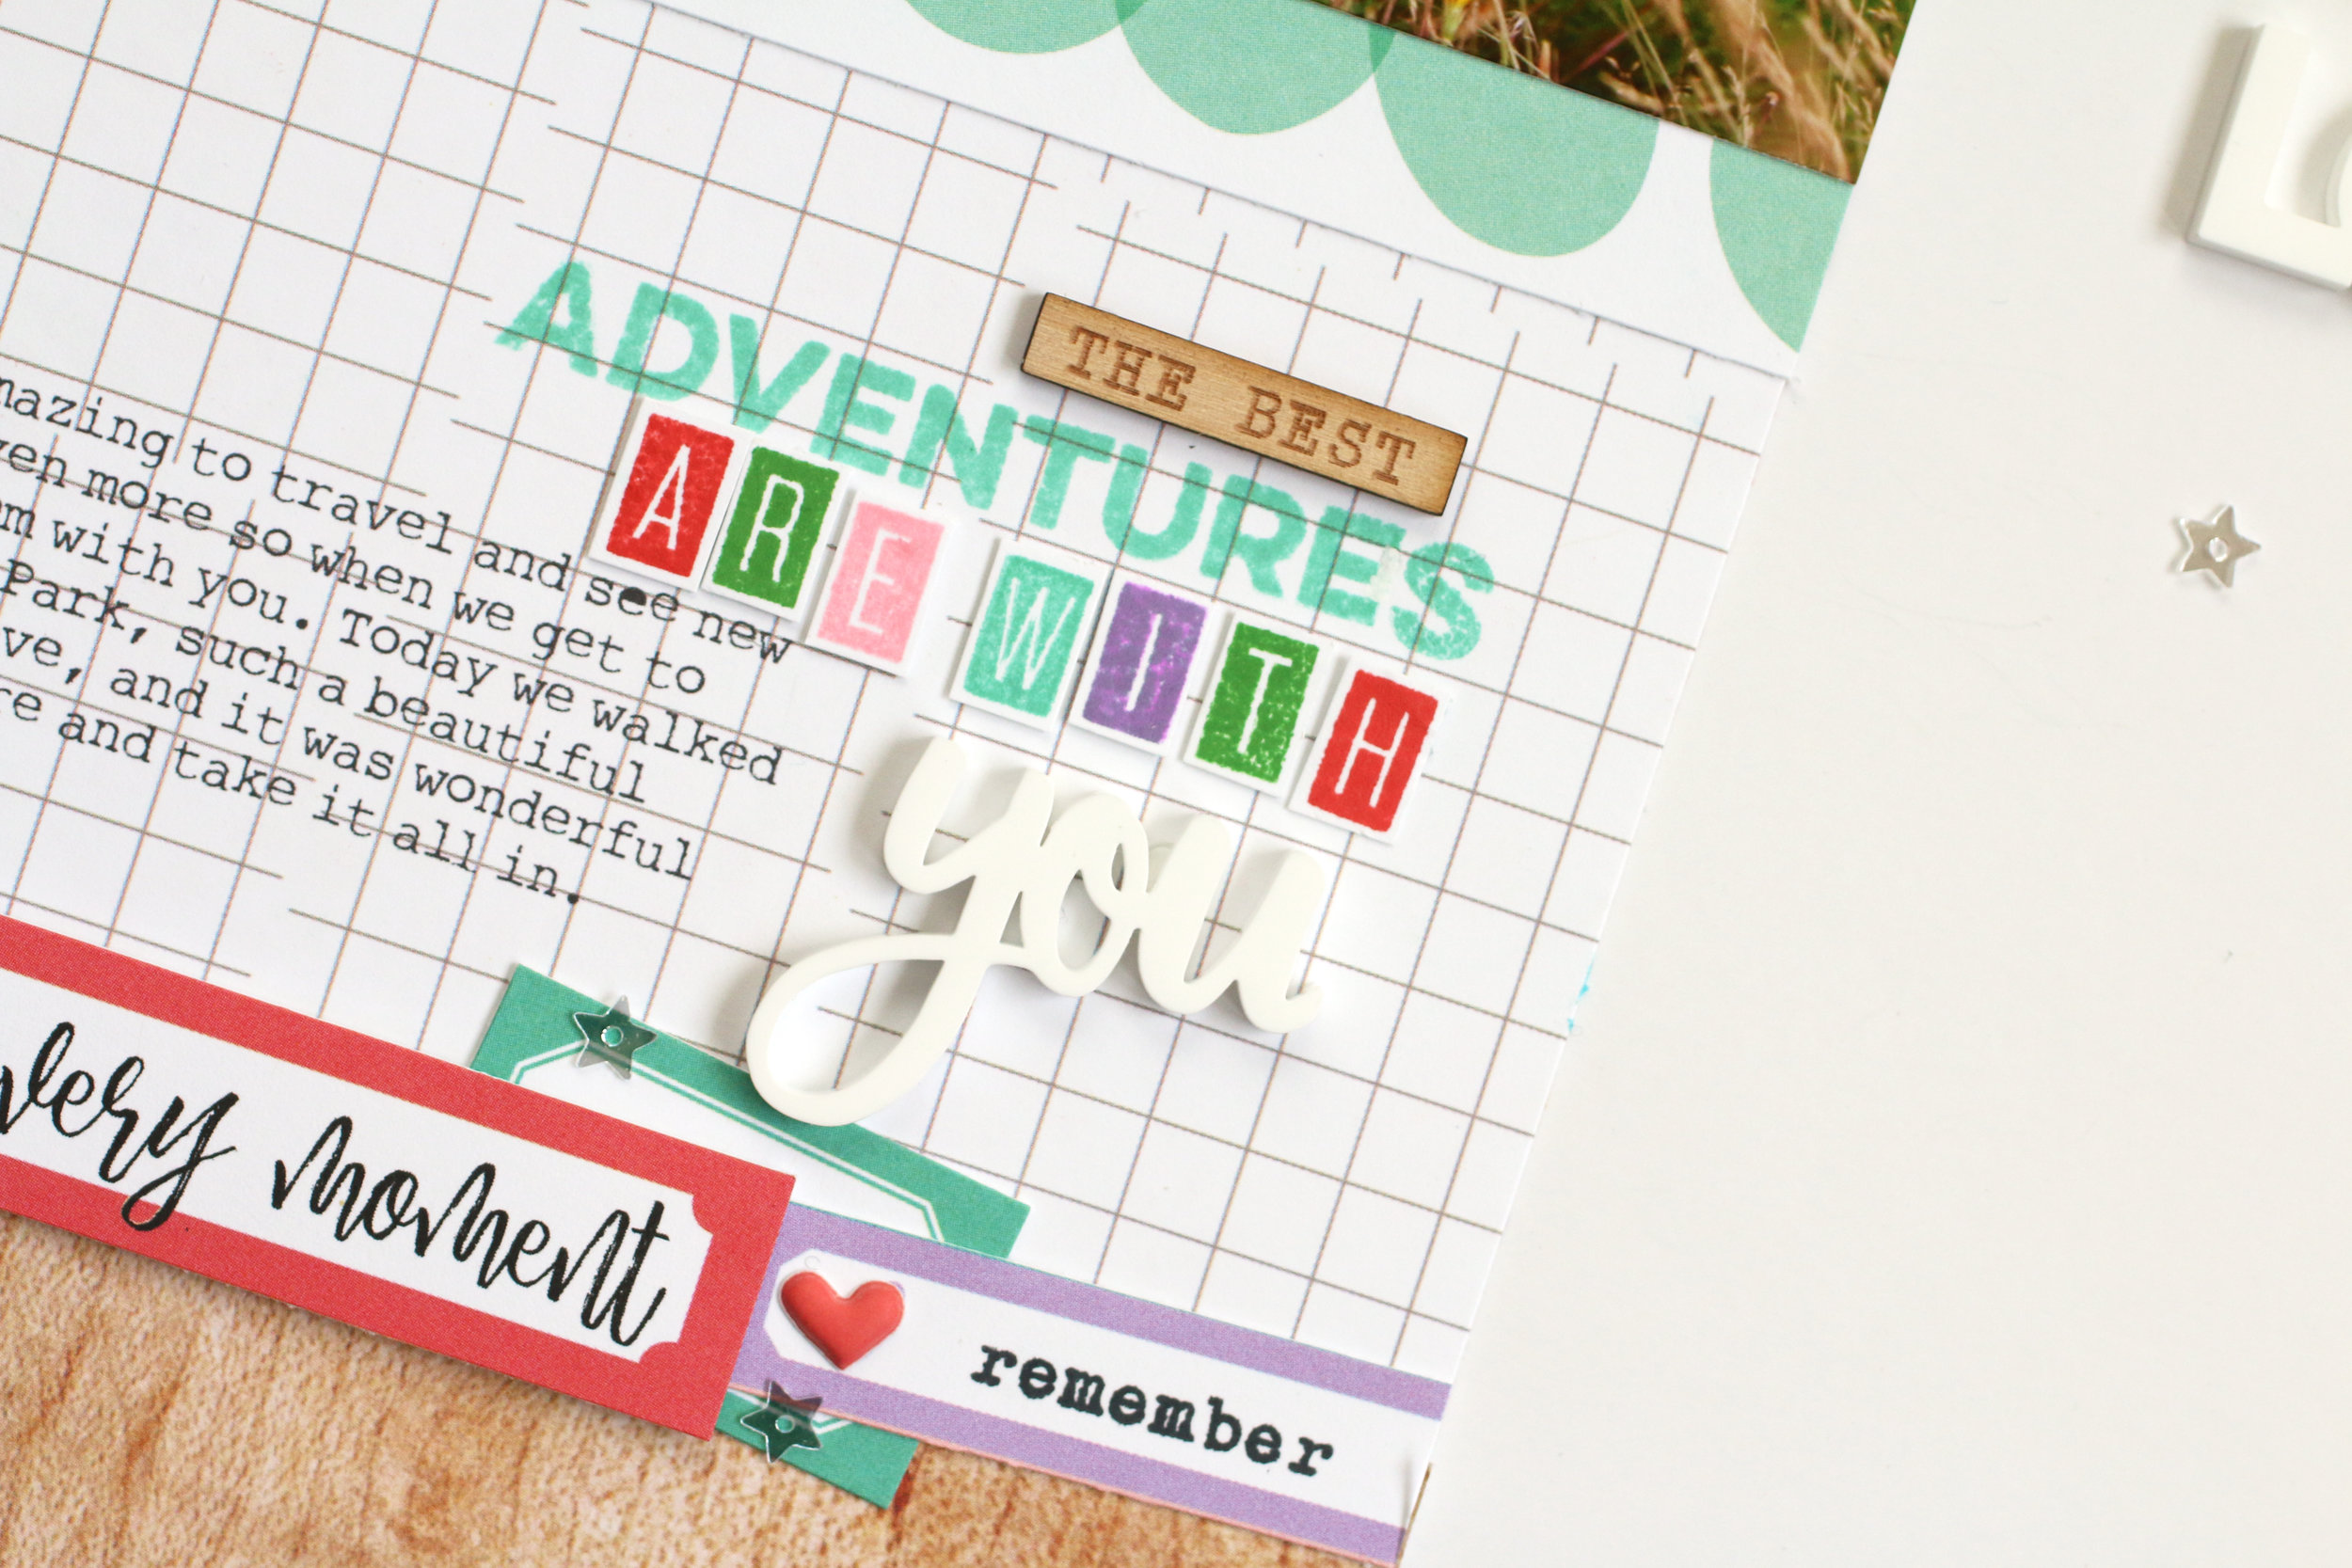
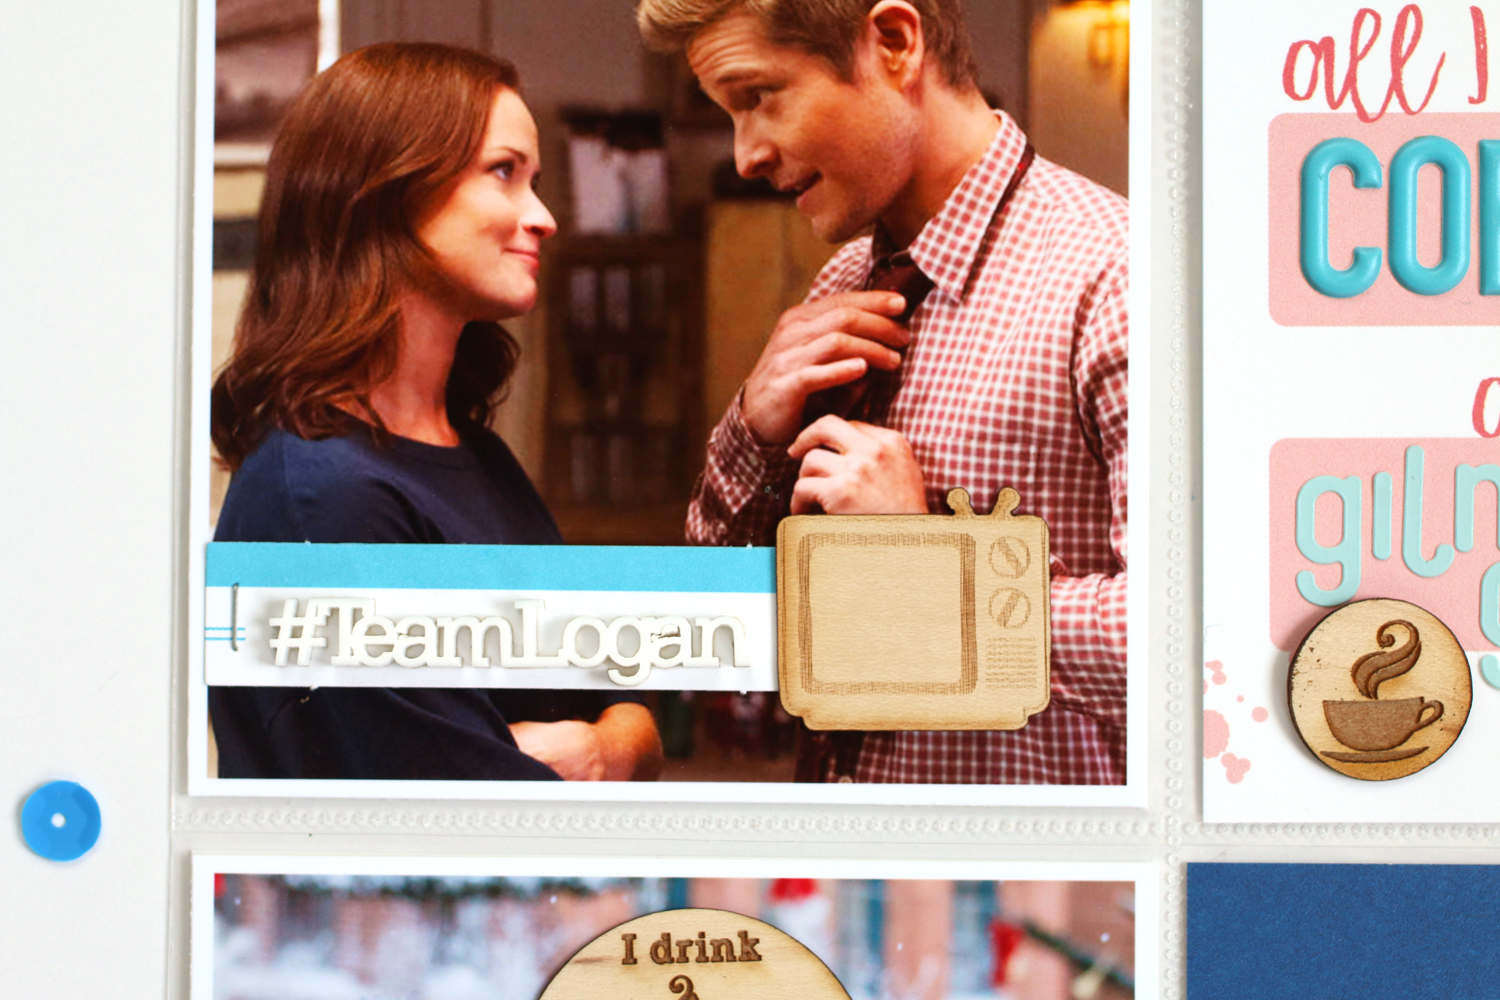
Once I had those pieces in place, I started at the top left corner with "this is my" and started stamping around my photo, which was still in place on the page, alternating colors all of the way around. For the words that didn't appear on the Title Builder Stamp, I used the Title Builder Alphabet Stamp and the pink Letter and Number Stickers. Finally, I added a few "fairy dust" sparkles from the Happy Birthday Stamp around the words.

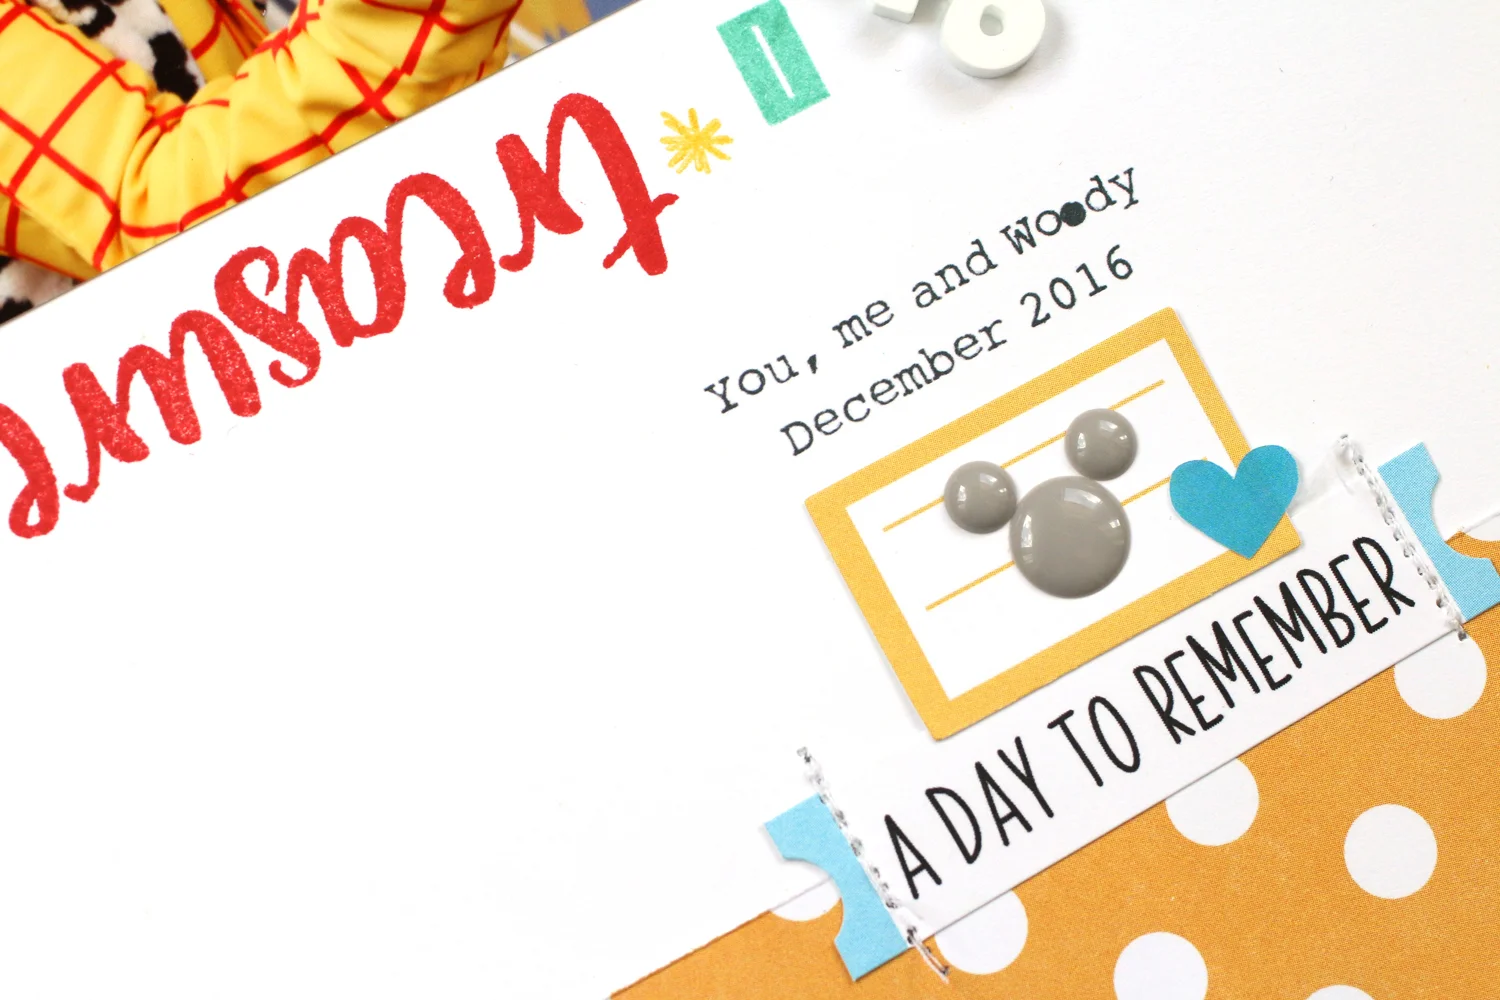
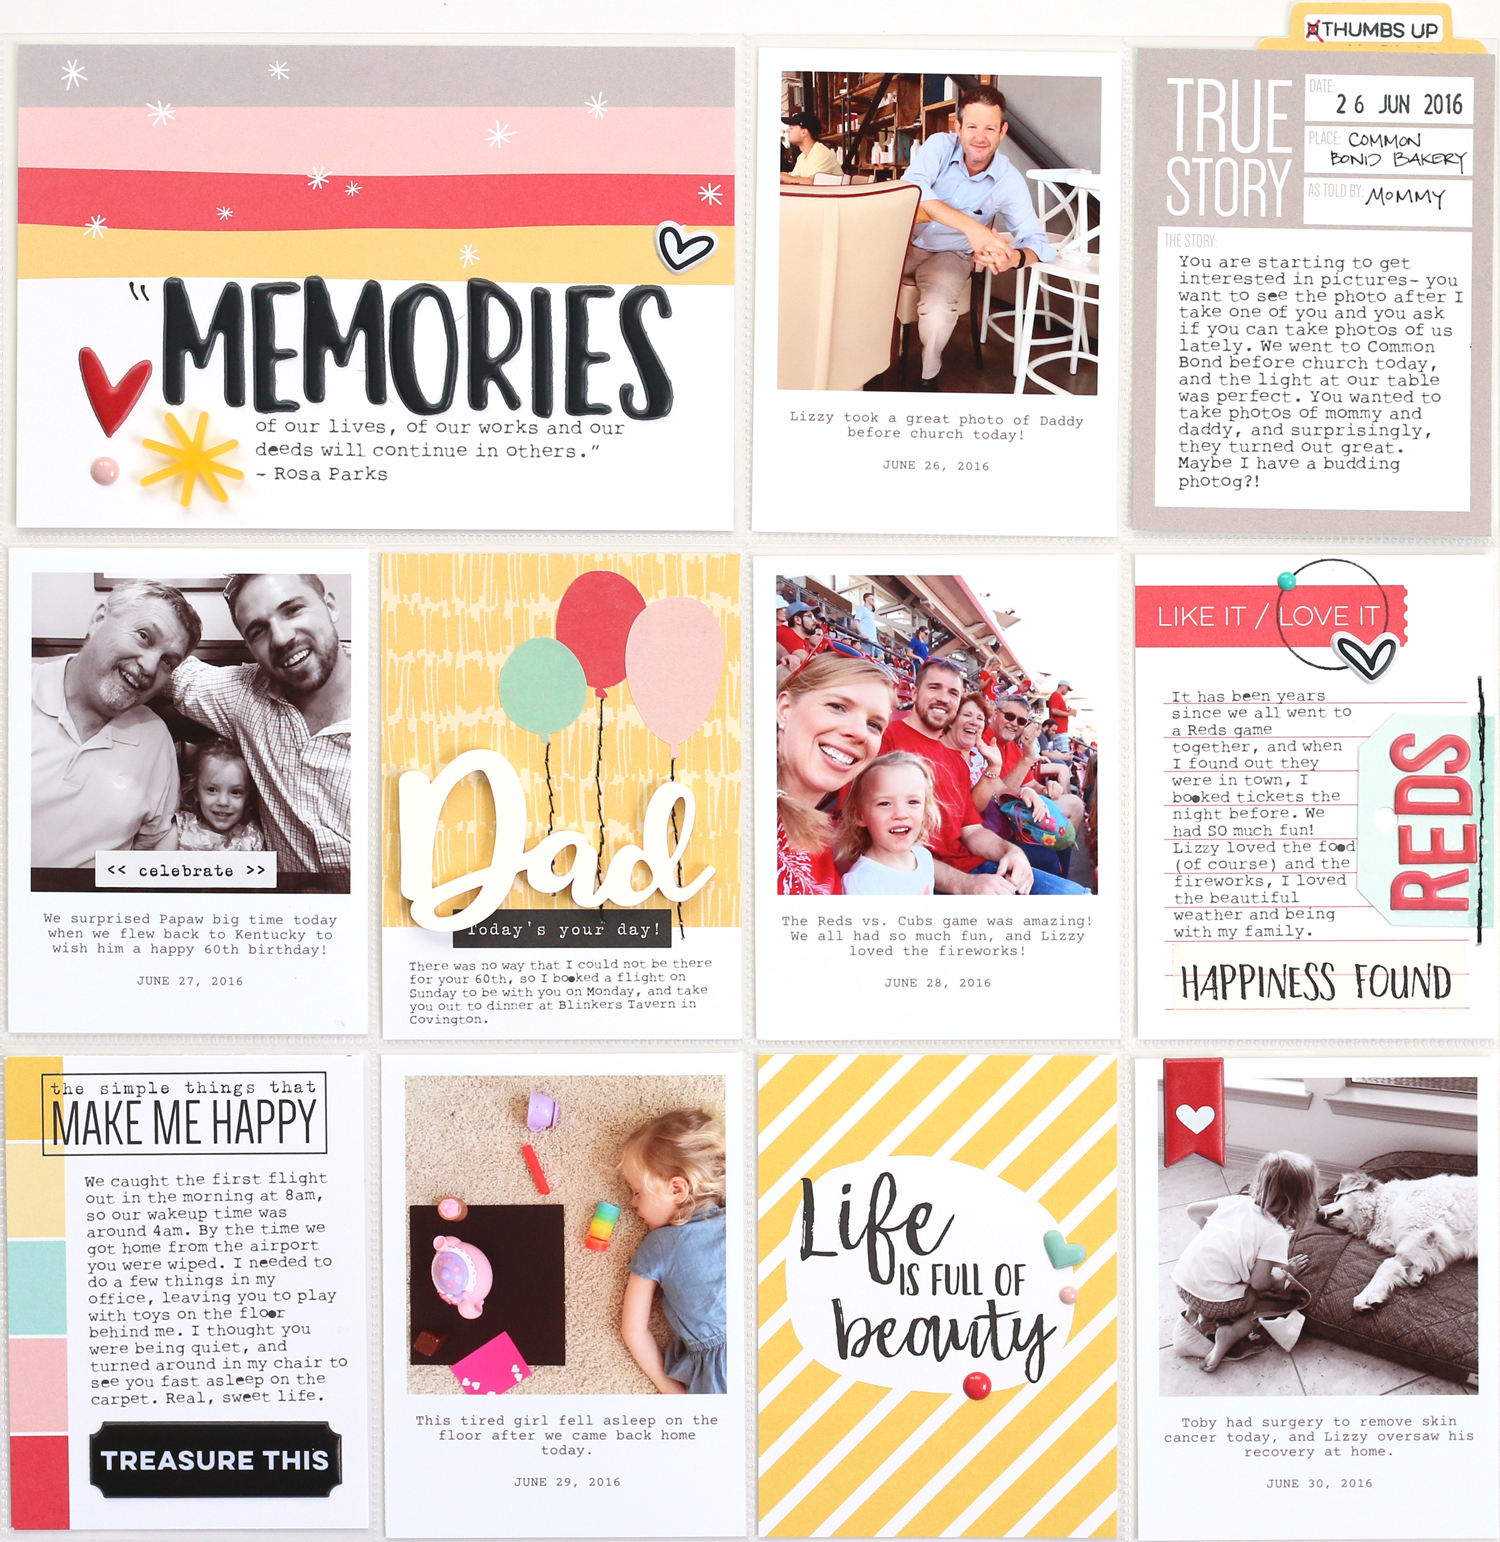
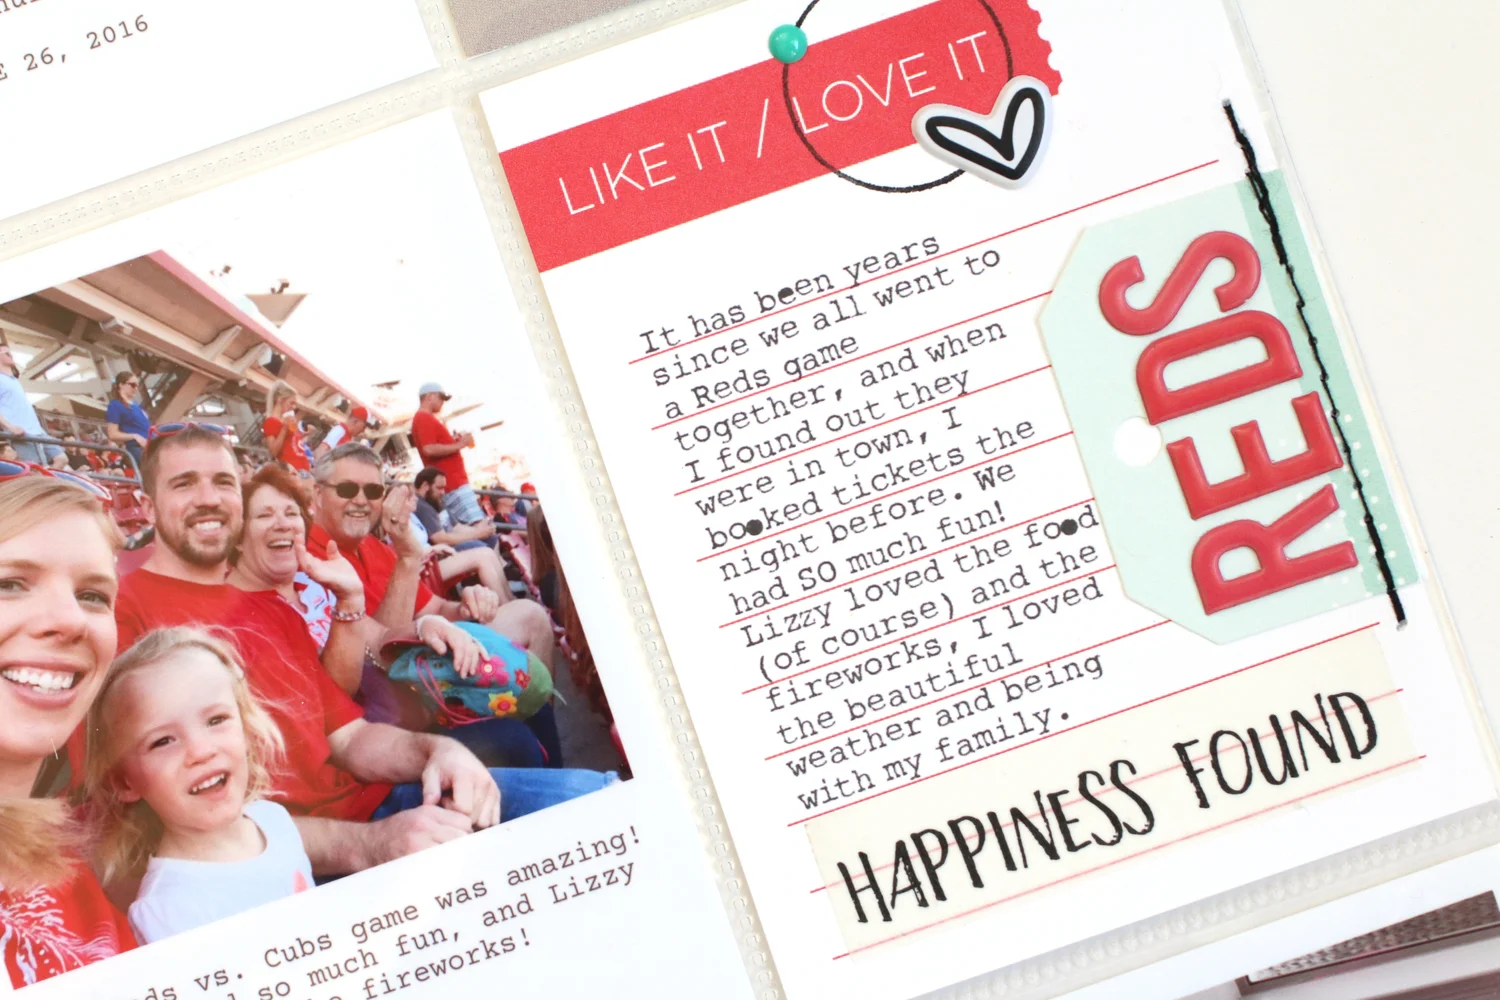
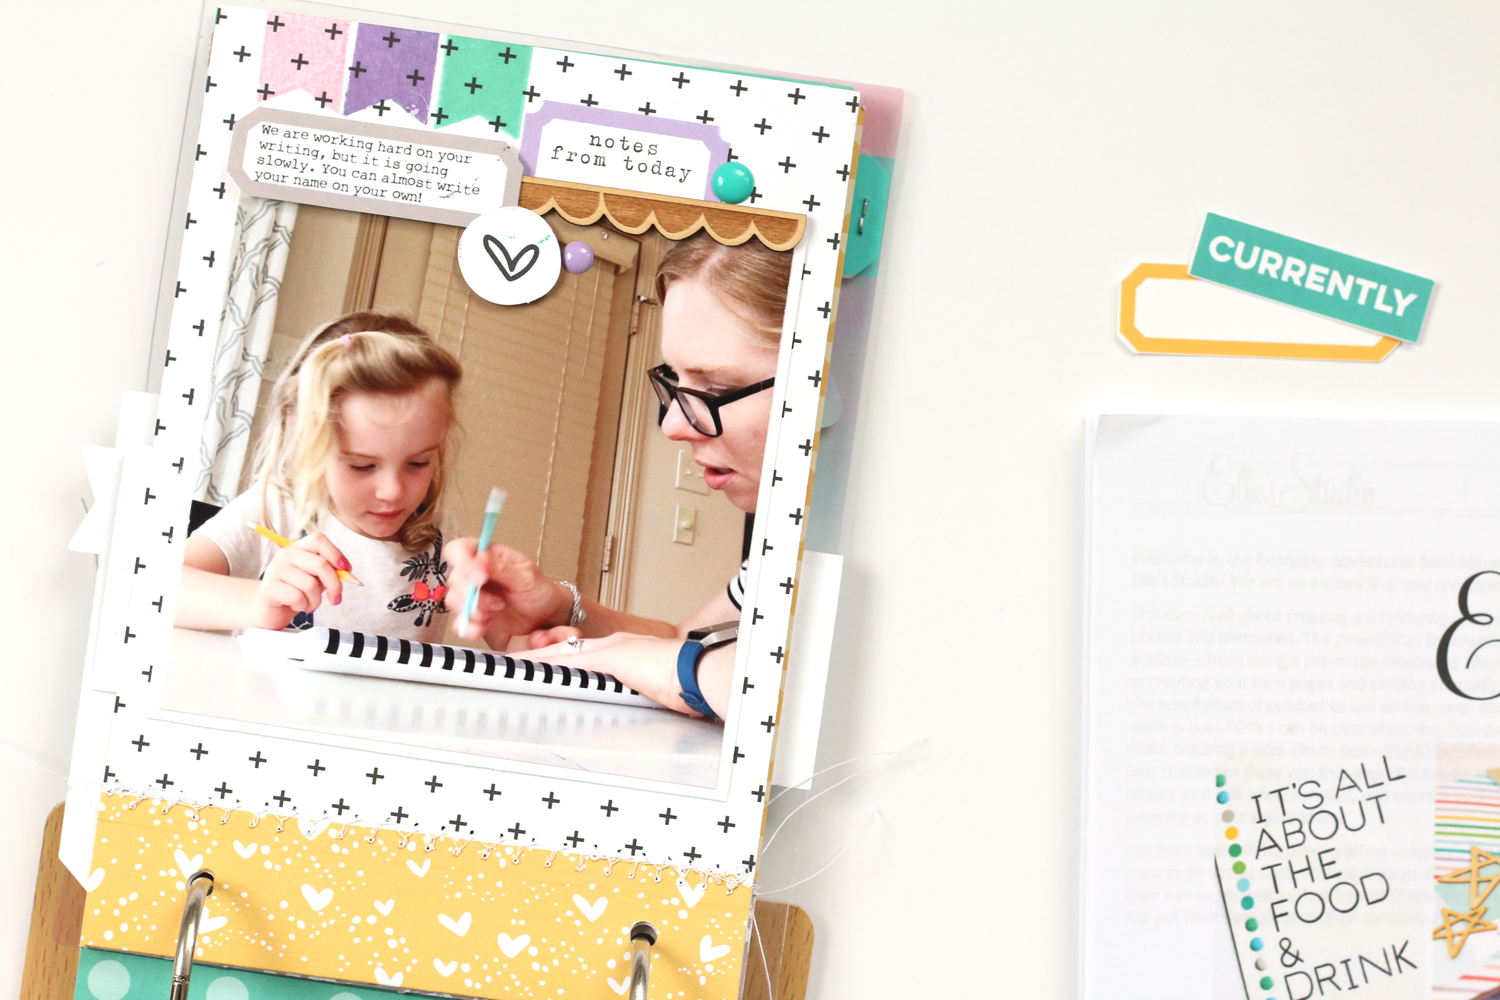
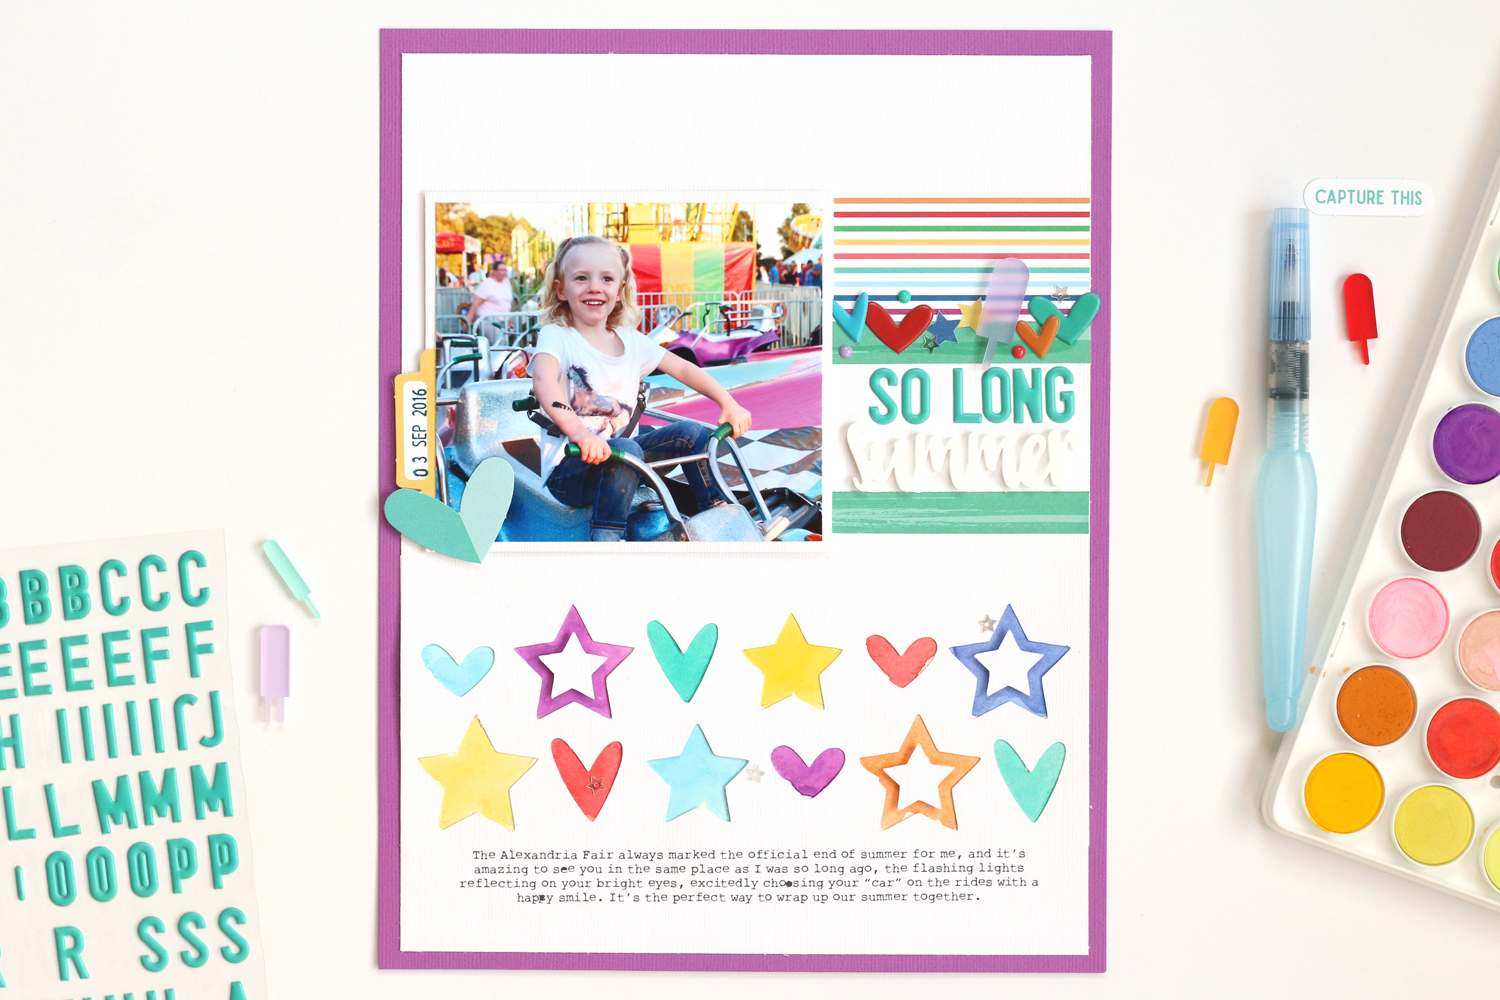
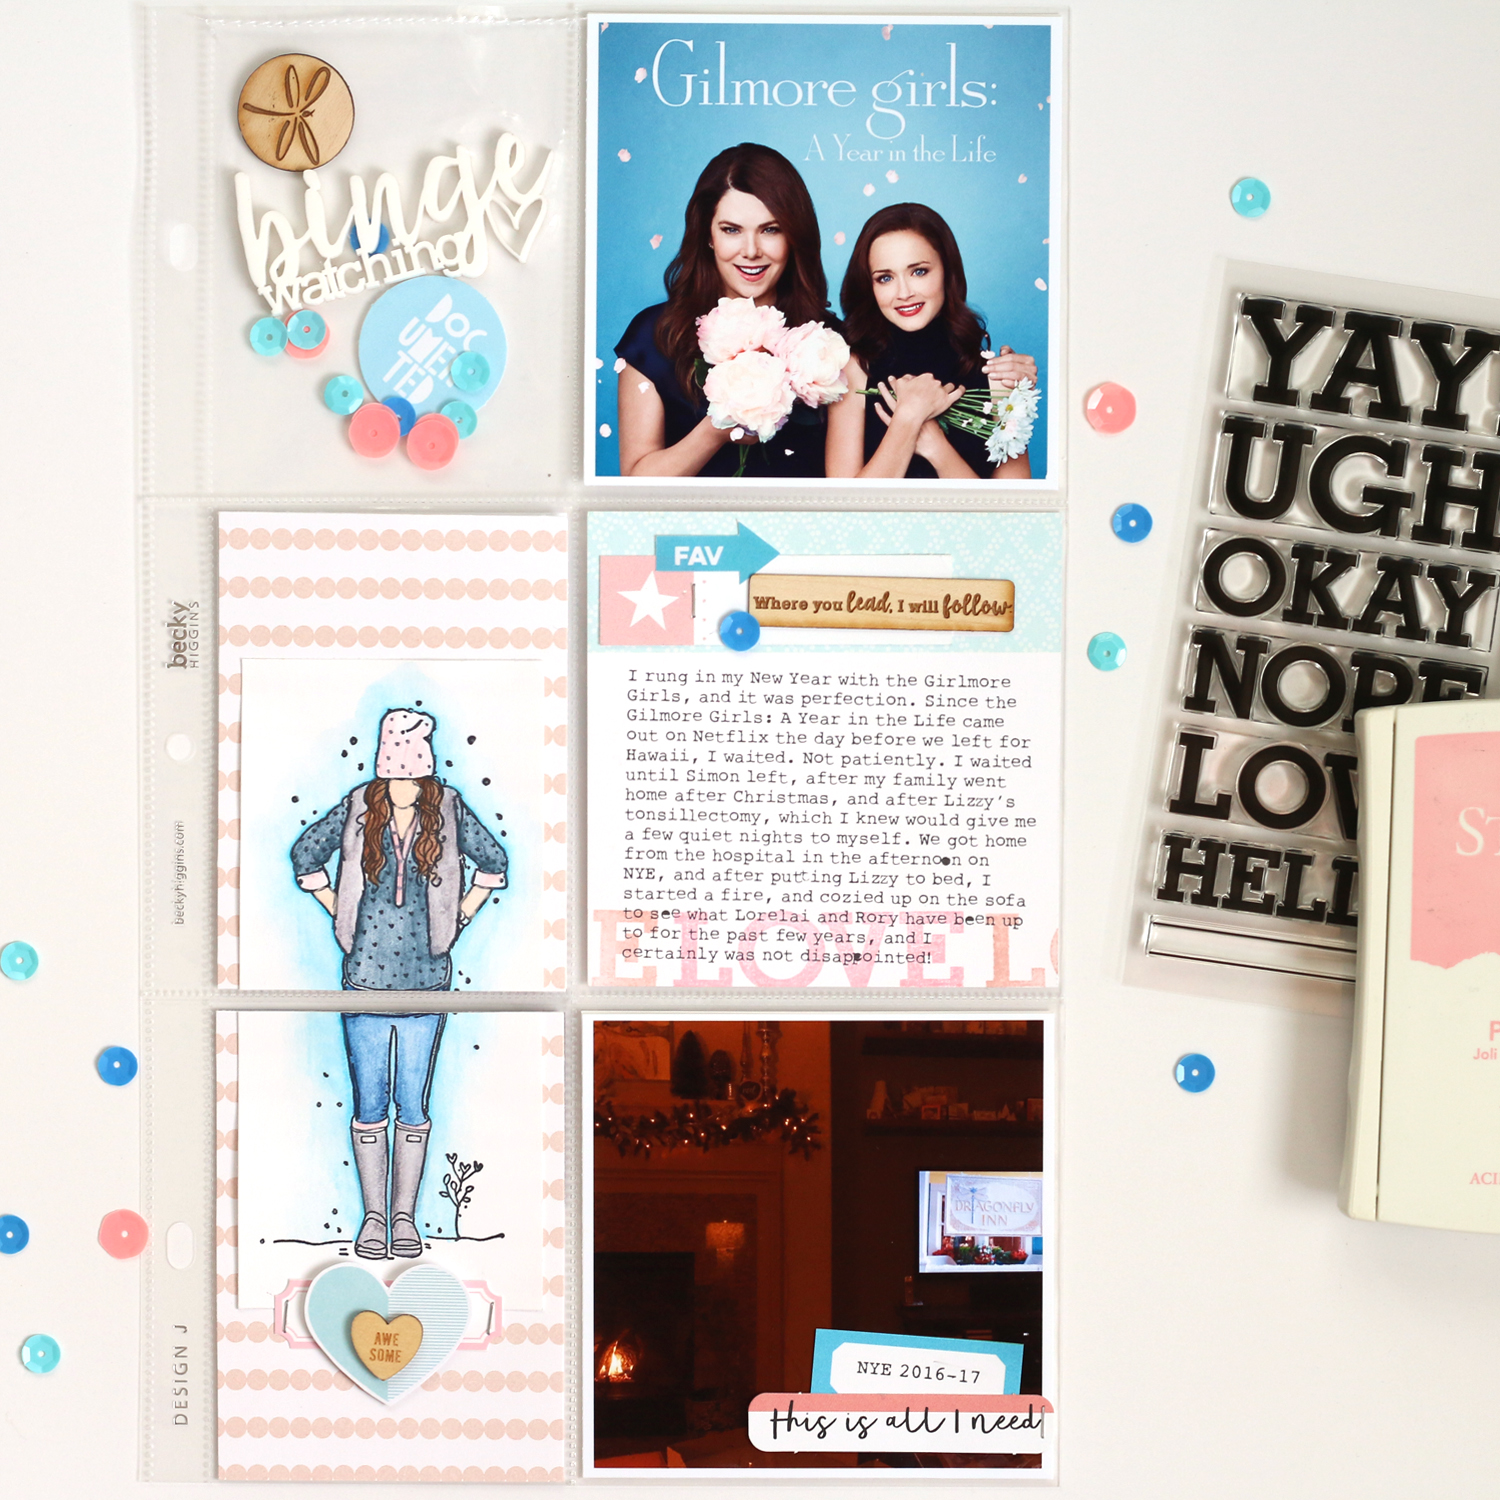
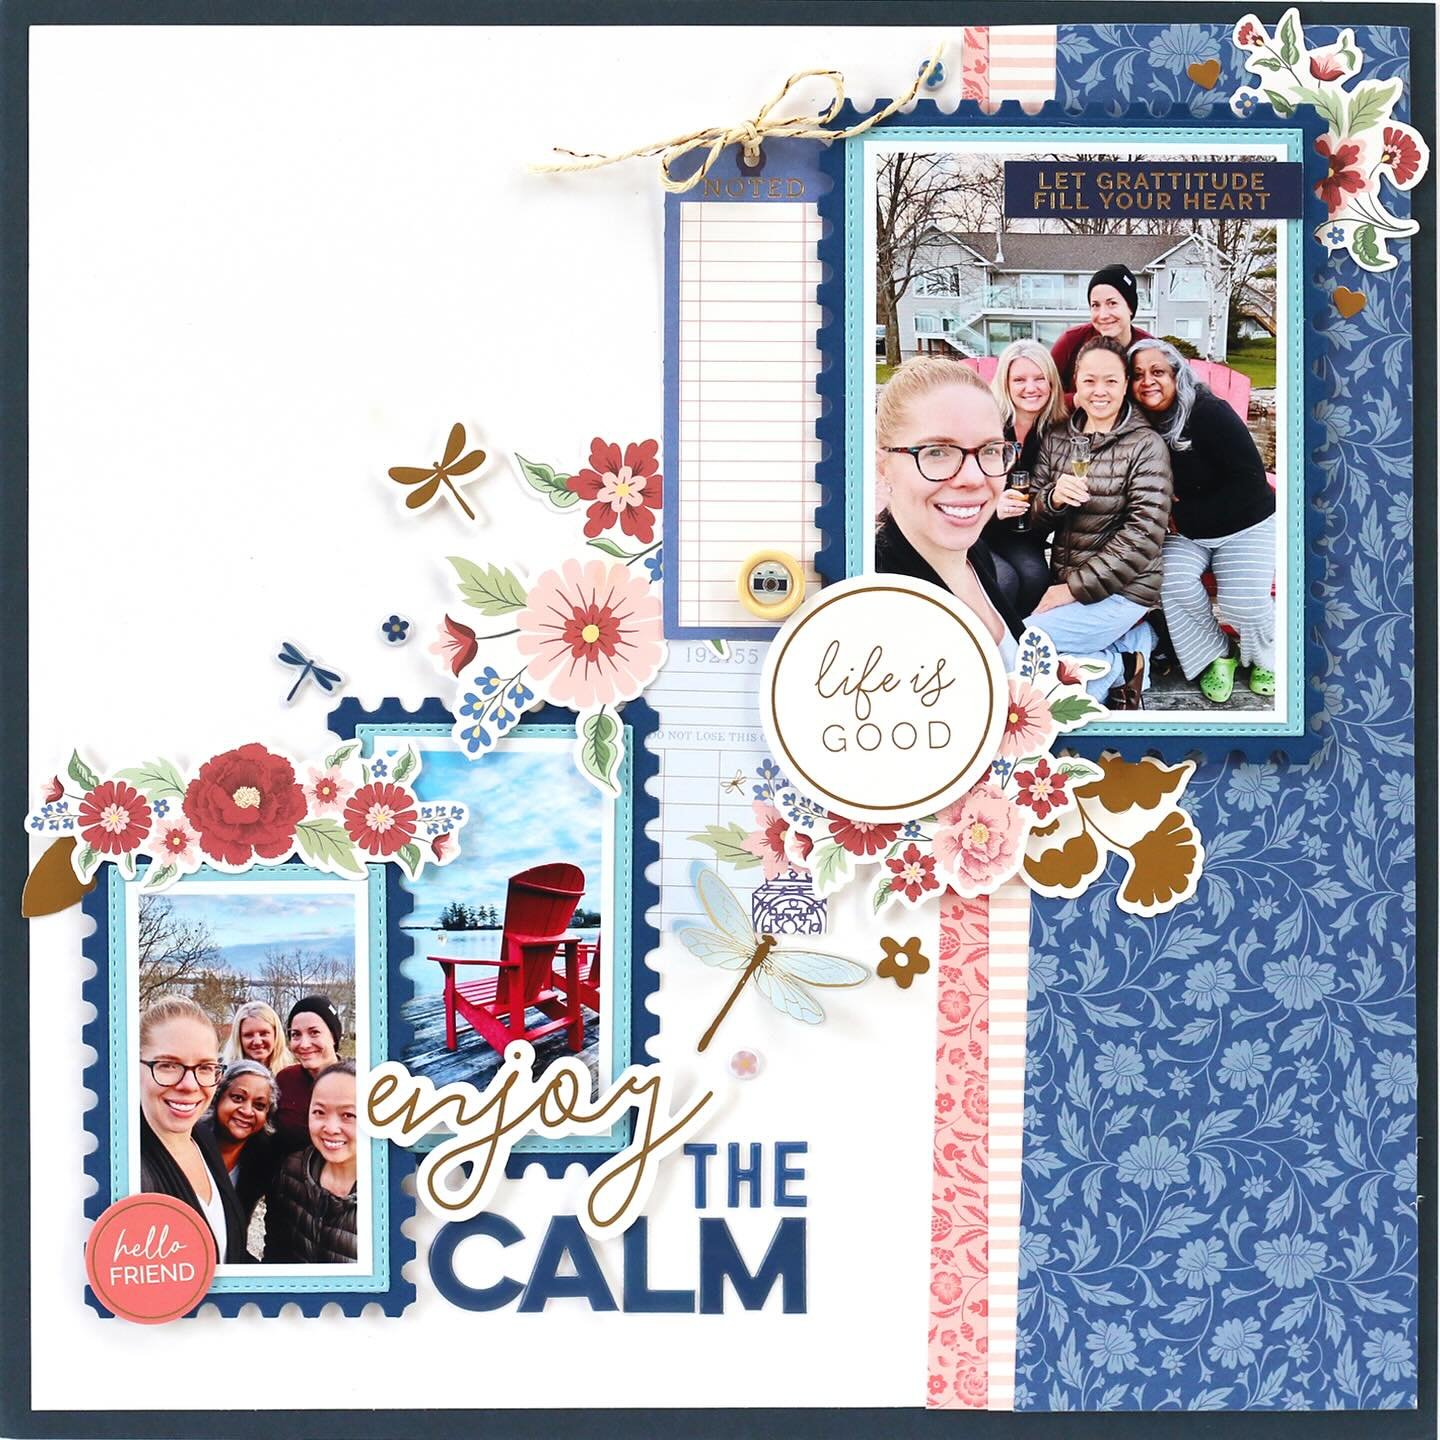
With such a colorful & prominent frame drawing your eye to my photo from our 2016 trip to Disneyland, I didn't want to add much more product to detract from it. After stamping and before adhering my acrylic and wood veneer, I typed out my short journaling in Photoshop Elements and printed it on the page. I then added a strip of patterned paper to the top and bottom to ground the page, then added two tags from the August 2017 Kit, which I sewed with my sewing machine, a Tiny Heart Sticker, and a Mickey Mouse head out of the Live Laugh Love Enamel Dots.

I love the way this turned out, and it was fairly simple to do! Pull out your Title Builder products today and frame your photo! Happy creating!  

Elle's Studio August Reveal Day!

We at Elle's Studio are so excited about the August kit and add-ons! With fun graphics and beautiful colors, you will definitely want to create with these goodies! (*All product links are affiliate links. You don't pay any extra, but I get a small percentage of your sale! Thanks for your continued support!) 

The August Kit has so many amazing tags this month. I didn't know where to begin when I started my layouts! There is a perfect mix of journaling and filler tags, perfect for any type of project.

In addition to the kit, you'll find the perfect coordinating add-ons in the shop: (from left to right) Wood Veneer Clips, Yes to This Stamp, So Awesome Puffy Stickers, Wood Veneer YUM, Wood Veneer Pocket Fillers, Enjoy Acrylic, Hearts and Circles Acrylic, Tiny Heart Stickers, August Labels

You'll also find the The Story printables and August 2017 cut files in the shop as well!

Extra, extra! Read all about it! We have a new mini-collection in the shop, too! The In the News journaling tags and stamp will help you document what's happening in your life and the world around you.

In other news, the Title Builder stamp and bundle have been RESTOCKED! Get them before they're gone! We completely sold out last month, and they're not guaranteed to be restocked again.

Now for my projects!

This was most definitely my favorite project this month. I LOVED the colorful pencil journaling tag and puffy stickers in the August Kit and So Awesome Puffy Stickers, and as soon as I saw them, I knew I wanted to document our struggles with teaching my daughter how to write. To begin the page, I drew a handwriting guide on a piece of 8-1/2" x 11" white cardstock, and just asked her to write her name with a felt-tip pen. While she was writing, I took photos. Within a few hours, I had this page completed! Scroll through the gallery to see all of the product that I used.

My second layout is just an ode to my foodie nature, and a celebration of my love for summer food! The "good eats" die cut and journaling tag from the August Kit, along with the wood veneer YUM were perfect for this page! I also had to use the Stanley alphabet stamps for my title. I LOVE them! Check out the product I used on the gallery below.

Thanks so much for stopping by to check out all of the new goodies! June and July kits have sold out, so be sure not to miss out on this one! Start a subscription today to guarantee that you don't miss out on any future kits, and lock in your reveal day price of $9.99. Plus, subscribers will also receive FREE SHIPPING on any other products that are purchased during the 24 hour bundling period starting each month on the 10th at 8:00 am PST and ending on the 11th at 8:00 am PST. These products will be shipped with your subscription. Happy creating! 

SCT Summer Edition: Pocket Play

I was so excited to be featured twice in Scrapbook and Cards Today's summer issue, and I loved being a contributing writer for the Pocket Play column. It it, I described how I finally found a way to make pocket page scrapbooking work for me, and I shared a new favorite layout with a favorite color scheme for me: yellow and red with a touch of teal. You can find this color scheme often in my albums. (*All product links below are affiliate links. You don't pay any extra, but I get a small percentage of your sale! Thanks for your continued support!) 

My title pocket was created with the fun, colorful tag from the Happy Birthday Journaling Tags. I started the quote out with the word "memories" from the Live Laugh Love Puffy Stickers and searched online for a quote about memories, finding this one from Rosa Parks. I loved it, and typed it in Photoshop before printing it on the tag. A few more puffy stickers and an Acrylic Birthday Confetti piece finished off the pocket, which introduced the page.

This page documented a surprise trip to my mom and dad's for my father's 60th birthday. I had to create a tag that documented that, and the balloon Happy Birthday Stickers and Dad acrylic and word set helped me add a bit of embellishment to the Happy Birthday Journaling Tags. This may be one of my favorite ever embellished tags in my album, although my sewing machine was acting up that day when I sewed the balloon strings!   

Summer to me means baseball games. I love going to them with my family, and our hometown stadium is so fun to visit. I used the "like it/love it" tag from the April 2017 Kit as a base for my pocket, typing my journaling and adding a cut tag from the Live Laugh Love Bits and Pieces and a piece of printed Live Laugh Love washi tape stickers

Check out the FREE Scrapbook and Cards Today summer issue to red my full article and get loads of summer scrapbooking inspiration! Happy creating! 

Summer Mini Tag Album

I am excited to share the inside of my summer mini tag album, created with the new products in the Elle's Studio shop*, with you today. (*All product links are affiliate links. You don't pay any extra, but I get a small percentage of your sale! Thanks for your continued support!)

When I saw the new Cork Tags, I immediately thought of a mini album, and knew I had to create one. So, I chose the "summer" tag, which meant that I set to work choosing photos from our summer to document. 

Supplies | July 2017 Kit, Cork Tags, Love This Life StampSummer Puffy Stickers, Everyday Circle StickersSummer Journaling TagsSummer Stamp, Dated Stamp, Live Laugh Love 6" x 6" Paper Stack, Live Laugh Love Small Blank Labels, July Labels

I began with the Cork Tag itself; backing it with a piece of patterned paper from the Live Laugh Love 6″ x 6″ Paper Stack and stamping "documented 2017" with the Dated Stamp. Just a few of the Summer Puffy Stickers finished off the front cover! 

After choosing my photos, I sized them to match the tag, at 1-7/8" high and 3-1/2" wide. Three images fit on each 4" x 6" photo print. After I trimmed them down, I simply lined it up with the cork cover as a template and snipped the edges and punched the holes.

On the inside of my cover, I added another piece of the yellow pattern from the Live Laugh Love 6″ x 6″ Paper Stack and stamped "around here" with the Love This Life Stamp, adding a die cut from the July 2017 Kit in the center of the words. My first photo, taken of my daughter swimming to my husband, only needed a few Summer Puffy Stickers to finish it off. 

Summer2017Mini_Page02_blog.jpg

On the back side of the swimming photo, I used the perfect water tag from the Summer Journaling Tags, adding my typed journaling and a date stamp. On the opposite page, I documented an afternoon play date, again adding only the Summer Puffy Stickers to the image.

The back side of the playdate photo was created with the red stripe tag from the July 2017 Kit and the circle heart from Love This Life Stamp, adhered with dimensional adhesive. On the opposite page, the Everyday Circle Stickers and Summer Puffy Stickers embellished a fun photo of my daughter relaxing by the pool.

I had a hard time cutting into the yellow ombre tag from the July 2017 Kit, but I used it on the backside the photo, adding typed journaling and a simple Summer Puffy Star. On the opposite page, I documented a trip to the Museum of Natural Science, adding another Summer Puffy Sticker that said, "around town."

Another tag from the July 2017 Kit that I had a hard time resisting the urge to hoard was the colorful polka dots one. I used it on the backside of the HMNS photo, and added a Live Laugh Love Small Blank Label for my journaling and a July Label for the date.

On the back side of the splash pad photo, I added a Live Laugh Love 6″ x 6″ Paper Stack yellow heart pattern, another Live Laugh Love Small Blank Label and a July Label, stamped with the "hello summer" sentiment from the Summer Stamp. On the opposite page, I used a black and white photo from a trip to TCBY, and added the "favorite snapshot" die-cut from the July 2017 Kit to cover a face in the left corner of the photo. I love the way that blue "pops" against the black and white photo.

To add my journaling to the back side of the image, I printed it directly onto the adorable ice cream tag from the Summer Journaling Tags, then stamped the date. 

I can't wait to add more summer memories to this little tag mini album, and it's easy to do since it's on attached with a binder ring. Thanks for stopping by today, and be sure to pick up these awesome new products to help you document your summer memories! 

Elle's Studio July Reveal Day!

I'm so excited to share the new Elle's Studio July 2017 Exclusive Kit* and add-ons that just hit the shop! (*All product links are affiliate links. You don't pay any extra, but I get a small percentage of your sale! Thanks for your continued support!) 

The July 2017 Kit may just be my favourite Elle's Studio kit EVER! With the beautiful colors, illustrations and sayings, these tags and die-cuts are just perfection! 

Last, but not least, the Love This Life Printables and July Cut Files are perfect for reusing over and over again on your projects!

When I saw the "love this" tag in the Love This Life Printables, I knew it would make an amazing background for a scrapbook layout. I opened the PNG file in Photoshop & got to work recoloring the circles to match the photo of my daughter on the beach that I wanted to document. I also added the word "beach" to the inside of the pink circle, just to fit more to the layout subject. I didn't need much embellishment on this layout, and a simple title created with a mix of the Stanley Outline Alphabet Stamp and the Title Builder Stamp finished off the page!

As soon as I saw the package of Cork Tags in my July box, I knew that I was destined to make a mini out of them. Oh my goodness, are they not the best thing ever? I immediately grabbed the "summer" tag and decided to document our best summer moments with this little beauty. The best part is that I can continue to add to it by creating more pages throughout the summer!

I'm going to share exactly how I created this little mini album on the 15th, as well as show you all of the pages, so please come back for the full reveal!

An Everyday Adventures Class-Inspired Mini Album

It's rare lately that I get to join in with the contributors for a class that I'm coordinating at Elle's Studio, but the entire time I was editing the Everyday Adventures class*, I wanted to CREATE! The projects from the contributors, some of my favorite designers in the industry, were amazing, and I loved their tips and tricks that they shared to help you create an album you love! So, I decided to read through the class again and highlight some of my favorite parts to then inspire my own mini album, and I'm sharing that with you today!

(*Product links are affiliate links. You don't pay any extra, but I get a small percentage of your sale! Thanks for your continued support!) 

Supplies | Everyday Adventures Mini Album Class with Stamp & Digital Files, Everyday Adventures Product Bundle, Jonah Alphabet Stamp, Dated Stamp, The Story Of Stamp

I found this fun wooden board mini album in my stash and loved it, without realizing it was the same album that Barbara Picinich used for her album in the class! I kept the transparent cover page, using it to adhere a few embellishments and a tag with a stamped title, using the exclusive Everyday Adventures stampJonah Alphabet StampDated Stamp and The Story Of Stamp

My first page features the image that you see on the cover, since it was only separated with a transparent cover page. Patterned paper created the foundation for my album pages, just like Jennifer Gallacher’s mini album in the class. On the first page, I used the patterned stripe from the Live Laugh Love 6″ x 6″ Paper Stack found in the Everyday Adventures Product Bundle and as Mel Blackburn recommended in her class lesson, I only used these colors throughout the entire album to make it cohesive from page to page.

Since the pages were only 6″ long, and I wanted mine to be 7″ to fit with the album, I cut a coordinating pattern to the same width of the page, 4.75″ and 2″ high, scoring it in half and sewing the bottom edge to the top of my patterned paper, giving me elongated pages and a nice sturdy top to flip around the binding rings.

Lizzy absolutely loves dinosaurs, and when we went to a classmate's dinosaur party at the museum of natural science, I took this lovely photo of her in a dinosaur hat that she made. I knew it had to go on the cover.

On every page of my album, I featured a 4″ x 4″ photo, that I backed with white cardstock. I used the digital labels included with the class to add my journaling in Photoshop before printing and cutting, allowing me to add the maximum amount of words in a small space. I also made sure that I had stamped images on every page, using the Everyday Adventures stamp, and included just a few small embellishments.

This page is SO fun, and it was simple to add just a few Live Laugh Love collection enamel dots and plus stamps from the Everyday Adventures stamp directly to the photo of my daughter's "decorated" bath.

YouAre4Mini_Page02_Blog.jpg

I had to get the things we like to do together in the album, and since they're about me, I made sure to get my photo in there, too. 

One of Kristin Tweedale’s tips from the class was to create interest with banners or tags sticking out from the pages, so I added several labels to the page edges, as well as this tag with my daughter’s name stamped with my favorite, Jonah Alphabet Stamp, that was purely for embellishment!

No mini album about Lizzy would be complete without a cute giraffe in it. She LOVES them, and I love this photo and page!

In Laura Wonsik’s lesson, she recommends creating “clusters” of embellishment, which allows for the maximum amount of white space on each page. I loved compiling these clusters with the digital class die cuts, Live Laugh Love Bits and Pieces, Puffy Stickers, Wood Veneers, Washi Tape, Enamel Dots and the Everyday Adventures stamp.

Recently, when my talking with a friend, I told her that Lizzy still pronounces "animals" as "aMinals," and she said that I had better write that down, since it will likely change soon. Why didn't I think of that? It was fun to find a photo of her talking, and then use the speech bubble from the Everyday Adventures stamp to add in the baby words that she still says today. Ah... I'm not ready for that to change just yet.

There is nothing more "everyday" for us than a visit to the library, and I love that I can combine our "everyday adventures" with things that Lizzy loves right now in this album. The sentiments in the Everyday Adventures stamp were perfect for every page.

I'm not sure how I scored this photo, but it really has my heart... Lizzy loves her Red Shirt Bear, and seeing her carefully placing him on her bed is really part of her sweet little personality at the moment.

I had to document Lizzy's favorite lunch out at the moment—a pizza flatbread from Potbelly. I just love how those plus signs float from the bottom to the top of the page.

On my final page, I included a photo of us painting together, something we do often to pass the time at home. 

I can't wait to add more pages into this album as the year goes on, so that I can remember my daughter's likes and dislikes, and funny personality at four! Thanks so much for stopping by today, and be sure to check out the Everyday Adventures Mini Album Class and Everyday Adventures Product Bundle—it really is wonderful and inspiring!

Introducing Title Builder: A Collaboration with Elle's Studio!

This post has been a long time in the works, and I am SO excited to finally share a product that I've been working on with Elle's Studio, inspired by my class Terrific Titles, at Big Picture Classes and devoted to my love of creating titles, and my desire to help you love to create them, too! Introducing Title Builder! Watch this video to learn about why I wanted to create this product. (*All new product links are affiliate links. You don't pay any extra, but I get a small percentage of your sale! Thanks for your continued support!) 

The new Title Builder products, specifically designed to help you come up with and create stunning titles on your layouts and pocket pages, include the 6″ x 8″ word and phrases Title Builder Stamp, the Title Builder Alphabet StampTitle Builder Wood Veneer, and the Title Builder Acrylic. These can be purchased separately, or together in our Title Builder Bundle, specially priced with a 15% discount!

I had so much fun creating with the Title Builder supplies on both a layout and a pocket page, showing that these words and phrases can be used on any memory-keeping project. 

Supplies | Title Builder Stamp, Title Builder Alphabet Stamp, Title Builder Acrylic, Title Builder Wood VeneerParty Time Acrylic, Live Laugh Love Word Labels, Live Laugh Love Small Blank LabelsLive Laugh Love 12" x 12" Paper Collection, Spring Sequins

I love this layout, and my title, "The Best Adventures Are With You," is the perfect title for the story I wanted to tell about traveling with my daughter, and introducing her to some of our favorite places. 

With the word "magic" included in the Title Builder Acrylic, I had to create a Disneyland pocket page, and I love how my title tag turned out. It was so simple to stamp only certain words on the phrase stamp to create my title, "Treasure the Magic of Today."

Another bonus of these awesome products: When you purchase the Title Builder Stamp, you will receive an email with a PDF page of title combinations using only this stamp, over 100 total, giving you easy access to get titles on your pages!

This is the first time I have ever put myself "out there" with a product, and it is one that I truly believe that scrapbookers and memory keepers will benefit from! I would love for you to check it out in the Elle's Studio shop today, and please let me know what you think!

Elle's Studio June Reveal: So Long Summer

As you may have seen in my post yesterday, the Elle's Studio June 2017 Kit* is live and perfect for documenting your summer! It along with the embellishment add-ons* are in the shop while supplies last, so don't delay in picking up these great products before they're gone! I'm here to share my second project with you today, an 8-1/2" x 11" layout created to document our end-of-summer fair. (*All new product links are affiliate links. You don't pay any extra, but I get a small percentage of your sale! Thanks for your continued support!) 

When I laid out the kit next to the photos I had already printed to document, this one stood out. Both the photo and the kit are full of color, so I grabbed the multicolor stripe 3" x 4" tag, my photo and went to work. I had a lot of fun with this one, using the June Cut Files* and watercolors. You can see how it all came together in this short process video:

Don't miss the unboxing video that I created of all of the new product* that hit the shop this month. You will LOVE it all! Happy creating!

Elle's Studio June Reveal!

The Elle's Studio June 2017 Kit and extras* are available now in the shop, and this month I've done an unboxing video to show you all of the gorgeous product! (*All new product links below are affiliate links. You don't pay any extra, but I get a small percentage of your sale! Thanks for your continued support!) 

In addition to what I've featured in the video, there is a new mini-collection release which includes the Summer Journaling Tags and Summer Stamp.

Don't forget about the digital files! The June Cut Files and Happy Printables are perfect to add to your summer digital library!

My first layout created this month is about the excitement of heading to a summer baseball game, and I used one of the 3" x 4" tags from the kit to inspire my punched, stitched circle layout. And how awesome is the new Stanley Alphabet Stamp, huh? You can see my entire process in the following video. Be sure to subscribe for more process videos

Stay tuned for my second layout with process video, coming to the blog tomorrow! It has a completely different feel to the first layout, something I love about working with these kits—you can achieve so much versatility! 

Thanks for stopping by and happy creating!  

Documenting My Love for The Gilmore Girls

Gilmore_Closeup2_Blog.jpg

When I found out that The Gilmore Girls: A Year in the Life was coming out in the fall, I was SO excited, as were most 30-somethings all over the country. But when it was released, the day after Thanksgiving, we were just about to embark on a trip to Hawaii and Disneyland, so I waited. I waited through December, until my husband left for work, and waited again until New Year's Eve, when my daughter was having her tonsillectomy. All of that waiting was completely worth it, and because the event was part of my New Year's celebration, I decided to document it in a pocket page. I even included a photo of The Dragonfly Inn on my TV screen with my twinkle lights on the mantel and a fire in the fireplace. Ah... cozy!  

Supplies | Elle's Studio May 2017 Kit*, Elle's Studio Today Stamp*, Elle's Studio Arrow Stickers*, Unity Stamp Company Lux Girl, misc. die cuts, Colorcast Designs Gilmore-themed wood veneer & acrylic (sold out), misc. sequins (Supplies with an * are affiliate links. You don't pay any extra, but I get a small percentage of your sale! Thanks for your continued support!)

Supplies | Elle's Studio May 2017 Kit*, Elle's Studio Sky Blue Puffy Alphabet Stickers*, Elle's Studio TV Journaling Tags*, Elle's Studio TV Stamp*, Elle's Studio TV Wood Veneer*, misc. cardstock alphabet stickers, misc. sequins, Colorcast Designs Gilmore-themed wood veneer & acrylic (sold out), (Supplies with an * are affiliate links. You don't pay any extra, but I get a small percentage of your sale! Thanks for your continued support!)   

I took my color scheme from the official A Year in the Life image with the beautiful sky blue background, as well as the photo of Lorelai and Rory grabbing a coffee and the morning paper in Star's Hollow. Mixing the beautiful light blue, with navy and pink felt just perfect for this spread. 

Gilmore_Closeup1_Blog.jpg

Back in March, when I attended Scrapbook & Cards Today's Crop and Create Toronto, one of my kind, fellow croppers gave me this Lux Girl stamped image by Angie Bloom and Unity Stamp Company. It reminded me so much of Lorelai, and I knew it would be perfect to use when I was ready to create this spread. I held onto it for three months & coloring it in with watercolor pencils and a water pen was so relaxing. I backed it onto a piece of striped patterned paper from an old Scraptastic Club kit, and cut it in half, so that it would fit across two 3" x 4" pockets. Since she was looking down, I wanted to put a bit of embellishment under her feet, so I added label and heart die cuts, as well as a wood veneer heart.

This 3" x 4" tag that I used on the back side of the page is from the Elle's Studio May 2017 Kit. I knew what words I wanted to add right away, and I used the Elle's Studio Sky Blue Puffy Alphabet Stickers, and another lighter blue set that I had laying around from an old Studio Calico kit. To finish off the tag, I added the wood veneer coffee cup from Colorcast Designs 

Alongside the Colorcast Designs veneer and acrylic pieces, I also used the Elle's Studio TV Wood VeneerJournaling Tags and Stamp. We don't watch much television around here, but I think documenting what little we do watch is important! Since we just started House of Cards on Netflix, you can expect to see another spread using these supplies to document that series later in the year! 

What shows do you watch? Have you documented them yet?

Elle's Studio May Kit Reveal

When I opened my Elle's Studio May box last month, I was blown away. The May 2017 Kit is absolutely gorgeous, and the colors and designs are right up my alley. I know you will love it, too!

Last, but not least are the Fun in the Sun digital printables and May 2017 Digital Cut File.  

My favorite project that I created this month was a layout, created about my daughter's bestie's first unaided bike ride. I just happened to be there with a camera ready, and these supplies were perfect to document this fun moment in his life! It is one of my favorite layouts to date.

JustRide_Blog.jpg

I received this tassel on the tag of a new piece of clothing I purchased this month, and held on to it. When I saw the "let the good times roll" tag in the kit, I immediately thought of graduation, and knew that I had found a home for this happy little tag. I paired the supplies from the kit and the Bike Ride stamp with the Happy Birthday mini collection to create a happy, celebratory card, perfect for any grad!

I know that this kit is going to be a popular one, so be sure to get yours today at the introductory price of $9.99!

While you're there, don't forget to add the latest class from Elle's Studio, the Everyday Adventures Mini Album Class, to your cart! You will love the inspiration that it provides with eight different contributors creating eight original mini albums with the same supplies! Plus, the exclusive stamp set that comes with the class is perfection!

Elle's Studio Reveal: April Exclusive Kit + Live Laugh Love

We at Elle's Studio are very excited about this month's reveal! First, we have a beautiful new exclusive kit in the shop to document your memories with! 

Along with the kit, there is an entire stash of new add-ons in the shop that coordinate with the kit, as well as the Live Laugh Love collection. These include (from left to right): Orchid Pink Puffy Stickers, Black Puffy Stickers, Pink Puffy Stickers, Sights and Sounds Stamp, Extraordinary Stickers, Family Acrylic, Fun Acrylic, Explore Acrylic, Enamel Dots, Vellum Hearts and Stars, Mom Acrylic and Wood Set, Dad Acrylic and Wood Set, Puffy Heart Stickers

EllesStudio-April2017Extras.jpg

Don't forget about the digitals! This month we have the Fun Printables and April 2017 Digital Cut File new in the shop!

In addition to the new exclusive kit and add-ons, the Live Laugh Love collection is now available in the shop! This bright, cheery collection will pair perfectly with your April items to create perfect layouts and pocket page spreads!

We just got back from a family R.V. trip with my parents to Big Bend National Park, and I couldn't wait to scrapbook my thoughts about doing the trip in an R.V. with this kit! 

To keep my layout clean with a lot of white space, I added a pocket page next to the 12" x 12" layout in my album.

I loved the April 2017 Digital Cut File so much this month that I used it for my second layout as well! The dotty background was just begging to be filled with colorful paper from the new Live Laugh Love collection, and I used the new exclusives to color block my embellishment on top.

Last month's kit sold out quickly, so don't hang around. Go and grab these amazing new exclusives today, while the kit is only $9.99! 

Elle's Studio Reveal: March Exclusive Kit + Add-ons

The March exclusive kit is live at Elle's Studio, and the color scheme is perfect to document your spring memories! 

In addition to the physical product, there are the Treasure Printables and March 2017 Digital Cut File to keep in your digital library! 

This month, I created two 8-1/2"  x 11" layouts, that came together so easily with the new products! The Grow and Bloom Wood Veneer were my favorite embellishment this month, and I used them on both layouts to create my titles. Shop the products used on these layouts via the galleries below.

This kit paired so well with the beautiful large floral pattern from Shimelle's new Little by Little collection to create this page about my daughter and mom gardening one day:

Because we are celebrating 10 years of business this month, Elle has released an amazing Happy Birthday Mini Collection to celebrate! 

All subscribers will receive an exclusive Elle's Studio Sharpie pen with their order, so if you don't have a subscription, be sure to get all of the details and sign up today to receive this awesome free gift!  

All orders placed this month, subscription or not, will receive an exclusive set of journaling tags and a scratch ticket. The prizes on the ticket include: $10 off, 10% off, $5 off, free shipping,  a 3-month subscription, and more! 

Stop by the Elle's Studio shop to see all of the new products and take advantage of the free gift this month! Thanks for stopping by!

Elle's Studio Reveal: February Exclusive Kit!

The new Elle's Studio exclusive kit is live and ready to document your memories!

There are so many beautiful, warm colors and saying on the tags this month! 

The What Happened Printables and February Cut Files are also in the shop for you digi-lovers! 

When I saw the "Say What" cut file I knew I wanted to use it to document a funny photo of my daughter from our last Valentine's Day.

My second layout is my favorite of the month! I used the What Happened Printable digital file to create a custom patterned paper for my background of this playful layout. There are so many add-ons this month that worked perfectly to embellish this fun page about my daughter and her new playmate.

LondonLion_blog.jpg

Be sure to pick up these fabulous products, perfect for your next papercrafting project, before they're sold out! And, watch out for a tutorial on how I created custom patterned paper with the What Happened Printable here on my blog later this month.

Make it Yourself Mini Valentines with Elle's Studio Products

I LOVE, love, love the new products at Elle's Studio this month, but my favorite new item in the shop is the Love You Journaling Tags. I decided to use them to create mini valentines, and I'm sharing the step-by-step process for each simple card on the Elle's Studio blog today!

Using a few supplies from the Elle's Studio shop, you can create twelve different variations of these sweet little cards- perfect for your loves on Valentine's Day! 

Shop all of this Elle's Studio product through the links below, and follow the simple step-by-step instructions included in my post on Elle's Studio blog today! 

Happy Valentine's Day, and happy creating! 

A New Year at Elle's Studio, and a NEW Exclusive Kit!

We at Elle's Studio are so excited about a fresh new year. A new design team to bring you inspiration, as well as a new kit

This bright and cheerful kit is full of color to help you document the beginning of your year, including your goals and intentions for 2017!

To coordinate with the kit and help you get in the Valentine mood, the Love You journaling tags are perfect! 

Last, the True Love printables and January cut files will be in your digital library to help you document your memories. 

On my first layout, I pulled the pink, red and blues out of the January kit to create this 8-1/2" x 11" layout with a favorite photo of my daughter bundled up at Disneyworld. The fun stitched banner using circles cut from 12" x 12" paper, as well as tags from the kit, was inspired by a 3" x 4" tag in the kit that featured a colorful, circular banner, which you will see featured on my next layout!

BundledUp_closeup2_blog.jpg

I love a stamped title, and mixing the "you" from the All My Heart stamp with the Olivia alphabet stamp turned out perfectly! 

My second 8-1/2" x 11" layout documents another Disneyland memory, a moment with my daughter at a princess breakfast. It features the 3" x 4" tag from the January kit that inspired the layout above, and to match it, I added a stitched column of colorful cardstock hearts along the left side of the layout. My 3" x 4" photo and the three other tags sat perfectly on the Sunny Days woodgrain paper. 

I couldn't resist making little Mickey head figures on this layout using the new sequin mix! This is definitely one of my new favorite layouts to date. 

Be sure to pick up a January 2017 exclusive kit and start documenting 2017 today! 

Elle's Studio December Exclusive Kit Reveal

It's that time of the month again- the Elle's Studio December exclusive kit is live and perfect for adding to your holiday memory keeping projects! Whether you purchase a one-off kit, or start a new subscription so that you're ensured a new kit each month, you'll love what's new in the shop today!

The bright, fun colors of the December kit will allow you to use it for a variety of projects. This kit is jam packed with 4" x 6" and 3" x 4" tags, as well as a variety of bits and pieces to use as embellishment.

The add-ons this month will also give you more options to embellish your projects! You can choose from the Winter acrylic, Celebrate acrylic, Winter acrylic stars, Holly acrylic, Cheers acrylic, Happy New Year acrylic, Celebrate stamp, and December labels that coordinate with the colors in the kit.

The digital Celebrate printables and cut files are also perfect to add to your digital library.

In addition to the Date It stamp, the Malia lowercase alphabet stamp is also available in the shop! The uppercase Malia stamp has been a favorite of mine, and I know that I will get a lot of use out of this one, too! 

Supplies | December exclusive kit, Celebrate stamp, Joy journaling tags, acrylic snowflake'Tis the Season 12" x 12" paper collection, 'Tis the Season puffy stickers

My first project has a Christmas theme, and features a favorite photo of my daughter and my brother I used a lot of white space here, adding texture with a doily underneath my photo mat, created with the 'Tis the Season 12" x 12" paper collection. The "very merry details" tag from the December kit was my favorite this month, so I added that to the left side of my photo. I also used the Celebrate stamp to add "remember magic" to the small tag at the bottom of the journaling tag. To add that big pop of red, and create a title, I used the "jolly" tag from the Joy journaling tags, and finished off the layout with the lovely acrylic snowflake.

Supplies | December exclusive kit, Celebrate stamp, Date It stamp, Winter acrylic stars, 'Tis the Season 12" x 12" paper collection, 'Tis the Season acrylic, letter and number stickers- gray, letter and number stickers- red

My second layout is a review of the year, inspired by the "favorites of the year" 4" x 6" tag in the kit. I loved pairing it with the multicolor stripe 3" x 4" tag, and I pulled those colors throughout the layout, by using the strips from the 'Tis the Season 12" x 12" paper collection, the little tags from the kit at the top left corner, and the Winter acrylic stars. 

Thanks so much for stopping by today, and be sure to check out the Elle's Studio shop for these new releases, as well as a great "Celebrate the Season" sale: 25 products are available for $2 or less! 

Elle's Studio November Exclusive Kit Reveal!

Can you believe it's November, and the year is almost over? That means there's only two Elle's Studio exclusive kits left for 2016, and the November kit is spectacular! 

Document your November and get ready for December with the November 2016 exclusive kit, in which fall colors pair with Christmas classics. You'll also want to check out all of the awesome add-ons that coordinate with the kit this month: 

From top to bottom: Thanksgiving Acrylic, Love Wood Veneer, Merry Christmas Acrylic, Large Acrylic Stars, Good Cheer Stamp, Joy Journaling Tags, Acrylic Snowflake, Gingerbread Wood Veneer, Acrylic Christmas Trees, Stars and Hearts Frosted Acrylic, Christmas Wood Veneer Attachers, FaLaLa Acrylic, Bah Humbug Acrylic, Twinkle Acrylic, Deck the Halls Wood Veneers

My first project this month is a combination of an 8-1/2"  x 11" layout with an adjoining pocket page, and I combined this month's kit with the Sunny Days and the Autumn mini collection for an autumnal spread.

My second project is a 12" x 12" layout with a Christmas theme, featuring a series of three fun photos of my little family.

Supplies | November 2016 exclusive kit, Stars and Hearts Frosted Acrylic, ’Tis the Season 12” x 12” paper collection, Family acrylic, Malia alphabet stamp.

In addition to the kit and add-ons this month, there are also some new 2017 products to plan your Project Life album for next year that you'll want to pick up in the shop.

From top to bottom: Monthly Wood Veneer Tabs, 2017 Large Black Acrylic, 2017 Large White Acrylic, 2017 Small Black Acrylic, 2017 Small White Acrylic, Date It Stamp, Right Now Journaling Tags, 2017 3" x 4" Calendars, Monthly Journaling Tags

Check out all of the new offerings in the shop this month, perfect for all of your end of year documenting! Happy creating! 

Elle's Studio October Exclusive Kit Reveal- With Subscriptions!

I am so excited to share the new October exclusive kit from Elle's Studio with you this month, not only because it is gorgeous, but also because this month is the first month that Elle is offering kit subscriptions with NO CANCELLATION FEE. How great is that? Anyone who subscribes today will  also receive a free acrylic gift, so check out all of the amazing new products in the shop! 

You will definitely want to start your subscription this month! Take a look at the October kit!

Those gorgeous colors and patterns definitely won me over! The add-ons, which include the Autumn wood veneer, Autumn wood veneer attachers, Family acrylic, Family Fun stamp, Autumn leaves acrylic mix and Autumn journaling tags, are perfectly designed to coordinate with your kit, and will inspire you to document your October memories!

And, get more "bang for your buck" by ordering the October cut files and Love My Tribe printables

My first layout turned out exactly as I had planned- crisp and clean, but still with an autumnal feel.

With just a few supplies, I created this layout about how much I yearn for fall each year! By backing the die-cut cardstock page with a stamped and misted piece of cardstock, I created a lot of texture on my background, and topped it with pieces from the exclusive kit and add-ons. 

My second layout has a much more playful feel.

There were so many lovely smaller tags in the the kit this month, along with the digital cut files and acrylic pieces- I just couldn't stop layering! 

Have questions about the new subscription format? Check out the ES blog for any questions you may have. Grab your kit via subscription before they're gone- these lovelies are sure to sell out fast! 

Elle's Studio September Exclusive Kit Reveal!

Can you believe it is already September? I always find this month strange- summer is not quite over, but I'm yearning for fall, and the Elle's Studio exclusive kit this month has the best of both seasons! Take a look at this beautiful kit!

There are SO many embellishments that coordinate with the kit this month, including the vellum hearts, foodie wood veneer, Right Now stamp, Collecting Moments acrylic, Best Ever acrylic, Fall acrylic, Autumn acrylic, Awesome acrylic and Autumn stars.

Lastly, the Hello Autumn printables and September cut files are a must-buy! 

I was so excited about the herringbone pattern in the digital cut file this month, that I made it the focus of the design on my first layout.

I absolutely love the simplicity of this layout. Although it was a bit time-consuming backing the cut file with tiny pieces of colorful paper, the outcome is so worth it to me! This is easily one of my favorite layouts of the year.

My second layout was created for my Disneyland album, which is always a work in progress!

Supplies | September exclusive kitSeptember cut filesSunny Days 12" x 12" paper collection, Sunny Days puffy stickersEveryday Labels puffy stickers- gray, Marie alphabet stamp, Autumn acrylic stars

I again used the September cut files to cut "documented" to place under my photo, which I then placed on top of the bold stripe on the "Adventures" pattern from the Sunny Days collection. Because I wasn't using orange in this album, I simply cut out the orange stripe and adhered the design back together on my background! 

The title was so much fun to create, and was stamped with the Marie alpha stamp in multiple colors. I then stitched over the letters, so that the title looked like a banner, and added some puffy and acrylic stars.

Watch out for another project from me coming next week, using the September kit and add-ons!

This month is very exciting, because Elle is doing a free shipping offer! Any orders $50+ shipping  to the U.S. should use code SHIPUSA and international orders of $75+ use code SHIPINT. Happy shopping, and happy creating!