Scraptastic Club Sweet Child of Mine Kits: Love These Girls

When I received my Sweet Child of Mine kit and girl add-on from Scraptastic Club last month, I initially thought that I would have to pull out baby photos to make the colors and phrases work with the kit. However, this week, I challenged myself to use some photos that I already had printed and on hand, and I was excited at how versatile these kits were. They're not just for baby photos! 

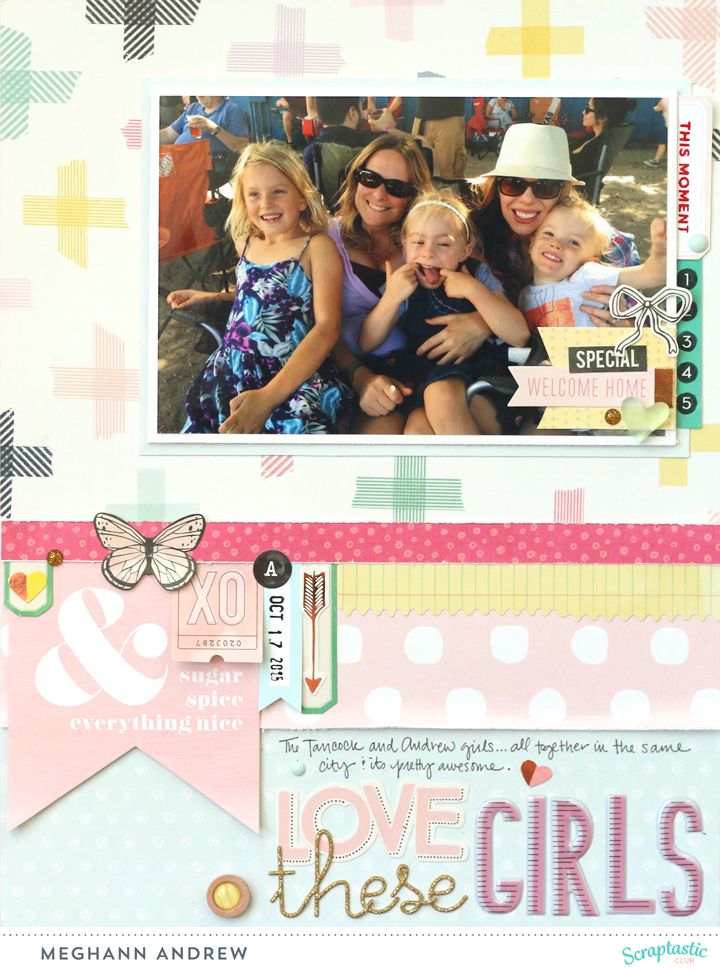
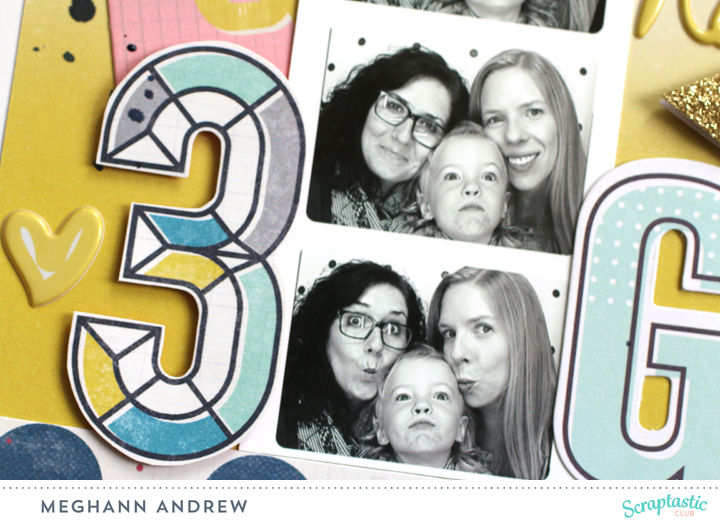
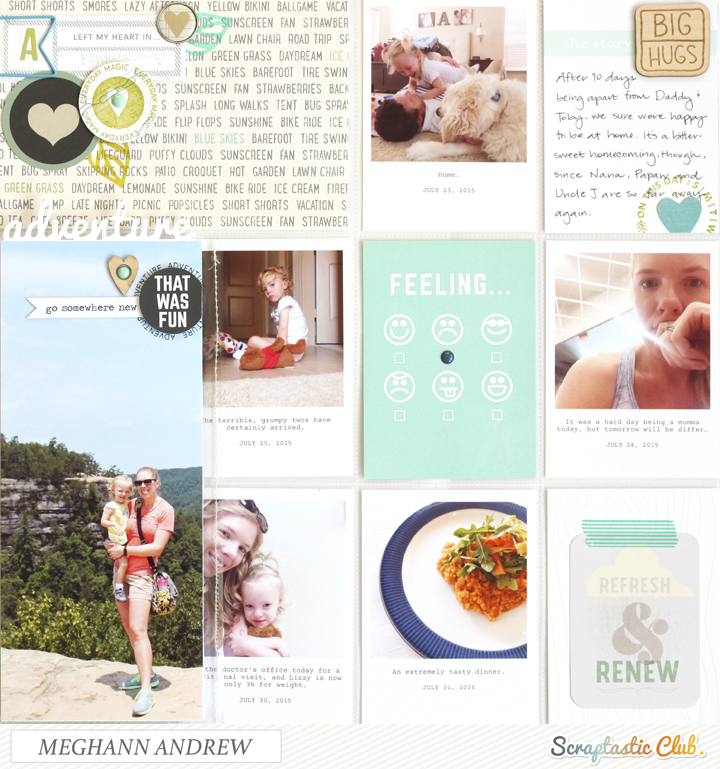
Since I received the girl add-on, (a boy add-on is available too!) this photo of me with my friend, daughter and goddaughters was perfect to coordinate with the kit. The photograph was already printed in color, so a colorful layout was in order. The Maggie Holmes plus-sign paper in the girl add-on was my starting point for the page, and I based the other colors that I chose from it. 

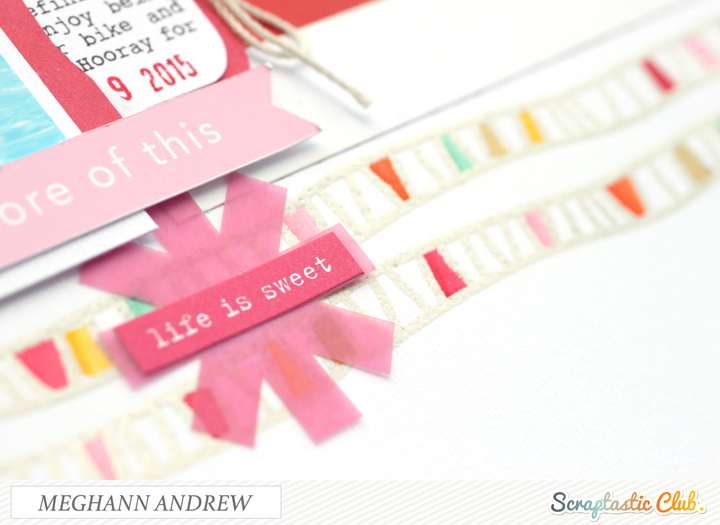
The big "sugar and spice" pennant was actually a cut-apart 3" x 4" tag from the girl add-on, and there was enough room at the bottom to cut the triangle out and form a pennant. Not only is this a design element in itself, it also grounded the other smaller labels, tabs and pennants that I added next to it. 

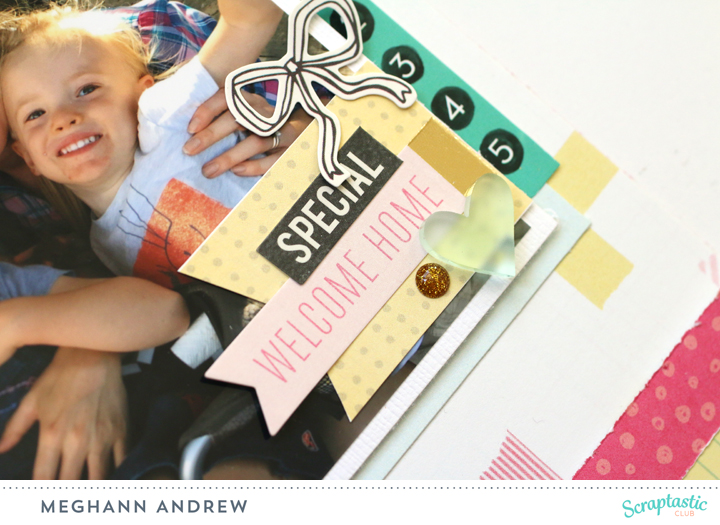
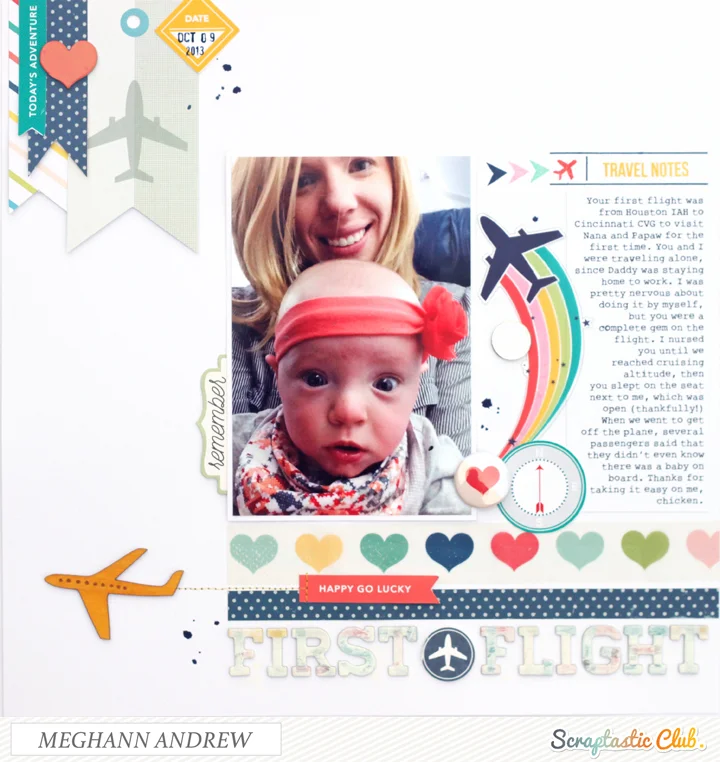
To balance out the large embellishment grouping on the left side of my page, I decided to add another grouping to the bottom right corner of my photo. I couldn't resist pulling a few stickers from the Amy Tangerine Better Together sticker book, located in the March 2016 This Life Noted kit, just because I wanted to add a bit more yellow and green to the page. The green "1-5" sticker is from that book, as is the yellow notebook strip sticker. I also had to get a stamp on the page, so I chose to stamp "this moment" from the Drops of Jupiter stamp set onto a printable label. (If you subscribe to the kits, these digital files come free with your kit subscription!)

So I guess the moral of the blog post today is to not take something on face value! Be sure to look at your kit from different angles to get the most use out of it! Have a great day!

Scraptastic Club 'All of You' Kit Layout: 3 Happy Girls

I'm just finishing up with the "All of You" kits from Scraptastic Club before I break open my new January kits, and I have a new favorite layout to share with you today! 

I broke down and used one of my favorite papers in the "All of You" add-on, the yellow Maggie Holmes background paper. I wanted this layout to look different than all of the others that I created with these kits, so I decided to keep the color pink to a minimum, and emphasize yellow, teal and navy. 

All of this color was perfect for this black and white photo booth photo strip taken while a good friend was visiting from the U.K. To create my title, I hand-cut the "3" from the Maggie Holmes number paper in the "All of You" main kit, and paired it with the Fancy Pants Happy Place script word puffy stickers, which were a shop add-on for December, as well as the Fancy Pants Happy Place alphas & numbers die-cuts in the "All of You" add-on.

The Pink Paislee Cedar Lane arrow was a perfect embellishment to add in my title and added a small touch of pink.

I love printing out the kit digital files every month to add to my stash, ready to add to a project. The "no.3" and "love it here" tags were printed from the "All of You" digital files, and the exclusive flair badge finished off the corner.

That finishes it off with my "All of You" kits. To see the other layouts I created with the kit, check out my gallery link at the top of the page & keep a look out here for my projects using the new January 2015 "Just a Girl" kits! 

Scraptastic Club 'All of You' Kit Layout: 3 Happy Friends

Help there! I am trying to get back into the swing of things after a long break from scrapbooking to visit Disneyland, then my parents house for Christmas! Whenever I take a break, I feel a bit rusty pushing paper around for the first time, but the 'All of You' main kit from Scraptastic Club helped me get right back into my groove.

Here's the layout I created. Although the kit seems to include a lot of pink, I created a layout without a touch of it to coordinate with the colors in my photo.

I've had this photo of my daughter's three favorite infant toy sitting around for quite some time, just waiting for the perfect supplies. Putting them up in the attic for storage was hard for me- it meant that I no longer had a baby and had a little girl. Before I packed them away with the other infant supplies, I snapped a photo of them on our breakfast table. These were the toys that were always on the diaper bag, the ones that she always reached for and played with while teething, while riding in the car, etc.

To create this layout, I used the 'All of You' main kit and the word puffy stickers, an add-on item for December. I loved adding them underneath my title. 

When you subscribe to the club, you get a member exclusive every month, and this month it was a fantastic pie shape stencil. I used my inks and foam daubers to add these shapes along the left side of my layout, and one by my title. I love the playful nature it adds to the page. 

I'm a big fan of making things work, so when I was looking for a folder tab to put at the top of my photo, I noticed this exclusive rectangular tag in the kit. It was exactly the color and sentiment that I needed, so I just trimmed it to the tab shape with some scissors. It was the perfect addition to my page.

I love that I've documented these toys that mean so much to me, and the 'All of You' kit was just perfect for doing that. Thanks for stopping by! Be sure to stop back before the new year to check out my favorite layouts from 2016! 

Scraptastic Club "Feels Like Home" Layouts

Since it's the last day of the month, I wanted to share my November "Feels Like Home" kit layouts from Scraptastic Club!

"The Best Day" supplies | Feels Like Home kit, Feels Like Home add-on, Feels Like Home digital files, Ain't No Sunshine stamp set

This layout was actually created for the Sketchy Thursday blog post, but as it was the week of Thanksgiving, I completely forgot to post it to the Scraptastic Club blog! Here's a look at the sketch: 

Hey Turkey supplies | Feels Like Home kitFeels Like Home add-onFeels Like Home digital files, This Life Noted November 2015 digital filesNovember 2015 This Life Noted kit

This fun layout documents a Thanksgiving craft that my daughter created, with my help. I love adding in bits from the This Life Noted kit and digital files. 

"Girlies" supplies | Feels Like Home kitFeels Like Home add-onAin't No Sunshine stamp set, Feels Like Home stamp set

This cute layout was featured on the Scraptastic Club blog as a challenge to use two 4" x 6" photos on a layout. 

"Just Play" supplies | Feels Like Home kitFeels Like Home add-on, November 2015 This Life Noted kit

This layout, which turned out completely different from the rest (I love how you can get such a different feel from the same kit!), was shown in a previous blog post. Check it out for more info! 

Thanks for stopping by. Be sure to check out all of Scraptastic Club's kit subscriptions for more info! 

Scraptastic Club Skinny Love: 1st Pony (with process video!)

The first day I put my daughter's hair in a pony tail was a pretty monumental day for me. I knew I definitely had a little girl! All she wanted to do was look in the mirror that morning because she wasn't sure what the heck I had done to her hair, and so I snapped a cute photo of her making a funny face while she was brushing her teeth. When I received my Skinny Love kit and add-on from Scraptastic Club, I knew this would be one of the photos that would work perfectly with the kits.

The photo and this layout just makes me insanely happy! I love the mix of patterns, color and whimsical embellishments. While I created the layout, I filmed a process video so that you could watch my decision making process and get a close-up view of some of the awesome items in the kits this month.

While you are at my YouTube feed, please be sure to leave a comment with any ideas or suggestions of things you'd like to see more from me! If you like my videos, be sure to subscribe so that you will be notified each time a video is released. 

Happy Monday! Have a great week!

Scraptastic Club Skinny Love: Not Just a Pretty Face

Remember that on my last post, I said that I created two layouts in one day? That's how much I love the Skinny Love kits from Scraptastic Club and today I'm here to share the second layout with you. 

Because I love these kits so much, this layout came together quite easily. The photo, taken only a few days ago, was just screaming to be paired with the Skinny Love stamp sentiment, "not just a pretty face," as my daughter, at the age of two, picked up a National Geographic in Whole Foods and started browsing. Taking cues from the colors in my photo, I decided on a yellow and teal color scheme, with black and brown neutrals.  The patterned papers, floral from Crate Paper and the butterfly print a Scraptastic exclusive, topped my layout. A yellow exclusive journaling tag from the add-on, along with the die-cut tag which houses my title, surrounded my photo on the bottom, while the exclusive "the bestest" die-cut topped it.

Now for my favorite part - the embellishment - which flanked my photo on the right and left sides. I layered a printable heart circle on top of the Scraptastic exclusive cork ribbon piece and added a puffy "E," my daughter's first initial. I tucked the Crate Paper "today" tag just behind my photo and layered it on top of the ribbon. To the right of my journaling tag, I added the Studio Calico washi tape and topped with a Crate Paper puffy heart and mini letter "A." A felt and acrylic heart and a few gold chipboard dots and a splatter of black mist finished off the right side.

On the left side, I tucked a date tag under my photo at the top. I then used the Studio Calico washi strip again, and topped it with an exclusive "bright" cork circle, then a puffy "2" from the Crate Paper Wonder collection. On my title tag, I tied a thick piece of baker's twine.

I have to say that this layout, in terms of the photo, the product and colors, may just be my favorite of the entire year, and it was created in about 40 minutes. 

Thanks for stopping by! Have a great weekend. Make some memories to document!

Scraptastic Club Skinny Love: You're A Keeper

Last month, I celebrated my one year anniversary with Scraptastic Club, and believe me when I say that the kits just keep getting better and better. And no, I do not get paid to say this. I just get the kits to work with each month. 

Kits.jpg

For some reason, fall kits have always been my favorite, and the September Skinny Love kit and add-on is proving to be my favorite kit from my tenure with Scraptastic. The colors, themes and especially the exclusive patterned papers are all just Meghann Andrew. I'm finding that when creating a layout, I'm not hesitating whatsoever when choosing my product. I made TWO layouts today- one during nap time and one after bedtime, which I will share tomorrow!

Today, I'd like to share my second layout created with this kit, You're a Keeper.

First, let me say that the exclusive cloud paper on the background, created by Kaitlin Sheaffer, I by far my favorite exclusive paper from Scraptastic, ever. It's simple, and perfect for a background, and the color is just beautiful. The bunting paper at the bottom of the layout is also an exclusive paper this month, and I cut it along the bunting line to give the layout a bit of whimsy. The lines created by the bunting were perfect to line up my title, using American Crafts Thickers.

I love layering my embellishments- it almost creates an entirely custom embellishment by putting the Pinkfresh dip-dyed tag, the Crate Paper Wonder "a wild spirit" tag and the star die-cut together, directly next to the exclusive wood veneer kitty cat. A journaling card, also an exclusive, and the Crate Paper Wonder bingo card grounded my main embellishment grouping. 

In addition to the larger embellishment, I also created small groupings of the exclusive cloud vellum pieces, Skinny Love printable labels (the date label and the yellow star) and the Crate Paper wonder puffy triangles. I finished these groupings off with a few small drips of mist. The only thing on the layout not from the Skinny Love kits is this lone cork star, which I took from an older Scraptastic Kit because I felt that I was missing a small piece of brown at the top of the layout. 

I absolutely love the way the layout turned out, and it only took about 30 minutes. Win-win. The Scraptastic Club site is down at the moment because the new website is coming soon, hopefully within the next week, but until then, check out the Scraptastic Club Facebook page for more inspiration and kit info!

Scraptastic Club September Main Kit: Using the Stencil

Each Scraptastic Club main kit includes a stencil, and the pattern on the Skinny Love stencil this month is perfect for creating a background! I decided to use it in two different ways. First, on my layout, I repeated the pattern four different times to create a background for my photo mat, using a grey ink pad and a sponge dauber. 

After I sponged my background, I framed it with strips of patterned paper, also from the Skinny Love main kit, and added my photo mat on top.

To create my title, I cut the word "happy" from the Crate Paper Wonder "Bright Paper" pattern and added the "little you" banner on top of the Pinkfresh dip-dyed tag.

The exclusive, along with Crate Paper embellishments in the kit helped me to add the final perfect touches, along with a few drips of mist.

I had so much fun with the stencil, I decided to use it in a different way to create a card, outlining it with fine-tipped markers, and then coloring in some random bits with a blender pen.

There you have it! Two great ways to use an awesome stencil in a lovely kit! Thanks for stopping by. 

July Project Life Spreads

Hello there! Today I’m sharing a TLN spread that I created with the Scraptastic Kit Club's August This Life Noted and Wednesday Night kits documenting the final days of our July. The green and turquoise cards and paper in the kits worked perfectly with the photos from our trip home to Kentucky. 

To bring attention to our trip to Kentucky, I created two customized cards in the center of my spread with my Silhouette Cameo and papers from the Wednesday Night kit & add-on. I topped the cards with a flair badge and "long way home” cutout from the TLN kit.

In between the left and right sides of my spread, I added a hand-sewn pocket, sized 3-1/4” x 8” to house a photo of my daughter and I from a day of hiking, as well as our hiking trail guide on the back.

The TLN stamp, which I stamped with Staz-On directly onto my photo worked perfectly with the “that was fun” cutout that I punched with a circle punch. To finish off my embellishment grouping, I added the “go somewhere new” banner and a wood veneer heart.

The right side of my spread included some tough days, which required hidden journaling, housed under the “refresh & renew” tag, which I attached with washi tape from my stash.

And that's a wrap with July in our Project Life album! Now, on to August. It feels great only being a month behind! 

Scraptastic Layout: Sunny, Happy Summer

Over at Scraptastic Club this month, I worked with the bright and bold True Colors kit and add-on. With the pink, orange, yellow, white and black color scheme, it was the perfect kit to use with a sunny, summer photo of Elizabeth in the pool, however, I wanted to add a few more colors to highlight the colors in my photo.

In addition to the kits, I added the wonky border from the July 2015 Summertime Rolls stamp set to add additional colors into my layout.

To make my colorful borders, I stamped the border onto my background (using the patterned paper I had already adhered as a guide to keep it nice and straight) with Versamark. I added American Crafts Zing white embossing powder, to keep the background clean, then heat set. Once it was cool, I added little bits of watercolor in the spaces randomly. To add a bit of shine, I also colored in a few squares with a PenTouch gold metallic pen.

I love using an embossing technique when coloring in stamped images! The raised surface is perfect for helping me to color in the lines.

I kept most of my embellishment around my photo, using a sleeve for my journaling tag, In addition to the beautiful bright yellow doily, I also added the star circle, attached with a mini clip, and 'more of this' from the True Colors digital files

I knew I had to use the beautiful stamp set again to create my title, and I opted to leave the word "sandy" out, since we weren't at the beach, and replace it with the Bella Boulevard alpha stickers spelling, "summer." To make the words really stand out against the colorful paper, I again heat embossed "sunny" and "happy" with white embossing powder. 

I love how versatile and useful stamps can be on my layouts. Thanks for stopping by & have a great week! 

Around the web...

Summer is busy around here. We have been enjoying time spent with family, going on adventures and taking it easy at the same time. I have been living in the moment, which means that I haven't shared everything that I've been doing around the scrapbooking web-o-sphere lately. So today, I'd just like to give you a head's up on a few places I've been featured.

Basic Grey June Guest Designer

I was so excited to be asked as the Basic Grey guest designer for the month of June! I created four different layouts using the Tea Garden collection, which at first I was afraid would be a bit busy for me. However, the beautiful colors drew me in and I created four projects that I absolutely love, not to mention am so proud of. Check out the original guest designer post on the Basic Grey blog to see my other projects. 

Pocket Talk Podcast

Layout featured in Jot Magazine, Issue 10.

Layout featured in Jot Magazine, Issue 10.

Earlier this month, I sat down to have a chat with the lovely Jess Forster on her podcast, Pocket Talk. I have been a listener since episode one, and when she asked me to chat with her, I was so excited. In my episode, episode 12, we chat about my pocket page documentation failures and successes, as well as how I photograph and edit my pocket page photos for design team work. 

Traveler's Notebook for Scraptastic Club

Yesterday, I was featured on the Scraptastic Club blog using the packed, beautiful "Can't Go Home" kit and add-on to make a traveler's notebook insert that I plan to use on an upcoming trip to Boston. The process was so easy and I can't wait to use it to document my trip! 

If you want to be sure to catch everything I'm up to in my personal, as well as scrapbooking life, I update my Instagram account regularly, so be sure to follow me there! 

Thanks for stopping by and I hope you're having a wonderful summer! 

Scraptastic Club June Projects

June was definitely a great month at Scraptastic. I worked with the Can't Go Home kit and add-on this month, as I was drawn to the travel theme and the bright, bold colors. 

My first project this month was a 'main kit only' project and documented my daughter's first flight- a pretty momentous occasion.

My favorite part about the kit was the Can't Go Home stamp set, which I used to stamp the top of my journaling.

My second layout used both the main kit and the add-on to document my daughter's start to walking while we were in Paris. 

I loved the mix of the Shimelle True Stories collection with the Pink Paislee Atlas collection in these kits. I also used a label from the June Can't Go Home digital files on this one.

My third layout, again documenting a part of our Parisian trip, records an amazing boat tour down the Seine.

I also used the June 2015 This Life Noted kit to record the start of my June. 

My favorite part of the spread was this bold, colorful title to highlight the start of our vacation to Savannah, which I created by die-cutting letters (with Bebas Neue font) from my Silhouette Cameo and adhered to a 4"x6" TLN card.

I followed the same color scheme on the right side and used a lot of this month's stamps on my title card.

With a mix of the Can't Go Home and Thinking Out Loud stamp sets, using stamp pad colors to match the rest of the spread, I created a perfect accent card for my layout. 

Be sure to check out the beautiful June kits, which are still available in the Scraptastic store