Project Life: July

I'm still plugging away at my Project Life layouts, and although I've only just updated with my July spread, I'm keeping the same attitude towards this project as I started with at the beginning of the year... 

Stay calm and keep going. 

So that's what I'm doing. Recording my journaling in the Collect app before printing really helps me to get the facts down so that I don't forget. Without the Collect app, I would've stopped this project months ago. 

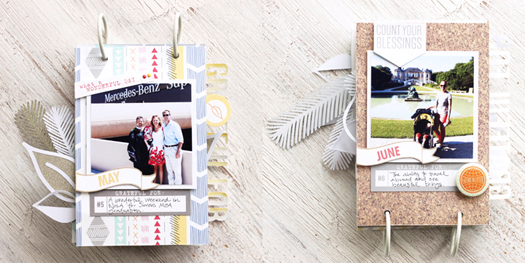
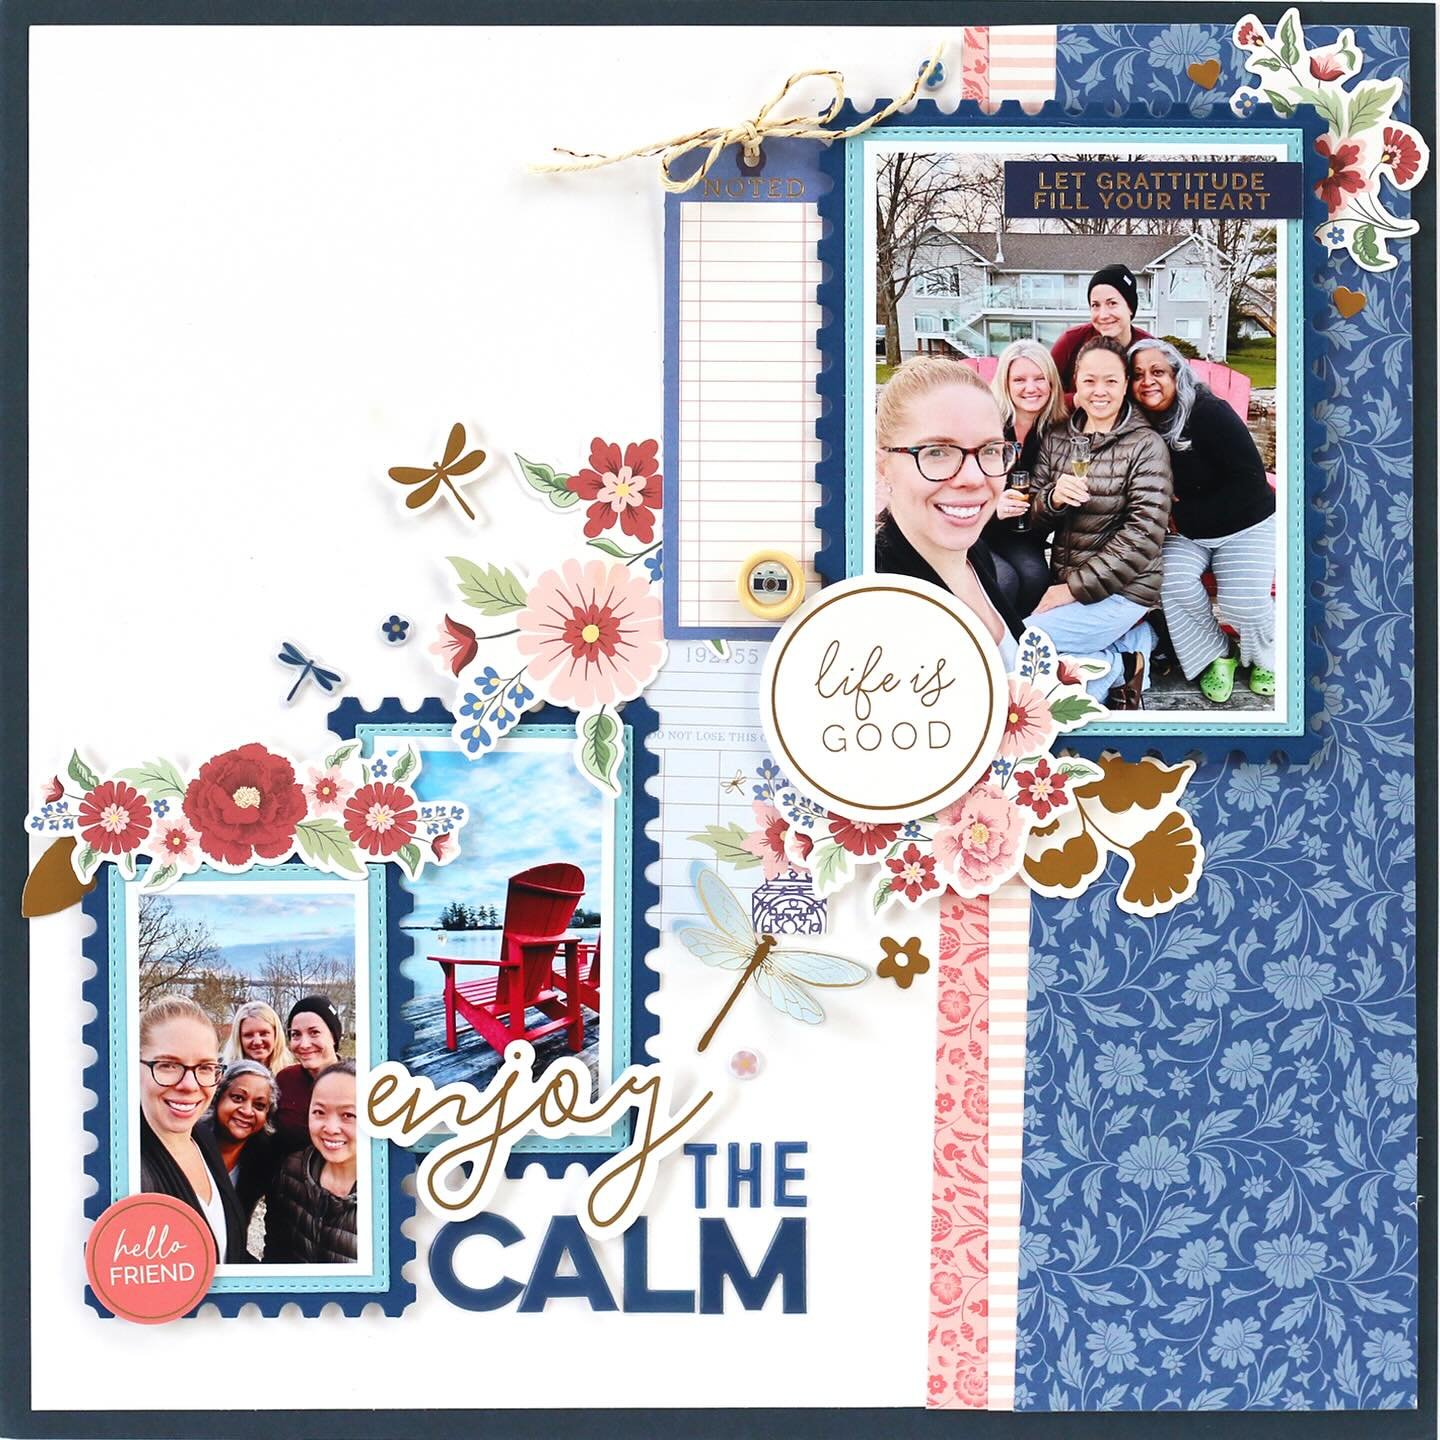
Another tool that really helps me conquer this year-long project is the This Life Noted kit from Scraptastic. I used the October TLN kit for this spread, along with bits and pieces from the Heart it Races kit

My first page was on the right side against June's final page, so I worked with the same colors. The 'be brave' wood veneer from the Heart it Races kit was perfect for the photo of Lizzy in the ER. 

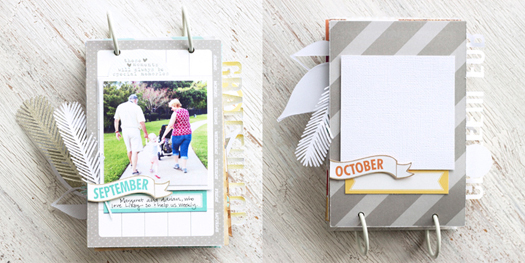
On pages two and three, I kept to a tomato-red color scheme with bits of green and light blue. The digital files available this month were perfect for adding little touches to my cards. 

'The details' on my 4"x6" card was stamped with the beautiful Heart it Races stamp set, I handwrote 'of' and added 'life' from the Crate Paper rub-ons, included in the kit. 

July was an awesome month, and I love this spread this project.


What We're Eating Wednesday: Tilapia with Mango Salsa

I'm always looking for new ways to use tilapia. Compared to other fish, its by far the most economical. It is also mild enough to pair with many flavor combinations. I buy my fish from Whole Foods, so I know that it is sourced responsibly, and not farmed in China. When I came across this recipe by doing a Google search for mango salsa, I knew I had to try it out, and it couldn't be any easier.


Tilapia with Mango Salsa (serves 2)
recipe adapted from this recipe
(make with brown rice for a full meal)

Fish:
4 tilapia fillets (the ones I buy are usually quite small, so I make two per person)
2 Tbsp. olive oil
1-1/2 Tbsp. grated orange zest
1/4 c. fresh orange juice (from one juicy orange)
1/8 tsp. crushed red pepper

Salsa:
1 mango, peeled, seeded and diced in 1/2" pieces
1/4 c. finely diced red onion
1 avocado, peeled, pitted & diced in 1/2" pieces
2 on-the-vine tomatoes, seeded and chopped
Zest and juice of 1 lime or 1 lemon
1 Tbsp. finely minced ginger root
1/4 c. chopped fresh cilantro
3/4 tsp. kosher salt

1. Preheat oven to 400 degrees F. In a shallow baking dish, combine olive oil, orange zest & juice and crushed red pepper. Pat the fish dry & place in baking dish. Turn to coat with ingredients. Salt and pepper both sides of the fish to taste. Bake for 10-12 minutes, until fish flakes easily with a fork.
2. While the fish cooks, combine all ingredients for the salsa and stir to combine. When fish is cooked, plate the brown rice, top with the fish & the extra olive oil mixture from the baking dish, then the mango salsa.

Enjoy!

Elle's Studio Grateful 2014 Mini Album

Every year, I work on at least one project about the things which I'm grateful for. From year to year, the list doesn't change much. I'm always grateful for my family, my friends, my home. This year, I decided to create something a bit different, and used Elle's Studio products to do so. 

This mini album includes 12 different pages to document the 12 months of 2014. For each month, I went through my photos to find a moment for which I was grateful. 


The outside cover is a was created with the Autumn wood veneer mini album covers, perfect for layering with paper, or for leaving plain. I chose to dress it up with the Sycamore Lane paper collection pack and October and Sycamore Lane digital cut files, which I lightly colored with watercolors.


The pages were created very quickly by keeping the same design layout on each page. A photo, month banner and journaling spot appear on each page, and I embellished with the amazing Elle's Studio cut files and Sycamore Lane Bits & Pieces. This is probably the fastest that a mini album has ever come together for me. 


January: A beautiful, thriving girl who beat all odds to be with us. 
February: An awesome brewery right down the road that we can visit with friends.


March: Family willing to travel to be with us.
April: The best birthday that I ever had, thanks to Simon.


May: A wonderful weekend in NOLA for Simon's MBA graduation.
June: The ability to travel abroad and see beautiful things.


July: My parents allowing us to join in on their vacation in Charleston. 
August: A date night, sans baby, to attend a wedding.


September: Margaret & Adrian, who love Lizzy so and help us weekly.


I've left the last three months blank so that I can quickly add my grateful photo and embellish to finish off the album. 

I know that this will be a cherished mini album to document all that I have to be grateful for in 2014. 

How are you documenting your gratitude this year?

Lovely Girl

Happy Friday! I have a quick post for you with a new layout to share, created with the beautiful Heart It Races kit, add-on and stamp set from Scraptastic Club. This is another favorite photo of my daughter that has been sitting on my desk for months. I knew that the beautiful bold autumnal colors in the kit would pair perfectly with it, even though the subject has nothing to do with autumn.
Journaling: Just an ordinary day with you, spending time playing on my bed- even Toby joined in. I wouldn't trade this time at home with you for anything.


This layout is very simple to make, even though it includes a lot of elements and may not appear that way (I love when that happens!). Here's how I created it:

1. Background: Cut out three folders from the Crate Paper folder patterned paper. Using a craft knife, cut slits in the bottom and top folder for your journaling cards and photos. I also cut along the tabs and distressed it a bit to give the folders a three-dimensional look. Adhere to the Chickaniddy Crafts Autumn Haze background paper, being sure not to adhere your pockets.
*Tip: If you love this paper and want to leave the bottom green section for another project, trim it off beforehand and just adhere your file folder paper to the bottom of the piece you just trimmed, being sure to keep to the 12" measurement. That way, you use every last bit of the paper! * 
2.  Journaling & title: Print the fox journaling card from the Heart it Races digital files and stamp 'lovely' using the Heart it Races stamp set. Using the Chickaniddy letters, add 'girl.' Cut out the square journaling card from the Shimelle patterned paper and journal. Tuck both cards into the bottom file folder with the yellow doily behind and adhere all pieces.
3. Photo: Layer a 4"x6" photo on top of the Pebbles Homemaker paper, leaving 1/4" around the edge. Insert into the top folder slit and adhere at a slight angle, adding dimensional adhesive at the top. Add the Teresa Collins 'my heart' border stamp along the bottom of the photo, along with the flair badge at the bottom left corner. Cut the 'noted' speech bubble from the This Life Noted digital files, add the date and attach to the right side of your photo with the Lawn Fawn paper clip.
4. Embellish: Add the Teresa Collins arrow border, wood veneer heart stamp and a sequin along the right edge of your title card. Fussy cut the Teresa Collins Flowers paper bunch, along with three small flowers. Slip underneath the left side of your photo and adhere with dimensional adhesive. Adhere two sequins near the flowers. Adhere the Teresa Collins 'love this' sticker on top of the flowers with dimensional adhesive. Add the three small flowers near the bottom right corner of the photo. Fussy cut the Chickaniddy flower banner from the die-cuts package. Stamp 'you're the bestest'. Apply a Teresa Collins banner sticker at the top left corner and adhere the Chickaniddy banner with dimensional adhesive directly to the right.

Once I had the idea for my layout, the process above only took about 30 minutes for me to pull together. I also cut out my digital files beforehand when my kit arrived so that I wasn't having to do it each time I created a layout. It's a great way to save some time, especially when you're working predominately during precious nap time!


Thanks for stopping by today, and be sure to check out this beautiful kit! I'm still loving every single bit of it.

Scraptastic September Projects

When I received my first Scraptastic kit after becoming a DT member, I was blown away by the amount of product included in the kits. They are so full of awesome paper and embellishments! The September The Girl kit (which is still available!) did not disappoint, and today I want to share my projects with you. 

'Date Day' was a layout I created for Pinterest Monday on the Scraptastic Blog documenting a recent date afternoon that my husband and I had- our first time hiring a babysitter! I love using Pinterest images to inspire a layout. It can be a great way to try something different and pull yourself out of a creative funk!

'C is for Cheeky' is a layout created for September's Sketchy Thursday on the blog, and may be my favorite this month. The clusters of embellishments created with rub-ons, stamps, die-cuts and wood veneer just make me happy.


'What a Fun Day' is a layout that features a photo of my Goddaughter that has been sitting on my desk for ages just waiting for this kit. I punched the stars from the background paper and popped them up, putting glitter paper behind them. For more info and some closeup photos, check out this post on the Scraptastic blog.


My June project life spreads are my favorite so far in my album because of the September This Life Noted kit. For more info about my spreads and the process, see this Scraptastic blog post

Scraptastic also has a brand new online store featuring the latest and greatest scrapbooking supplies. Be sure to check it out as well as the awesome monthly kits!