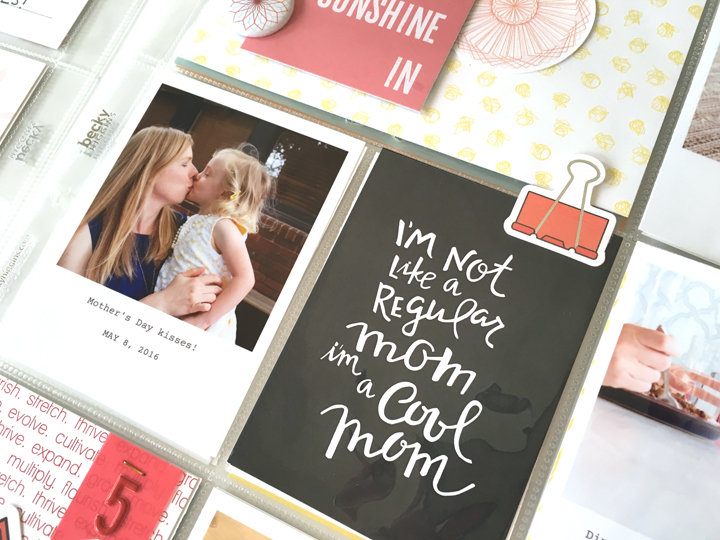
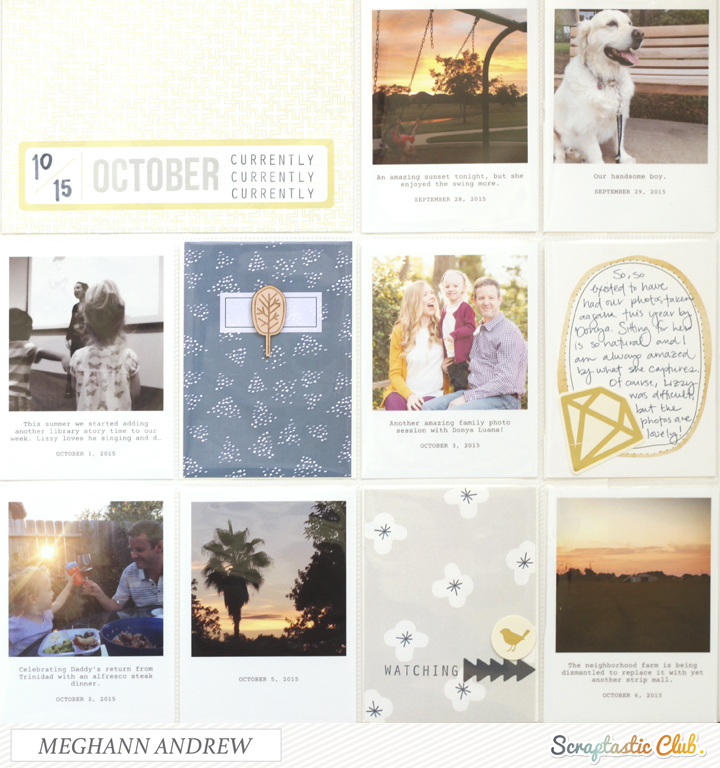
Scraptastic Club Farewell: Capture Beautiful You

This week, I'm wrapping up my May kits from Scraptastic Club, which means I had to create another layout with the Cake by the Ocean kits (both sold out, but check out the contents here.)

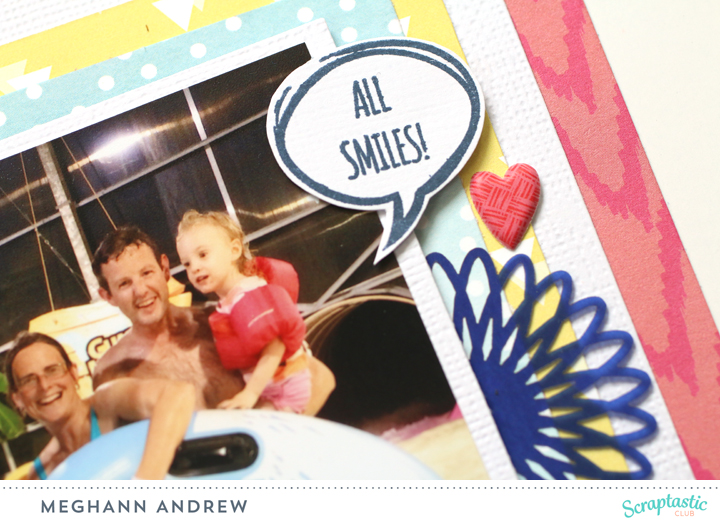
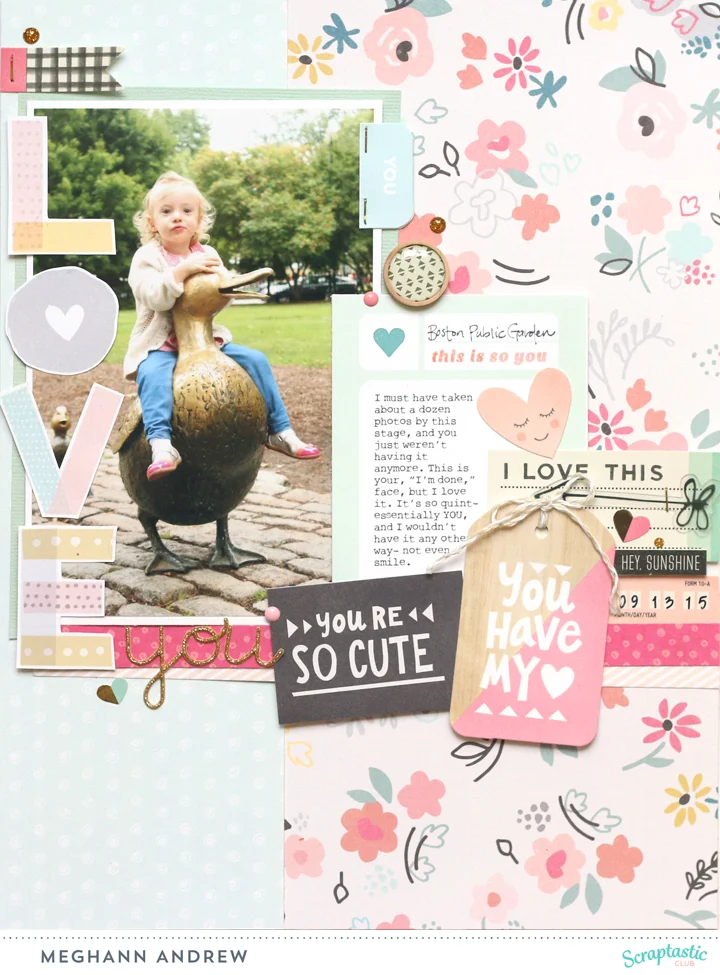
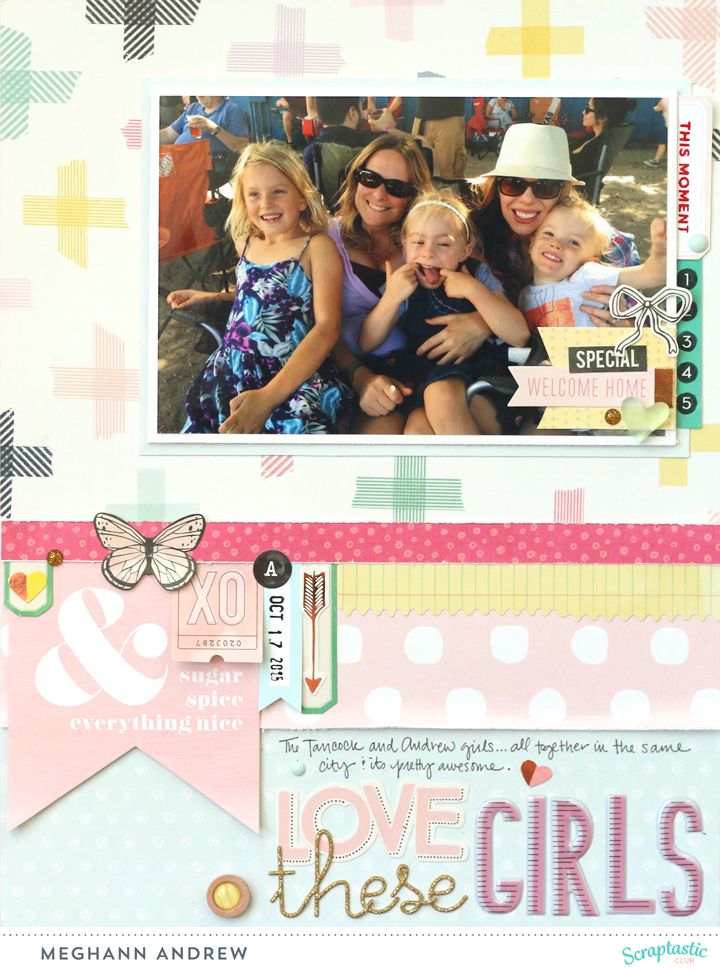
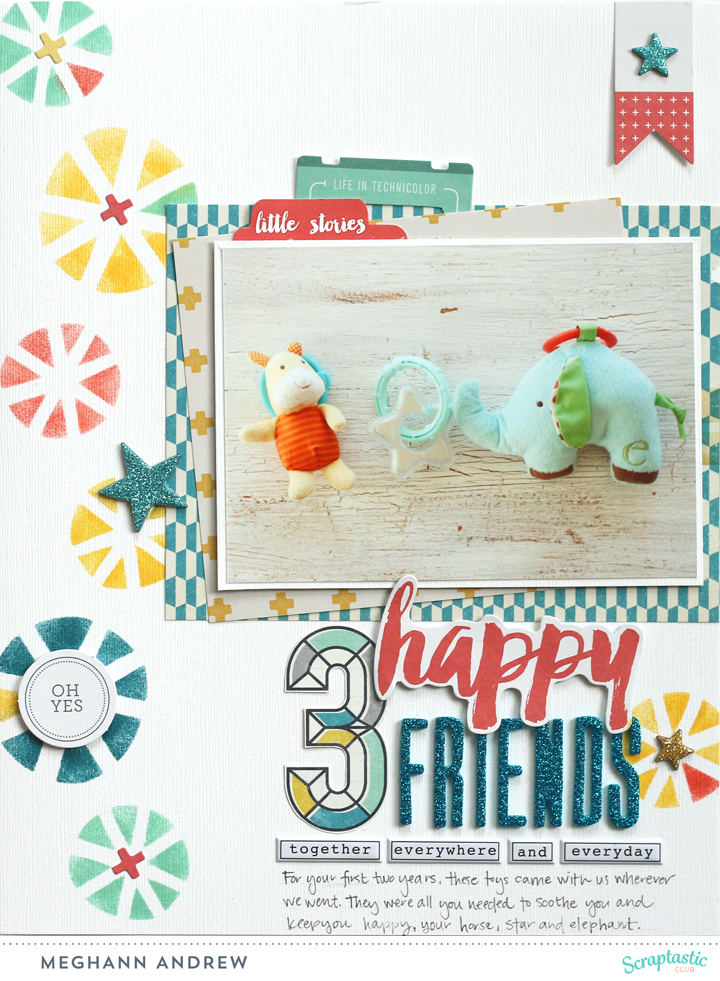
This beautiful photo that I took of my goddaughter last fall was just screaming to be documented with these kits. The bright colors in her dress deserved bright products, too.

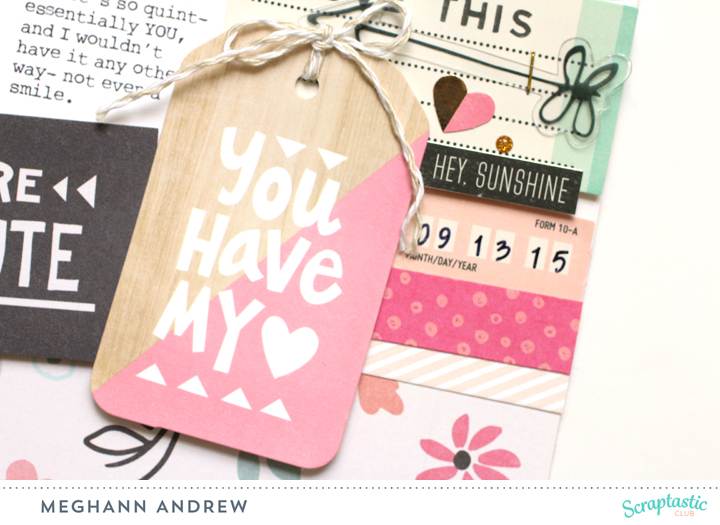
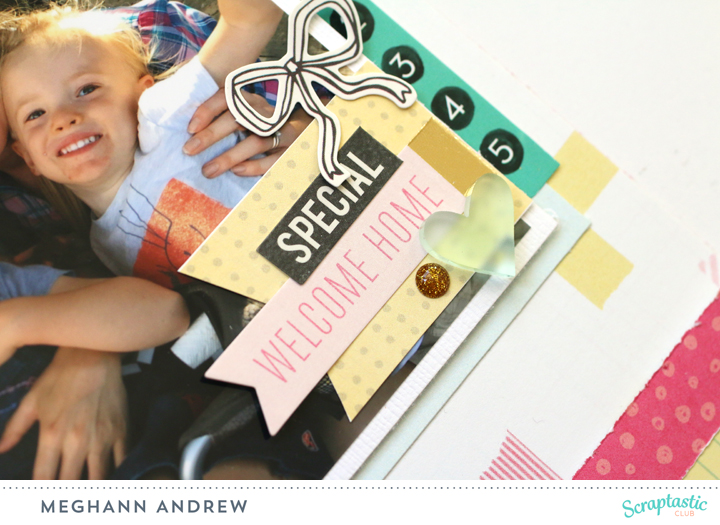
These kits were full of the Fancy Free collection by Paige Taylor Evans and Pink Paislee, and the exclusives, like this star die-cut and those fun circles, worked so well with the collection. 

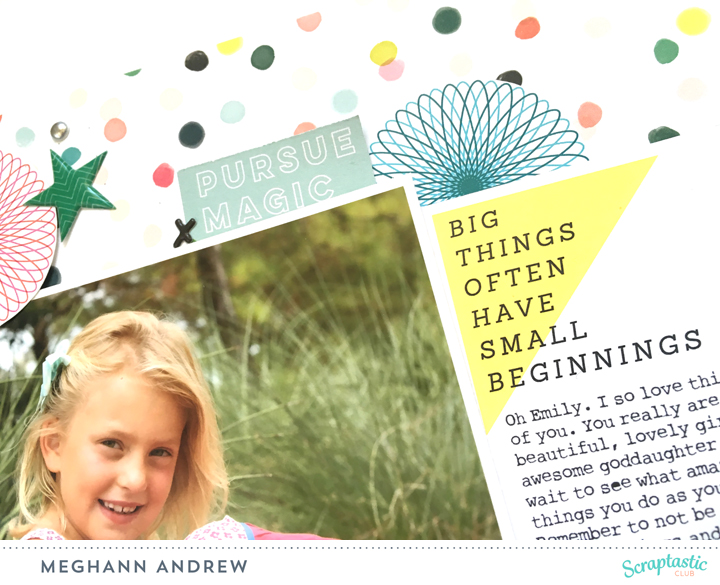
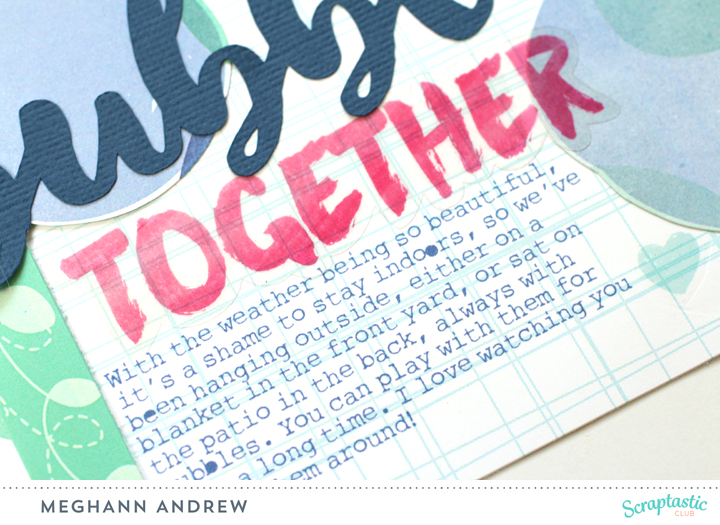
For my journaling, I pulled a card from my May 2016 This Life Noted kit. The "big things often have small beginnings" saying was perfect for her. 

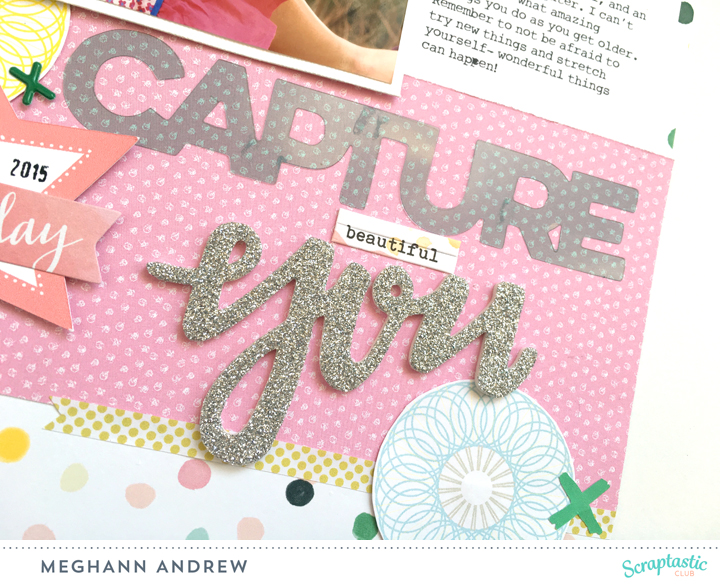
As I typically do to make things a bit more interesting, I used three different elements for my title- Pinkfresh Studio's acetate words and word stickers, as well as the glitter Thickers from the Fancy Free collection. Using the tone-on-tone pink dot paper behind my title helped to ground it and make it stand out more.

With this layout, I say goodbye to Scraptastic Club. I've been designing with their fabulous kits for almost two years now, and I felt that it was time to lighten my load and make a bit of a change this summer. I'll be watching their fabulous design team create beautiful projects in the future, though! 

Thanks for stopping by and have a safe and happy 4th of July weekend!

Documenting May

No matter how many traditional layouts I create, I still LOVE my monthly pocket page spreads. They allow me to get so many more photographs in my album which I don't have time to create layouts for, and document a huge portion of our daily lives as a family. 

For the month of May, I got to work on my Project Life spreads, using the May 2016 This Life Noted kit and add-on from Scraptastic Club.

I started off with a double page spread, using a red, pink and yellow color scheme. The majority of my journaling was done with the Collect App. I kept my pockets fairly simple, using die-cuts from the kits, and filling a lot of spaces in with the This Life Noted stamp, included in the kit.

This month included Mother's Day, so of course I had to include the "cool mom" card in my spread!

Spread two for the month has a blue, teal and yellow color scheme. Using yellow on both spreads ties them together, even though they have very different color schemes.

There were so many fun embellishments included in the kits this month! I especially loved the Project Life Currently Ephemera included in the add-on. The little cameras were perfect for adding a little something to my cards.

To add a bit of a title to my spread, I used the Fancy Free Thickers from the Cake by the Ocean kit (sold out) on my 4" x 6" card.

Page 5 again uses yellow, but with just teal this time. I used very simple embellishments on this page, but I love how it all turned out. I will use the same color scheme for the beginning of June, which will go to the right of this page.

Thanks for stopping by! How are you doing with your pocket page album? So far, I've been able to keep up, with help from the Collect App and my Scraptastic Kits! 

New "Off the Cuff" Video: Happy Hikers

Join me for video three in my "Off the Cuff" series, where I start with a kit and a photo, and make all of my design decisions on camera! In this video, I will be creating this layout with the Eloise kits from Scraptastic Club:

I've been getting a lot of feedback on these "Off the Cuff" videos, so let me know what you think after watching! 

Thanks so much for stopping by and for subscribing to this blog and my YouTube feed!

Scraptastic Club Eloise Kits: Water Park Fun

Working with the bright and colorful Eloise kits from Scraptastic Club requires a fun, happy photo to document, so I pulled one from a fun trip to a local water park last fall. 

Supplies: Eloise kit, Eloise add-on (sold out), Cherry Pie stamp set, Eloise digital files.

This simple layout came together quite quickly with a colorful scheme, inspired by the Pinkfresh Studio heart paper that I placed at the bottom of the layout. I decided to use the bright pink, light blue and yellow for the other patterned papers against the white background.

The Cherry Pie stamp set is so fun, and I used this stamp with the speech bubble here, and again at the bottom of my layout without the speech bubble on a navy label from the Eloise digital files. The majority of the embellishment came from the Amy Tangerine Better Together collection, and the fun themes and bright colors fit right in to this layout. 

I'm just about to wrap up creating with this kit, but I'll be back later in the week to share one more, bright and fun layout! Thanks for stopping by!

Scraptastic Club Eloise Kits: Backyard Bubbles Together

I am loving the bright, bold colors in Scraptastic Club's Eloise kits from April 2016. The kits feature a lot of Amy Tangerine's Better Together collection, which I love! I recently took a favorite  photo of my daughter in our backyard blowing bubbles, and the colors in the photo worked perfectly with this kit. Not to mention, that I'm pretty sure that Kaitlin Sheaffer, who designs the exclusive patterns for Scraptastic, must have peeked into my photos to create the perfect pattern for me!

Supplies | Eloise Kit, Eloise add-on (sold out), Cherry Pie stamp set, Eloise stamp set, Eloise digital files.

As soon as I saw the blue and teal bubble pattern, I knew that I wanted to scrap this photo. I lined up the pattern on the left side of my 8-1/2" x 11" background pattern, also a Scraptastic Exclusive, and then cut out three bubbles to place along the right side.

On the negative space in my photo, I had to use one of the sentiments from the Cherry Pie stamp set, and to the right of it, I placed my main embellishment grouping. I loved the Better Together clear stickers fro the main kit, and backed one on cardstock to place at the edge of my photo. 

I also couldn't resist stamping and watercoloring the cute little house from the Eloise stamp set. At this stage, my layout was only blue and teal, but painting that little door pink gave me just the pop I needed and prompted me to add a couple more spots of pink. 

By cutting "together" from the "better together" clear sticker, I added another spot of pink and the second word for my title. The word "bubbles" was cut from my Silhouette Cameo.

What fun kits these are to play with! On Saturday, I will have another layout and video tutorial up on the Scraptastic Club blog, so be sure to watch for that! Thanks for stopping by! 

Sweet Child of Mine Kits: Love You

Today I have one more layout to share with you using the Sweet Child of Mine kit (sold out) and girl add-on (sold out) from Scraptastic Club. This layout documents a favorite photo from our trip to Boston last September, when we visited the Boston Public Garden, and this momma wanted a photo with the Make Way for Ducklings statue.

I wanted this 8-1/2" x 11" layout to be girly and playful, just like my photo, and these kits were perfect to achieve that. 

To balance out the bold pattern on the right side of the layout, I placed my photo on the left side, and cut out the fun "love" word from one of the Crate Paper Little You papers included in the add-on kit, and adhered it directly to the left side of my photo. I created a shelf across the bottom of my photo with two strips of patterned paper that started the base for a large grouping of embellishment. 

The "this is so you" stamp from the Drops of Jupiter stamp set was absolutely perfect for stamping onto my journaling card, since this photo of my daughter is so totally her! 

Thanks for stopping by! Don't miss another fantastic Scraptastic Club kit- subscribe today

Scraptastic Club Sweet Child of Mine Kits: Going Home

So far with Scraptastic Club's Sweet Child of Mine kit + girl add-on, I've documented photos of my daughter as a toddler, and a girly photo, but I had yet to use the kits for and baby photos. That had to change, so I printed a photo of Lizzy's first car ride on the day we took her home from the NICU.

The majority of the pattern in this layout comes from Crate Paper's Little You collection, which make up a lot of the kits and are so lovely for scrapbooking those sweet baby moments. I wanted the layout to be a bit whimsical, and it was easy to achieve that look with these kits, which included the cute little animal stickers, flair, and sweet vellum clouds, one of my favorite exclusives this month. 

The "itty bitty" cut-apart tag from the girl add-on was so perfect for this layout, as we were able to take my daughter home at 34 weeks, adjusted, so she still only weighed about 5 pounds. It also added the perfect pop of yellow to the bottom corner of my photo.

Is there anything cuter than these Crate Paper Little You clips? I think not! This sweet little embellishment grouping balanced the other group in the bottom corner of my photo, and hid the unsightly "warning label" from the photo of the carseat. Win-win!

I added my journaling directly onto a piece of patterned paper- one that wasn't too busy so that it would be legible. While typing my journaling in PSE, I made sure to leave a small space for a few more embellishments, using a sticker tab from the Maggie Holmes Bloom accent stickers in the main kit, as well as a print and cut label from the Sweet Child of Mine digital files. Those things are SO versatile! 

Thanks for stopping by! I hope you have time to push some paper around this weekend! 

Scraptastic Club Sweet Child of Mine Kits: Love These Girls

When I received my Sweet Child of Mine kit and girl add-on from Scraptastic Club last month, I initially thought that I would have to pull out baby photos to make the colors and phrases work with the kit. However, this week, I challenged myself to use some photos that I already had printed and on hand, and I was excited at how versatile these kits were. They're not just for baby photos! 

Since I received the girl add-on, (a boy add-on is available too!) this photo of me with my friend, daughter and goddaughters was perfect to coordinate with the kit. The photograph was already printed in color, so a colorful layout was in order. The Maggie Holmes plus-sign paper in the girl add-on was my starting point for the page, and I based the other colors that I chose from it. 

The big "sugar and spice" pennant was actually a cut-apart 3" x 4" tag from the girl add-on, and there was enough room at the bottom to cut the triangle out and form a pennant. Not only is this a design element in itself, it also grounded the other smaller labels, tabs and pennants that I added next to it. 

To balance out the large embellishment grouping on the left side of my page, I decided to add another grouping to the bottom right corner of my photo. I couldn't resist pulling a few stickers from the Amy Tangerine Better Together sticker book, located in the March 2016 This Life Noted kit, just because I wanted to add a bit more yellow and green to the page. The green "1-5" sticker is from that book, as is the yellow notebook strip sticker. I also had to get a stamp on the page, so I chose to stamp "this moment" from the Drops of Jupiter stamp set onto a printable label. (If you subscribe to the kits, these digital files come free with your kit subscription!)

So I guess the moral of the blog post today is to not take something on face value! Be sure to look at your kit from different angles to get the most use out of it! Have a great day!

Off the Cuff Video Series: Little Sunshine

Hi there! I'm really excited to bring you video two of my "Off the Cuff" video series where I design an entire layout on the spot, and you get to walk through my decision making process, as well as my hesitation! This month, I'm working with Scraptastic Club's Sweet Child of Mine main kit, digital files and stamp to create a new favorite layout about my daughter's happy moment during story time at our local library.

The lovely, peach vellum bag that I included on the layout was actually part of the kit packaging, but I couldn't resist pairing it with the lovely teal patterned papers from Crate Paper's Little You collection, included in the main kit.

It could be that the colors in the kit were made for me, but I had such an easy time putting this layout together. The entire process took me about 30 minutes, but I've reduced that time a bit in this video, so put up your feet for a few minutes and grab a cuppa to see my complete process:

Thanks so much for joining me today. If you like my video and want to see more from me in the future, be sure to follow my YouTube feed for more in my Off the Cuff series next month! Have a great weekend!

Scraptastic Club Sunday Morning Kits: The Sweetest Friends

I just received my Scraptastic Club March package in the mail, so I'm busy playing with the Sweet Child o' Mine kits! Until I have something to share from the new kits, I'm here to show you another layout created with the February Sunday Morning kits: The Sweetest Friends.

Supplies | Sunday Morning kit, Sunday Morning add-on, Sunday Morning stamp set, February 2016 This Life Noted stamp set.

I absolutely loved the pennants in the Sunday Morning stamp set, and wanted to base my layout design around them! Instead of hanging them across the page horizontally, I decided to hang them vertically like flags, and use other pieces from the kit to add in some different elements. 

Since I had such a bold black polka-dot paper on the right side, I wanted to echo that black on the left side of the page and stamped the outside of my pennants with black ink. Other pieces from the We R Memory Keepers Crush accent stickers and Crate Paper Hello Love chipboard stickers filled in the spaces between the pennants, and I stamped heart outlines from the February 2016 This Life Noted stamp set directly onto the Crate Paper woodgrain print from the main kit to crate my own tiny embellishments.

A 3" x 4" card from the cut-apart sheet in the add-on started my title, and I added the word "friends" from the Amy Tangerine Better Together Thickers just below it, adding a little strip of colored paper from a manufacturer's strip under the word to help it to stand out against my photo. I printed my journaling directly onto the background patterned paper, placing it just below my title. 

I love this sweet layout about my daughter and her bestie, and it came together so easily with the Sunday Morning kits! Thanks for stopping by! 

Scraptastic Club February Sunday Morning Kits: So Much Love

I'm still working with the February Sunday Morning kit and add-on from Scraptastic Club, and I just received the notification that my March kits have shipped, so I'd better get on and share these with you, huh?

I struggled to figure out what to do with the Crate Paper photo frames paper in the kit. These lovely little squares are so great to look at, but when used them as a background on a layout, they completely took away from everything else. So, I decided to take a deep breath & cut each one individually! 

After cutting the squares out, I decided to arrange them in a shape, and since this month's kits are all about love, I decided to create a large heart, and sewed a heart shape around the outside.

I didn't want to throw too much embellishment on the heart, but I added a small cluster to the upper right side. I also added tiny stamped hearts from the February This Life Noted stamp set. 

This is one of those layouts where I don't have much to say in my journaling, but I wanted to get this favorite photo, taken by Donya Luana, printed and on a layout. I don't feel that you have to write a novel on every page.

I'll be sharing the rest of my Sunday Morning kit and add-on layouts here over the next few days. In the meantime, be sure to check out Scraptastic's March kits in the shop! 

Off the Cuff Video Series: Be You

Have you ever had a photo that just seemed like it was "made" for a certain kit or scrapbooking product? That's how I felt putting together this layout with the Just a Girl kits from Scraptastic Club

This layout was so fun to put together! Want to know why I did what I did? Check out my YouTube feed for the process video in my new series: Off the Cuff. In these videos, which I hope to do once a month, I will show you my process from start to finish, on a layout that I have not designed beforehand. I just have a photo and a kit, and I'm starting without a plan in mind! 

So, if you have about 30 minutes to spare, grab a cuppa and join me for Off the Cuff: Be You. 


Color-blocking with Scraptastic's Just a Girl Kits

I'm still enjoying the lovely January 2016 Just a Girl kit & add-on (both are sold out, but click on the links to see contents!) from Scraptastic Club, and today I'm here to share a new layout with you that utilizes a fun technique: color-blocking! 

I absolutely loved the background paper from Studio Calico, and wanted to use the four different triangles of color as a starting point in designing my layout. 

There were so many pieces of embellishment in the kits to be able to create a color-blocked design, keeping the pink embellishments in the pink triangle, the yellow embellishment in the yellow triangle, and so on. The 'live out loud' sticker was absolutely perfect for the photo of my daughter shouting during our family photoshoot last fall. 

To make my photo stand out, I backed it with a Scraptastic exclusive black painted stripe patterned paper and adhered it with dimesional adhesive.

EnjoyMoments_closeupblog.jpg

The white triangle was the most difficult to fill. Using a 3" x 4" journaling card from the cut-apart sheet, I cut off the colored top and kept the white polka-dot bottom. I typed my journaling in a light grey instead of black & embossed a '3' from the Just a Girl stamp set in the bottom corner. A few Project Life chipboard pieces, a speech bubble cut from patterned paper and an enamel heart later, I was finished.

If you don't have the Just a Girl kits, or the Studio Calico patterned paper to create this quadrant-designed layout, it would be easy to duplicate with four triangles of cardstock or patterned paper! Happy creating! 

Scraptastic Club 'All of You' Kit Layout: 3 Happy Girls

I'm just finishing up with the "All of You" kits from Scraptastic Club before I break open my new January kits, and I have a new favorite layout to share with you today! 

I broke down and used one of my favorite papers in the "All of You" add-on, the yellow Maggie Holmes background paper. I wanted this layout to look different than all of the others that I created with these kits, so I decided to keep the color pink to a minimum, and emphasize yellow, teal and navy. 

All of this color was perfect for this black and white photo booth photo strip taken while a good friend was visiting from the U.K. To create my title, I hand-cut the "3" from the Maggie Holmes number paper in the "All of You" main kit, and paired it with the Fancy Pants Happy Place script word puffy stickers, which were a shop add-on for December, as well as the Fancy Pants Happy Place alphas & numbers die-cuts in the "All of You" add-on.

The Pink Paislee Cedar Lane arrow was a perfect embellishment to add in my title and added a small touch of pink.

I love printing out the kit digital files every month to add to my stash, ready to add to a project. The "no.3" and "love it here" tags were printed from the "All of You" digital files, and the exclusive flair badge finished off the corner.

That finishes it off with my "All of You" kits. To see the other layouts I created with the kit, check out my gallery link at the top of the page & keep a look out here for my projects using the new January 2015 "Just a Girl" kits! 

Scraptastic Club 'All of You' Kits Layout: Fro-Yo Time

Hey there! The end of the year is near, and I'm creating my final pages of 2015, although, we've made so many memories this year that I could document them through 2016! Today I'm here to share another layout using the Scraptastic Club December 2015 'All of You' main kit + the add-on

How fun are these kits, right? I LOVE this photo of my daughter eating her favorite frozen treat in her Halloween costume, and it was just waiting for some fun product to match it with. 

I used the transparent overlay from the Maggie Holmes Shine collection over the watercolor Studio Calico paper, which made it super easy to print my journaling directly on the background paper before adhering the polka-dot overlay.

FroYo_closeup2.jpg

My initial idea for this layout included the numbers cut from a piece of the Maggie Holmes Shine paper included in the main kit. I love the color and playfulness they add to the layout.

In addition to the main and add-on kits, I also printed the 'All of You' print and cut digital page and used the 'hooray' tab. The 'hers' 3" x 4" card came from the December This Life Noted kit. I also had to use the awesome exclusive word puffy stickers to add 'time' to my title.

So that's another favorite memory from 2015 in the books! I'm working on knocking out a few more layouts using the 'All of You' kits before we ring in 2016 and start a whole new year of memories! Thanks for stopping by! Check back tomorrow for a look at all of the layouts I have created this year, and a re-cap of a few of my favorites! 

Scraptastic Club 'All of You' Kit Layout: 3 Happy Friends

Help there! I am trying to get back into the swing of things after a long break from scrapbooking to visit Disneyland, then my parents house for Christmas! Whenever I take a break, I feel a bit rusty pushing paper around for the first time, but the 'All of You' main kit from Scraptastic Club helped me get right back into my groove.

Here's the layout I created. Although the kit seems to include a lot of pink, I created a layout without a touch of it to coordinate with the colors in my photo.

I've had this photo of my daughter's three favorite infant toy sitting around for quite some time, just waiting for the perfect supplies. Putting them up in the attic for storage was hard for me- it meant that I no longer had a baby and had a little girl. Before I packed them away with the other infant supplies, I snapped a photo of them on our breakfast table. These were the toys that were always on the diaper bag, the ones that she always reached for and played with while teething, while riding in the car, etc.

To create this layout, I used the 'All of You' main kit and the word puffy stickers, an add-on item for December. I loved adding them underneath my title. 

When you subscribe to the club, you get a member exclusive every month, and this month it was a fantastic pie shape stencil. I used my inks and foam daubers to add these shapes along the left side of my layout, and one by my title. I love the playful nature it adds to the page. 

I'm a big fan of making things work, so when I was looking for a folder tab to put at the top of my photo, I noticed this exclusive rectangular tag in the kit. It was exactly the color and sentiment that I needed, so I just trimmed it to the tab shape with some scissors. It was the perfect addition to my page.

I love that I've documented these toys that mean so much to me, and the 'All of You' kit was just perfect for doing that. Thanks for stopping by! Be sure to stop back before the new year to check out my favorite layouts from 2016! 

Scraptastic Club "Feels Like Home" Layouts

Since it's the last day of the month, I wanted to share my November "Feels Like Home" kit layouts from Scraptastic Club!

"The Best Day" supplies | Feels Like Home kit, Feels Like Home add-on, Feels Like Home digital files, Ain't No Sunshine stamp set

This layout was actually created for the Sketchy Thursday blog post, but as it was the week of Thanksgiving, I completely forgot to post it to the Scraptastic Club blog! Here's a look at the sketch: 

Hey Turkey supplies | Feels Like Home kitFeels Like Home add-onFeels Like Home digital files, This Life Noted November 2015 digital filesNovember 2015 This Life Noted kit

This fun layout documents a Thanksgiving craft that my daughter created, with my help. I love adding in bits from the This Life Noted kit and digital files. 

"Girlies" supplies | Feels Like Home kitFeels Like Home add-onAin't No Sunshine stamp set, Feels Like Home stamp set

This cute layout was featured on the Scraptastic Club blog as a challenge to use two 4" x 6" photos on a layout. 

"Just Play" supplies | Feels Like Home kitFeels Like Home add-on, November 2015 This Life Noted kit

This layout, which turned out completely different from the rest (I love how you can get such a different feel from the same kit!), was shown in a previous blog post. Check it out for more info! 

Thanks for stopping by. Be sure to check out all of Scraptastic Club's kit subscriptions for more info! 

Scraptastic Club Feels Like Home Kits: Just Play

Every month, I go through my Scraptastic Club kit and begin to create layouts, but for my first few layouts, I use the same colors, and in this case, my first three layouts created with the Feels Like Home kit and add-on (sold out) have a fall-like feel. So, for my next layout, I decided to switch it up and really show the versatility in the kit by creating a bright, sunny layout.

The exclusive papers this month, designed by Kaitlin Sheaffer, were some of my favorites from the entire year! On this layout, two of the three (the yellow and teal) are exclusives. The journaling tag, cut from the exclusive cut-apart sheet in the add-on, is something I look forward to every month.

The title was created with the Elle's Studio grey alpha stickers and the "play" wood veneer from Freckled Fawn.

My embellishment from the main kit included the vellum leaves and acrylic arrow. From the add-on, I used flowers and leaves cut from the Pink Paislee Cedar Lane floral paper, and the Heidi Swapp word bubble. From this month's This Life Noted kit, I added enamel dots, a washi tape circle from the Pink Paislee Cedar Lane washi book, and the star strip cut-apart. 

To finish off my layout, I printed my journaling on the exclusive cut-apart journaling tag and tucked it in between the patterned paper layers. All in total, the layout took me about thirty minutes to complete.

Thanks for stopping by! 

October/November Project Life Spread

I have to say, every time my This Life Noted kit from Scraptastic arrives, I'm so excited to flip through the cards to see what color combination I can use on my next spread! What's even more exciting is when two different kits coordinate to create a fantastic spread, like with the October (sold out) and November TLN kits.

This spread documents the end of October and beginning of our November, so I felt it was appropriate to mix both the October and November kits, and uses a gold, orange and teal color scheme. I really wanted to use the big pumpkin 3" x 4" card for our Halloween photo, and I stamped it with the This is Halloween stamp set from October.

My favorite card in the spread is this 4" x 6" leaf card from the October kit, which I added teal watercolor to, to tie into my color scheme. I also stamped "I want to remember these moments" with the November Ain't No Sunshine stamp set.

The right side of the spread continued the color scheme, as well as the watercolor and painted effects that I loved with both of these kits.

The exclusive embellishments in this month's kit were fantastic, especially the puffy stickers, which are also available a-la carte in the shop

It's crazy to think that with a few more spreads, this year will be completely wrapped up in my album! Thanks for stopping by & happy Wednesday! 

September - October Project Life

Life is super busy lately. If you missed my announcement on Instagram, I have an upcoming class in January at Big Picture Classes that I am hard at work on. With that added to the things that I already have going on, as well as general life, I'm finding the need to keep my Project Life pages simple even greater at the moment.

On this spread, which highlights the end of September and beginning of October, I used the October This Life Noted kit and stamp from Scraptastic Club.

Every month when I open my TLN kit, there are so many possibilities for a color scheme on my spread. This month, I chose navy, citrine yellow and grey. I love how clean and modern it feels. 

Left_blog.jpg

I completely allowed myself to have a few filler cards this month with minimal decoration, but I made up with it by adding more journaling to a couple of cards, like the "book review" card, and another which I made my own by stamping "enjoying" on a cut-apart and pasting at the top.  

With the switch to October on the right side of the spread, I created a new month card with the stamp and some grey alphas included in the kit. I put minimal decoration on this page again, just to keep the process quick and simple. 

That's it! Another spread in the books. It's amazing that I'm almost finished with my second year on this project, and I'm loving it more and more every month! 

Thanks for stopping by!