Shimelle collection sneaks & a giveaway!


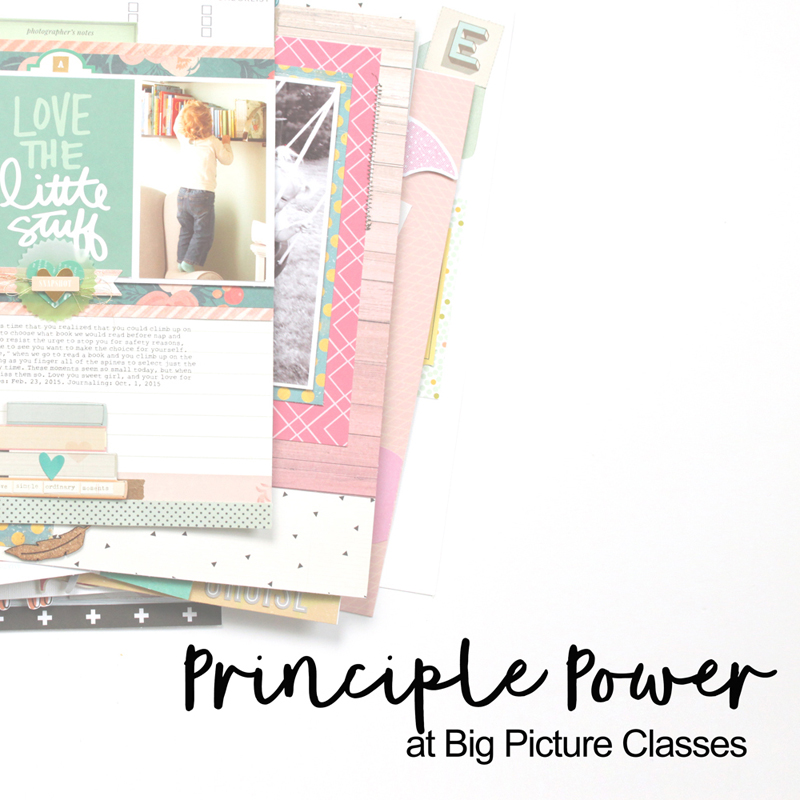
I'm guest posting on Shimelle.com today with 5 ideas on how to use the Shimelle collection metal dies. I'd love for you to hop on over and check out my post!

Also, the link to my watercolor tutorial video didn't get on the Shimelle post, so if you're interested in checking that out, please go here.

Once you've done that, come back here and leave a comment for a chance to win the beautiful gold glitter 12"x12" album from the Shimelle collection! (Giveaway open to U.S. residents only, please, due to shipping costs overseas.)

Scraptastic This Life Noted November

I'm happy to say that I'm caught up all the way through August in my Project Life album and using the November This Life Noted kit from Scraptastic is making me love this process and especially my August spreads so much!


For my first spread, I used a predominately red color scheme, accented with teal, yellow and green. I love the little bits and pieces that came with the kit this month, and I also love the digital files! The 'our story' tag on the month card came from the Shake it Off digital files, and they really stretch your stash. I also stamped the 'love your smile' tag using the TLN stamp set this month


The opposite side included a bit less embellishment, but carried the same color scheme across.


My second spread is my favorite for August... possibly for the entire year. I love the muted teal, orange and green colors in the tags as well as the embellishments. Although it is sold out, I love, love, loved the Shake it Off stamp set this month and I used the 'this is what matters' phrase to fill in the tabs of the file folders at the top. The 'look how far we've come' card also couldn't have been more perfect next to the photo of Lizzy in therapy. She's come such a long way this year!


The opposite page has the awesome, 'I am very busy' card, and I love that I used it right next to the picture of Lizzy dusting. I embellished the beige card at the bottom left with stamps from the Shake it Off stamp set and also added the cute cutlery stamp from the Sentiments Series V.2 stamp to the 'goodness' card. 


Here's a look at my three favorite cards from my layouts this month. Nothing over the top, just some simple stamping and applying rub-ons and wood veneer. 

I just received my December This Life Noted kit and I know that September will be a fun month to document too, however, November's kit is still available, so if you're loving what you see in this post, be sure to grab one up before they're gone.


Scraptastic November Layouts

The November kit from Scraptastic, Shake it Off, is my favorite kit so far, and I loved working with it. The bright yellow, coral, muted teal and metallic gold color scheme, and pretty, feminine touches really suited my style. I'd like to share my projects with you using the kit (still available!) and add-on (sold out).
'My Heart is Full': The Shake it Off stamp set (sold out), helped me create this spotted background on this layout- which is my favorite from the month. I kept it very simple and used a black and white photo for lots of contrast.


'Read': The 'storyteller' themed paper and cards in this kit really inspired me to create this layout about Lizzy's love of books. I used the TimerCam app to get this photo back in January and I'm so glad I did. 

'Enjoy These Days Together': This layout records a moment during our trip to New Orleans in May- and my favorite photo from the trip in Audubon Park. I wanted to do something different on this layout & decided to create origami hearts from the patterned paper in the kit. I love the way it turned out- exactly as I had hoped it would. 

'And Then There Were Pumpkins': My last layout for the month utilized the strips of patterned paper leftover in my kit. I got a little 'artsy' on this layout with embossing paste (which I colored with ink spray) and used one of the Jillibean Soup Mini Placemats in the add-on kit (sold out) as a stencil. My favorite part of the layout is the title and journaling area, where I separated my title from my journaling by stamping sentiments using the Shake it Off stamp set (sold out). I also added a pumpkin banner at the bottom using the Free Fallin' stamp set, the other kit offered this month.

Thanks for stopping by. Stop by tomorrow, when I will be sharing my monthly layouts using the November This Life Noted kit

The Great British Baby Shower

With five of my friends expecting in our British mum's group, I thought it was necessary to throw a big baby shower brunch. Okay, I know what you're thinking. I'm not British, but I joined an ex-patriate group so that my husband could meet fellow Brits. Since he works, I'm the one who does most of the socializing, and they very nicely accepted me into their group. All of my local friends are British, and lovely, lovely people.

So, back to the baby shower. It seemed appropriate that I make the shower British in some way, so I decided to make it a Paddington Bear theme, however, with very little Paddington Bear decor available, it became a British/Paddington Bear shower. I couldn't have been happier with how the party turned out & I'd love to show you photos from the day.

When you walked in the front door, the entry table was decked out with a vintage Paddington Bear, borrowed from a dear friend for the day, Union Jack flags and bunting and a Paddington sign that I created and cut out with my Silhouette Cameo. The favors were also on this table, so that the girls could grab one on their way out. 

I had a local business,

Carrie's Kitchen

, create custom cookies for the favors. They were so lovely, I [almost] didn't want to eat one! 

In the kitchen and living area, we hung Union Jack bunting and cute British baby clothes on a clothesline, which also doubled as a memory game. 

I pulled globes out of Lizzy's room, and paired them with a Paddington book and teacups.

Over the kitchen island, I paired some Martha Stewart red pinwheels with handmade map-print pinwheels created from patterned paper. Behind them, I hung a large Union Jack scarf.

On the island, I raised Paddington Bear up on a borrowed Union Jack box and pulled decor from around the house, like a teacup, map print candles and a red and white plaque.

On the buffet, I served two breakfast stratas, a smoked salmon plate with bagels, a cheese plate, muffins and scones. For dessert, I made an orange and raspberry trifle, complete with a blueberry & raspberry Union Jack on top.

And what kind of British party would it have been without tea?

On the mantel and in the entryway, I hung bunting with alternating Paddington faces (cut from my Silhouette) and red tissue paper tassels. 

One of my favorite pieces of decor that I made the night before were these large Paddington tags that I hung from the ceiling fan, along with more Union Jack bunting. Each mum-to-be took their tag home as a keepsake from the day.

I love throwing a party, especially one that includes mimosas. 

Thanks for stopping by! 

What We're Eating Wednesday: The Best Blueberry Scones EVER

I am a huge fan of scones. I love making them, I love eating them. Making them because, well, they're so simple and eating them because, let's face it, they're crispy on the outside and warm and soft on the inside. In one word, 

delicious

.

I make a few different scone recipes around here, but this one is my most loved. I made two batches for a baby shower brunch this weekend and they were the first item to disappear on the buffet. I love these so much that I want to share them with you today. Be sure to share the love and pass them on, too.

Blueberry & Lemon Scones

 (

makes 8 scones) 

adapted from

this

recipe

Scones:

2 c. all-purpose flour

1 Tbsp. baking powder

1/2 tsp. salt

2 Tbsp. sugar

5 Tbsp. cold, unsalted butter, cut into chunks

1 c. fresh blueberries

1 c. heavy cream (approximately- see note below), plus more for brushing

Zest from 2 lemons

3 Tbsp. coarse demerara sugar (optional)

Preheat oven to 400 degrees F. Sift together the dry ingredients. Using a pastry blender or a food processor to make it faster, cut the butter into the dry ingredients until the mixture resembles coarse crumbs

(this was about 20 pulses on my food processor- you want to still see some butter chunks in the mix to make them fluffy!)

Place mixture back in a large bowl and mix in blueberries and lemon zest, being careful not to mash the blueberries. Make a hole in the center of the mix and pour in 1 c. of heavy cream. Using a spatula, fold the cream into the dough until it just sticks together when pressed.

(I have found that I usually need a couple of more tablespoons of heavy cream to get it all incorporated here, which is why I wrote approximately above.)

Press the round ball of dough out onto a lightly floured surface and press lightly with your hands

(minding the blueberries!)

until the flattened round is about 1" in height. Cut the circle in quarters, then in eights. Place scones on a parchment paper lined cookie sheet and brush the tops with heavy cream and sprinkle with demerara sugar, if using. Bake 20-25 minutes, until the scones are a beautiful golden brown.

They are wonderful if you just stop here, but to make them really amazing, be sure not to skip the lemon glaze.

Lemon glaze:

1/2 c. freshly squeezed lemon juice

2 c. confectioner's sugar, sifted

1 Tbsp. unsalted butter

Zest from one lemon

Mix the lemon juice with the confectioner's sugar and place over a pot of boiling water in a double-boiler until dissolved. Whisk in the butter and the lemon zest and continue to whisk for about a minute. When butter is melted, place glaze through a mesh strainer to take out the lumps and lemon zest. Drizzle or brush the glaze on top of the warm scones and serve.

Enjoy!

Elle's Studio November Kit Reveal

It's the 10th again and the Elle's Studio November kit is live!


This kit is packed with Christmas themed tags perfect for your December Daily, Thanksgiving themed tags to document your turkey day and an assortment of general tags as well! The beautiful colors in the Christmas tags were calling for me to combine them with the Good Cheer collection and make my first Christmas layout of the year!

Elle's Studio Supplies: November 2014 kit, November cut file, Good Cheer paper collection, dark grey letters & numbers, Good Cheer bits & pieces, Good Cheer wood veneer, Warmest Wishes stamp set, Merry & Bright stamp set

Don't you just love the beautiful colors? This layout is very special to me, as it was a photo taken a few days after Lizzy got out of the PICU last December. It was a very scary time for us, and we were so thankful that we still had her in our lives. The tags in the kit this month, along with the Good Cheer products, really spoke the story behind my photo- one of gratitude and thanks. The 'I thank my lucky stars,' stamp and 'Enjoy Every Moment' wood veneer piece also couldn't have been more perfect.


Be sure to pick up the November digital cut files! I used the cut file 'Joy' on this layout, which I backed with patterned paper from the Good Cheer collection.

In addition to the November kit & cut files this month, there are so many exciting new products in the shop to check out:


Remember that the kit has a special price of $9.99 on the 10th only, and then goes up to $11.99 thereafter. You will love this kit! Happy crafting!

Elle's Studio Inspiration Blog Hop!

Hey there & thanks for stopping by! If this is your first time to my blog, you can find out more about me from the links on the sidebar, and my other social media links are there, too! 

I'd like to share a layout created with the super-versatile Sycamore Lane collection from Elle's Studio. I can't get enough of Sycamore Lane because of it's lovely color palette, handrawn elements and cute motifs. Aren't those feathers from the Sycamore Lane cut files awesome?
The next Elle's Studio monthly kit launch is November 10th at 8am PST. The above photos are a sneak peek of what will be available with the launch. Mark your calendars so that you don't miss the exclusive kit, four add-ons, printables and cut files!

Leave a comment here to be entered to win a $15 Elle's Studio gift certificate to spend at the Elle's Studio shop! Check back here on November 7th to see if you are a winner. Don't forget to check out the other stops on the hop- you can leave a comment at each blog to be entered to win! Here are your stops:

*Meghann Andrew* << You are here

Good luck!

Update: Heather Adams, you are the winner of my giveaway! Congratulations! Email me at meghann.andrew@gmail.com to claim your gift certificate!

Project Life: July

I'm still plugging away at my Project Life layouts, and although I've only just updated with my July spread, I'm keeping the same attitude towards this project as I started with at the beginning of the year... 

Stay calm and keep going. 

So that's what I'm doing. Recording my journaling in the Collect app before printing really helps me to get the facts down so that I don't forget. Without the Collect app, I would've stopped this project months ago. 

Another tool that really helps me conquer this year-long project is the This Life Noted kit from Scraptastic. I used the October TLN kit for this spread, along with bits and pieces from the Heart it Races kit

My first page was on the right side against June's final page, so I worked with the same colors. The 'be brave' wood veneer from the Heart it Races kit was perfect for the photo of Lizzy in the ER. 

On pages two and three, I kept to a tomato-red color scheme with bits of green and light blue. The digital files available this month were perfect for adding little touches to my cards. 

'The details' on my 4"x6" card was stamped with the beautiful Heart it Races stamp set, I handwrote 'of' and added 'life' from the Crate Paper rub-ons, included in the kit. 

July was an awesome month, and I love this spread this project.


What We're Eating Wednesday: Tilapia with Mango Salsa

I'm always looking for new ways to use tilapia. Compared to other fish, its by far the most economical. It is also mild enough to pair with many flavor combinations. I buy my fish from Whole Foods, so I know that it is sourced responsibly, and not farmed in China. When I came across this recipe by doing a Google search for mango salsa, I knew I had to try it out, and it couldn't be any easier.


Tilapia with Mango Salsa (serves 2)
recipe adapted from this recipe
(make with brown rice for a full meal)

Fish:
4 tilapia fillets (the ones I buy are usually quite small, so I make two per person)
2 Tbsp. olive oil
1-1/2 Tbsp. grated orange zest
1/4 c. fresh orange juice (from one juicy orange)
1/8 tsp. crushed red pepper

Salsa:
1 mango, peeled, seeded and diced in 1/2" pieces
1/4 c. finely diced red onion
1 avocado, peeled, pitted & diced in 1/2" pieces
2 on-the-vine tomatoes, seeded and chopped
Zest and juice of 1 lime or 1 lemon
1 Tbsp. finely minced ginger root
1/4 c. chopped fresh cilantro
3/4 tsp. kosher salt

1. Preheat oven to 400 degrees F. In a shallow baking dish, combine olive oil, orange zest & juice and crushed red pepper. Pat the fish dry & place in baking dish. Turn to coat with ingredients. Salt and pepper both sides of the fish to taste. Bake for 10-12 minutes, until fish flakes easily with a fork.
2. While the fish cooks, combine all ingredients for the salsa and stir to combine. When fish is cooked, plate the brown rice, top with the fish & the extra olive oil mixture from the baking dish, then the mango salsa.

Enjoy!

Elle's Studio Grateful 2014 Mini Album

Every year, I work on at least one project about the things which I'm grateful for. From year to year, the list doesn't change much. I'm always grateful for my family, my friends, my home. This year, I decided to create something a bit different, and used Elle's Studio products to do so. 

This mini album includes 12 different pages to document the 12 months of 2014. For each month, I went through my photos to find a moment for which I was grateful. 


The outside cover is a was created with the Autumn wood veneer mini album covers, perfect for layering with paper, or for leaving plain. I chose to dress it up with the Sycamore Lane paper collection pack and October and Sycamore Lane digital cut files, which I lightly colored with watercolors.


The pages were created very quickly by keeping the same design layout on each page. A photo, month banner and journaling spot appear on each page, and I embellished with the amazing Elle's Studio cut files and Sycamore Lane Bits & Pieces. This is probably the fastest that a mini album has ever come together for me. 


January: A beautiful, thriving girl who beat all odds to be with us. 
February: An awesome brewery right down the road that we can visit with friends.


March: Family willing to travel to be with us.
April: The best birthday that I ever had, thanks to Simon.


May: A wonderful weekend in NOLA for Simon's MBA graduation.
June: The ability to travel abroad and see beautiful things.


July: My parents allowing us to join in on their vacation in Charleston. 
August: A date night, sans baby, to attend a wedding.


September: Margaret & Adrian, who love Lizzy so and help us weekly.


I've left the last three months blank so that I can quickly add my grateful photo and embellish to finish off the album. 

I know that this will be a cherished mini album to document all that I have to be grateful for in 2014. 

How are you documenting your gratitude this year?

Lovely Girl

Happy Friday! I have a quick post for you with a new layout to share, created with the beautiful Heart It Races kit, add-on and stamp set from Scraptastic Club. This is another favorite photo of my daughter that has been sitting on my desk for months. I knew that the beautiful bold autumnal colors in the kit would pair perfectly with it, even though the subject has nothing to do with autumn.
Journaling: Just an ordinary day with you, spending time playing on my bed- even Toby joined in. I wouldn't trade this time at home with you for anything.


This layout is very simple to make, even though it includes a lot of elements and may not appear that way (I love when that happens!). Here's how I created it:

1. Background: Cut out three folders from the Crate Paper folder patterned paper. Using a craft knife, cut slits in the bottom and top folder for your journaling cards and photos. I also cut along the tabs and distressed it a bit to give the folders a three-dimensional look. Adhere to the Chickaniddy Crafts Autumn Haze background paper, being sure not to adhere your pockets.
*Tip: If you love this paper and want to leave the bottom green section for another project, trim it off beforehand and just adhere your file folder paper to the bottom of the piece you just trimmed, being sure to keep to the 12" measurement. That way, you use every last bit of the paper! * 
2.  Journaling & title: Print the fox journaling card from the Heart it Races digital files and stamp 'lovely' using the Heart it Races stamp set. Using the Chickaniddy letters, add 'girl.' Cut out the square journaling card from the Shimelle patterned paper and journal. Tuck both cards into the bottom file folder with the yellow doily behind and adhere all pieces.
3. Photo: Layer a 4"x6" photo on top of the Pebbles Homemaker paper, leaving 1/4" around the edge. Insert into the top folder slit and adhere at a slight angle, adding dimensional adhesive at the top. Add the Teresa Collins 'my heart' border stamp along the bottom of the photo, along with the flair badge at the bottom left corner. Cut the 'noted' speech bubble from the This Life Noted digital files, add the date and attach to the right side of your photo with the Lawn Fawn paper clip.
4. Embellish: Add the Teresa Collins arrow border, wood veneer heart stamp and a sequin along the right edge of your title card. Fussy cut the Teresa Collins Flowers paper bunch, along with three small flowers. Slip underneath the left side of your photo and adhere with dimensional adhesive. Adhere two sequins near the flowers. Adhere the Teresa Collins 'love this' sticker on top of the flowers with dimensional adhesive. Add the three small flowers near the bottom right corner of the photo. Fussy cut the Chickaniddy flower banner from the die-cuts package. Stamp 'you're the bestest'. Apply a Teresa Collins banner sticker at the top left corner and adhere the Chickaniddy banner with dimensional adhesive directly to the right.

Once I had the idea for my layout, the process above only took about 30 minutes for me to pull together. I also cut out my digital files beforehand when my kit arrived so that I wasn't having to do it each time I created a layout. It's a great way to save some time, especially when you're working predominately during precious nap time!


Thanks for stopping by today, and be sure to check out this beautiful kit! I'm still loving every single bit of it.

Scraptastic September Projects

When I received my first Scraptastic kit after becoming a DT member, I was blown away by the amount of product included in the kits. They are so full of awesome paper and embellishments! The September The Girl kit (which is still available!) did not disappoint, and today I want to share my projects with you. 

'Date Day' was a layout I created for Pinterest Monday on the Scraptastic Blog documenting a recent date afternoon that my husband and I had- our first time hiring a babysitter! I love using Pinterest images to inspire a layout. It can be a great way to try something different and pull yourself out of a creative funk!

'C is for Cheeky' is a layout created for September's Sketchy Thursday on the blog, and may be my favorite this month. The clusters of embellishments created with rub-ons, stamps, die-cuts and wood veneer just make me happy.


'What a Fun Day' is a layout that features a photo of my Goddaughter that has been sitting on my desk for ages just waiting for this kit. I punched the stars from the background paper and popped them up, putting glitter paper behind them. For more info and some closeup photos, check out this post on the Scraptastic blog.


My June project life spreads are my favorite so far in my album because of the September This Life Noted kit. For more info about my spreads and the process, see this Scraptastic blog post

Scraptastic also has a brand new online store featuring the latest and greatest scrapbooking supplies. Be sure to check it out as well as the awesome monthly kits!