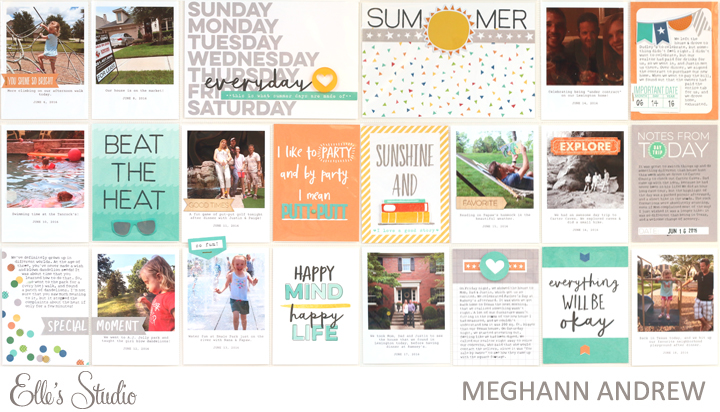
Jot Magazine September Mood Board

I am so excited to be the guest pinner for the Jot Magazine mood board this month! 

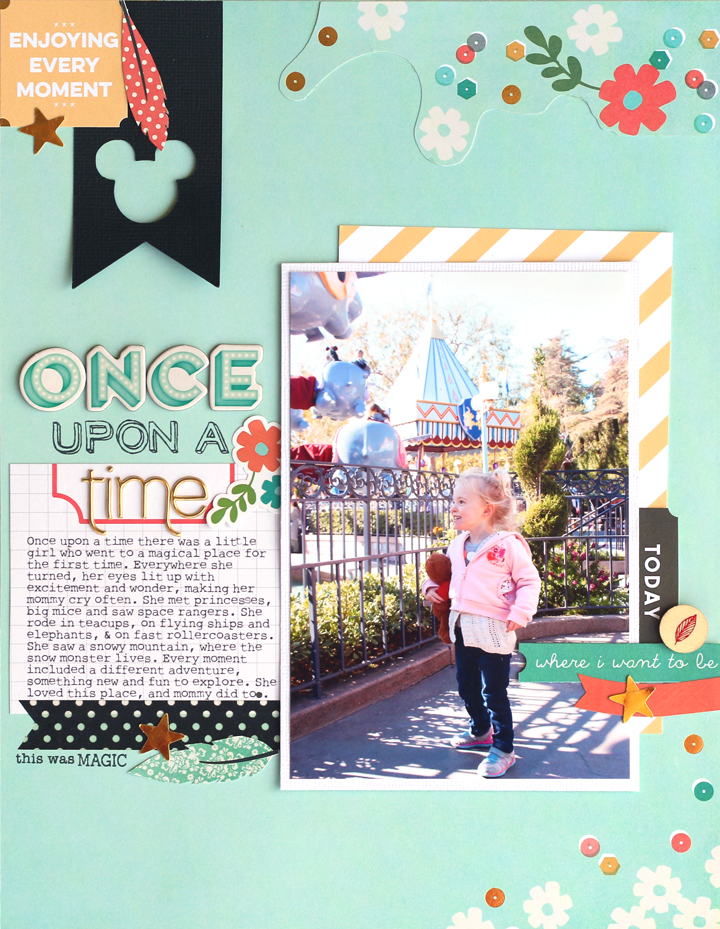
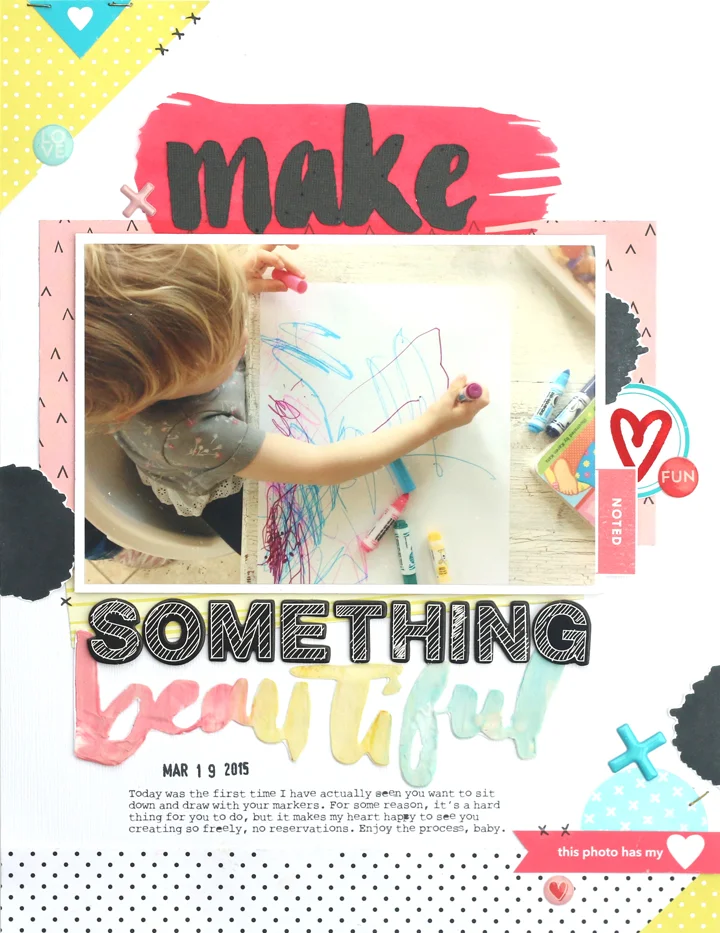
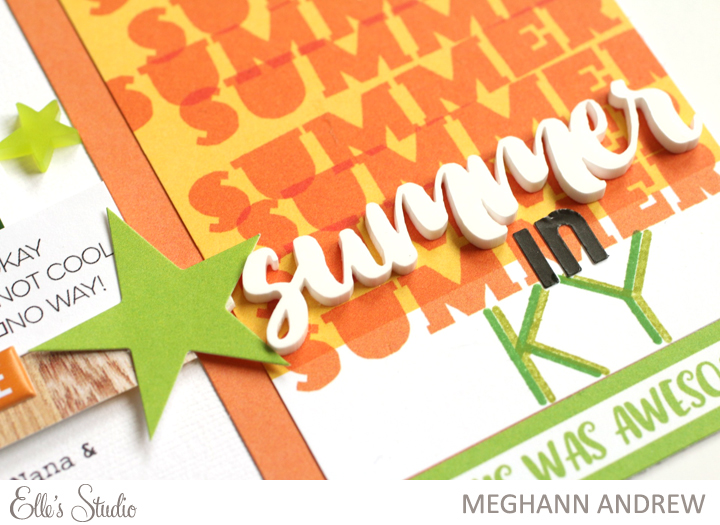
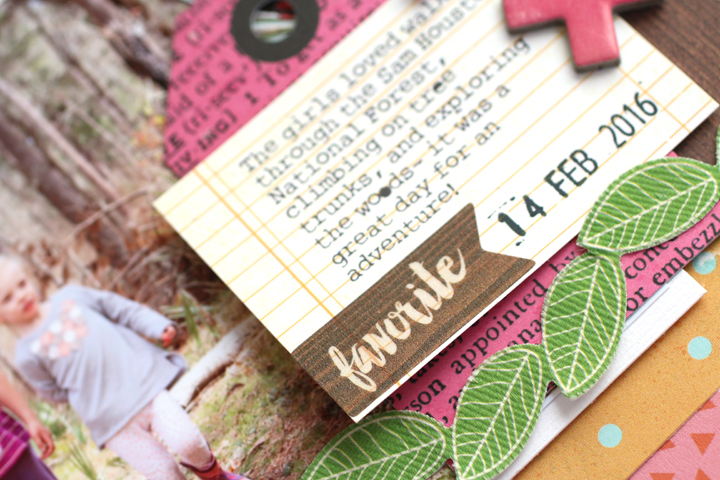
I am really loving sunset colors and aztec patterns right now, and this mood board certainly reflects that. My layout started with a photo of my daughter and goddaughters on a walk through  the woods.

InTheWoods_blog.jpg

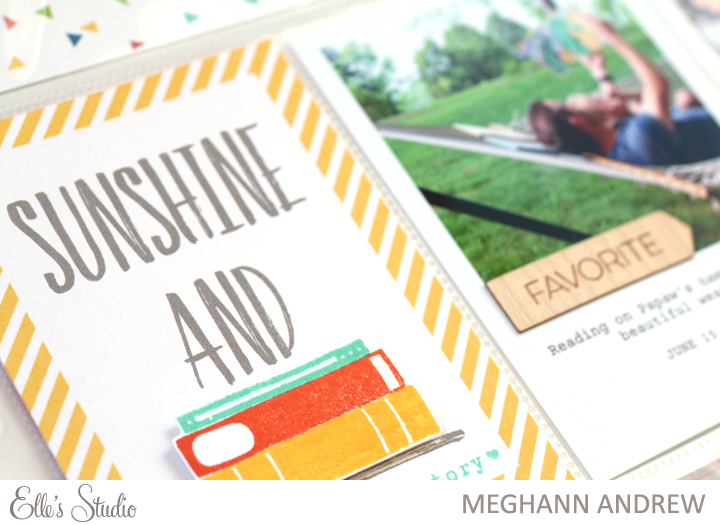
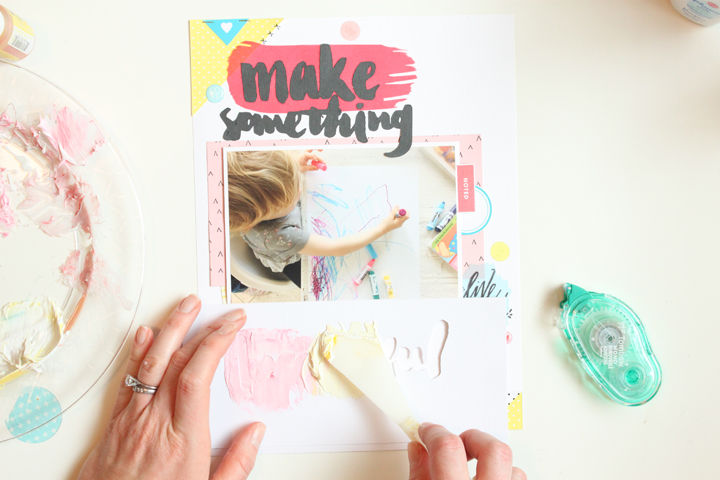
Going through my stash, I began pulling patterned papers with the colors and patterns that reflected the mood board. My favorite image of the painted leaves, had to be used on my layout, so I grabbed a BlockWalla wood leaf stamp, along with my acrylic paints to fill in some of the spaces.

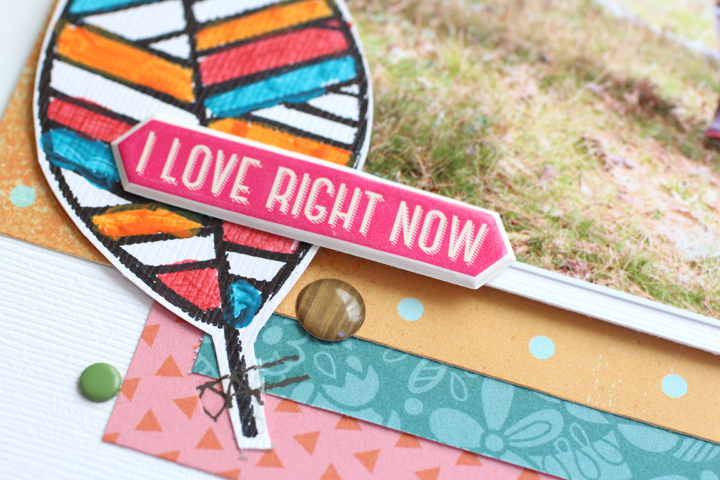
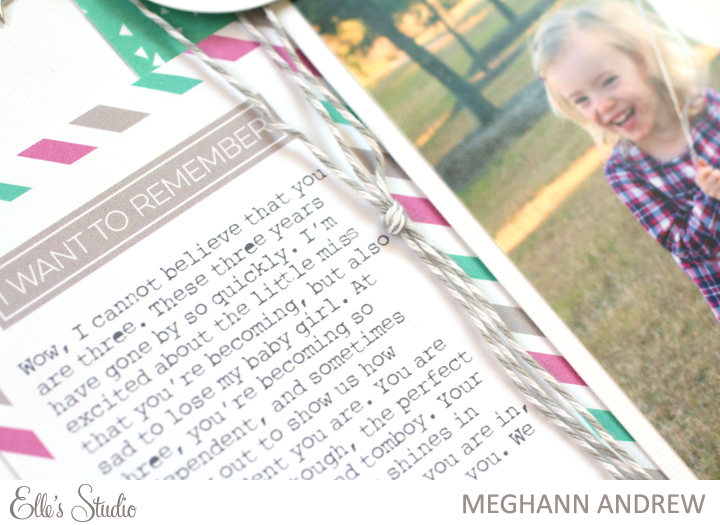
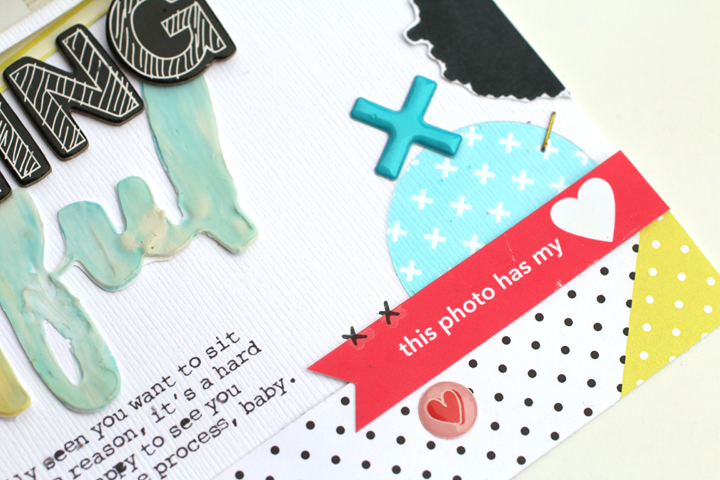
There is a lot of layering of colors and patterns on this page, and with all of the layers surrounding my photo, I kept my embellishment very simple, using a lot of old items from my stash, including this last piece of the Amy Tangerine fabric leaf border.

The Jot Girls projects inspired by this board are so amazing! Be sure to check them out and upload your own creation for a chance to win a fantastic prize! 

Pink Paislee Guest Designer: Birthday Week!

I am so excited to announce that I am the guest designer on the Pink Paislee blog today during birthday week! I had such a fun time making these creations using the new Birthday Bash collection, and I hope they inspire you to document and craft your next party! 

To create all of these projects, I worked with a few simple supplies:

Let's take a look at what I created! 

This 12" x 12" layout came together quickly by using a grid design. I made sure to run my elements both vertically and horizontally to create a lot of interest. Don't forget to document your own birthdays, and your hopes and fears for the upcoming year, as I did here!

I so love bunting, hanging at a party or on a layout, and my photo was framed twice- first by the bunting at the top and bottom of my page, then by the die-cut elements and watercolor surrounding the photo of my daughter getting ready to blow out her candle.

I started making one card, but had so much fun with it that I made three! These cards have an extra element of surprise for your recipient, given that each has an acetate window that carries part of the sentiment through to the inside of the card.

I just had to die-cut a balloon background to document this photo of my daughter, taken on her birthday with a bunch of balloons. To make the balloons stand out, I backed them with patterned paper, all from the Birthday Bash collection, then outlined the edges with watercolors, and stitched the balloon strings. This is my favorite project from my guest post! 

If you've been following me here for a while, you know that I'm a big fan of throwing a party, and I especially love making things for kiddos that they can call their own. These fun party hats were cut with this digital die-cut file, then embellished with two rows of crepe paper, sewn on at the bottom and cut with Martha Stewart fringe scissors. I also fringe cut more crepe, rolled it up and stuck it in the top of the hat. To customize each hat, a simple die-cut ephemera piece, topped with an initial and a sequin finishes them off quickly! 

Thanks so much for checking out my projects! Be sure to take a look at the Birthday Bash collection, currently on sale at Scrapbook.com! 

Elle's Studio August Exclusive Kit Reveal!

I'm so excited to tell you that the Elle's Studio August exclusive kit and add-ons are now available in the Elle's Studio shop! August is typically one of my favorite kits of the year, and this one definitely did not disappoint! 

The kit is full of great colors and awesome sayings. Also, the die-cuts are now being packaged on 4" x 6" sheets, ready to be easily punched out, and I created a short video to show you how easy they are to remove from their sheets, which make them so much easier to see all together in one place.

Don't forget the digital printables and cut files that coordinate with the kit! 

I started my projects out this month with a double pocket page spread! It's been a LONG time since I created one of these, and I just added a few stamps and items from the Sunny Days collection. There is so much packed in the kit that I had plenty of tags left to create a layout and still have leftover supplies! 

I just had to use the Read stamp to include these colorful little stamped books on the "sunshine and ___" tag! 

For my second project, I went back to my roots and created a 12" x 12" layout! The "long hot summer days" tag was my muse for this layout, and I printed out photos from an impromptu splash pad encounter this summer.

These are definitely some of my favorite photos from the summer, and this kit was perfect to document them! 

Be sure to stop by the Elle's Studio shop to check out all of the new items this month, and be sure to check out the sale items in the shop this month! 

Elle's Studio: Today You Are Three

Yesterday on the Elle's Studio blog, I shared a recent favorite layout with a photo that I've hesitated scrapbooking since January- that was until I pulled out my Documented mini collection

Elle’s Studio Supplies | Documented journaling tagsDocumented stampLittle Moments 6” x 6” paper stackSunny Days 12” x 12” collection packSunny Days 6” x 6” paper stackThe Story Of stamp.

This photo, taken on Lizzy's third birthday back in January, just always had me stumped. Because Lizzy was wearing fuchsia, I really didn't have any product that would go along with the photo, and almost made the photo black and white to scrapbook it. That was, until I pulled out my Documented journaling tags

The colors that I found in these journaling tags couldn't have been more perfect with this photo! By layering the Documented journaling tags with Little Moments 6" x 6" papers on a clean, white background, this layout came together so quickly! 

To mimic the balloons that Lizzy was holding in the photo, I punched circles from a Documented 3" x 4" journaling tag, the purple polka dot paper from Little Moments 6” x 6” paper stack, and a die cut from the Project Life Everyday collection. I taped bakers twine to the back before adhering them with dimensional adhesive, then tied them all together with a knot before adhering the knot to my journaling tag to keep it in place. 

I wanted to add some weight to the top and bottom of my layout, and the More Stars paper from the Sunny Days 12” x 12” collection pack was perfect to go along with the Documented supplies. To create my title, I used both the The Story Of stamp and the Documented stamp to stamp "today you are" before adding silver Thickers to finish off the layout. I kept the rest of the layout simple by adding a few acrylic, and puffy stars, and a bit of shimmer mist droplets. 

Be sure to check out the exclusive Documented products in the Elle's Studio shop before they disappear! 

Shimelle.com: Taking Inspiration From Planners

Today on Shimelle.com, I'm sharing a new layout that I created, taking inspiration from my favorite planner, my Get to Work Book!

I had so much fun creating this layout. For the full post, as well as to see Shimelle's lovely page that was also inspired by planners, check out Shimelle.com

Jot Magazine Issue 14: Once Upon a Time

Jot Magazine issue 14 has been out for a few weeks now, and if you haven't checked it out yet, I'd love to share a layout I created for the Storytelling section. This month's theme was "once upon a time," which immediately made me think of our trip to Disneyland at the end of last year, so I decided to create another 8-1/2" x 11" layout to add to my Disneyland album.

Supplies | Cardstock: Bazzill Basics. Patterned paper: Simple Stories. Journaling tags: Project Life, Elle's Studio. Stickers: Simple Stories, Crate Paper, Studio Calico. Stamps: In a Creative Bubble, Studio Calico. Wood veneer: American Crafts. 

When we first arrived at the park, the first ride we came to with a short line was the Flying Dumbo ride. Walking up to it, Lizzy was just amazed. I was so happy that I had my camera ready to capture the joy and excitement in her face. 

I loved the floral & sequin paper from Simple Stories that I chose for my background, but when I cut it to 8-1/2" x 11", the gold "I am" words were still visible in the right corner. So I simply covered that area with sequins and flowers cut from another corner of the paper. I continued my red, yellow, turquoise, white and black color scheme from the rest of my Disney layouts throughout the page, layering tags, washi, and stickers to create a whimsical, girly layout.

Title work is always my favorite part of a layout, and I had fun creating this one with Crate Paper Thickers, an older alphabet stamp from Studio Calico, and epoxy gold alphas from Studio Calico.

I'm loving having this memory documented in my Disneyland album! What will you create with the theme of "once upon a time?"

Elle's Studio July Reveal!

Today's the day! The Elle's Studio July exclusive kit is now available in the shop, and you won't want to miss out on it, or the other amazing deals going on over there- including 20% off on all stamps! (No coupon code needed!)

The July kit is super bright and colorful! I love the abundance of navy blue, and the camera icon is my favorite! 

Wow, there are so many extras to add to your order this month! Featured from top to bottom, left to right: Favorite acrylic, vellum hearts, Yum acrylic, star circles acrylics, Good Times tabs, So Awesome stamp, acrylic pie chart, wood veneer camera.

If you're looking to add some new digitals to your library, check out the July 2016 cut files, star background cut file and the Relax printables

This month, I created two colorful layouts with the kit, along with the fun Sunny Days collection. As soon as I saw the photo from a trip last year in San Antonio, with all of the multicolored umbrellas in the background, I knew that it would be perfect for this kit.

I hand cut five different umbrellas from both patterned papers in the Sunny Days collection, as well as tags from the kit to create the fun bottom half of my layout, using my sewing machine to create umbrella poles. It was so fun to create! 

My next layout uses a completely different color scheme to create a layout all about an awesome brunch shared in Savannah, Georgia.

There were quite a few food-based tags included in the kit, and paired with the Yum acrylic piece, it was the perfect basis for creating a foodie layout! 

Stop by the Elle's Studio shop today to see all of the new products available for July, as well as pick up some of the awesome stamps on sale at 20% off! Oh, and if you missed out on the Sunny Days puffy stickers last month, you'll be happy to know that they're back in stock! Happy shopping! 

Jot Magazine July Mood Board

A new month brings a new mood board over at Jot Magazine, and this one, created by Kim Jeffress, will leave you feeling full of sunshine! 

I am a huge fan of yellow, so it was pretty easy to find supplies to create this layout based on the mood board. I started out with a photo that I knew would work perfectly, from Easter 2015, when my father and daughter were both wearing yellow for an Easter egg hunt.

Supplies | Crate Paper (woodgrain paper, bunting, ampersand & star die-cuts, tag, arrow, "thankful" and bird stickers, bow clip, fabric brad.) American Crafts (chipboard "today"). Carta Bella (background yellow geometric pager.) Studio Calico (yellow floral.) October Afternoon ("smiles" tag). Stampin' Up! (twine). Other: enamel dots.

In addition to the yellow and warm wood tones from the board, I also included a tiny bit of mint, which I introduced when I chose the large tag tucked behind my photo. 

I have been hoarding this October Afternoon 4" x 4" tag from the Daily Flash collection for ages, so it was about time to use it! 

Since the mood board included hanging bunting, I also added a bit in the top corner of my layout. I love all of the layering in this corner- with lots of different patterns and textures to keep it interesting! 

Be sure to check out the other Jot girls layouts on the mood board page, and upload your own creation using the mood board as inspiration to win a chance for the Jot girls to choose your layout this month! 

Scraptastic Club Farewell: Capture Beautiful You

This week, I'm wrapping up my May kits from Scraptastic Club, which means I had to create another layout with the Cake by the Ocean kits (both sold out, but check out the contents here.)

This beautiful photo that I took of my goddaughter last fall was just screaming to be documented with these kits. The bright colors in her dress deserved bright products, too.

These kits were full of the Fancy Free collection by Paige Taylor Evans and Pink Paislee, and the exclusives, like this star die-cut and those fun circles, worked so well with the collection. 

For my journaling, I pulled a card from my May 2016 This Life Noted kit. The "big things often have small beginnings" saying was perfect for her. 

As I typically do to make things a bit more interesting, I used three different elements for my title- Pinkfresh Studio's acetate words and word stickers, as well as the glitter Thickers from the Fancy Free collection. Using the tone-on-tone pink dot paper behind my title helped to ground it and make it stand out more.

With this layout, I say goodbye to Scraptastic Club. I've been designing with their fabulous kits for almost two years now, and I felt that it was time to lighten my load and make a bit of a change this summer. I'll be watching their fabulous design team create beautiful projects in the future, though! 

Thanks for stopping by and have a safe and happy 4th of July weekend!

Documenting May

No matter how many traditional layouts I create, I still LOVE my monthly pocket page spreads. They allow me to get so many more photographs in my album which I don't have time to create layouts for, and document a huge portion of our daily lives as a family. 

For the month of May, I got to work on my Project Life spreads, using the May 2016 This Life Noted kit and add-on from Scraptastic Club.

I started off with a double page spread, using a red, pink and yellow color scheme. The majority of my journaling was done with the Collect App. I kept my pockets fairly simple, using die-cuts from the kits, and filling a lot of spaces in with the This Life Noted stamp, included in the kit.

This month included Mother's Day, so of course I had to include the "cool mom" card in my spread!

Spread two for the month has a blue, teal and yellow color scheme. Using yellow on both spreads ties them together, even though they have very different color schemes.

There were so many fun embellishments included in the kits this month! I especially loved the Project Life Currently Ephemera included in the add-on. The little cameras were perfect for adding a little something to my cards.

To add a bit of a title to my spread, I used the Fancy Free Thickers from the Cake by the Ocean kit (sold out) on my 4" x 6" card.

Page 5 again uses yellow, but with just teal this time. I used very simple embellishments on this page, but I love how it all turned out. I will use the same color scheme for the beginning of June, which will go to the right of this page.

Thanks for stopping by! How are you doing with your pocket page album? So far, I've been able to keep up, with help from the Collect App and my Scraptastic Kits! 

Jot Magazine Issue 14: Make Something Beautiful

Have you ever had a photo that you loved, so much, that you just held on to it until you had the perfect products to scrapbook it? Well, this was my photo, and when challenged with the "stencils" category in Jot Magazine issue 14, I finally pulled it out and got a bit messy to document it. Well, messy for me! 

Supplies | Cardstock: Bazzill Basics. Patterned paper: Studio Calico, Scraptastic Club. Stickers: American Crafts (alpha), Studio Calico (dots, crosses). Stamps: Scraptastic Club. Die-cut shapes: Studio Calico (blue circles), Scraptastic Club (red vellum brushstroke). Rub-ons: American Crafts. Digital files: Studio Calico. Die-cutting machine: Silhouette Cameo. Font: Rough Typewriter. Other: Golden modeling paste, Studio Calico spray ink, Project Life date stamp.

To create my title, I cut the word "beautiful" out with my Silhouette, using a freebie Studio Calico digital file that I received ages ago. Doing this isn't very tricky, if you have Photoshop. You can simply save the digital file as a PNG, erase whatever you don't want from the background, then save and drag the file into your Silhouette software to trace. 

After I cut the word "beautiful" from cardstock twice, I adhered the two pieces together, so that my stencil could be a bit thicker. I then adhered the stencil to my background cardstock using temporary adhesive, and colored three different spoonfuls of modeling paste with pink, yellow and teal spray ink, filling in my stencil and picking it up as soon as I was done. 

However, I wasn't too happy with the edges of my word. The stencil wasn't close enough to my background cardstock, causing some of the modeling paste to seep out from the edges. How did I fix this?

I didn't want to do it over again, especially since the stencil was a "one time use" item, so I just waited for it to dry, then cut the word out, cutting off the messy edges! I then adhered it to my new white background cardstock and finished off the page. Since I'm not the messiest scrapbooker, I opted to use vellum die-cuts and stamped ink blots instead of actually making them myself with ink! 

I absolutely love this colorful page, with a lot of white space, just like my daughter's artwork in the photo above. If you're like me, and are not a messy, mixed media scrapbooker, be brave and try this stencil technique this weekend! Also, be sure to check out the other awesome layouts in the stencil section of Jot Magazine issue 14

Have a great one, and happy creating! 

Elle's Studio June Reveal!

It's here! It's here! The June exclusive kit from Elle's Studio is now available in the shop! This colorful kit is perfect for documenting a variety of subjects- from summer activities to what books you're reading on the beach!

The digital cut files and printables offer so many awesome additions to the kit!

The patriotic stars, exclusive Shine Bright stamp set, popsicle acrylics, "summer" acrylic and summer star acrylics will embellish you project perfectly.

And, to top off all of these goodies, the Sunny Days collection is now available to ship in the Elle's Studio shop! I'm loving working with this bright, cheerful collection. My first layout, uses it along with the exclusive kit and add-ons- and they all work together seamlessly!

As soon as I saw the sunglasses cut file, I knew I wanted to put photos in the lenses. I found two similar photos of my husband and my daughter catching waves while on Tybee Island last summer. These products were perfect for documenting that day at the beach! 

My second layout this month has a completely different color scheme, using the same exclusive kit and Sunny Days products

Does anyone else have summery tractor photos to document? No? This kit was perfect for documenting this photo of my daughter on my parent's John Deere. I stuck with green and yellow to match the tractor and threw in orange to make it extra summery! 

Thanks for stopping by! Be sure to check out the rest of the design team's inspirational projects using the June exclusive kit and Sunny Days collection

Jot Magazine: June Mood Board

The June mood board at Jot Magazine is live, and its neutral, natural feel will make you want to create instantly!

I felt like this mood board held so many creative possibilities. I started with a kraft, black and white palette, then added in tiny bits of dark green. Once i knew what I was documenting, my favorite homemade breakfast treat, I threw in a tiny bit of orange, too!

Supplies: Cardstock: Bazzill. Patterned paper: Studio Calico, Crate Paper. Project Life cards: Project Life (striped), Scraptastic Club (orange). Die cuts: Crate Paper (leaves), Pink Paislee (citrus). Chipboard: American Crafts (love, alphas), Crate Paper ("find what makes you happy.") Other: thread and enamel dots.

How will this mood board inspire you? Create your project based on it & post at the mood board post for a chance to win a bundle of scrapbooking supplies!

New "Off the Cuff" Video: Happy Hikers

Join me for video three in my "Off the Cuff" series, where I start with a kit and a photo, and make all of my design decisions on camera! In this video, I will be creating this layout with the Eloise kits from Scraptastic Club:

I've been getting a lot of feedback on these "Off the Cuff" videos, so let me know what you think after watching! 

Thanks so much for stopping by and for subscribing to this blog and my YouTube feed!

Scraptastic Club Eloise Kits: Water Park Fun

Working with the bright and colorful Eloise kits from Scraptastic Club requires a fun, happy photo to document, so I pulled one from a fun trip to a local water park last fall. 

Supplies: Eloise kit, Eloise add-on (sold out), Cherry Pie stamp set, Eloise digital files.

This simple layout came together quite quickly with a colorful scheme, inspired by the Pinkfresh Studio heart paper that I placed at the bottom of the layout. I decided to use the bright pink, light blue and yellow for the other patterned papers against the white background.

The Cherry Pie stamp set is so fun, and I used this stamp with the speech bubble here, and again at the bottom of my layout without the speech bubble on a navy label from the Eloise digital files. The majority of the embellishment came from the Amy Tangerine Better Together collection, and the fun themes and bright colors fit right in to this layout. 

I'm just about to wrap up creating with this kit, but I'll be back later in the week to share one more, bright and fun layout! Thanks for stopping by!

Elle's Studio Documented Mini-Collection & New Sketch Class!

Today is the day for the Elle's Studio mid-release, and I am so excited about this one, for a very good reason! 

Elle and I have been working on a new class for you, called From Sketch to Finish! This class includes ten different sketches with ten contributors each sharing two papercrafting projects created from the sketch. You will get to read their tips and see their techniques in action as they share their process of working with the sketches. We end the class with a bonus of 20 full-page sketches and you'll be on your way to creating projects in no time! The projects in this class are seriously amazing, from some of the most popular paper crafters in the industry- Laura Bassen, Nancy Damiano, Danielle Flanders, Jess Forster, Andrea Gray, Maggie Massey, Leigh Odynski, Candace Perkins and Carson Riutta. All of the contributors have used the Little Moments collection, or the new Documented mini-collection to create their layouts, so head over to the classroom today to get inspired and get started! 

The other new product line in the shop today is called Documented, and includes journaling tags, a stamp set, and acrylic words in black and white. In addition to these products, Elle is also releasing basic journaling cards in grey & pink, as well as an awesome new tool: a 3" x 4" acrylic block to use for stamping or cropping your images!

I have one layout using the Documented supplies in the From Sketch to Finish class, but I made another one, just so I could show my blog readers just how awesome these new goodies are! 

"Today in Boston" supplies | Documented journaling tags, Documented stamp, Documented acrylic words- blackLittle Moments 6" x 6" paper stack, Little Moments blank labels, letter and number stickers- black, Jonah alphabet stamp. Other supplies | Vellum numbers, acrylic stars (ES sold out product), enamel dots.

Using the diagonal line strip stamp in the Documented stamp, I created a pattern of blue, pink and black lines along the right side of my page, and slightly colored the pink and the blue strips in with the same color ink and a sponge dauber. My photo completely drove my color scheme, and I was so excited that this mini-collection had this lovely cerulean blue color, along with the dusty pink.

The gorgeous acrylic words, which come in white and black are perfect for starting a mixed-font title!

I love that the Documented stamp includes both words and pattern starters, like these rows of offset dots here.

Stop by the Elle's Studio shop for all of the new goodies releasing today, and be sure to check out From Sketch to Finish while you're there! You will be so inspired by the class to pull out your pretty paper and document your memories!

Scraptastic Club Eloise Kits: Backyard Bubbles Together

I am loving the bright, bold colors in Scraptastic Club's Eloise kits from April 2016. The kits feature a lot of Amy Tangerine's Better Together collection, which I love! I recently took a favorite  photo of my daughter in our backyard blowing bubbles, and the colors in the photo worked perfectly with this kit. Not to mention, that I'm pretty sure that Kaitlin Sheaffer, who designs the exclusive patterns for Scraptastic, must have peeked into my photos to create the perfect pattern for me!

Supplies | Eloise Kit, Eloise add-on (sold out), Cherry Pie stamp set, Eloise stamp set, Eloise digital files.

As soon as I saw the blue and teal bubble pattern, I knew that I wanted to scrap this photo. I lined up the pattern on the left side of my 8-1/2" x 11" background pattern, also a Scraptastic Exclusive, and then cut out three bubbles to place along the right side.

On the negative space in my photo, I had to use one of the sentiments from the Cherry Pie stamp set, and to the right of it, I placed my main embellishment grouping. I loved the Better Together clear stickers fro the main kit, and backed one on cardstock to place at the edge of my photo. 

I also couldn't resist stamping and watercoloring the cute little house from the Eloise stamp set. At this stage, my layout was only blue and teal, but painting that little door pink gave me just the pop I needed and prompted me to add a couple more spots of pink. 

By cutting "together" from the "better together" clear sticker, I added another spot of pink and the second word for my title. The word "bubbles" was cut from my Silhouette Cameo.

What fun kits these are to play with! On Saturday, I will have another layout and video tutorial up on the Scraptastic Club blog, so be sure to watch for that! Thanks for stopping by! 

Scrapping Square Photos for Shimelle.com

Just in case you missed it, I had a layout featured at Shimelle.com on Monday, all about scrapping square photos, which I do pretty often! 

Supplies | Cardstock: Bazzill Basics; Patterned Paper: Shimelle Starshine Voyager (orange dot), Horizon (yellow dot), Mariner (#4), Viking (green dot), Astro (journaling card); Embellishment: Shimelle Starshine chipboard stickers (ticket), Starshine plastic buttons, Starshine cardstock & acetate ephemera (circle star), Shimelle layered chipboard stickers (clipboard), Shimelle accent and phrase sticker book, True Stories enamel dots, True Stories alpha Thickers, Elle’s Studio Jonah labels; Stamps: Starshine acrylic stamps (star, “explore,” “discover”), Shimelle acrylic stamps (arrows), Studio Calico alphabet, Elle’s Studio We Ate Here stamp, Elle's Studio Yummy Details stamp.

It's no secret that I love photographing our food adventures, especially while on holiday, so I created this layout to remember our top four food experiences from our trip to Boston last fall. What's funny was that two of the four were favorites from the U.K., that I didn't know were in Boston! 

Since the photos that I post to Instagram in a square format are edited and saved to my camera roll, it's easy for me to have a perfect photo ready to scrapbook! I love that I can fit four 3" x 3" photos neatly across the page. Since I had such a strong vertical emphasis with my tower of photos, I decided to create a fun vertical title just next to the photos.  

I had a lot of fun selecting stamps, patterned papers, die-cuts and stickers for this one! 

Be sure to check out the full post at Shimelle.com and play along by creating your own square photo layout! Thanks for stopping by, and watch Shimelle's blog for another challenge next week featuring my work!

Elle's Studio May Exclusive Kit Reveal!

It's a new month, which means a new exclusive kit is available today in the Elle's Studio shop! Let's take a look at the beautiful, new kit! 

I am loving the warm, springy colors this month! In addition to the kit, there are some amazing add-ons, including the May exclusive stamp set, Sunshine acrylic, The Good Life acrylic, Ice Cream Cone wood veneers, Sunglasses acrylic, and Marie alphabet stamp- my personal favorite item this month! 

Plus, you definitely want to add the printables and cut files to your digital library!

On my first project, I had to take advantage of all of the cute ice cream cones in the kit and add-ons this month, so I scrapped a favorite photo of my daughter and her bestie at Baskin Robbins. The fun polka dot paper from the Little Moments 12" x 12" paper collection set the colorful tone for this layered layout. 

The Ice Cream Cone wood veneers are the cutest embellishments, and so easy to customize to make them fit your project. I embossed the top of this one, but you can also stamp and paint to get the perfect color for your cone.

For my second project, I created another 8-1/2" x 11" layout to go into my Disneyland album.

The awesome font in the Marie alphabet stamp is the perfect playful typeface to use in my Disney layouts. I also love that the colors in the kit pair so well with the Little Moments collection, already in my stash, to create perfect Disney layouts!

Today and tomorrow only (the 10th & 11th), you can get free shipping for U.S. orders over $50 and international orders over $75 when you use coupon codes SPRINGUSA or SPRINGINT, so take advantage of free shipping and stock up! Thanks for stopping by and checking out the new kit! 


Elle's Studio: Sunshine Girl

Yesterday on the Elle's Studio blog, I shared a layout inspired by the April exclusive kit and cut file, and I'd love to share it with you today! 

It was the "remember when" tag from the April exclusive kit that started the idea for this layout. I knew that I wanted to use an older photo of my daughter as a baby. Because I was using a circle, I wanted to find other circular elements from the kit and add-ons, and that led me to the sun cut file from the April cut files. As a baby- not so much now as a toddler- my daughter was smiley and happy all of the time, so it was easy to find a happy photo that I could size to fit inside the sun cut file. The awesome, colorful striped 4" x 6" tag from the kit draws your eye directly to the photo to make it the focal point of the layout.

One more small circle created the base for another small embellishment grouping which included a grey circle from the Little Moments bits and pieces and another awesome puffy sticker from the Good Stuff puffy stickers.  

Possibly my favorite part of the layout is the title. Those outline and solid Jordan alphabet stamps are the perfect font for this playful layout. A bit of stitching on the rays of the sun and underneath the stamped title added the perfect finishing touch to the page! 

Thanks for stopping by! Be sure to check out these awesome ES products so that you can create your own sunny layout!