Altenew Crafty Friends Blog Hop Day 1 + Giveaway

Crafty Friends Blog Hop Graphic.jpg

Hello and welcome to my blog for the Altenew Crafty Friends Blog Hop! You’ve come here from the talented Zsoka Marko’s blogI

I am so excited to be a part of this industry of creative people, where I am inspired every day to create something new, and I love that this hop celebrates the support and kinship that we all give to one another! I’d love to connect with you on Instagram, where I’m most social! Now on to the crafty stuff! I have a new 12” x 12” layout to share all about this special job of mine:

Altenew_MeghannAndrew_HappyCreating_01.jpg

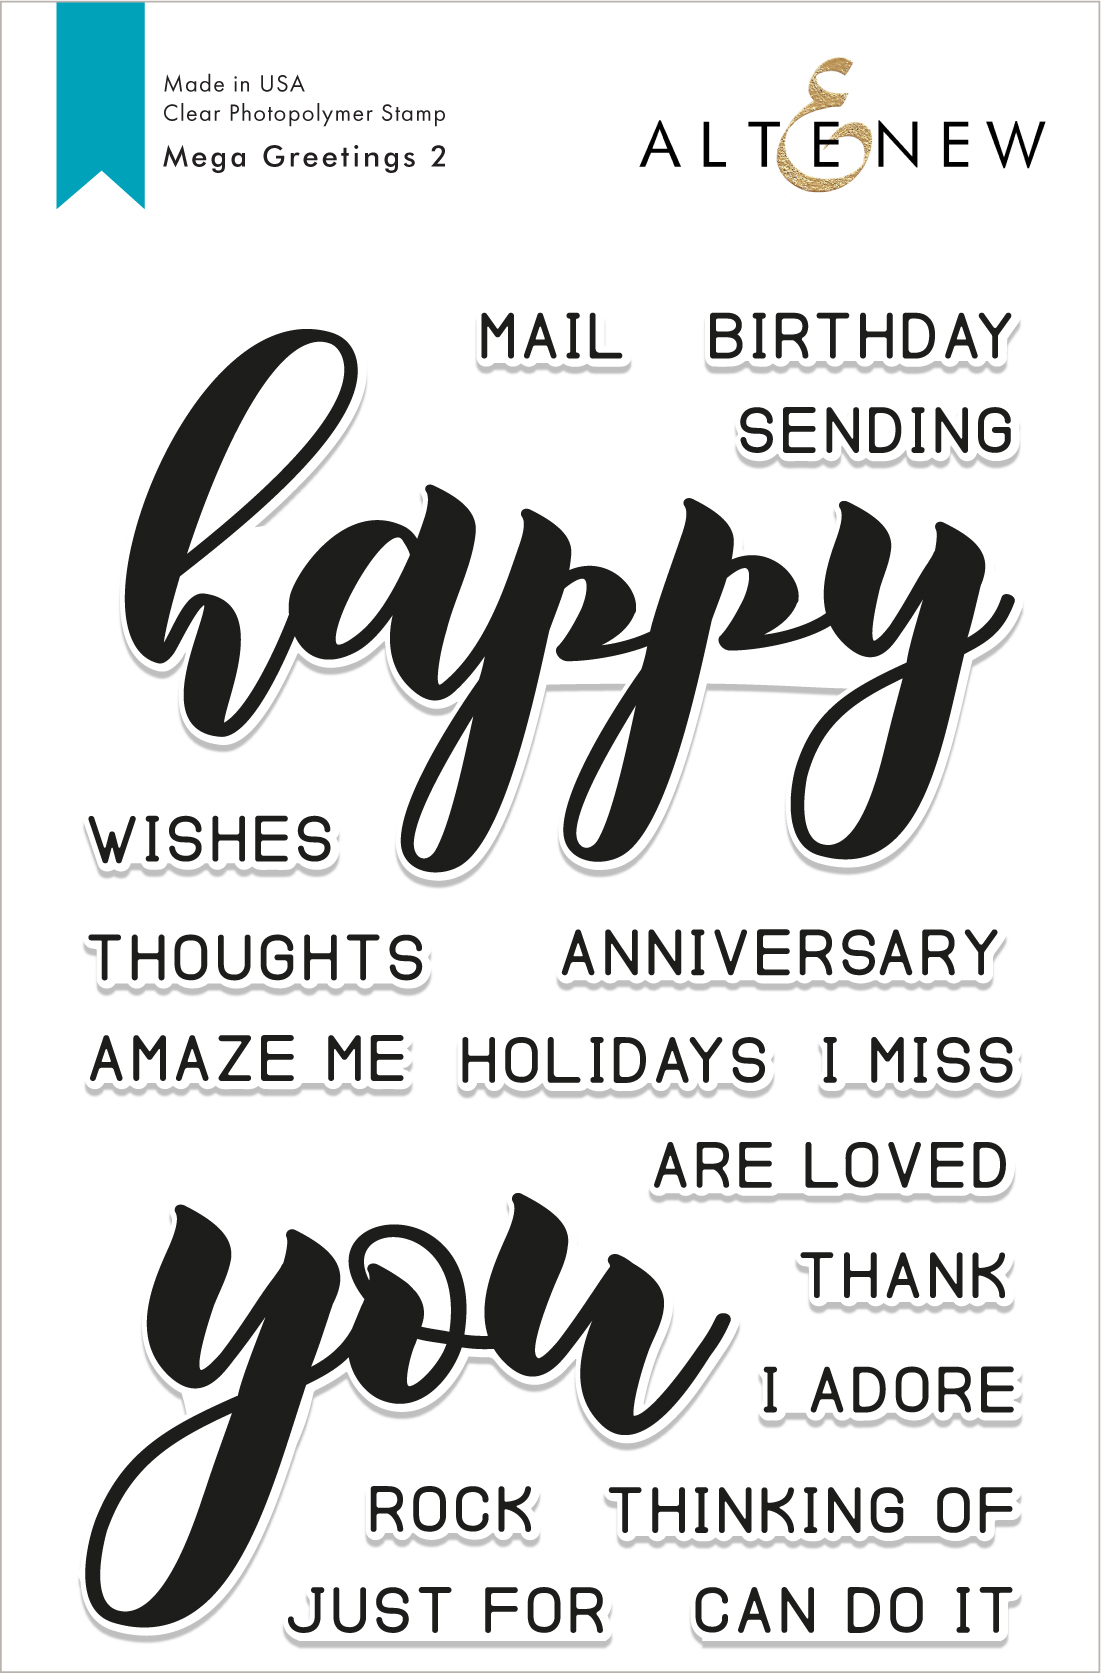
Supplies | Our Family scrapbook collection, Mega Greetings 2 stamp and die bundle, Crafty Life stamp and die bundle, Snapshots stamp set, Altenew glue tape

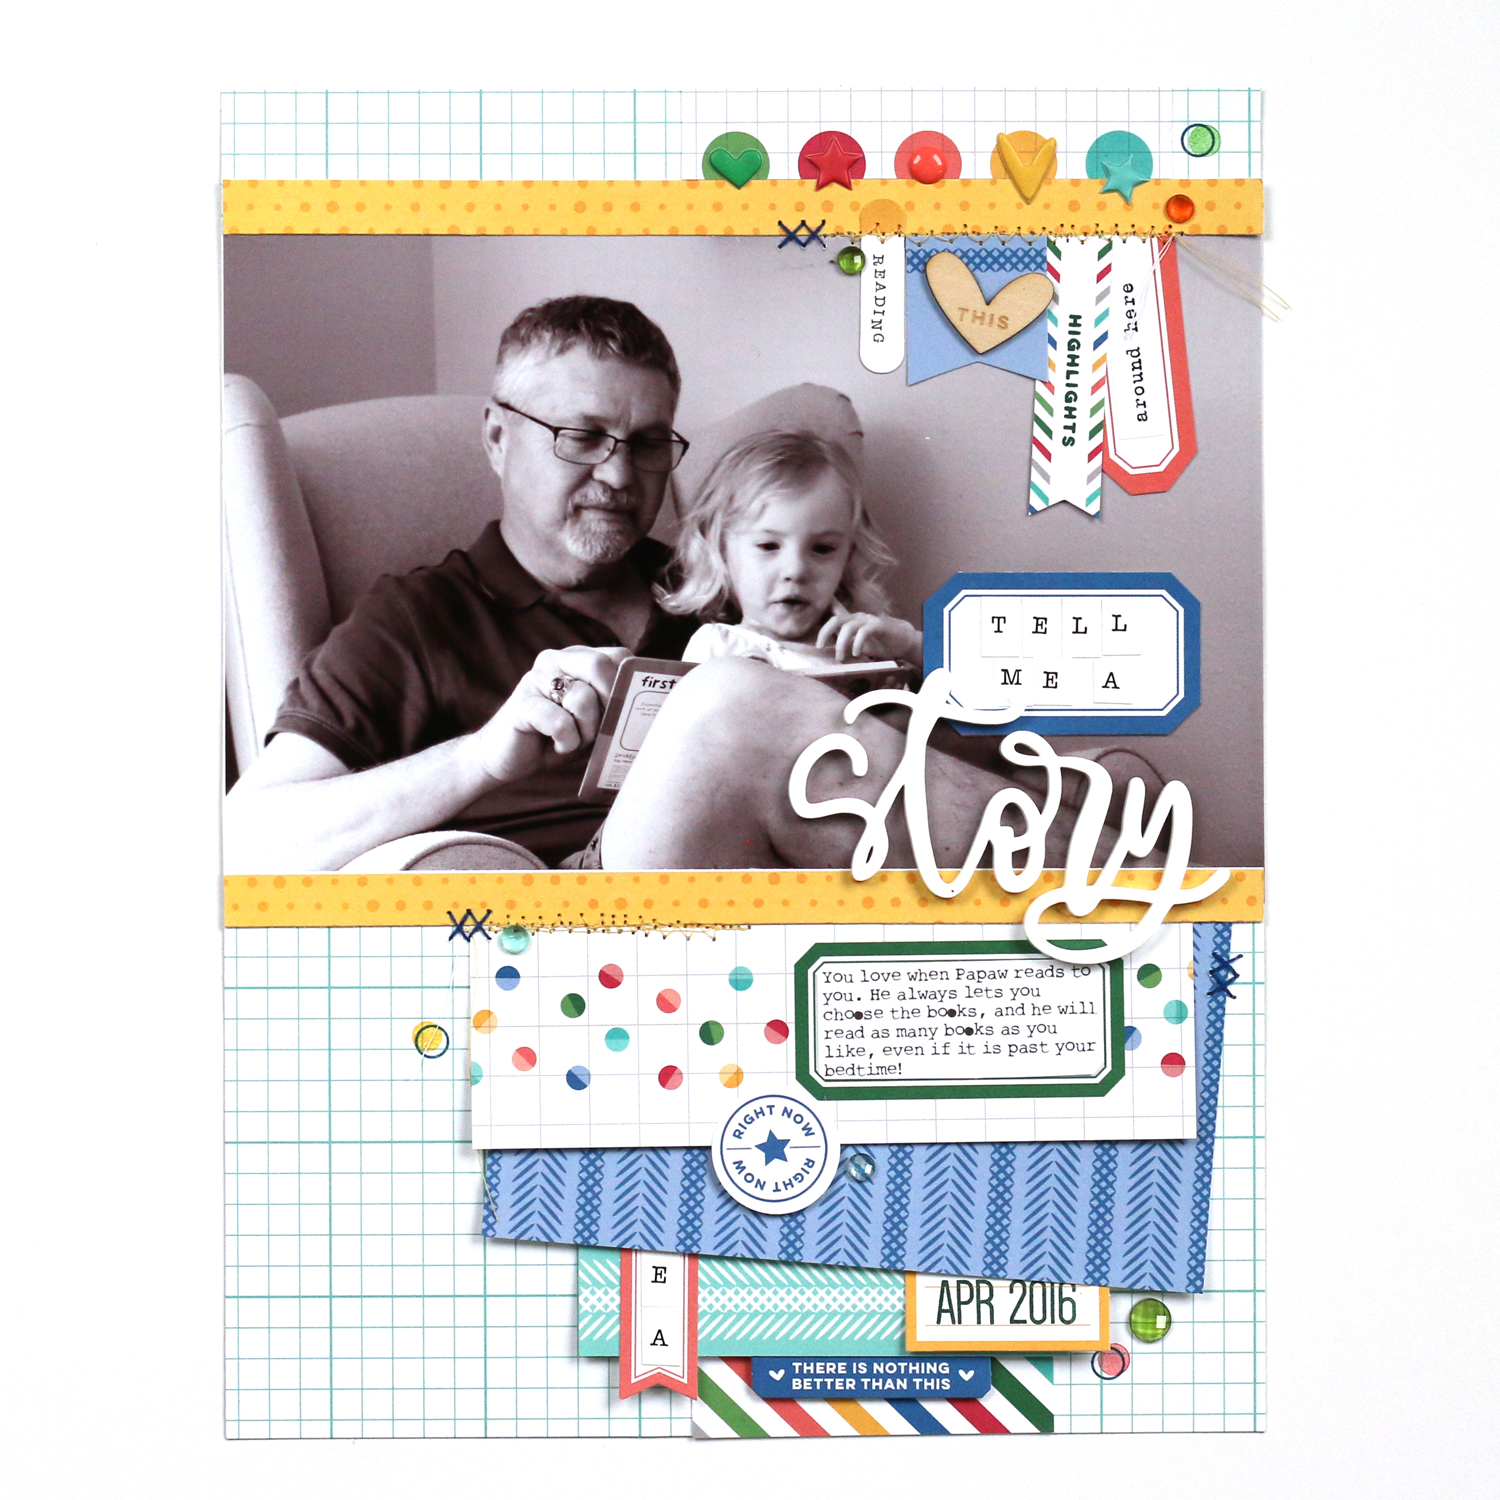
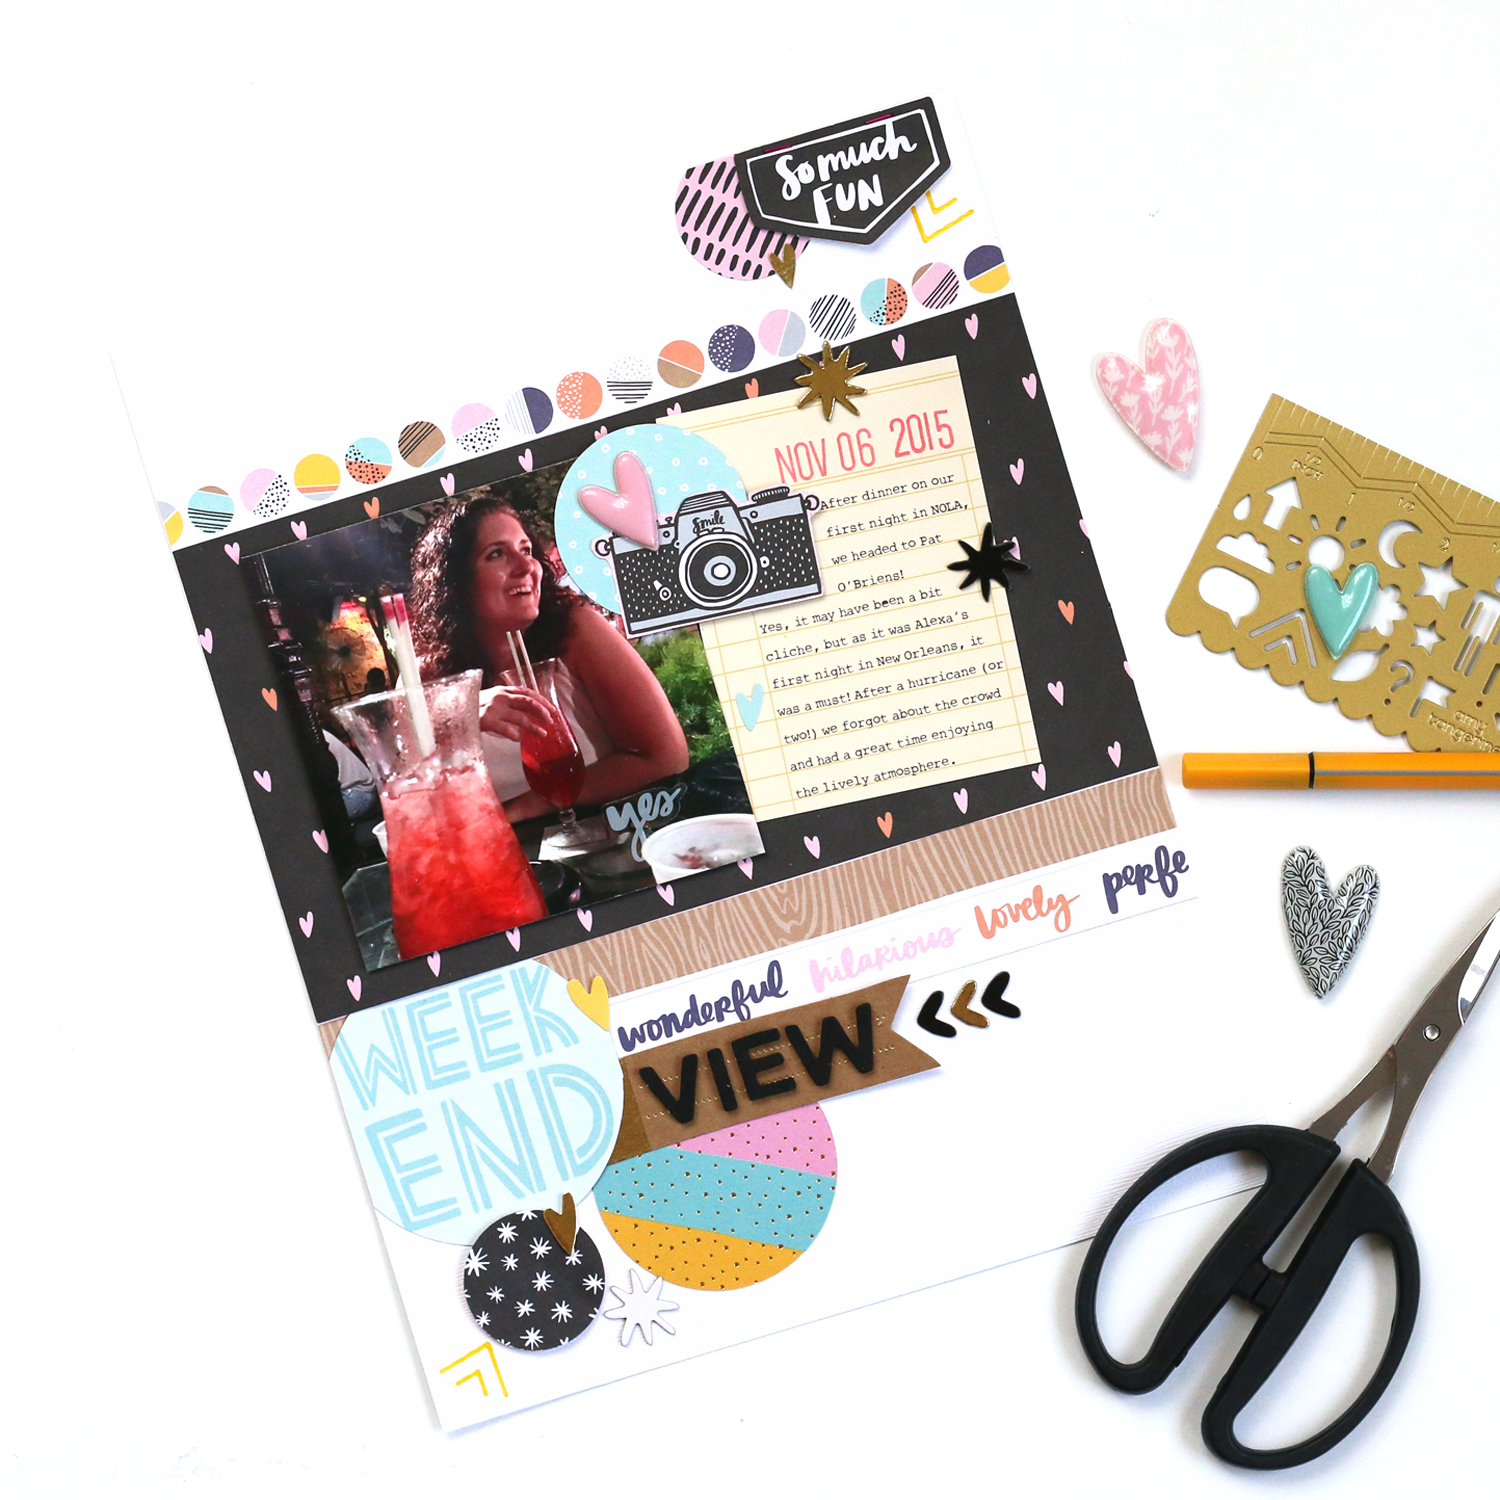
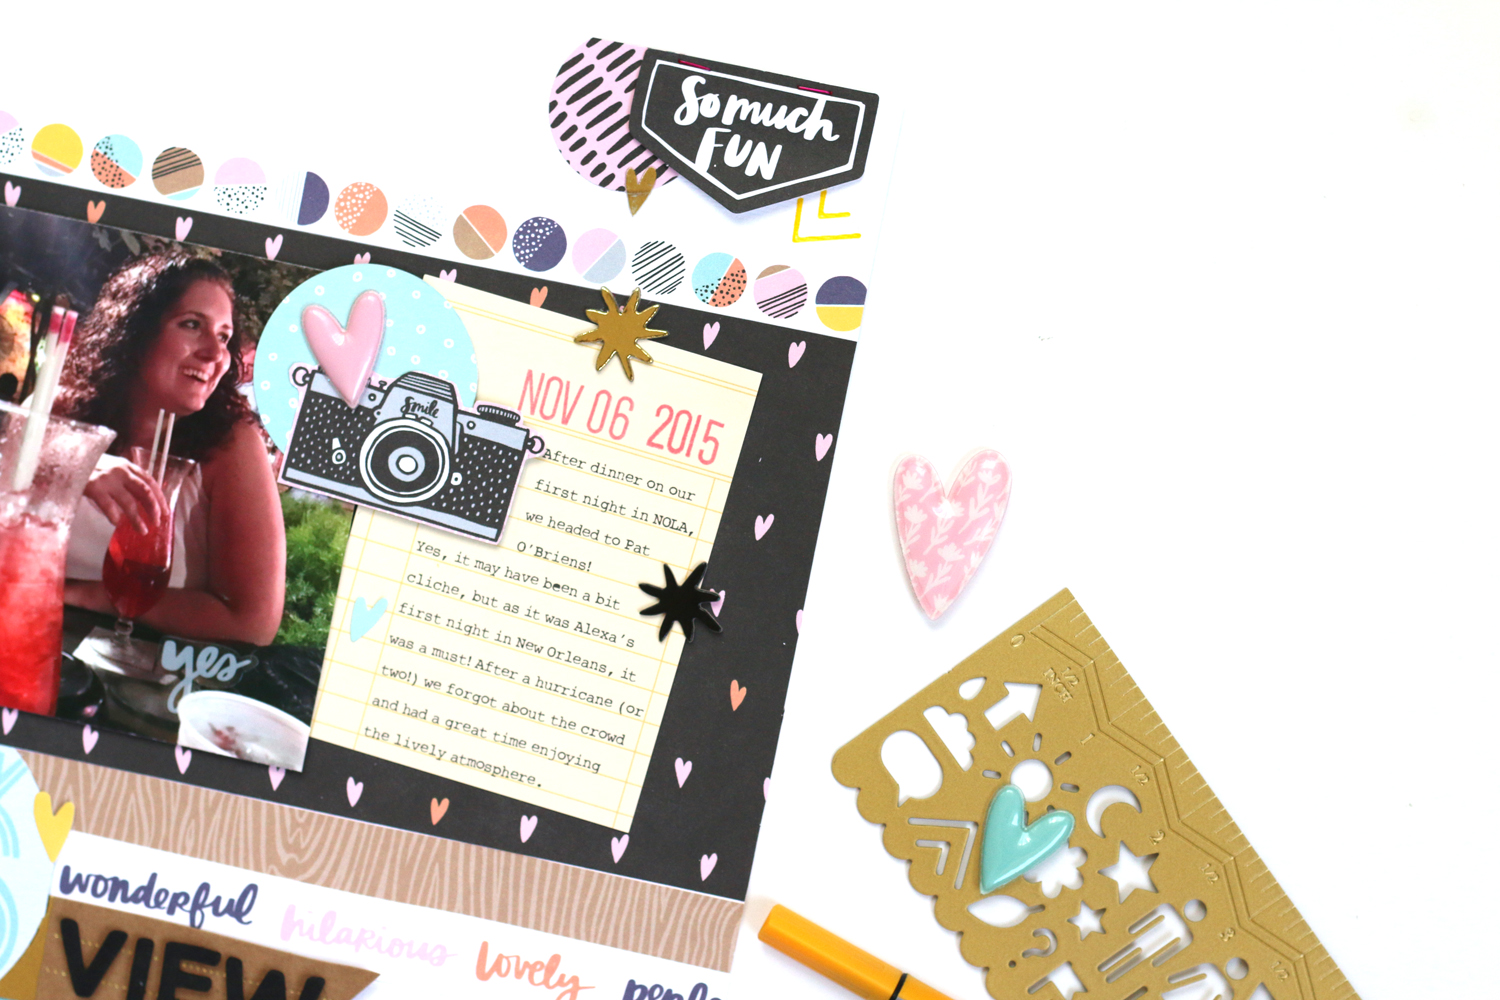
It’s quite rare that I have a photo of myself in front of the camera in my scrap space, and not just my hands for a process video! I wanted to create this layout all about how I love my job and pinch myself every day that I get to create for a living.

Altenew_MeghannAndrew_HappyCreating_04.jpg

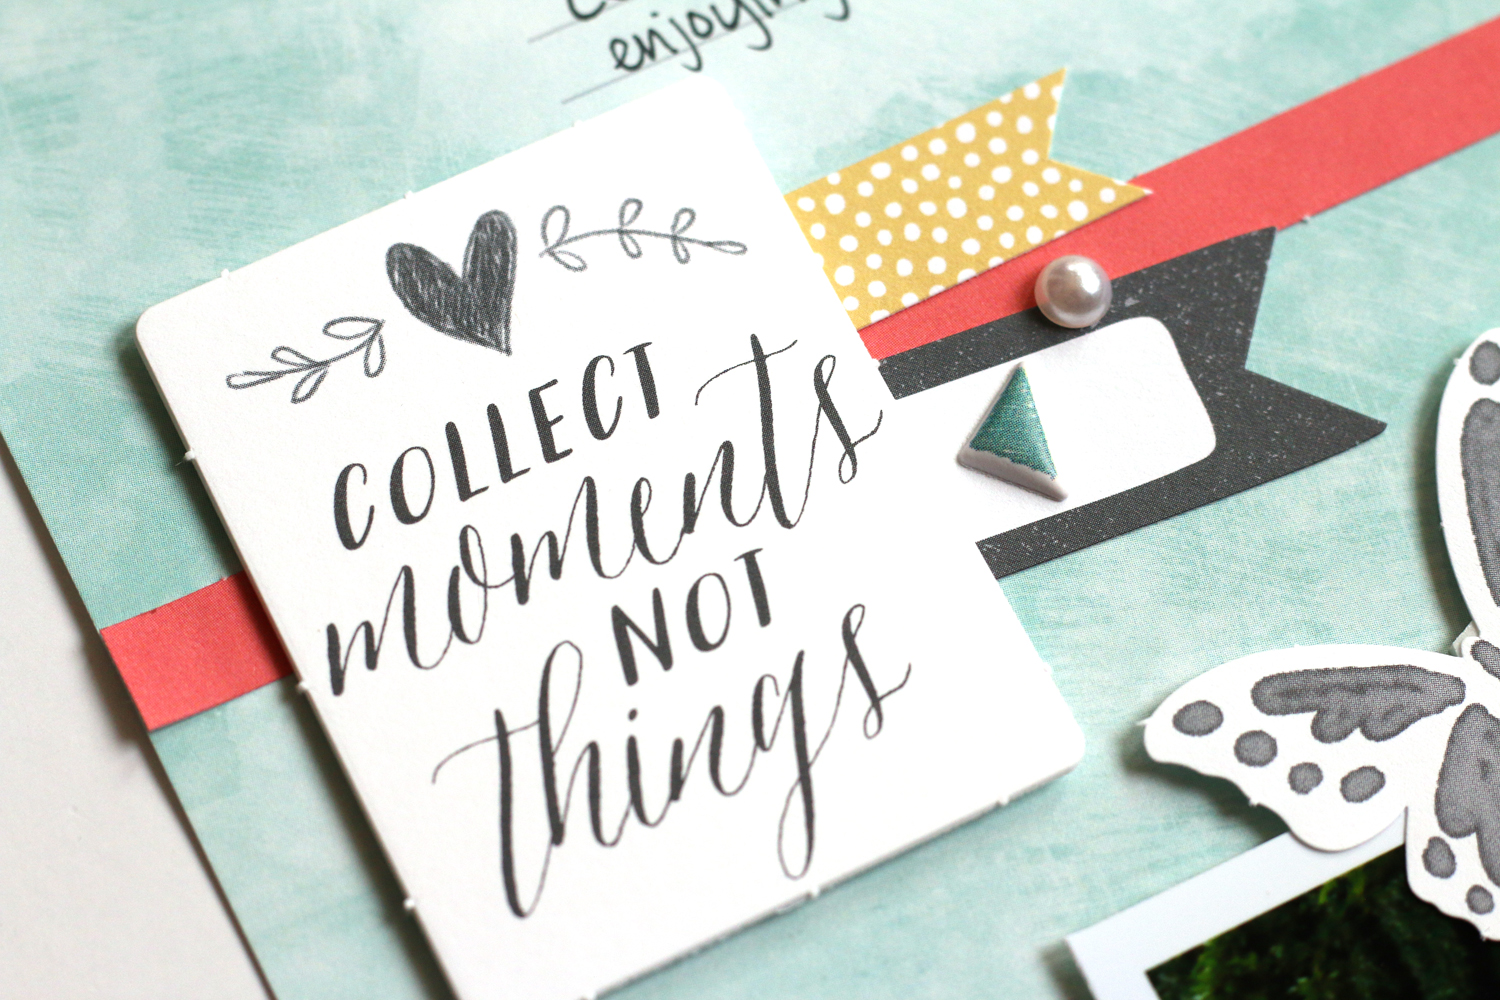
After I had my photo decided, it worked out perfectly that I could create my stamped title of my signature tagline, “happy creating,” using the Mega Greetings 2 and Crafty Life stamp and die bundles. I love the way that they look layered on top of each other in the mint green and teal blue ink.

Altenew_MeghannAndrew_HappyCreating_05.jpg

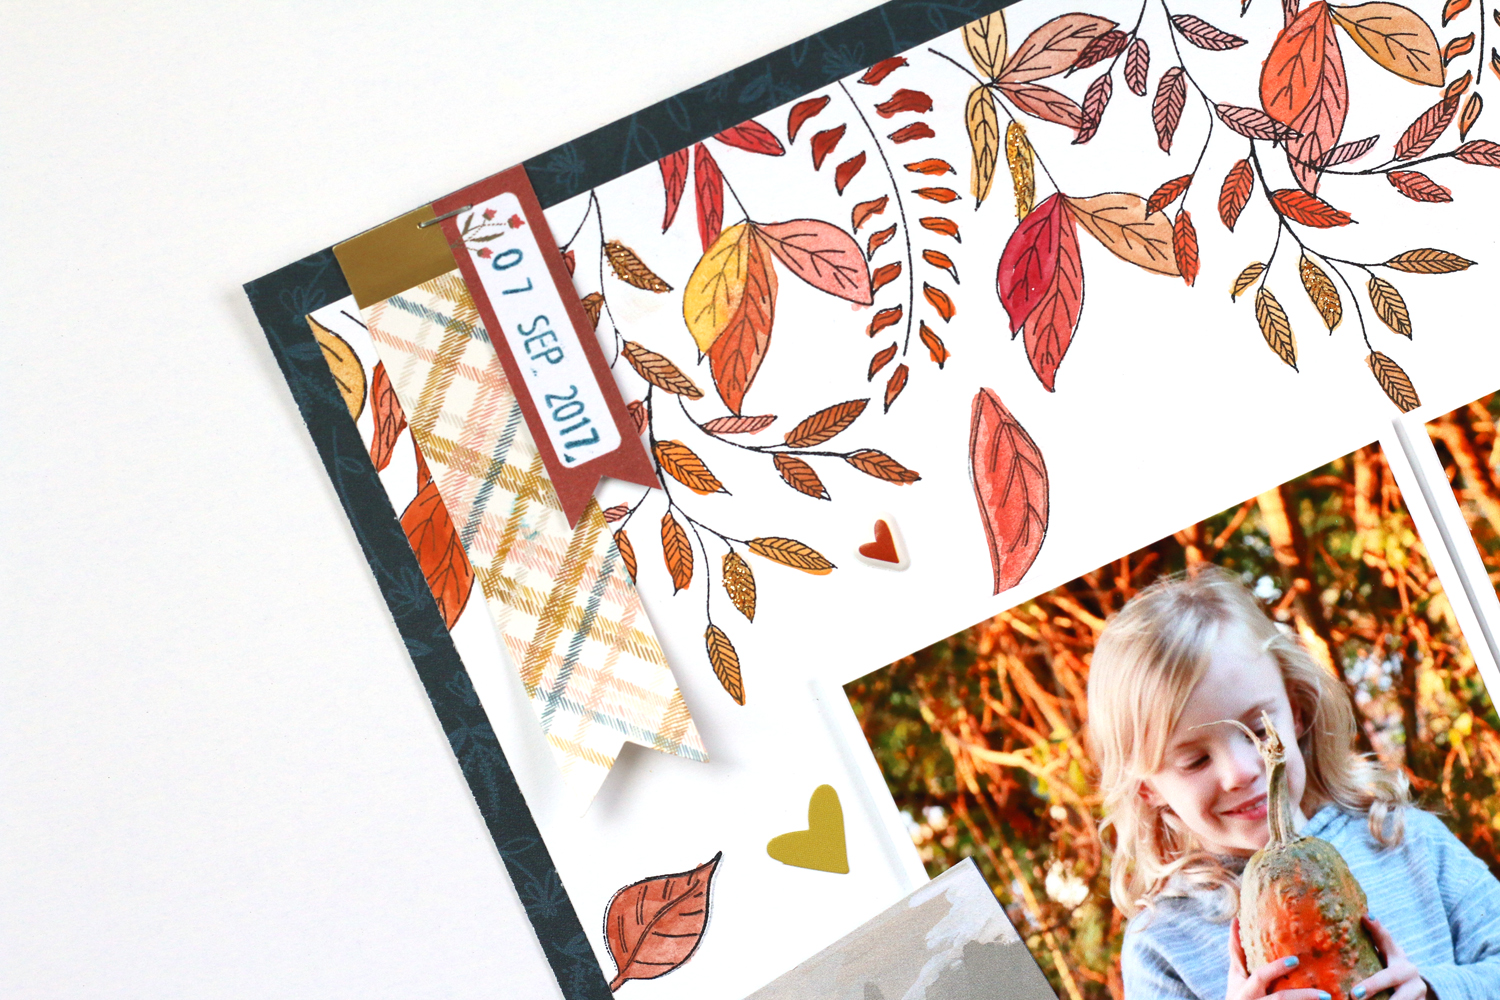
How perfect is this sentiment?! All around my layout, I included stamped elements from the Mega Greetings 2, Crafty Life and Snapshots stamps, along with fussy cut leaves, die cuts, enamel dots and beautiful patterned papers from the Our Family scrapbook collection.

Altenew_MeghannAndrew_HappyCreating_02.jpg

I love this layout, and I hope it has inspired you to document your love for paper crafting just like I did here! Tag me on Instagram when sharing your unique page! Now on to the prizes:

Altenew is giving away a $50 gift certificate to 5 lucky winners and one Altenew Academy class to 5 lucky winners. There are also 10 awesome friends who are celebrating with us, and they are offering the following prizes:

How do you enter to win one of these awesome prizes? Simply leave a comment at every stop along this hop list:

Altenew Card Blog

Jennifer McGuire

May Sukyong Park

My Sweet Petunia

Kathy Racoosin

Norine Borys

Chameleon Pens

Svitlana Shayevich

Kristina Pokazanieva

Raquel Bowman

Keeway Tsao

Butterfly Reflections Ink

Virginia Lu

Laura Jane

Simon Says Stamp

Lilith Eeckels

Dana Gong

Alex Syberia

Stamp & Scrapbook Expo

Zinia Redo

Jessica Frost-Ballas

Zsoka Marko

Meghann Andrew < you are here

Kay Miller

Be sure to leave comments by Sunday, December 9th, 2018 for a chance to win! 35 winners will be chosen at random from the comments left on all of these blogs listed below and will be announced on the Altenew Card Blog and Altenew Scrapbook Blog on December 15th, 2018. Good luck! Finish out the hop now by visiting Kay Miller for more inspiration. Good luck and happy creating!

Crafty Friends Blog Hop Sponsor Graphic.jpg

Close to My Heart Craft with Heart November Kit: Holly Jolly Snow Days

Living in Texas, we hardly ever get to experience snow, which I hate for my daughter. I always enjoyed the changing of the seasons, and the first snowfall of the year was always a magical day for me. On Boxing Day 2017, we woke to a beautiful, fresh morning of a few inches of snow, and I bundled my girl up and pushed her out the door to enjoy it. Today I’m documenting her excitement playing in the snow using the Close to My Heart Craft with Heart November Kit!

MeghannAndrew_CTMH_HollyJollySnowDays_01.jpg

This kit could not have been more perfect to for these photos. The colors and the subject of what I needed to document seemed to be made for this layout! Once I had my photos placed, I tweaked the title a bit by adding the playful Erin’s Hand Alphabet Stamp to what would have been the journaling tag, to add the word “snow.” I love how it adds to the page, and that pink heart on top of the tag gave such a bright pop of color to the title!

MeghannAndrew_CTMH_HollyJollySnowDays_04.jpg

I also loved adding some coordinating embellishments to this spread, like the gorgeous Oh What Fun felt shapes for added texture, the white pearls to bring that snowy pearlescence and the Sugarplum glitter gems for a bit of sparkle!

MeghannAndrew_CTMH_HollyJollySnowDays_06.jpg

I stamped the “enjoying today” sentiment from the Boutique Scrapbooking: Day-to-Day set and added my journaling above and below my photos, with printed cardstock strips.

MeghannAndrew_CTMH_HollyJollySnowDays_07.jpg

Check out how this layout came together quickly and easily in such a beautiful way, in the process video I’m sharing on my YouTube feed:

Be sure to subscribe to my YouTube feed (you can find a link in the right sidebar >>> ) to see what I create with next month’s Craft with Heart kit! Until then, happy creating!

Elle's Studio November 2018 Kit + Add-Ons in Pockets

Hello there! In case you missed my Elle’s Studio November reveal blog post, be sure to click here to watch my unboxing video to preview all of the new goodies in the shop this month!

In this post, I’m going to share my second project with you, created with the November 2018 kit and add-ons*, a 24” x 12” pocket page spread, which I created to document November of 2015, a hole in my monthly album!

EllesStudio_MeghannAndrew_November2015Pockets_FullSpread_01.jpg

This kit was just perfect for all of my photos! I had so many deep blues and bright reds, as well as green, and the themes in the kit this month could not have been more perfect either. I created my 4” x 6” title tag using the ledger tag from the November kit, which I accented with my favorite add-on this month, springs of greenery from the Merry Moment stamp. I also punched a red circle from the Merry and Bright 6” x 6” paper stack, and accented that grouping with a Christmas hand drawn acrylic heart. I stamped “hello” using the Title Builder stamp, then added “November” with the new navy puffy alphabet stickers.

EllesStudio_MeghannAndrew_November2015Pockets_Left_02.jpg

You may have noticed this 3” x 4” tag in the Elle’s Studio sneak video on Instagram (which we release every month on the 1st!). The “the stockings are hung” phrase can be found in the This Season phrase stickers, which have a wide range of phrases which can fit for your November and December stories! Then I added the fabulous red Jane alphabet stickers to add “deck the halls,” and accented with a die-cut arrow from the November kit, a stamped heart from the Merry Moment stamp and a Christmas hand drawn acrylic heart. It was the perfect tag to point to the photo of our house lit up with twinkle lights!

EllesStudio_MeghannAndrew_November2015Pockets_Right_02.jpg

I couldn’t forget about the beautiful blue hue in the kit! I grabbed the blue dot pattern found in the Merry and Bright 6” x 6” paper stack to create a custom 3” x 4” tag, then stamped the “a day to remember” circle with the Merry Moment stamp and fussy cut it out, adhering it to the patterned paper. Last, I added a long journaling tag, found on a 4” x 6” tag in the November kit, adding the word “proud” with the navy Jane alphabet stickers and another This Season phrase sticker. I love that this tag spans three different pockets to tie them together!

I know you will love using this kit and coordinating add-ons to tell your stories, whether inside or outside of the pocket! Be sure to shop all of the products that I used to create this spread in my shapable gallery below, which will take you directly to that product in the Elle’s Studio shop! Happy creating!

*Clicking these links will take you to the Elle's Studio shop, and when you purchase, I receive a small percentage of the sale. It doesn't cost you any extra, so thanks so much for your support!

Elle's Studio November 2018 Reveal Day!

Hooray for my favorite day of the month! It’s reveal day at Elle’s Studio, which means a brand new, beautiful kit and array of add-ons*, created with your memories in mind, has hit the shop! Take a look at my unboxing video to see all of the new goodies:

Get ready for the holiday spirit to hit your desktop with the fun, new November kit! It will take you from the Thanksgiving table and straight into Christmas with its bold and bright colors, and crisp, clean designs:

Ellestudio_November2018_Kit.jpg

You will also want to check out the coordinating add-ons, which range from new, shiny acrylics, to a gorgeous 6” x 6” paper stack! Many of them also coordinate with the Document December kit to work double-duty for you!

Ellestudio_November2018_Add-Ons.jpg

Elle has this knack for always coordinating her fall items with our previous year’s family portraits, and this year was no exception! The beautiful teal, navy and shades of green from the kit and add-ons were perfect to use while creating a new 8-1/2” x 11” layout about our family:

EllesStudio_MeghannAndrew_TreasureThis_01.jpg

I’d love for you to check out how this layout came together in my process video below! “What’s this?” you say? Two videos in one post!? In this short video, you’ll see how much I love the new Merry Moment stamp this month, how I get indecisive on where to place my boughs (a word I cannot even pronounce on video) and just plain have fun with these products!

Be sure to pick up all of the Elle’s Studio goodies that I used to create this layout via the gallery below, only while supplies last! I can’t wait to hear your thoughts on this kit! It’s a beauty!

*Clicking these links will take you to the Elle's Studio shop, and when you purchase, I receive a small percentage of the sale. It doesn't cost you any extra, so thanks so much for your support!

American Crafts Head in the Clouds Collection: Pixie Perfect

The brand new Head in the Clouds collection* by Shimelle and American Crafts is right up my alley, and as soon as it landed on my doorstep, I made the time to create a brand new layout using it! This whimsical, magical and fantastic collection is perfect for my princess and unicorn-loving little girl, and I know it’s going to help me document a lot of memories!

MeghannAndrew_AmericanCrafts_PixiePerfect_01.jpg

My daughter’s first meet and greet with Tinkerbell was perfect for this collection! The beautiful floral patterns and natural details in the embellishments gave the Pixie Hollow feel to this layout that I was looking for!

MeghannAndrew_AmericanCrafts_PixiePerfect_02.jpg

I created three different embellishment groupings on this page, filled with stamped leaves, fussy-cut elements from the Head in the Clouds patterned papers, stickers and die cut ephemera.

MeghannAndrew_AmericanCrafts_PixiePerfect_04.jpg

My title is one of my favorite parts about this layout, as I LOVE the green banner that I fussy-cut from patterned paper to place it on! It also gave the perfect element to rest my photos on.

MeghannAndrew_AmericanCrafts_PixiePerfect_03.jpg

I just had so much fun making this page, and there’s a process video to prove it! Watch below to see how it all came together:


To find all of the products that I used to create this collection, click the links in the gallery below to head directly to the Scrapbook.com and Elle’s Studio shops. Thanks so much for watching, and happy creating with this gorgeous collection!

*Clicking these links will take you to the Scrapbook.com shop, and when you purchase, I receive a small percentage of the sale. It doesn't cost you any extra, so thanks so much for your support!

Close to my Heart's Craft with Heart October Kit: This is Us

Hello! As a Close to my Heart Craft with Heart Ambassador, I receive a lovely Craft with Heart kit to create with each month, and I get to add my own spin on the kit contents with beautiful embellishments from CTMH. Today, I’m sharing what I created using the September Craft with Heart kit with you, and I could not love the result any more!

CTMH_MeghannAndrew_ThisIsUs_01.jpg

This double-page layout came together so easily! I LOVE that the background paper appears to be layered with strips of navy and teal patterned paper, but looks are deceiving! The background paper is pre-printed that way, so you can get started quickly by placing your photos on the page and adding journaling and embellishments. Just by following the kit instructions, you can create this 12” x 24” spread in under 10 minutes. That’s amazing! But, if you want to add more embellishment, CTMH’s fantastic embellishments have you covered, too. Let me show you what details I added.

CTMH_MeghannAndrew_ThisIsUs_04.jpg

If you follow me, you know that I love stamping, and I add stamping to almost every layout I create! Once my foundation layout was done, I added this fantastic phrase from the wonderful Living My Best Life (D1814) stamp on my right layout, and lovely leaf sprigs from the same stamp set, both stamped with Pewter ink (Z2832). The Grateful Heart Complements (X7237C) also added a light floral touch, and one of my favorite embellishments, the Grateful Heart Cork Shapes (Z4229) added a different texture to the pages.

CTMH_MeghannAndrew_ThisIsUs_09.jpg

I placed my title slightly lower than the layout instructions show, and that allowed more room for me to add some beautiful stamped leaf sprigs coming out of my photo, as well as stickers and die cuts from the Grateful Heart Complements (X7237C). Underneath my title, I added the word “today” from the Boutique Scrapbooking: Day-to-Day set (D1793) before adding my title.

CTMH_MeghannAndrew_ThisIsUs_08.jpg

I couldn’t forget to add a bit of shine to the page, and the Gold Loose Sequins (Z4235) placed around the spread added just the perfect touch.

Do you want to see how easily this spread came together? Watch this short process video to see fast I created the original spread, then added my own signature style to it with extra embellishment. I’ll be giving you a few tips along the way, too!

Be sure to check out the Close to my Heart Craft with Heart subscription options to document your memories in a beautiful, but easy way, and search for a consultant near you to get your own copy of the Holiday Expressions Idea Book and learn more about what Close to my Heart has to offer! Thanks so much for stopping by today, and happy creating!

Elle's Studio From Sketch to Finish Vol. 4 Class Release!

I am so excited to announce that my latest class as a coordinator for Elle’s Studio, From Sketch to Finish Vol. 4*, is now available in the shop! Simplify your scrapbooking process by starting with a sketch from this new, self-paced class, which will take the guesswork out of the process and will allow to you create layouts you love in no time!

This seventy-page PDF class, which comes as a downloadable PDF file. starts with 10 different sketches and 10 contributors, each sharing two layouts created from a sketch. You will get to read their tips and see how they interpreted each sketch to fit their unique and beautiful styles. Next, the class features 20 full-page sketches that will have you on your way to creating projects in no time! Then, our class ends with another 20 bonus sketches that were inspired by the final outcome of our contributors projects and you'll be amazed at how differently they turned out! It is a great example of how sketches can inspire you to get creative!

Our amazing contributors: Nicole Nowosad, Maggie Massey, Jennifer McMurtrey, Jana Eubank, Victoria Calvin, Nathalie DeSousa, Meghann Andrew, Mary-Ann Maldonado, Rachel O'Neal, and Lorilei Murphy, will show you how you can work with the sketch and adapt it to work with your photos and supplies. Along the way, you’ll also learn tips on how you can customize each sketch to fit your style!

All of this sketch inspiration can be on your desktop for only $19.99! As an extra bonus, our subscribers will be able to purchase the class at 20% off the retail price! Not a subscriber? Start with the amazing October Kit and get your FSTF Vol. 4 class at a reduced price by clicking here to subscribe today!

MeghannAndrew_EllesStudio_FSTFVol4_01.jpg

You will love having seventy pages of inspiration for your scrapbooking process at your fingertips while creating! Thanks so much, and please let me know how you like the class!

*Clicking these links will take you to the Elle's Studio shop, and when you purchase, I receive a small percentage of the sale. It doesn't cost you any extra, so thanks so much for your support!

Elle's Studio October Kit Reveal: What's This?

I am so, so excited about the Elle’s Studio reveal today! October is my favorite month of the year, and the supplies included in the Elle’s Studio October kit and add-ons* will now make my layouts created this month my favorite in my album! Take a look at my unboxing video to see all of the new goodies in the shop!

The October kit is usually one of my favorites from the whole year, and this one did not disappoint! This girl loves autumn and Halloween, and the October 2018 kit includes the perfect mix of both! Check out the tags and die-cuts included in the kit:

The add-ons will also have you wanting to embellish all the things! From amazing shipping tags to wood veneer and stamps, there’s something for everyone in this mix of goodies.

Digital designs are always so handy to have on hand to stretch your kit, and this month we have three awesome designs to add to your digital library: the Gather Together printables, October 2018 digital cut file, and October print and cut labels to coordinate with your kit.

EllesStudio-SeptemberDigitals.jpg

As soon as I saw the digital cut file leaves and colors in the new Sweater Weather paper stack, I knew exactly which memory I wanted to document: my daughter meeting Jack and Sally for the first time during our trip to Disneyland last year.

MeghannAndrew_EllesStudio_WhatsThis_01.jpg

It’s bright, full of contrast and has a fun Halloween color scheme! Take a look at how it all came together in my process video:

You can shop all of the product that I used on this layout in my gallery below, which will take you to the Elle’s Studio shop!

*Clicking these links will take you to the Elle's Studio shop, and when you purchase, I receive a small percentage of the sale. It doesn't cost you any extra, so thanks so much for your support!

Documenting Autumn with American Crafts

AmericanCrafts_MeghannAndrew_LovelyDay_02.jpg

Hello there! It’s finally October—my favorite month of the year! That means I can decorate to my heart’s content, drink hot drinks and stamp ALL OF THE LEAVES; even if it is still 100 degrees where I live!

Recently I received a new package of goodies from American Crafts, and it included the brand new Goldenrod collection* from 1Canoe2, as well as some fantastic new Kelly Creates stamps, and I was inspired to document a favorite photo of my daughter last fall, taken after she picked squash from my dad’s pumpkin patch!

AmericanCrafts_MeghannAndrew_LovelyDay_01.jpg

The beautiful sunset hues in the Goldenrod collection matched the gold hues in my photos perfectly, so I set out to choose the best patterns to show off my photo. I created a dark frame around the edge using the b-side of the Pink Tile paper first, then added a smooth white cardstock background, perfect for stamping!

AmericanCrafts_MeghannAndrew_LovelyDay_04.jpg

Let’s just talk about this Kelly Creates floral stamp set for a second, which is ONLY $3.49! What a bargain!

I used three of the leaf designs on the set to create a curtain at the top of my white cardstock, stamping them with permanent black ink so that I could color them in using the Vicki Boutin watercolor set, in hues to coordinate with the colors in my photos and give the layout an autumnal feel. Once my paint was completely dry, I added a bit of sparkle using a gold glitter Moxy glitter glue from the Jewel Thief set—a mess-free way to add some sparkle!

AmericanCrafts_MeghannAndrew_LovelyDay_03.jpg

Next I added my photos, sized at 3” x 3” and framed with a white border, using dimensional adhesive. To the left, I had just enough space to add the “these are the days we dream about, when the sunlight paints us gold,” card from the Goldenrod 6” x 6” paper pad. It was the perfect sentiment for these photos, as the sunset was lighting up the tree behind my daughter in brilliant gold hues.

AmericanCrafts_MeghannAndrew_LovelyDay_05.jpg

At the base of my page, I added a banner from the b-side of the Pink Tile paper to create a shelf for my photos and add contrast for my title, created with the beautiful Goldenrod Thickers. Below my title, washi and a gold manufacturer’s strip began a series of lines: the bold “making memories” sticker from the Goldenrod cardstock sticker sheet above, and my journaling added in strips below, all set on the gorgeous plaid b-side of the Sweet Strawberries paper—which might be my favorite from the collection! I had to add a few more leaves to my title block, so I stamped, painted and fussy cut three out, combining them with heart stickers from the collection.

AmericanCrafts_MeghannAndrew_LovelyDay_06.jpg

I can’t tell you how happy this layout makes me, and the creative process was so fun using the beautiful Kelly Creates floral stamp and Goldenrod collection! Grab a PSL and these autumnal supplies, and start documenting your fall memories! Be sure to check out all of the product I used on this layout in the affiliate gallery below:

*Clicking these links will take you to the Scrapbook.com shop, and when you purchase, I receive a small percentage of the sale. It doesn't cost you any extra, so thanks so much for your support!

Documenting Change with American Crafts Field Notes Collection

I’ve had a really cool photo taken of myself in front of a mural wall for years, just sitting with my printed photos. Then the Field Notes collection* came to my desk, and the perfect product married with the photo to tell a story about change in my life, and I’m excited to share this new 8-1/2” x 11” layout with you today!

AmericanCrafts_MeghannAndrew_Changing_01.jpg

The colors in my photo could not have been more perfect with the bold and saturated colors in the Field Notes collection, and the phrases found in the Field Notes embellishments fit my subject perfectly: change in my life. This was a subject that I don’t think I could have journaled about when the photo was taken in 2015, but today, I’m embracing change, and pushing myself to be better in all aspects of my life.

AmericanCrafts_MeghannAndrew_Changing_03.jpg

While I was putting this layout together, I created a short process video all about the design decisions that I made! I’d love for you to grab a cuppa and watch how the product and my story came together on this fun page.

The Field Notes collection provided so many fun patterns and embellishments on this layout, and the best thing about it is that the colors and subjects in it are so varied that I could use it again and again with completely different results! Check out the gallery links to Scrapbook.com below where you can find all of the product I used to create this page. Thanks so much for stopping by, and happy creating this weekend!

*Clicking these links will take you to the Scrapbook.com shop, and when you purchase, I receive a small percentage of the sale. It doesn't cost you any extra, so thanks so much for your support!

Documenting my Whole30 Journey with Elle's Studio September Kit

Back in March, I went on a journey with Whole30, and it changed my life, my body and my mind. I started the program to kick my sugar habit, as I really have a sweet tooth and always wanted sweets after a meal. I wanted to document this month in my album, and the Elle’s Studio September 2018 kit and add-ons*, full of food-themed products, was perfect for this project.

EllesStudio_MeghannAndrew_Whole30_01.jpg

I could tell you all about how I created this layout and pocket page spread, but why not watch my process video instead?

The back side of the pocket page was not included in my process video, so here’s a look at how it turned out.

EllesStudio_MeghannAndrew_Whole30_02.jpg

At the top of the page, I used a digital tag from the New Season printables to add my journaling on the left side of the 4” x 6” pocket, then adhered a 3” x 3” photo of one of my favorite dinners on the right side. The “notes” die cut from the September kit and “more of this” Here and Now phrase sticker finished off the pocket.

EllesStudio_MeghannAndrew_Whole30_11.jpg

Can I just say that I have been hoarding the circle numbers in the Noteworthy puffy stickers since the collection released in April!? I finally had a good excuse to use them: to document my non-scale victories—or things that I noticed changing in my body besides my weight. Next to that, on the “favorites” New Season printables tag, I added a list of my favorite foods and meals during my month of Whole30.

Even though I did not start this program to lose any weight, my before and after image is pretty telling—I lost fat, gained muscle and just felt better overall. I also kicked my “need” for sugar! I added my before and after photos to the bottom pocket, separating them with the wooden spoon from the Good Eats wood veneer, adding the “this happened” die-cut from the September kit to the top. At the bottom, I added the words “before” and “after” to the colorful September labels using the new Hazel white alpha stickers.

EllesStudio_MeghannAndrew_Whole30_12.jpg

This has to be one of my favorite projects in my album—both because I love the product that I used and the subject that I’m documenting so much! Be sure to check out all of the product I used on this spread in the gallery links below, which will take you directly to the Elle’s Studio shop. Thanks so much for stopping by! If you’re interested in the Whole30 program, be sure to check out their website for all of the details!

*Clicking these links will take you to the Elle's Studio shop, and when you purchase, I receive a small percentage of the sale. It doesn't cost you any extra, so thanks so much for your support!

Elle's Studio September 2018 Kit: A Day at the Ballpark Pocket Page + Process Video

Hello! I'm so excited to have the new September 2018 kit and extras from Elle's Studio on my desk this month, and when I saw the new Go Team journaling tags, stamp and wood veneer, that released as extras with the kit, I knew that I needed to document my family's yearly trip to a Cincinnati Reds baseball game, and I did that with a new pocket page:

This Design J pocket page is one of my favorites, and I had documented a fun day visiting the U.S.S. Midway with it before—it's one of my favorite pocket pages that I've created this year. I decided to not re-invent the wheel, so I used the exact same photo/tag layout that I used for that page on this one. It helped me to complete this page faster, and know exactly where I would place my photos and journaling tags. 

EllesStudio_MeghannAndrew_DayattheBallpark_06.jpg

The highlight of this page for me is the title tag with the cutest baseball bat wood veneer piece, and the photo of my daughter with the female mascot, Rosie, next to it.

EllesStudio_MeghannAndrew_DayattheBallpark_09.jpg

I could not resist stamping a border of those cute baseballs from the Go Team stamp with water-based markers so that the stitching could be red! It's all in the details, right?

EllesStudio_MeghannAndrew_DayattheBallpark_04.jpg

Another fun detail that I added was the red bakers twine knots on this "we won" wood veneer piece from the Go Team wood veneer. It only took an extra minute, and I love the way it looks at the top of my photo. 

You can see how all of these elements came together in my quick process video! In it, I'll show you how to create that baseball border, how I messed up while stamping my title tag (real life!), and how I put just the right amount of embellishment around my pages.

Thanks so much for watching and stopping by my blog today! I hope you're as excited about the new September release from Elle's Studio as much as I am! Be sure to grab up these goodies before they're gone—the August kit sold out weeks ago, so don't delay! You can also see all of the product that I used to create this pocket page in the shoppable gallery below. Happy creating!

*Clicking these links will take you to the Elle's Studio shop, and when you purchase, I receive a small percentage of the sale. It doesn't cost you any extra, so thanks so much for your support!

Elle's Studio September 2018 Kit Reveal Day!

Hello! September is a fantastic month—it still feels a bit like summer, but the days are getting shorter and the kiddos are back in school. The brand new September 2018 kit and add-ons* from Elle's Studio is the perfect mix of summer and fall, and I know you'll love them as much as I do, especially the gorgeous color scheme! Take a look at this unboxing video to see all of the new product firsthand:

An array of colors, phrases and subjects adorn the tags and die-cuts in the September kit this month. I have so many favorite tags from this kit, that it is difficult to choose just one!

The add-ons are sure to make you want to embellish a bit more! With a wide range of products, from labels to wood veneer, you're sure to find a product that you want to use on your next project!

EllesStudio_September2018_AddOns.jpg

My favorite add-on this month is the beautiful Story acrylic

I used it as a story-starter to document how much my daughter loves her grandfather reading to her, on a new 8-1/2" x 11" layout:

I'm pretty sure that this layout will go down in my books as being one of my absolute favorite of all time, and that's because I loved the kit and add-ons so much! 

EllesStudio_MeghannAndrew_TellMeAStory_03.jpg

Instead of hoarding all of my favorite tags and die-cuts from the kit, I used them all together on this layout, creating a waterfall effect with lots of dimension and texture. 

EllesStudio_MeghannAndrew_TellMeAStory_05.jpg

The 4" x 6" colorful circles tag was a favorite for sure, so I added more circles around my page by stamping the outline and filled circles from the Right Now stamp in three areas around the page.

EllesStudio_MeghannAndrew_TellMeAStory_04.jpg

Colorblocking is one of my favorite embellishment techniques, and it was SO FUN to do that here with this colorful dots 3" x 4" tag from the kit. I added a few puffy stickers and an enamel dot in the coordinating hues. Below that, a line of stitching, both machine and by hand, finished off a banner of die-cuts, embellished with the Good Eats wood veneer and the Here and Now phrase stickers.

Be sure to grab all of this new, beautiful product released with the September 2018 kit and add-ons before they're gone, especially when the kit is $9.99 for reveal day ONLY! You can also check out all of the product used in my "Tell me a Story" layout in the gallery below. Stay tuned for my second project using the new kit and extras, which will be live here on my blog in two more hours! Thanks so much for stopping by and I hope to see you again in a little while! Until then, happy creating!

*Clicking these links will take you to the Elle's Studio shop, and when you purchase, I receive a small percentage of the sale. It doesn't cost you any extra, so thanks so much for your support!

American Crafts Shine On Summer Memories Mini Album

AmericanCrafts_MeghannAndrew_Summer2018Mini_03.jpg

Hello there! Recently I was assigned a task of documenting summer memories for the American Crafts blog. I looked around my new stash of the Shine On collection* and wondered, "Should I create a layout? a mini album?" Then, I came across this adorable card kit, perfect for sending handwritten greetings in the mail, and I came up with a wonderful idea.

The camera card in the Shine On collection card kit was the first thing I picked up, and realized that it would be the perfect mini album cover! I began by choosing four different Shine On patterned papers to create my pages, and cut them down to 10" x 3-1/4", so that they would fit inside the card. I then scored them in half and put them inside the camera. 

Next, I used my Crop-a-Dile to punch two holes at the top and bottom on the fold line of the card, punching through all of the layers of patterned paper, too. I grabbed some neutral baker's twine, threaded with an embroidery needle, and pulled it twice through my holes, finishing it off with a bow to create a binding edge. To make it extra special, I also tied a Sunshine and Good Times tassel to my baker's twine.

AmericanCrafts_MeghannAndrew_Summer2018Mini_02.jpg

Now my album was ready for photos! I printed photos at 3" x 3" from my top 10 or so best memories from our summer of 2018—the best of the best, like my Dad's birthday dinner, my brother's wedding, and our trip to the U.K. I adhered them straight onto the patterned paper using tape runner—I didn't want any extra bulk in this album. Around the photos, I used the journaling tags from the Shine On ephemera pack and cardstock stickers to add a few words about the memories on each photo.

AmericanCrafts_MeghannAndrew_Summer2018Mini_05.jpg

The More of This paper includes a full sheet of 3" x 3" journaling and filler cards, and was perfect for adding this "about us" journaling card to this page. My favorite ever date stamp, from Shimelle's first collection with AC added the date to each page, too.

AmericanCrafts_MeghannAndrew_Summer2018Mini_08.jpg

Thin stickers added some extra interest, like the little hearts from the Shine On sticker book and washi tape strips, placed directly on my photos—like I did here on top of the photo of my Lizzy jumping off of a boat into the river.

AmericanCrafts_MeghannAndrew_Summer2018Mini_10.jpg

On my final page, I had to add one of my favorite ever photos from the summer—and amazingly, I'm in it! It's a rare find around here! I finished off this page with the bitty and adorable Shine On puffy heart stickers!

To keep the album closed, I added the teal "love" Shine On binder clip to the right side, and my title— "Summer" from the Shine On sticker book and "2018" from the numbers on the kraft cardstock stickers, along with a couple of puffy heart stickers to finish it off!

AmericanCrafts_MeghannAndrew_Summer2018Mini_01.jpg

I LOVE, love the way this little mini album turned out. I'm sure that the other cards in the Shine On collection card kit , especially the flower and the "love" cards, would also made darling mini album covers. I hope you'll give this project a try! You can shop all of the product I used in my mini though the gallery below, which will take you to the Shine On product ON SALE at Scrapbook.com! Thanks so much for your support!

*Clicking these links will take you to the Scrapbook.com shop, and when you purchase, I receive a small percentage of the sale. It doesn't cost you any extra, so thanks so much for your support!

Close to My Heart Craft With Heart September Kit Layout + Process Video

MeghannAndrew_CTMH_SeptKit_LovingTogether_04.jpg

Hello there! Recently my friends at Close to My Heart contacted me about their Craft with Heart kit, and asked if I wanted to give it a try. I'm all about kits that help me get my memories documented quickly, and after I saw the kit images, I was all for it! These kits are beautifully designed, and include the paper, stickers and die-cuts that you'll need, as well as instructions for how to complete two 24" x 12" layouts in each kit. All you need to do is add photos and your journaling. These kits also coordinate beautifully with their gorgeous paper collections included in the new Holiday Expressions Idea Book. There are also three different subscription options, so be sure to check out all of the details on the Craft with Heart website.

MeghannAndrew_CTMH_SeptKit_LovingTogether_05.jpg

I started out with the September kit, and decided to document a special family wedding, because the colors in the kit were perfect for all of the brightly colored clothes (and accessories!) that we were wearing for the wedding day. Sticking to the kit and instructions would have created a beautiful layout, but I wanted to take it a step further by adding more embellishment and (of course!) STAMPING! It's just what I do! I'm so happy with how my final layout turned out:

MeghannAndrew_CTMH_SeptKit_LovingTogether_Full.jpg

This kit was perfect for documenting a special day, using my own photos and memories! You can see what the layout would have looked like had I stuck to the kit instructions, and find out how I had to change things up a bit to reflect the photos that I had on hand, in this process video:

Be sure to check out the Craft with Heart kit subscription options, and stay tuned for another layout next month, using the beautiful October kit! 

MeghannAndrew_CTMH_SeptKit_LovingTogether_07.jpg

Note: I was asked to be a Craft with Heart Ambassador by Close to my Heart, and I chose to do that because their kits are lovely, and I think that they will be great for you, my blog readers and video followers. I would only recommend product that I myself would use and enjoy. I hope you enjoy it, too!

Elle's Studio Document December 2018 Kit + Add-On Unboxing!

DocumentDecember_MeghannAndrew_01.jpg

Christmas came early to my house this year, and it was in the shape of a little brown paper bag packed full of paper crafting goodies! The Elle's Studio Document December Kit and add-ons* were just released this week, and I can't wait to show you everything in this unboxing video! Grab a cup of hot cocoa and pretend it's the holiday season, just for a few minutes! 

The Document December Kit has everything you need to document your holiday season in a mini album or traveler's notebook, on scrapbook layouts or in pockets, and is packed with 6" x 8" papers, 4" x 6" and 3 x 4" journaling tags, die-cuts, labels, alphabet stickers in two fonts, two sheets of puffy stickers, shipping tags, wood veneer, acrylic and sequins. Phew! That's a lot of product—all for only $41.99! But wait, if you shop now through September 4th, you'll get 10% off of that kit price (no discount code needed!) 

If you love to use A LOT of product in your December album like me, don't worry! You can also find awesome coordinating add-ons in the shop, like these candy cane puffy alphabet stickers:

Or, if you're a stamper, be sure to grab the Oh What Fun stamp

And you definitely don't want to miss out on the Christmas colorway of the popular Shapes and Dots puffy stickers:

I cannot wait to organize all of my new Document December supplies—and better yet, for Christmas to get here so that I can start to collect all of the memories we'll share with this gorgeous kit! I can't wait to see what you do with yours! Be sure to check out the Document December Kit and add-ons today! The 10% off sale on the kit only lasts through September 4th! 

*Clicking these links will take you to the Elle's Studio shop, and when you purchase, I receive a small percentage of the sale. It doesn't cost you any extra, so thanks so much for your support!

American Crafts Shine On Collection Layout + Process Video: "Weekend View"

AmericanCrafts_MeghannAndrew_WeekendView_02.jpg

Happy Friday! Who's glad that the weekend is finally here? Today I'm excited to share a brand-spankin' new layout with you that is all about weekend fun on a girl's trip to New Orleans, created with the new Shine On collection* from American Crafts and Amy Tangerine!

Supplies | American Crafts: The Good Life paper ("weekend" circle), Surrounded by Love paper (hearts), Even Out paper (border strips), Alive paper (pink and black pattern), Three Sides paper (black and white), Remember paper (camera), 6" x 6" paper pad, Twilight foam alphabet Thickers, ephemera die-cuts, chipboard accent Thickers, mini inflated hearts, sticker book, 6" ruler stencil, Detail Doodlers pens; Elle's Studio: Mini Dated Stamp, July 2018 Kit

I wanted to create a layout with circles, as I was inspired by this layout featured on @mefunscrapt's Instagram feed, and realized that it had been a LONG time since I had cut out circles! I started grabbing Shine On 12" x 12" and 6" x 6" patterned papers, and used my old Creative Memories circle cutter to cut them out. The "weekend" circle from The Good Life paper was the paper that inspired my title, and I found the Kraft tag in the ephemera die-cuts to add the word "view" using the Twilight foam alphabet Thickers 

AmericanCrafts_MeghannAndrew_WeekendView_03.jpg

What originally began as a two-photo page, turned into a one-photo layout, since I could not cover up the photo-bomber on the second photo well enough, and it didn't add anything to the story, and editing the number of photos actually left me with more space for a cute journaling tag from the Elle's Studio July 2018 Kit anyway! I topped this with a fussy-cut camera, another circle of paper and the cutest pink mini inflated heart!

AmericanCrafts_MeghannAndrew_WeekendView_04.jpg

Who is looking for a fun and functional tool for their stash? This Shine On 6" ruler stencil was super fun to use with the Detail Doodlers pen to add the cute little arrows to my layout at each corner. I know that I'm going to use the heck out of this stencil. It has so many cute icons on it! 

AmericanCrafts_MeghannAndrew_WeekendView_05.jpg

I went completely "off the cuff" with this layout, and filmed a process video while creating it! In it, you'll see how I struggled to cover up that photo-bomber, the other ways I tried to make my title work, as well as how I added my typed journaling to my journaling tag, leaving room for that cute camera. Take a look at how it all came together: 

You can shop all of the product I used on this page at the links below, and psssst! The Shine On collection is currently ON SALE! I hope you'll document your big weekend adventures using the fun Shine On collection! Happy creating! 

*Clicking these links will take you to the Scrapbook.com shop, and when you purchase, I receive a small percentage of the sale. It doesn't cost you any extra, so thanks so much for your support!

Altenew August 2018 Stamp and Die Release Blog Hop + Giveaway

Altenew_Blog Hop Graphic.jpg

Hello, and welcome to my blog! I'm so excited to be joining in on the Altenew August 2018 blog hop, and if you're following the hop list, you've come here from Nicole Picadura's blog. This month I worked with these beautiful stamps from the entire line of new releases*:

This Inked Flora stamp set has beautiful, sketchy flowers perfect for making a statement on your project, along with plenty of handwritten sentiments.

I love the font combinations on the Mega Greetings 2 stamp! It's perfect for layout titles or card greetings, and you can also purchase the Mega Happy Die and the Mega You Die to coordinate with the stamp!

All of the new releases hitting the shop today come with tri-fold insert cards showcasing lots of added inspiration, project ideas, printed layering guides, and other useful information!

Using these new products, along with the Our Family scrapbook kit, I created a brand new 8-1/2" x 11" layout about my lovely little girl:

Altenew_MeghannAndrew_HappyYou_01.jpg

How pretty are those big flowers? I loved stamping them in different colors on my layout background, as well as embossing them and watercoloring the inside to create a beautiful embellishment piece.

Altenew_MeghannAndrew_HappyYou_04.jpg

The Mega Happy Die and the Mega You Die created the perfect title for this page. I cut "happy" twice: first with the purple paper from the Our Family scrapbook kit, then with a piece of gray cardstock to create a shadow. Using gold metallic cardstock for the "you" word created a nice visual triangle of gold on my page with the embossed florals.

Altenew_MeghannAndrew_HappyYou_05.jpg

I had so much fun creating this page that I didn't want to stop making! I decided to create a greeting card, too!

Altenew_MeghannAndrew_YouAmazeMe_01.jpg

The gorgeous watercolor paper from the Our Family scrapbook kit created the perfect background for this simple and easy card. 

Altenew_MeghannAndrew_YouAmazeMe_02.jpg

Using the washi tape from the Our Family scrapbook kit to create a shelf on the card front, I adhered the stamped and die-cut "you" using the Mega Greetings 2 stamp and die, then repeatedly stamped "amaze me" from the same stamp set. I just love how it turned out, and it was so easy to create! 

GIVEAWAYS:

Now the part that you've come here for! The giveaways! To celebrate this release, Altenew is giving away a $50 gift certificate to 6 lucky winners! Please leave a comment on the Altenew Card Blog and/or Altenew Scrapbook Blog by Wednesday, August 22nd for a chance to win. 6 winners will be announced on the Altenew blogs on 8/26/2018.

I'm excited to also be giving away a $30 gift certificate here on my blog! Simply leave a comment on this post by midnight CST on 8/21 letting me know what your favorite product is in the entire line-up of new releases to be entered! Be sure to leave your contact information when commenting, and I will contact a winner on 8/22. 

To continue on the hop, head over to Virginia Lu's blog for more inspiration! In case you get lost along the way, you can find a list of all of the participants below. Thanks so much for stopping by and happy creating! 


Altenew Card Blog

Rubeena Ianigro

Anna Komenda

Agnieszka Malyszek

Tania Ahmed

Erum Tasneem

Karin Åkesdotter

Simon Says Stamp Blog

May Sukyong Park

Keeway Tsao

Sveta Fotinia

Altenew Scrapbook Blog

Vicky Papaioannou

Zinia Redo

Amber Rain Davis

Svitlana Shayevich

Zsoka Marko

Norine Borys

Lilith Eeckels

Nancy McClelland

Enza Gudor

Laurie Willison

Kymona Tracey

Nicole Picadura

Meghann Andrew

Virginia Lu

Mayline Jung

Sandra Dietrich

Lydia Evans

Mona Tóth

*Clicking these links will take you to the Altenew shop, and when you purchase, I receive a small percentage of the sale. It doesn't cost you any extra, so thanks so much for your support!


Back to School Photo Banner with the Box of Crayons Collection!

Hey there! We're just a few days away from the start of a new school year! For the past couple of years, I have taken my daughter's photograph before her first days of preschool and pre-Kindergarten on our doorstep to mark the occasion. This year, I decided to create a prop—a first day banner— to show how special this day really is, using the Box of Crayons collection* from American Crafts.

AmericanCrafts_MeghannAndrew_FirstDayBanner_01.jpg

Supplies | Box of Crayons collection: Make Something paper, All the Things paper, Cut Here paper, Treat Yourself paper, All Change paper, In the Frame paper, Countdown paper, In the Sky paper, ephemera cardstock die-cuts, alpha sticker book, sticker book, accent and phrase stickers, glitter enamel dots; Star Gazer collection: Rose gold foil Thickers; Stickers and Bling collection: glitter stickers

This cute banner was simple to put together! First, grab 8 different patterns from the Box of Crayons collection. (You can see the exact papers I used in my gallery below!) Cut a banner from each paper, sized around 5" high and 3" wide, either by hand or with a die-cutting machine and software. Next, punch holes at the top left and right sides of each banner.

AmericanCrafts_MeghannAndrew_FirstDayBanner_05.jpg

In between the 5th and 6th banner, add the crayon journaling card from the Box of Crayons cardstock die-cuts, punching holes in it, too. Attach all of the banners with baker's twine, then start the fun part: embellishing! On the crayon card, add small, black glitter alphas for " grade" and the date, with the fun, rainbow stickers from the Box of Crayons alphabet sticker folder spelling out the grade.

AmericanCrafts_MeghannAndrew_FirstDayBanner_06.jpg

On each banner, place a chipboard letter from the Star Gazer rose gold foil Thickers, which are big enough to stand out on the banner, and add a bit of shine. From there, it's all about adding some fun! Fussy-cut several elements from one piece of patterned paper: Make Something. This single piece of paper includes cute elements like the watercolor set and brush, camera, large easel and the "yay" circle.

After the fussy-cutting, grab the Box of Crayons ephemera pack (those glitter scissors!), cardstock stickers and the awesome sticker and washi book to add to the cuteness! The enamel dots also add a different texture and a bit more sparkle! 

AmericanCrafts_MeghannAndrew_FirstDayBanner_10.jpg

I can't wait to take my daughter's first day photo this year with this cute banner! I hope you'll give this fun project a try too! Check out the product I used to create it in the gallery below, and thanks so much for stopping by! 

*Clicking these links will take you to the Scrapbook.com shop, and when you purchase, I receive a small percentage of the sale. It doesn't cost you any extra, so thanks so much for your support!

Elle's Studio Celebrates: New Birthday Layout + Process Video!

Hello! You probably already saw my previous post today that introduced the beautiful, new August 2018 kit and extras* from Elle's Studio, but in this post, I wanted to highlight a couple of the add-ons in particular: the Celebrate stamp and Celebrate journaling tags

First up is my favorite: the Celebrate stamp. This awesome 4" x 6" stamp was created in collaboration with In a Creative Bubble, which is probably why I love it so much! It's clean, graphic and everything a celebrate stamp should be! I LOVE that it includes a big, round balloon, complete with a tassel, as well as create-your-own bunting!

Since you're all starry-eyed over the stamp, don't forget about the Celebrate journaling tags! This set of 10 tags is perfect for your layouts, pocket pages and card fronts, and includes the same awesome fonts and graphic designs as on the stamp. Let's take a look at how I pulled these two products together to document a special birthday photo shoot for my daughter:

EllesStudio_MeghannAndrew_CelebrateFour_01.jpg

Supplies | Celebrate journaling tags, Celebrate stamp, August 2018 kitGo Team wood veneer flags, purple puffy alphabet stickers, gold shapes and dots puffy stickersJune print and cut labels, Noteworthy 12" x 12" paper collection

Don't these photos seem to be just made for the Celebrate products? I had to stamp and watercolor the beautiful balloon over and over again to create ballon clusters for this page!

I also loved adding custom bunting with the Celebrate stamp, and it made it even more fun when my title, created with the Celebrate stamp, a label from the June print and cut labels, and the purple puffy alphabet stickers could rest on the top! 

EllesStudio_MeghannAndrew_CelebrateFour_02.jpg

Instead of telling you how I created this layout, full of stamping, mixed-media and FUN, how about I just show you in this short process video?! Grab a chair and take a 20-minute break to see how much I loved creating this page!

Thanks so much for watching, following and leaving a comment! I appreciate every single one! Be sure to check out the Celebrate stamp and journaling tags, as well as all of the fabulous Elle's Studio product I used on this page, via my gallery below. Thanks for stopping by, and happy creating! 

*Clicking these links will take you to the Elle's Studio shop, and when you purchase, I receive a small percentage of the sale. It doesn't cost you any extra, so thanks so much for your support!