Elle's Studio August 2018 Kit Reveal + New Pocket Page Layout!

Hello there! I'm SO over-the-moon excited about this month's Elle's Studio August 2018 kit and extras* release! There are some surprises in store for you, my friends! Check out my unboxing video to see all of the new goodies:

This month comes with a fabulous, completely new color scheme for ES, and I couldn't love it more. The addition of coral, one of my favorite colors, just has me excited to create! Check out the August 2018 kit, that has an introductory price of $9.99 today only:

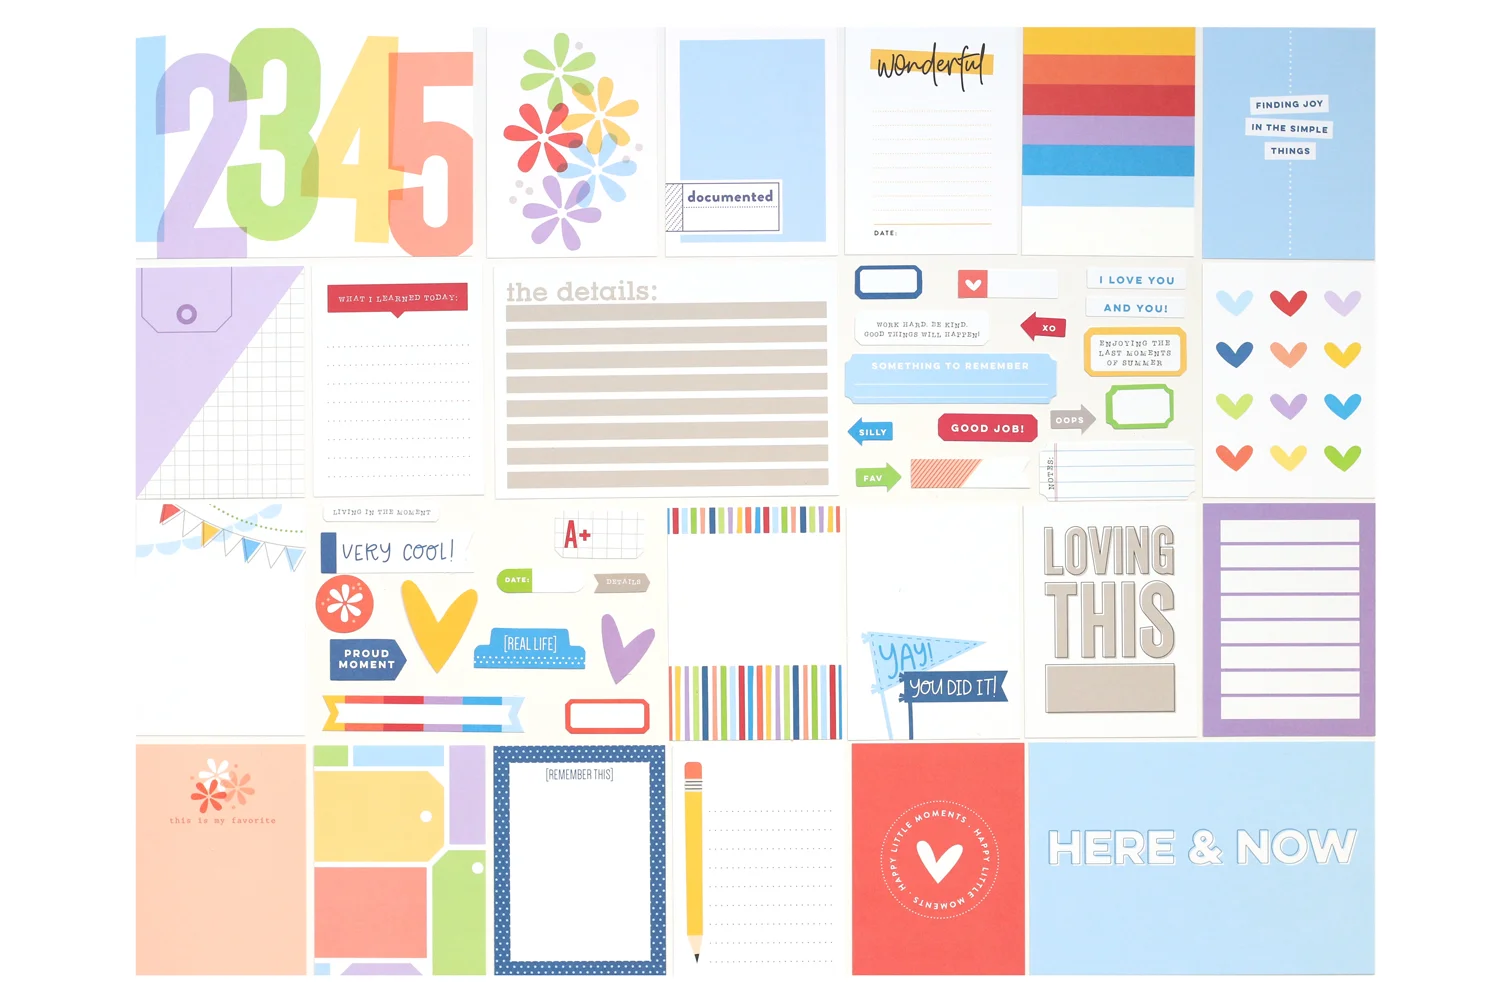
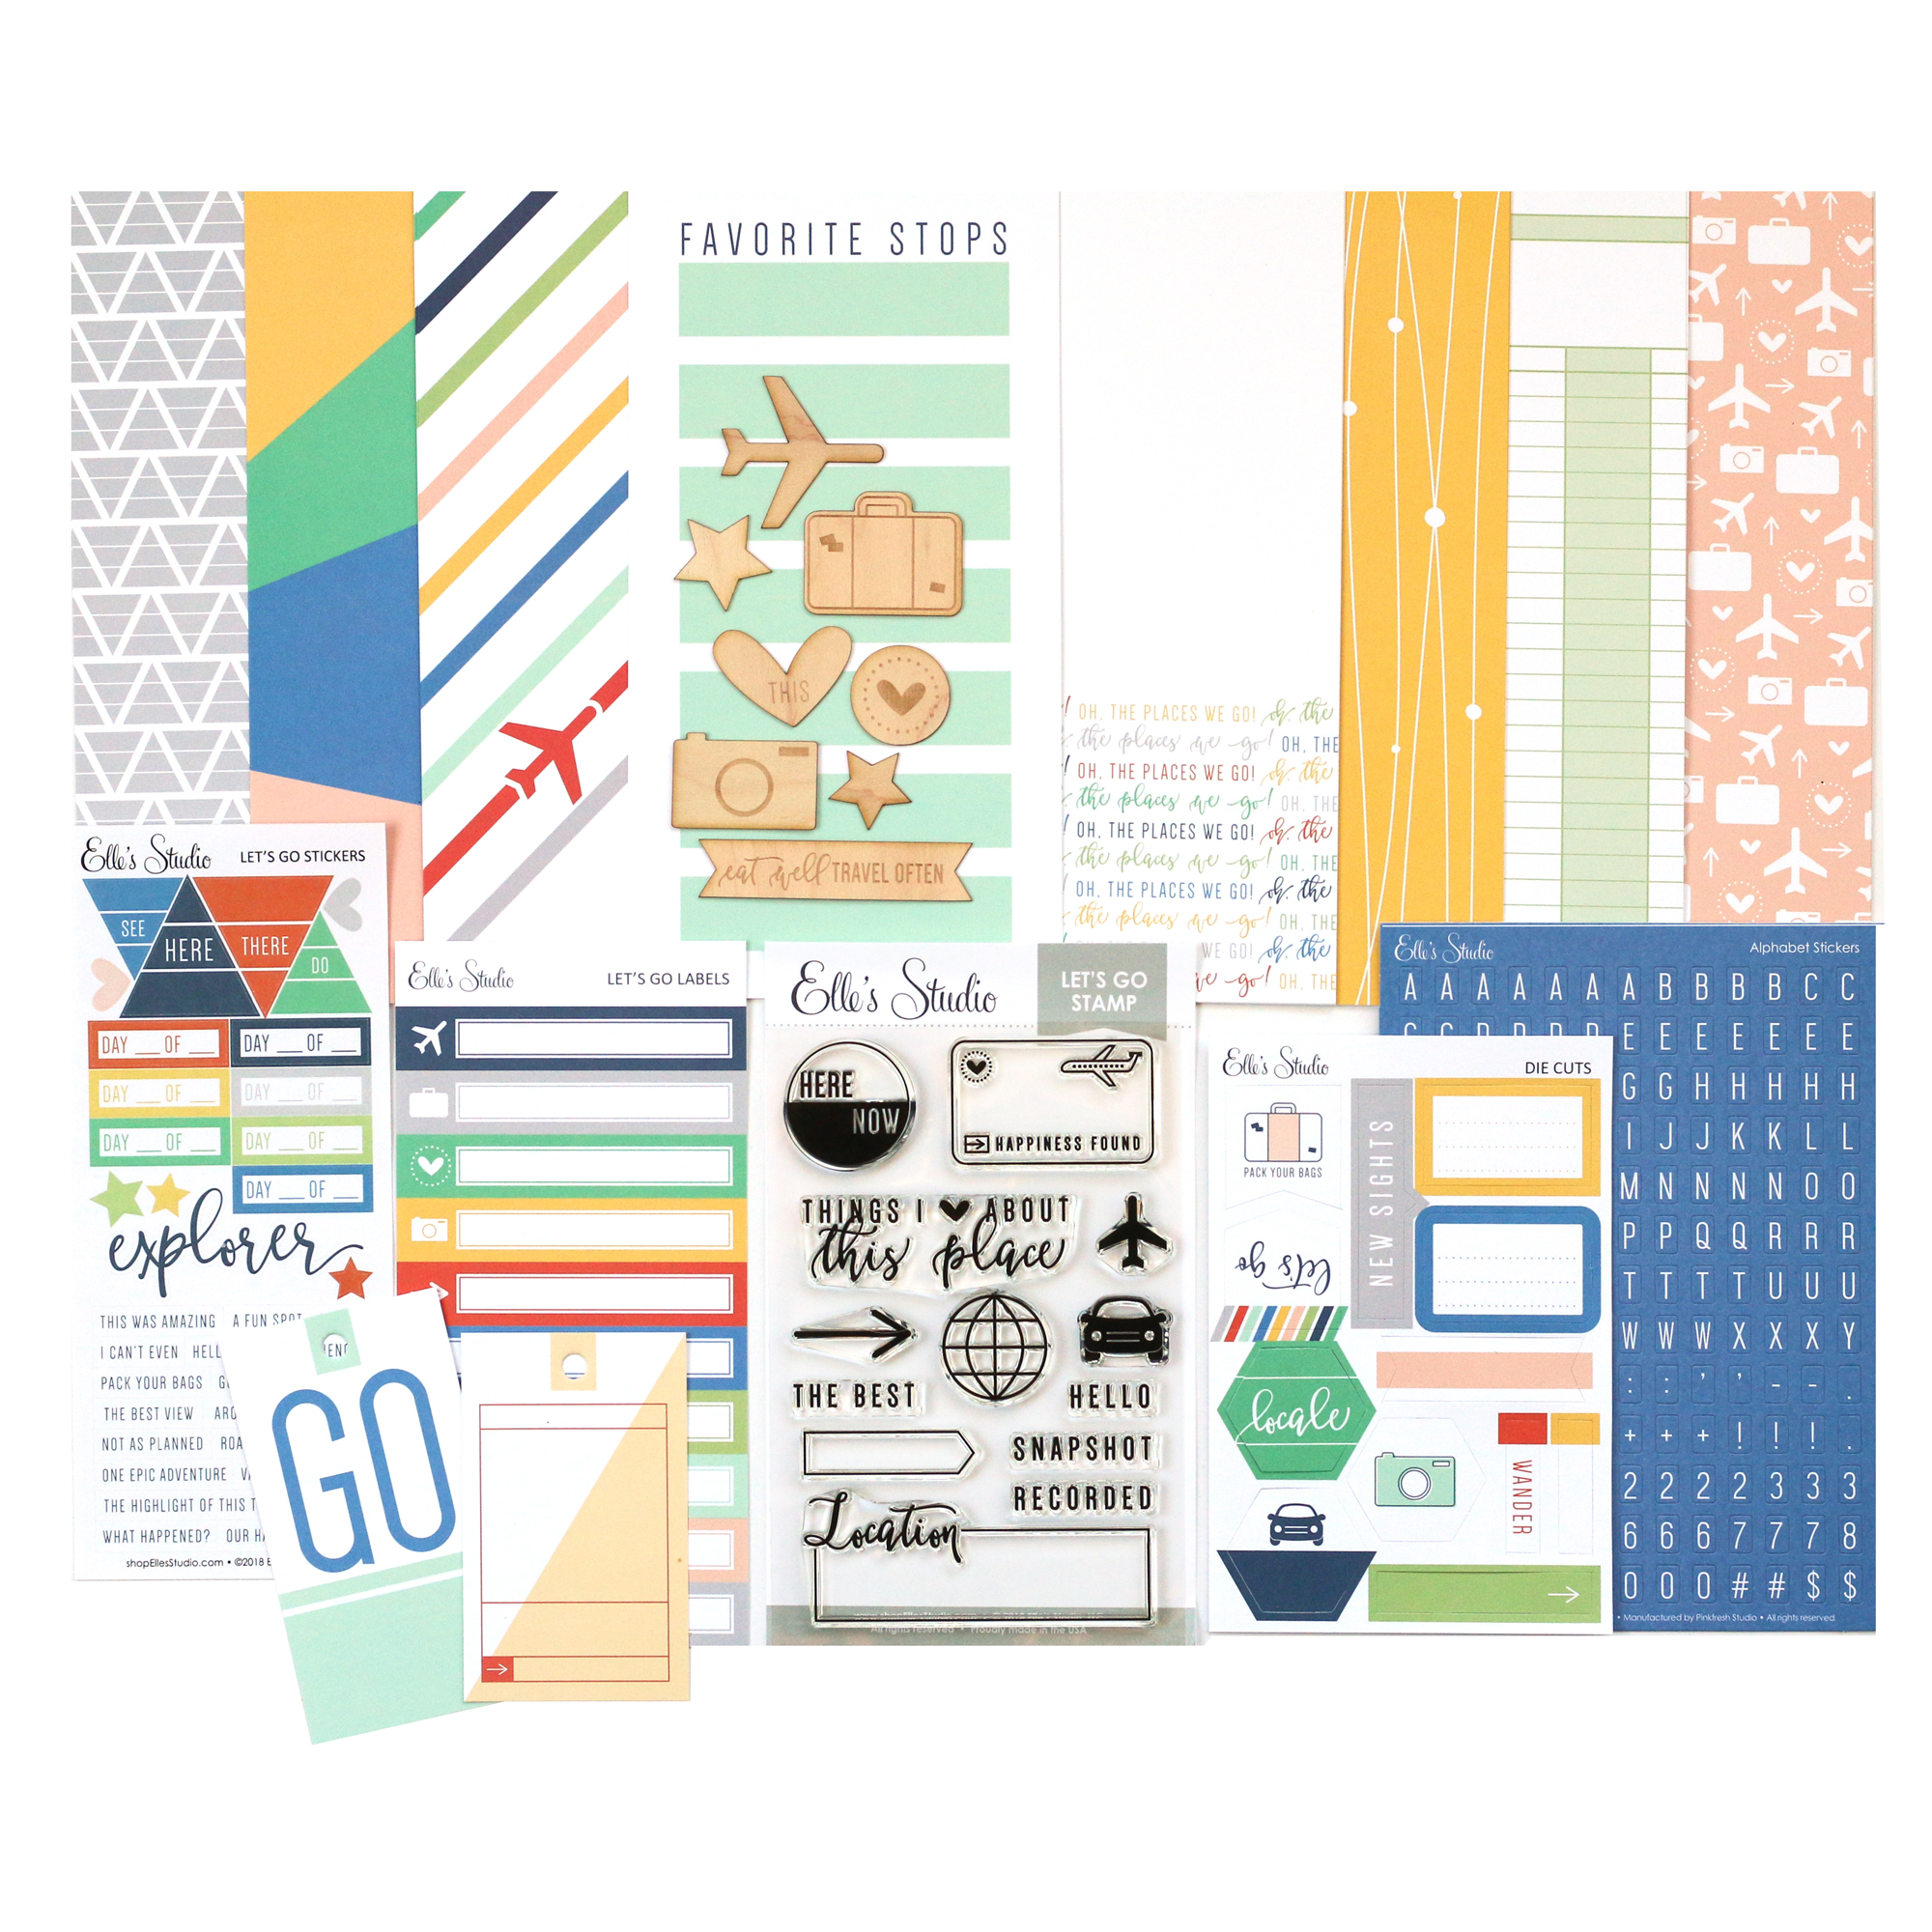
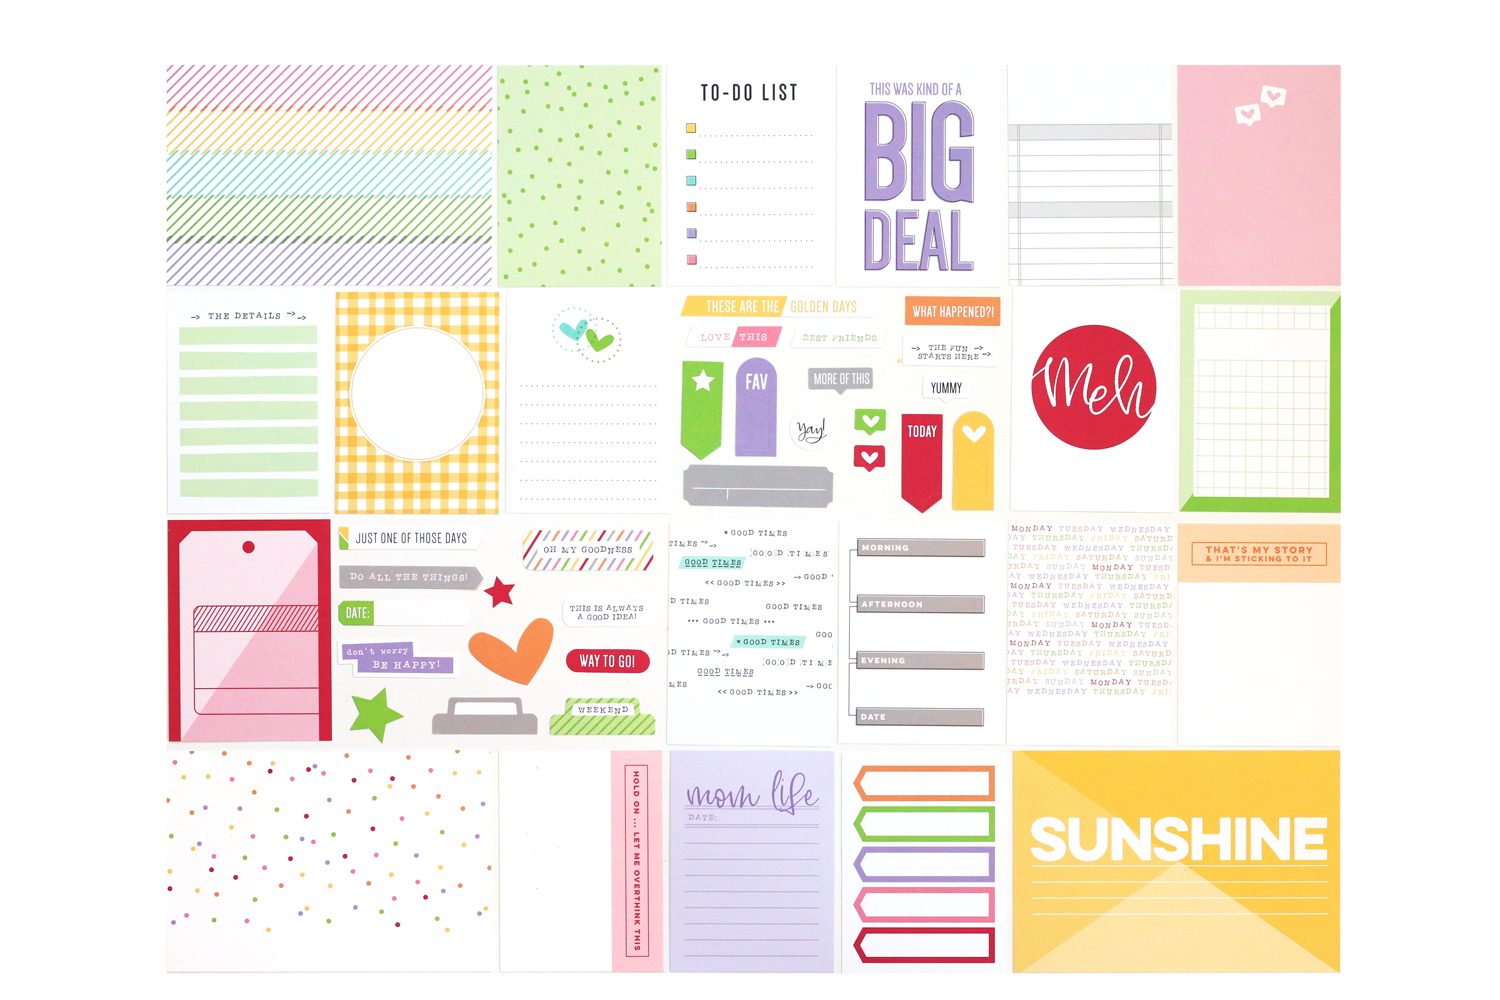
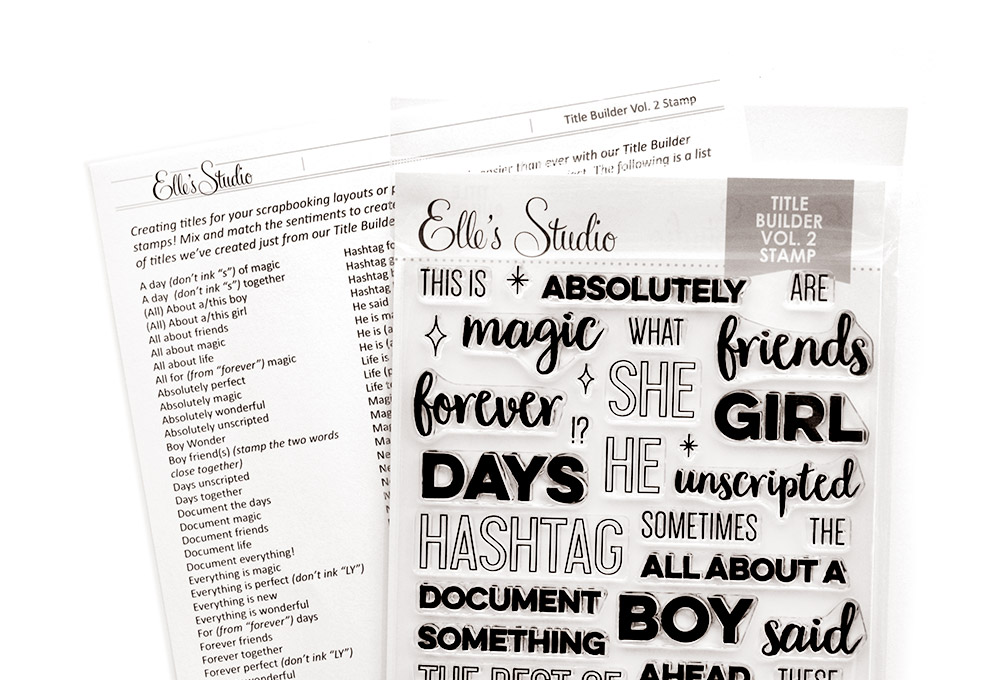
AH! I so love this color scheme, and especially the tags that come in the kit that feature the entire color way of the kit! Now how about some coordinating extras? Let's take a look at them:

EllesStudio_August2018_AddOns.jpg

From left to right, we have: Go Team wood veneer flags, Back to School acrylic, ABC wood veneer, August label stickers, Good Job stamp, purple puffy alphabet stickers, Celebrate stamp, Celebrate journaling tags, little photo flag stickers, Love This acrylic, Happy Moments wood veneer circles

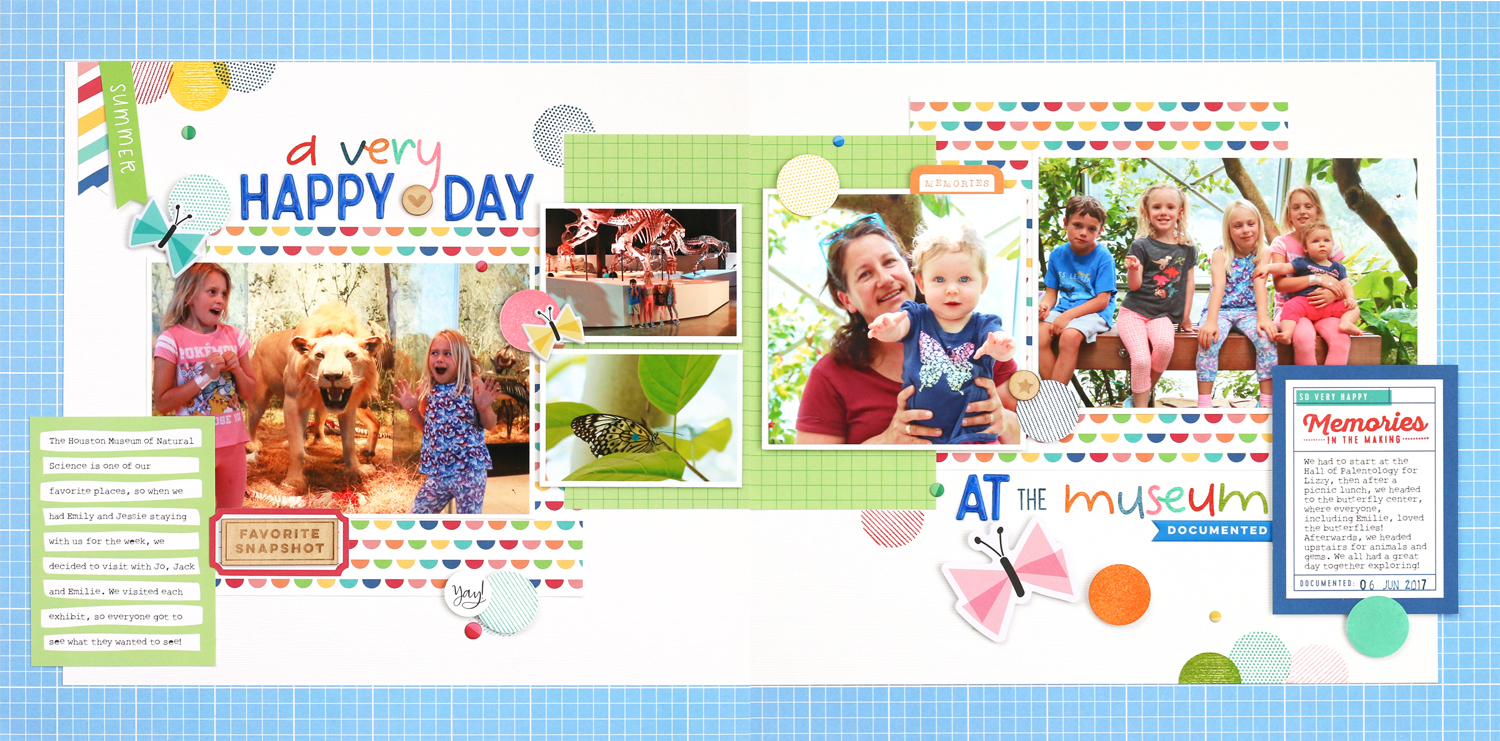
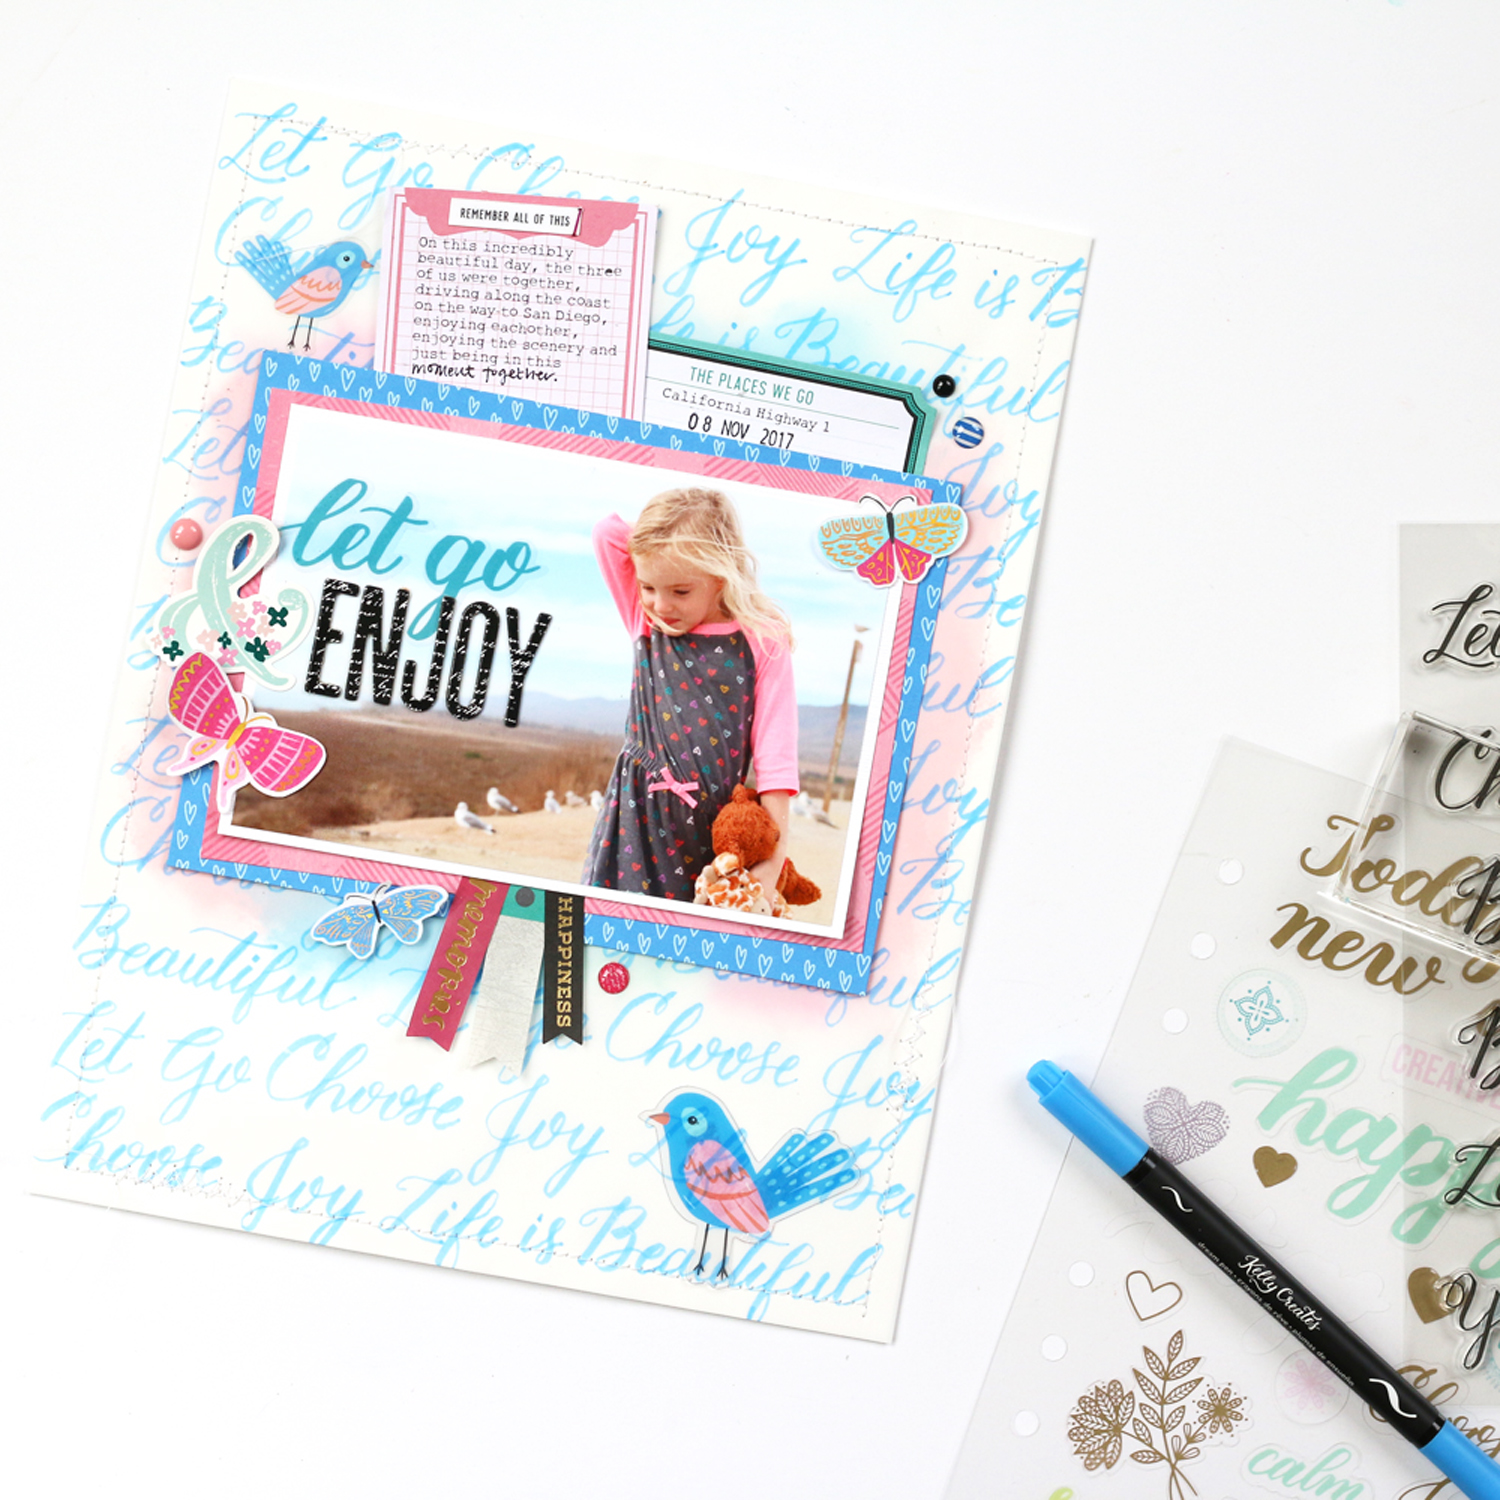
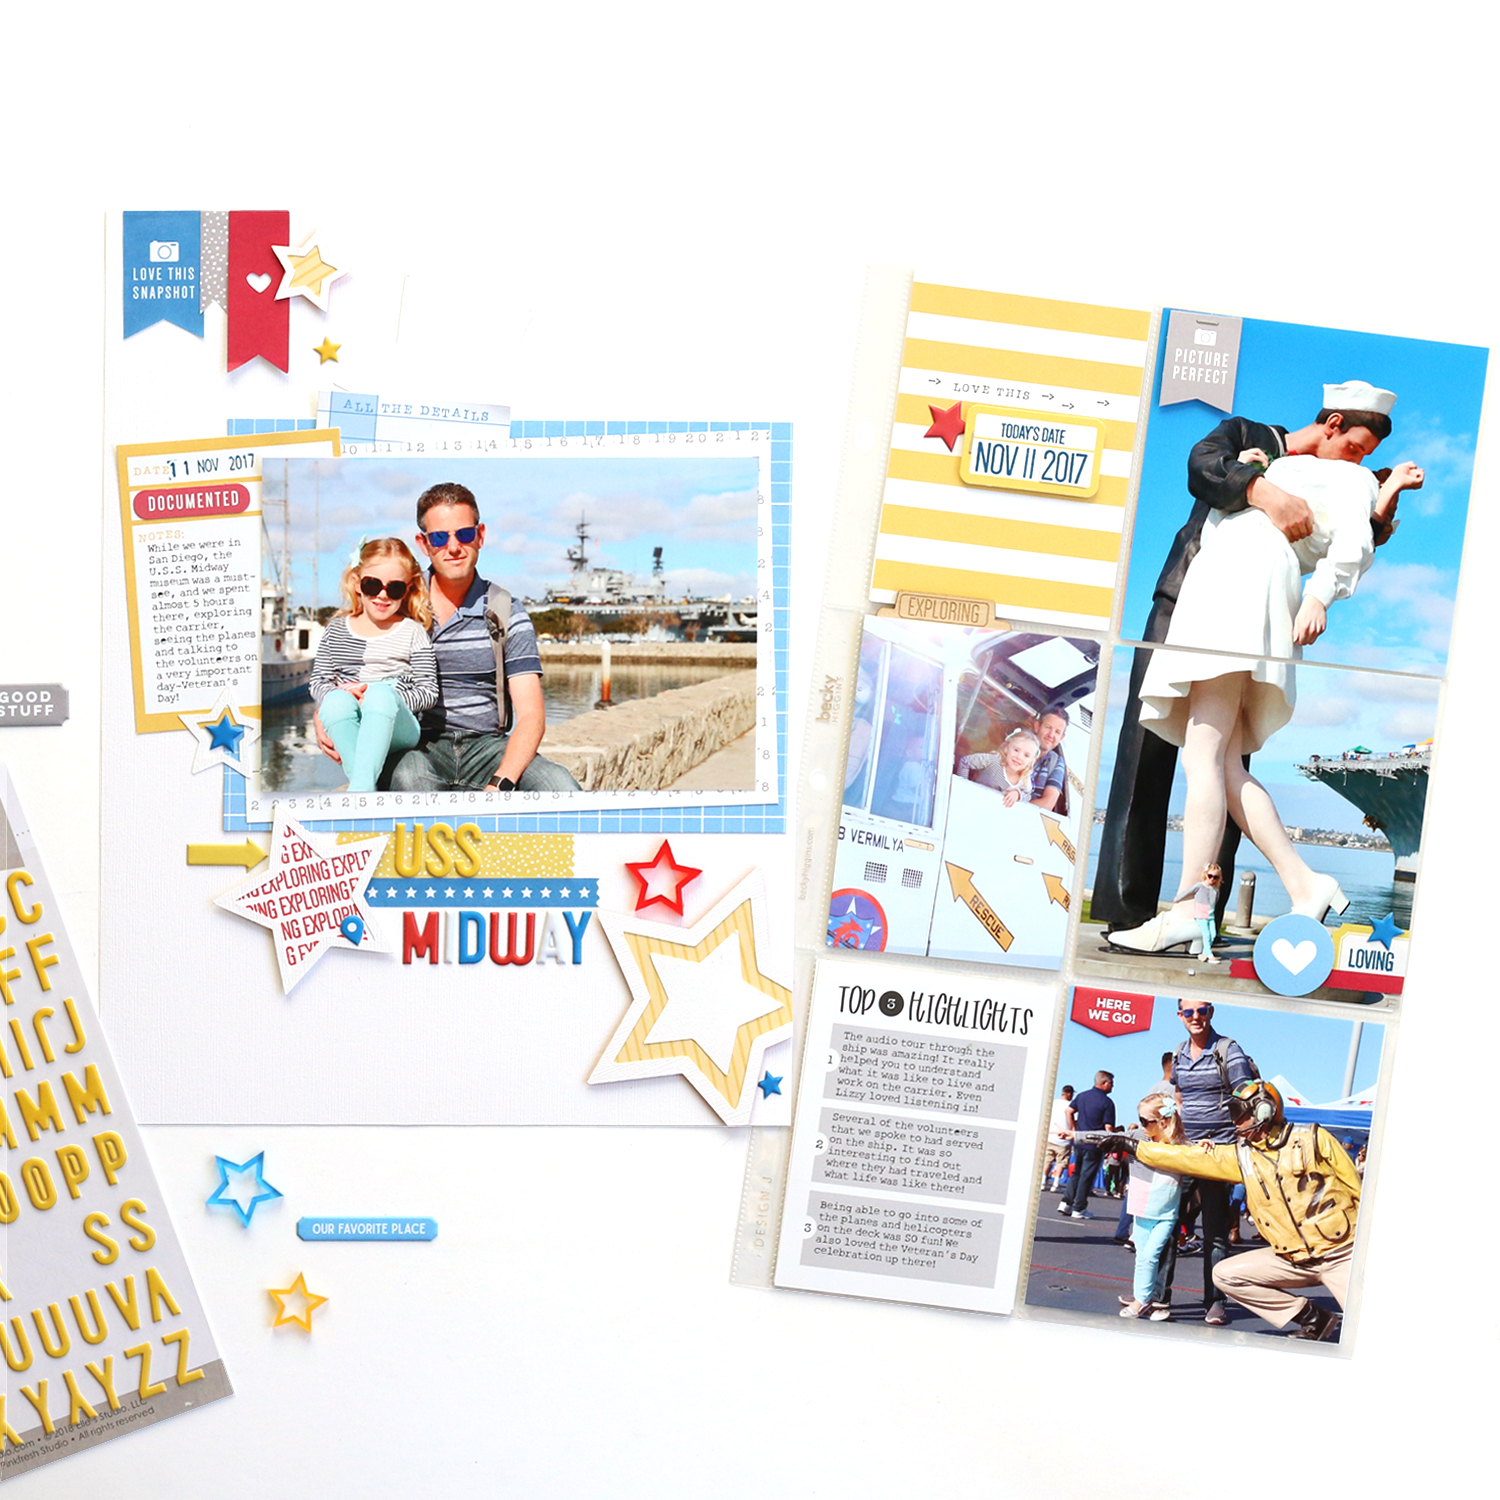
This month, I was inspired by the beautiful color scheme and the "learning" tags, that I decided to start a few pocket pages to document my daughter's year in Pre-K. After going back through her entire school year in photos, I pulled out a few that really stuck out to me, and told the story of her year at school:

EllesStudio_MeghannAndrew_PreK3_01.jpg

The "1,2,3,4,5" tag in the August 2018 kit was one of my favorites! I wanted to highlight the "3", since my daughter was in the 3rd Pre-K classroom, so I cut it out with an exact-o knife, then adhered the entire tag to a blank piece of cardstock before adding the "3" back with dimensional adhesive. Then I simply added a purple August label sticker, and topped it with the purple puffy alphabet stickers.

EllesStudio_MeghannAndrew_PreK3_02.jpg

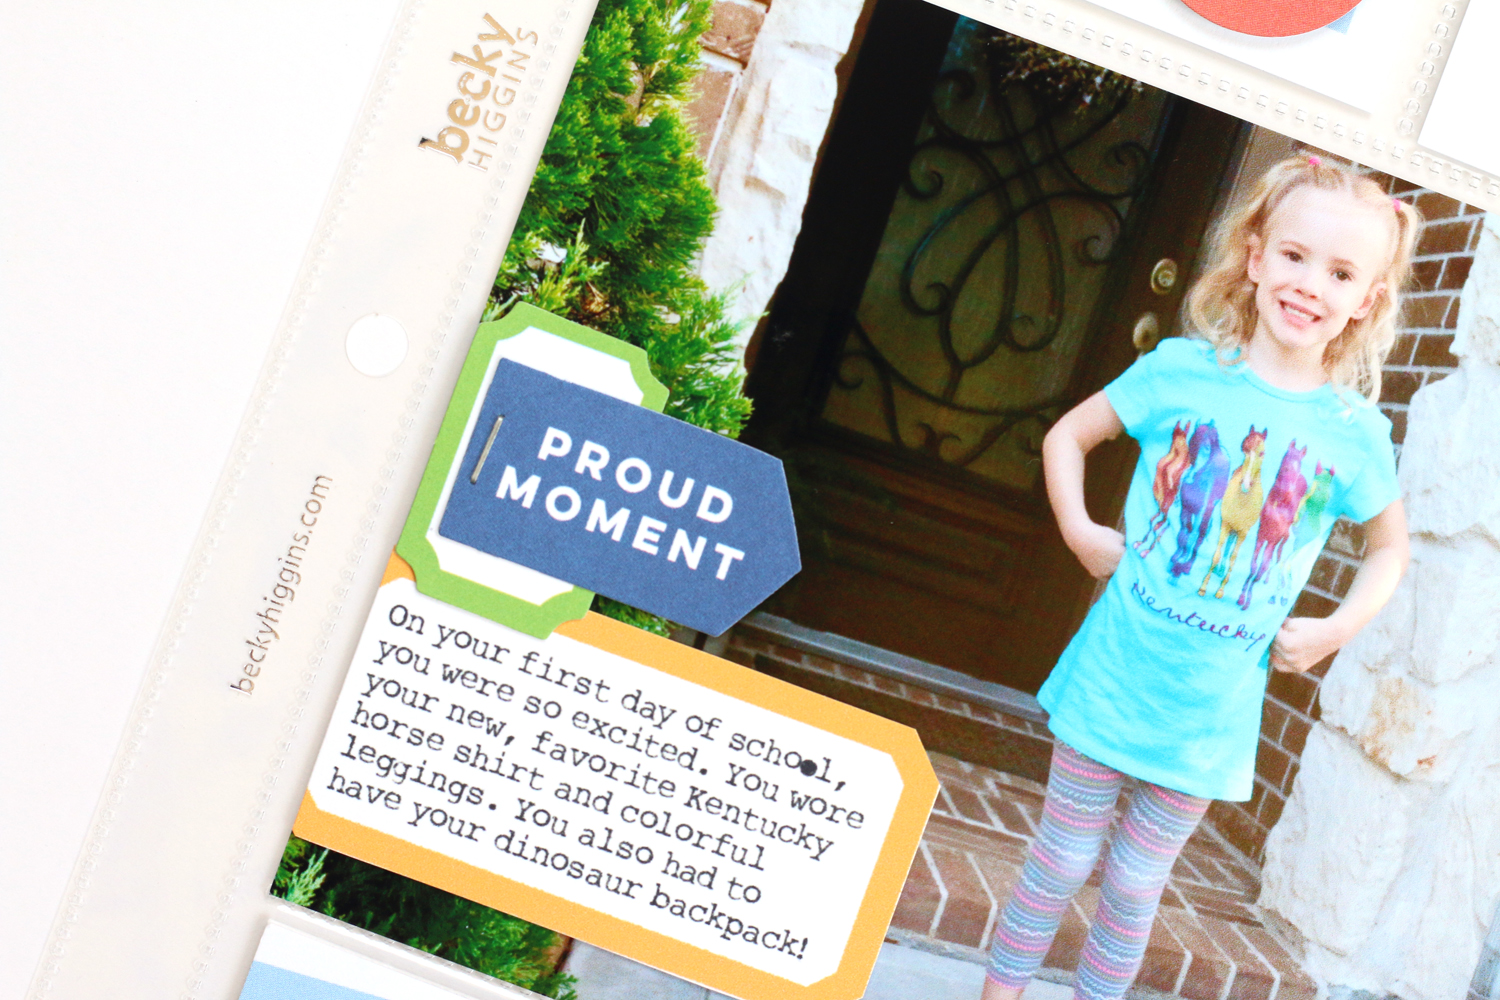
This "proud moment" die-cut was perfect for the obligatory first day of school photo! I also added some notes below (onto an August print and cut label) about what she chose to wear, and her favorite backpack. 

I printed, then cut the multicolored tag from the gorgeous School Days printables to add to the bottom of this photo from my daughter in a soccer lesson. I love how it stands out against the black and white photo, and adds a happy home for the "something to remember" tag from the kit.

EllesStudio_MeghannAndrew_PreK3_03.jpg

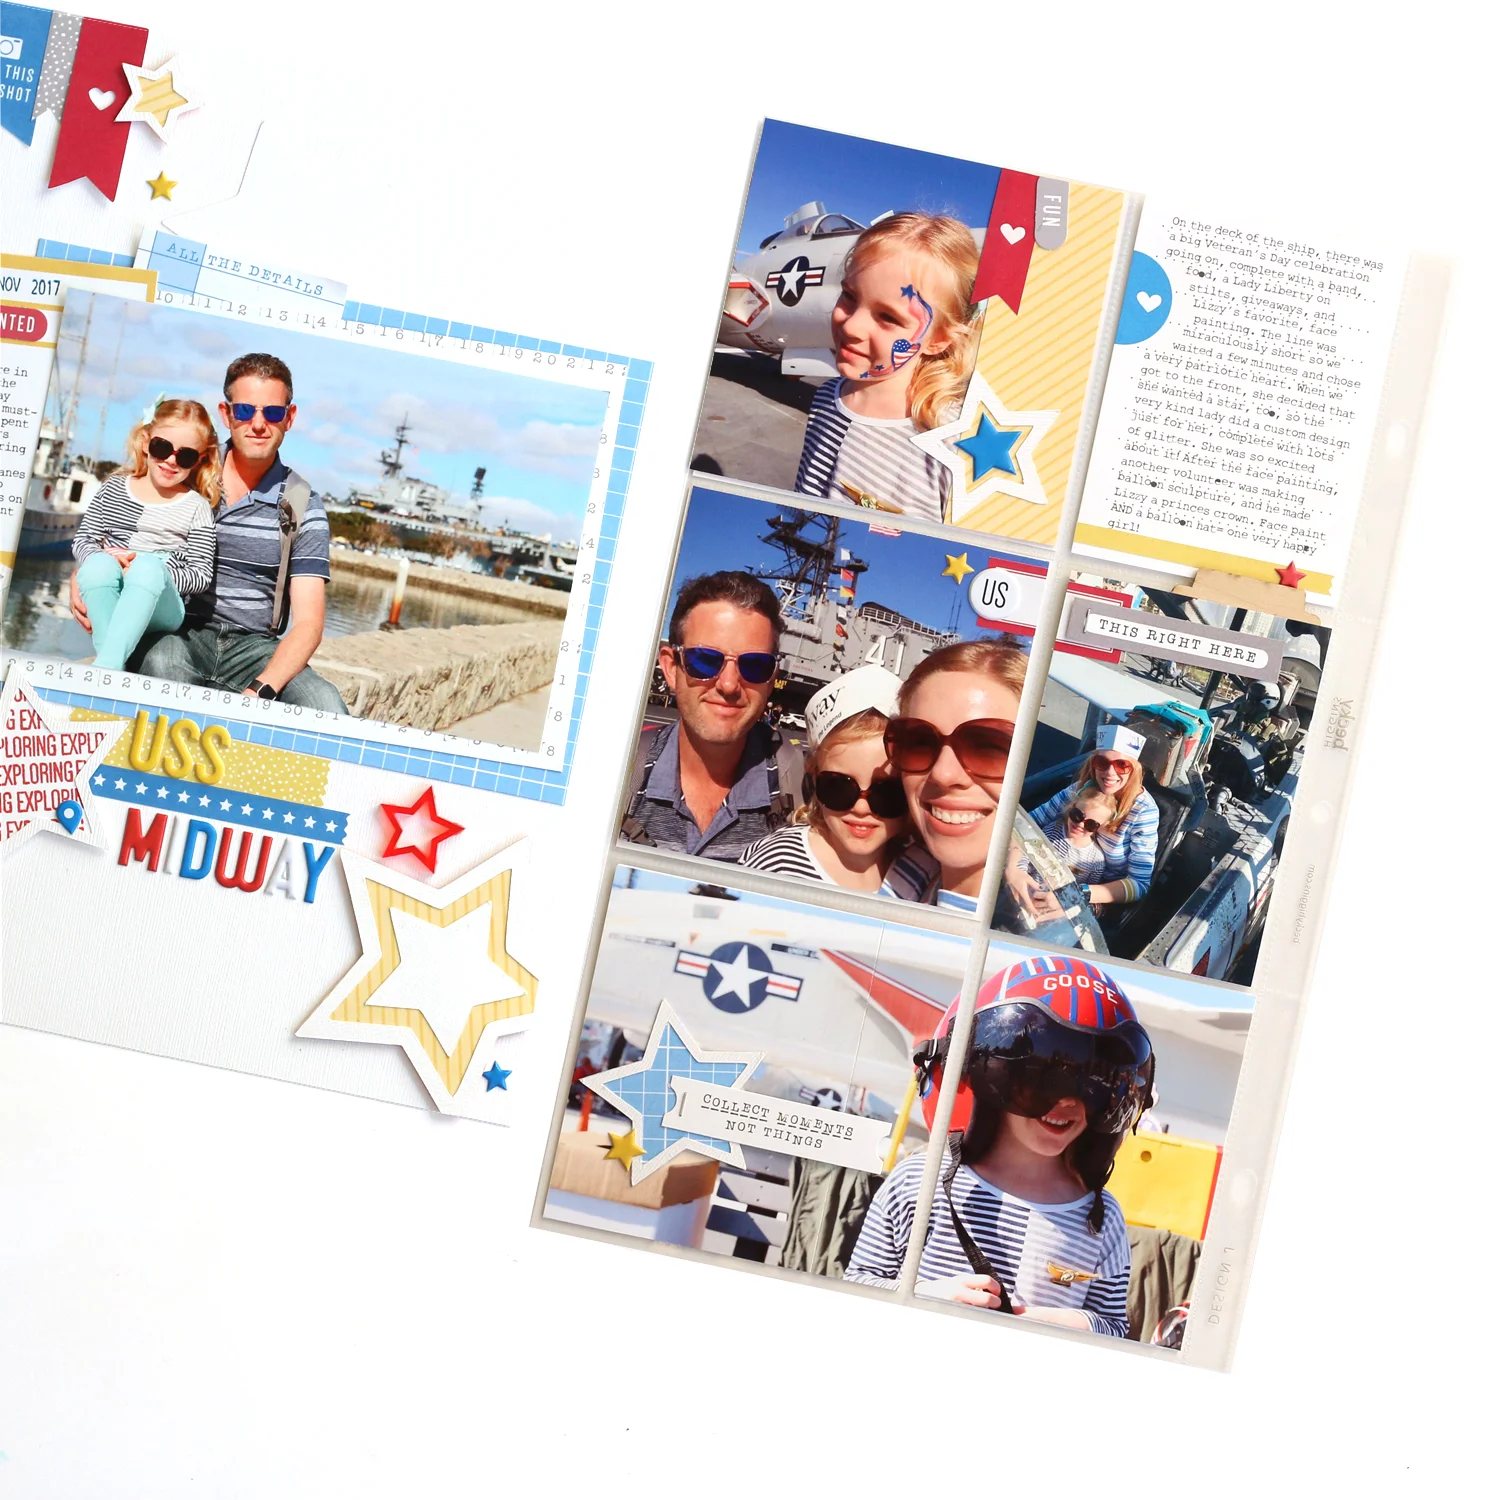
On the backside, I continued the colorful colors of the August kit, and adding some fun stamping and embellishment, too!

EllesStudio_MeghannAndrew_PreK3_Side2_01.jpg

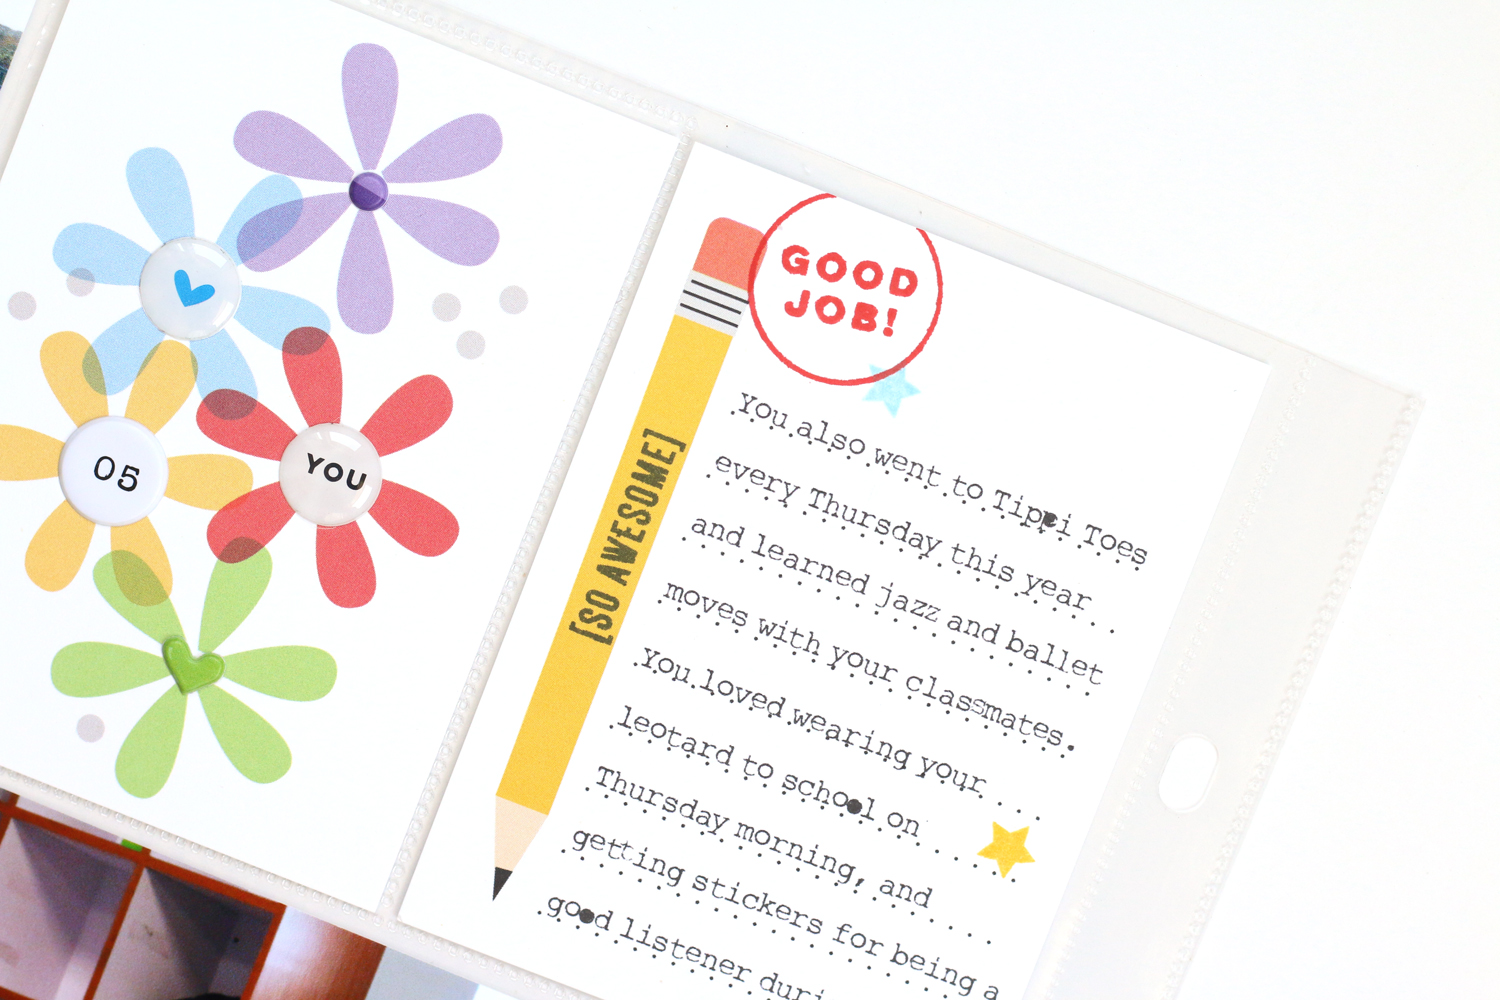
That graphic flower tag was another favorite from the kit this month, and I had to top it with Noteworthy puffy stickers, epoxy stickers and a puffy heart! Next to it, on the pencil 3" x 4" tag, I added the "so awesome" phrase, "good job" circle and tiny stars from the Good Job stamp. It just added to the whimsical feel of this page.

EllesStudio_MeghannAndrew_PreK3_Side2_02.jpg

Gah! There's another one of those multi-colored tags! I just LOVE them this month! This one may seem like it would be a vertical tag, but I used it horizontally, adding my typed journaling to the white space, then topping with the "totally awesome" Happy Moments wood veneer circle. I love the way this looks alongside those colorful photos! 

Let's just have a little talk about how cute these Go Team wood veneer flags are. It almost hurts me to put them to use, they're that cute. But, this photo of my daughter with her soccer "team" just called for it.

EllesStudio_MeghannAndrew_PreK3_Side2_07.jpg

So, this project will continue, most likely with one more pocket page spread, as well as a pocket page of artwork created by Lizzy only, similar to how I documented her Preschool year! I'll be sure to share once the entire year has been completed. Stay tuned! 

Until then, be sure to check out all of the product that I used to create this pocket page spread in the Elle's Studio shop, via the gallery below. Remember that the kit price increases to $11.99 after today, so get it at a discount! Thanks for stopping by, and happy creating!

*Clicking these links will take you to the Elle's Studio shop, and when you purchase, I receive a small percentage of the sale. It doesn't cost you any extra, so thanks so much for your support!

American Crafts Moxy Glitter Collection: Dance Love

Recently, American Crafts sent me a big box of glitter—and not just any glitter, but their new Moxy collection*! 

MeghannAndrew_AmericanCrafts_DanceLove_01.jpg

Supplies | Moxy Collection: Blossom Extra Fine Glitter, Amethyst Extra Fine Glitter, Lip Gloss Extra Fine Glitter, Cosmic Glimmer 24-pack, Double-Sided Stickers; Sunshine and Good Times collection: Flower Power paper, Yesss Please paper, Major Heart Eyes paper, Ephemera Die-Cut Shapes, Let’s Dance Phrase Thickers, Wood-Mounted Stamp Set; Other: Adhesive Rhinestones, Adhesive Rhinestones, Vicki Boutin All the Good Things Phrase Stickers (343889)

Let me just start by saying that I am not typically a "glitter girl," but I loved creating this page! Because of the colors in the photos, I grabbed the Sunshine and Good Times collection to begin my page layers with the purple and pink patterned papers that I used on the top half of my 8-1/2" x 11" layout and to mat my photos. I also fussy-cut the "so lovely" phrase from the Yesss Please patterned paper.

Now here's where the fun really started! Below my photo, I started adding glitter by using the fine tipped Moxy white glue to add a shower of dots from the manufacturer's strip of hearts down to the title, creating an ombre effect by starting with dark purple at the top and ending with pink at the bottom. 

MeghannAndrew_AmericanCrafts_DanceLove_03.jpg

While my background was drying, I created the "dance" die-cut word on Silhouette, using my favorite sans-serif font, Bebas Neue. After cutting the letters from smooth cardstock, I covered them with double-sided tape using my permanent tape runner, being sure that the adhesive went all the way to the edges. Then, in my glitter tray, I added portions of three different colors of fine glitter: Blossom, Amethyst and Lip Gloss, shaking the tray slightly to get them to run into each other. I carefully placed each letter face-down in the glitter, pressing slightly on the back to be sure that the glitter stuck to the adhesive. The double-sided tape gave a very consistent coverage and didn't require any drying time at all! Afterward, I grabbed the bow and two hearts from the die-cut double-sided stickers and put it in the tray, covering them with the leftover glitter—a great way to not waste any of that gorgeous glitter!

MeghannAndrew_AmericanCrafts_DanceLove_05.jpg

I adhered these glitter letters with dimensional adhesive to the base of my layout. Next, I grabbed the "love" stamp from the Sunshine and Good Times stamp set to finish off my title. A puffy heart from the Sunshine and Good Times puffy phrase stickers finished off the title with a bit of pink!

MeghannAndrew_AmericanCrafts_DanceLove_04.jpg

I really love the way this page turned out! My daughter's dance recital called for some sparkle on the page, and the Moxy collection helped me add those perfect, sparkly touches! Thanks so much for checking out my latest layout! To shop the Moxy collection, please click on the gallery links below for Scrapbook.com:

*Clicking these links will take you to the Scrapbook.com shop, and when you purchase, I receive a small percentage of the sale. It doesn't cost you any extra, so thanks so much for your support!

SCT Magazine Summer Issue: Salcombe Pocket Page

Last summer, we spent a lovely few days exploring the lovely little seaside villages of Devon, and I was taken by one in particular: Salcombe. When I received the Fancy Pants Bright Side collection* to work with for my Pocket Play column in the summer issue of Scrapbook and Cards Today Magazine, I knew that the photos that I took in this colorful and happy place would be the perfect fit.

Salcombe_MeghannAndrew_SCTMagazine_01.jpg

Supplies | Bright Side collection pack, 6" x 6" paper pack, chipboard stickers, tags and labels; Elle's Studio Mini Dated stamp, All the Details stamp, Family Fun stamp

By sticking with a single collection, it was an easy job to put this double pocket page spread together! 

Salcombe_MeghannAndrew_SCTMagazine_05.jpg

I wanted to make the title, or the name of the village really stand out on my page, so I cut the alphas out with my Silhouette machine, using my favorite sans-serif font, Bebas Neue. I cut them twice, first with patterned paper from the Bright Side 6" x 6" paper pack, then from gray cardstock, so that they would have a shadow and stand out more. These were bookended with the pretty "Natural Beauty" floral pattern, also found in the paper pack. I also added a thin strip of red washi tape across all of the title pockets to draw your eye to the "highlights" chipboard sticker on the right.

Salcombe_MeghannAndrew_SCTMagazine_08.jpg

Around my central title, I added the colorful photos that I took during our trip, all with a thin, white border. This helped to keep the page bright and light. Each photo was topped with a journaling spot from the tags and labels pack, which I added my typed journaling to. I also filled in any negative spaces in my photo with small embellishments, like the "life is sweet" chipboard sticker here. What better phrase could there be for an ice cream photo, right? 

Because the little labels weren't enough, I added more extensive documentation by using larger journaling spots in the tags and labels pack, with the Rough Typewriter font. Since they were smaller than my pocket, I simply adhered them to 4" x 4" squares of patterned paper from the 6" x 6" paper pack! I also added some stamped phrases around my layout, like the "happiness found" one here from the Elle's Studio All the Details stamp. The pretty pinwheel and flowers found in the ephemera pack from the Bright Side collection pack were perfect for adding to the left side of my journaling.

Salcombe_MeghannAndrew_SCTMagazine_09.jpg

Thanks so much for checking out this new pocket page spread! Be sure to read my Pocket Play column in the summer issue of Scrapbook and Cards Today Magazine, where I'm sharing my tips and tricks for easy and beautiful pocket pages! 

Salcombe_MeghannAndrew_SCTMagazine_07.jpg

You can find all of the awesome product that I used on this spread via the clickable gallery links below. Thanks for your support!

*Clicking these links will take you to the Scrapbook.com shop, and when you purchase, I receive a small percentage of the sale. It doesn't cost you any extra, so thanks so much for your support!

lt's Time for the Elle's Studio Summer Sale!

Exciting news! The Elle's Studio Summer Sale* has begun, and tons of product has been marked down in the shop 20-90% off! There are also mystery kits and digitals are on sale, too! Plus, each order will receive a free gift! How awesome is that?

While you're in the shop, be sure to check out the new lady in the alphabet stamps, Jane! I love the Jane alphabet stickers, and now you can have the same font in a stamp, too!

I can't wait to see what you pick up in this awesome sale! Be sure to shop before it ends on Friday, July 27th at midnight! Happy shopping!

*Clicking these links will take you to the Elle's Studio shop, and when you purchase, I receive a small percentage of the sale. It doesn't cost you any extra, so thanks so much for your support!

Super Cool Zoo: A New Layout + Process Video

Hey there! I got a bit crafty last week, and created what may just be my favorite layout of 2018. I know, that's saying a lot, but this layout, created mostly with the Box of Crayons collection* from my friend, Shimelle and American Crafts, really ticks all of the boxes for me:

MeghannAndrew_AmericanCrafts_SuperCoolZoo_01.jpg

Supplies | Box of Crayons 6 x 8 paper padCut Here patterned paper (manufacturer's strip), On a Roll patterned paperAll the Things patterned paperBox of Crayons ephemera die-cutsBox of Crayons chipboard ThickersBox of Crayons sticker and washi bookBox of Crayons rotary phrase stampBox of Crayons glitter enamel dotsBox of Crayons mini puffy stickersGlitter Girl teal glitter ThickersAmy Tan sticker book

So, what are those "essential layout" element boxes that require ticking, you ask? A fun title, created with different textures and fonts: Check. An interesting texture created with hand-stitching: Check. Bright color and fun patterns: Check. Lots of fun embellishments that highlight the photos: Check and check. 

MeghannAndrew_AmericanCrafts_SuperCoolZoo_03.jpg

Okay, let's talk titles. They're my jam. I have an entire, massive class devoted to them at Big Picture Classes. This title is just about my idea of a perfect title. It contains three different fun fonts for interest, it includes all of the colors found throughout the layout, and is created from three different mediums: glittery foam, transparent stickers and dimensional, smooth cardstock. In my book, it doesn't get much better than that!

MeghannAndrew_AmericanCrafts_SuperCoolZoo_02.jpg

This notepad-heart found in the Box of Crayons 6 x 8 paper pad caught my eye straight away when I started creating, but as I went on, the lack of a different color between the grid and the teal dot on the outside really started to bother me. Enter embroidery floss. By punching holes 1/4" all the way around the heart and adding a simple backstitched yellow frame, this heart, which holds the story of this day, became one of the main focal points of my layout.

MeghannAndrew_AmericanCrafts_SuperCoolZoo_04.jpg

Next on the list: bright colors and fun patterns. Well, if you've checked out the Box of Crayons collection, you can see that it's hard to stay away from either of these. I chose bright, yet simple patterns to frame two of the four images on my layout, and the big area of teal on the 6" x 8"
paper pad sheet gave a resting area for the eye, and also points out the importance of my journaling.

Do embellishments get any more fun than a toucan, flamingo and tiger? I think not, friends. These stickers and die-cuts were PERFECT for adding to this layout about visiting the San Diego Zoo, and the floral die-cuts, which framed my photos, gave it a wild, jungle-esque feel. 

How did it all come together, you ask? Well, you can see the full process in my video below:

You can find all of the product I used on this layout in the Scrapbook.com store, via the gallery at the bottom of this post.

Thanks so much for joining me today here on the blog! Question: What are the "essential layout" element boxes that you just HAVE to check when you create? I'd love to hear your thoughts in the comments! 

*Clicking these links will take you to the Scrapbook.com shop, and when you purchase, I receive a small percentage of the sale. It doesn't cost you any extra, so thanks so much for your support!

Birthday Greetings in a Hurry with American Crafts!

I don't know about you, but I typically realize that I've forgotten a birthday card right around the time I'm due to leave the house for a party. After that initial "oh sugar!" moment sets in, I typically grab the nearest cute paper crafting products that I have on hand to create a simple greeting, full of color and sparkle. I did this recently with the beautiful Stay Colorful collection* from American Crafts!

This collection is just full of bright colors and celebratory sayings, making it the perfect one to grab when you're short on time! I created three different cards quickly and easily:

Supplies | Mood Ring paper (yellow), Jive Talkin' paper ("hooray), 6" x 6" paper pad (sprinkles), cardstock stickers, self-adhesive sequins, rhinestone stickers

"Hip, hip, hooray!" is the perfect sentiment for a birthday card! This simple design looks like a million bucks when you use a colorful sprinkle background paper and back the sentiment with a bright yellow circle of color! To really focus the eye on the sentiment, I added the "hooray" manufacturer's strip behind the circle. Don't forget the sparkle! I added a few sticker sequins and rhinestones to dress it up.

MeghannAndrew_AmericanCrafts_BirthdayCards_04.jpg

Supplies | 8 Tracks paper (dots), 6" x 6" paper pad ("treat yo' self"), ephemera die-cutscardstock stickers, glitter enamel stars

What better day to "treat yo' self" than on your birthday? This little sentiment, cut from a sheet of patterned paper in the 6" x 6" paper pad was the perfect topper for a multi-colored polka dot, then accented with die-cut ephemera and sticker treats! 

Supplies | 6" x 6" paper pad (teal hearts), Jive Talkin' paper (banner), layered stickers (unicorn), cardstock stickers, enamel dotsrhinestone stickers

Birthdays should be magical, so why not add a magical creature to the card front? I loved adding this pretty ribbon-tailed unicorn to the card front, along with the "ride a unicorn" banner, cut from the Jive Talkin' paper. This card would be perfect for a special little girl! 

These three cards prove that you don't have to run by Target on your way to the birthday party! Create your own cards at home quickly and easily with the Stay Colorful collection from American Crafts, and "wow" that special birthday someone! Be sure to check out the product I used, via the gallery links to the Scrapbook.com store below:

(*All product links contained in this post are affiliate links. You don't pay any extra, but I get a small percentage of your sale! Thanks for your continued support of my YouTube feed and this blog!)

Elle's Studio Pocket Page Process Video #2 with the July 2018 Kit

Hello there! In case you missed it, this is my second post today. You can see my Elle's Studio July 2018 kit reveal post which includes an unboxing video and pocket page process video #1 here

This afternoon I'm here to share the back side of the pocket page layout that I created using the July 2018 kit and add-ons* from Elle's Studio! 

Sticking to essentially the same products that I used on the front side of my layout creates a flow across the two sides of my page, but I added a few fun details that were different from the front. I'd love for you to watch this video to see how the page came together:

Be sure to shop all of the fun products that I used on this page via the gallery below, while supplies last! You won't want to miss having these summery, fun details to add to your projects!

* This post contains product affiliate links. Clicking any of these links will take you directly to the Elle's Studio shop, and when you purchase, I receive a small percentage of the sale. It doesn't cost you any extra, so thanks so much for your support!

Elle's Studio July 2018 Kit Reveal & Process Video!

Welcome to my blog! I'm so excited that today is the 10th, because that means brand-spankin' new product is available from the Elle's Studio shop! The July 2018 kit and add-ons* do not disappoint, and I know that you'll love using them to document your summer memories as much as I did. How about we take a look at my unboxing video to check out all of the new product?

How about this July kit? Not a stitch of pink to be found, and I love it! It has a lot of energy in this fun color scheme, and awesome graphics and fonts to really make your projects stand out!

The add-ons this month are SO fun! There is so much product here to embellish any project that you'd want to create, you won't really need any other options in your stash!

This month I created two 12" x 12" pocket pages using the new kit and embellishments! The color scheme, you guys, just has me at teal, orange and navy. I can't even handle the awesomeness. Just take a look:

While making my page, I filmed a process video so that you can see how the page came together, and the decisions I made around the new product I was using. Pull up a chair and watch this short video for all of the details:

The July kits are typically the most popular kits of the year, so be sure to grab this one quickly, and don't forget about the awesome add-ons this month that coordinate with the kit. You can shop all of the product I used on this pocket page in the gallery below, and be sure to stop by later today when I'll be sharing the back side of the page, along with another process video!

* This post contains product affiliate links. Clicking any of these links will take you directly to the Elle's Studio shop, and when you purchase, I receive a small percentage of the sale. It doesn't cost you any extra, so thanks so much for your support!

American Crafts Stay Colorful Collection: Swan Lake

MeghannAndrew_AmericanCrafts_SwanLake_03.jpg

A beautiful summer day spent on a lake on the south coast of England deserves an equally beautiful layout, and I created one using the Stay Colorful collection* from Dear Lizzy and American Crafts! 

MeghannAndrew_AmericanCrafts_SwanLake_01.jpg

Supplies | Stay Colorful collection: Bellbottom Blue paper, Jive Talkin' paper, 8 Tracks paper, 6" x 6" paper pad, cardstock accent and phrase stickers, washi tape book, ephemera die cut shapes, glitter chipboard Thickers, glitter clothespins, layered stickers; All the Good Things collection: phrase stickers; Shimelle Box of Crayons collection: alpha sticker folder; Shimelle Glitter Girl collection: glitter enamel dots, embellishment pack; Stickers and Bling collection: adhesive rhinestones 

I have to admit, I struggled with this layout at first. I had a general idea of how I wanted it to look, and what I was putting on paper just didn't match with what was in my mind. My break-through moment came when I added the flag embellishment from the layered stickers, which inspired me to create a column of colorful pennants against the left side of my page.  

MeghannAndrew_AmericanCrafts_SwanLake_04.jpg

Swans were the reason why I went with this collection! I loved the die-cut swan included in the ephemera die cut shapes and on the little cut-out included in the 6" x 6" paper pad, which I attached using a glitter clothespins. They were the perfect little embellishments for this fun layout. 

MeghannAndrew_AmericanCrafts_SwanLake_06.jpg

Ah, my title. I love looking at it! It's the perfect mix of glittery hand-drawn Thickers and little tile alphas, set on a pink pennant, which matches the ones throughout my layout. 

MeghannAndrew_AmericanCrafts_SwanLake_02.jpg

I'd love to show you how this layout came together in this process video! You can see my struggles and triumphs, all in 20 minutes, by watching the video below:

Be sure to check out all of the product used on this layout at Scrapbook.com via the gallery below! Thanks so much for stopping by and have a great weekend!

(*All product links contained in this post are affiliate links. You don't pay any extra, but I get a small percentage of your sale! Thanks for your continued support of my YouTube feed and this blog!) 

Elle's Studio June Kit + Add-Ons: At the Museum

In case you missed my first post of the day, the Elle's Studio June 2018 kit and add-ons* were released today! I already shared an 8-1/2" x 11" layout and process video, but for my second project, I wanted to switch things up a bit and document more photos with a 24" x 12" double-page spread!

(*All product links contained in this post are affiliate links. You don't pay any extra, but I get a small percentage of your sale! Thanks for your continued support of my YouTube feed and this blog!)

This spread records a fun day at the Houston Museum of Natural History with 5 photos, sized at 6" x 4", 3" x 2" and 4" x 4"! I love getting all of these photos on my page together, and the colors in the kit and add-ons this month coordinated perfectly with them!

EllesStudio_MeghannAndrew_AtTheMuseum_03.jpg

I started off the spread with a base of the blue grid found in the Noteworthy paper collection. After I topped that with a clean, white base, I added full 6" x 6" Shine paper stack patterns that coordinated with the colors in my photos. The circles included on the Let's Relax stamp are meant to be for creating ice cream cones, but who says you have to use anything as intended? I made them float across my page from the top left corner to the bottom right, helping your eye move across this wide spread.

EllesStudio_MeghannAndrew_AtTheMuseum_04.jpg

There's a new girl in the shop. Her name is Chloe, and we are already good friends! The Chloe alphabet stamp is fun and whimsical, and it contrasts perfectly with the font in the Hello Happy puffy words

Two 3" x 4" tags from the June 2018 kit were perfect for adding my typed journaling to, and I love the added texture that the "favorite snapshot" Noteworthy wood veneer piece adds to the page. I layered it on top of one of the June print and cut labels—a new product for Elle! They're so easy to use! 

EllesStudio_MeghannAndrew_AtTheMuseum_05.jpg

I couldn't finish a layout about the natural history museum without including a few butterflies, chosen from the Noteworthy bits and pieces and puffy stickers! They were the perfect addition to the movement already created on this page by my stamped circles. I also love breaking my title up across the page—it's yet another tactic for making your eye move from the top left to the bottom right of the spread.

Check out all of the supplies that I used to create this layout in the gallery below, which will take you to each product in the Elle's Studio shop:

Thanks so much for stopping by! Be sure to grab the new June goodies while supplies last. Happy creating! 

Elle's Studio June 2018 Kit + Add-On Reveal!

Hello there! Summer is quickly approaching, and the June 2018 kit and add-ons* from Elle's Studio will get you ready to document all of your summer memories! Let's take a look at the kit and extras in this short unboxing video: 

(*All product links contained in this post are affiliate links. You don't pay any extra, but I get a small percentage of your sale! Thanks for your continued support of my YouTube feed and this blog!)

The fun June 2018 kit, which was created by collaborating with Geralyn Sy of In a Creative Bubble, is summery, graphic and contains the perfect amount of fresh color for your projects! 

EllesStudio_June_2018_Kit.jpg

The add-ons will complement any project you create, with an awesome mix of stamps, embellishment, labels and a new paper stack! 

EllesStudio_June2018_AddOns.jpg

From left to right, you can find: the Let's Relax stamp, Shine acrylic, June blank label stickers, Summer wood veneer frames, Hello Happy puffy words, Shine 6" x 6" paper stack, Chloe alphabet stamp, Jane alphabet stickers — white, bright hand-drawn acrylic hearts

I just had to search through my summer memories to find the perfect photos for this kit, and when I found two photos of my daughter running into the ocean waves, I knew I had to document them with the new supplies!

EllesStudio_MeghannAndrew_BeachFunInTheSun_01.jpg

How awesome is this kit when paired with the Noteworthy collection? I couldn't love this layout more: the movement, the fun, graphic design and those awesome stamps! YES!

EllesStudio_MeghannAndrew_BeachFunInTheSun_02.jpg

The awesome Hello Happy puffy words are perfect to recolor with an oil-based paint or marker, like the Sharpie oil-based markers that I used here. I also love how the Jane alphabet stickers pair with the puffy words to create the perfect title!

EllesStudio_MeghannAndrew_BeachFunInTheSun_03.jpg

This awesome striped pattern appears in the June kit, as well as in the Shine 6" x 6" paper stack! It was perfect for customizing with the "summer vibes" phrase from the Let's Relax stamp! Don't forget to add the bright hand-drawn acrylic hearts to your cart to add a different texture to your page.

Take a look at how this quick and easy layout came together in this process video:

Check back here in just a couple of hours when I will be sharing a new 24" x 12" double page spread featuring the June 2018 kit and add-ons! Until then, click the links in the gallery below to shop all of the fun product that I used on my "Beach Fun in the Sun" layout:

Box of Crayons Collection: Firefighter Lizzy

AmericanCrafts_MeghannAndrew_FirefighterLizzy_03.jpg

Hello there! Hopefully you've planned some crafty time this Memorial Day weekend! Today I'm kicking off this long, creative weekend a bit early, and I'm here to share a bit of colorful inspiration with you using the Box of Crayons collection from Shimelle and American Crafts!* 

AmericanCrafts_MeghannAndrew_FirefighterLizzy_01.jpg

Box of Crayons Collection Supplies | A New Thought patterned paper, Spell it Out patterned paper, On a Roll patterned paperjournaling 6 x 8 paper pad, Crayon Box alpha Thickers, cardstock stickerssticker and washi book, alpha sticker folder, ephemera die cuts, enamel dots with glitter, self-adhesive patches 

This fun and playful layout began by matching my photo to the yellow, black and white A New Thought patterned paper. Once I added the rainbow of colors using a manufacturer's strip, giving my photo a "shelf" to sit on, I opened up the door to adding more color on my page!

AmericanCrafts_MeghannAndrew_FirefighterLizzy_04.jpg

As is usually the case, my title is my favorite part of this layout. I loved combining the red tile alphas from the Box of Crayons alpha sticker folder with the Crayon Box alpha Thickers, and the addition of the "hello" self-adhesive patch just topped it off perfectly.

AmericanCrafts_MeghannAndrew_FirefighterLizzy_02.jpg

While creating this page, the space above my journaling just felt like it needed something "more." I was so excited to find the "e" on the Spell it Out patterned paper, which I cut a banner shape into before tucking it under my photo. It was the perfect addition to create the visual triangle of embellishment that I needed on this layout. 

Guess what? With all of that free time you have relaxing this weekend, you can also watch a process video of how this layout came together! Hooray! 

Thanks so much for watching! Be sure to find all of the product I've used on this layout in the product gallery below while it is ON SALE at Scrapbook.com! Happy creating!

(*All product links contained in this post are affiliate links. You don't pay any extra, but I get a small percentage of your sale! Thanks for your continued support of my YouTube feed and this blog!)

Elle's Studio May 2018 Kit + Add-Ons: Girly Fun

EllesStudio_MeghannAndrew_GirlyFUN_04.jpg

Hi there! I'm having so much fun creating with the May 2018 kit and add-ons* from Elle's Studio, and I created a girly, blinged-up layout to prove it! When I saw the colors in the kit, I immediately thought of a photo of my daughter and oldest Goddaughter playing dress up, complete with makeup!

(*All product links contained in this post are affiliate links. You don't pay any extra, but I get a small percentage of your sale! Thanks for your continued support of my YouTube feed and this blog!)

EllesStudio_MeghannAndrew_GirlyFUN_01.jpg

This 8-1/2" x 11" layout came together easily, and my favorite part, the BIG title was created with a mix of the Title Builder Vol. 2 stamp and the wood veneer fun word!

EllesStudio_MeghannAndrew_GirlyFUN_05.jpg

I used every single bit of the 4" x 6" yellow tag from the May 2018 kit—I cut the word "sunshine" from the middle to use on my "Good Times in the Sunshine" layout, then I used the bottom half, here, to house my typed journaling and title, then added the top part above my photo. That big space at the bottom here was just perfect for stamping "perfectly girly" using the Title Builder Vol. 2 stamp. Just a little trick: The word "girl" is included in the stamp, so I added the "y" from the word "boy" to use the word "girly" in my title! I love how versatile this stamp set it for creating fabulous titles!

EllesStudio_MeghannAndrew_GirlyFUN_02.jpg

Now, how about this wood veneer fun word? It's natural wood, so you can use it as-is, or paint it, spray it; or do what I did here and bling it up using gold shapes and dots puffy stickers, the new spring mix puffy heart stickers, and pearls and bling from your stash! I backed this word with another favorite 4" x 6" tag from the May kit—the tiny, colorful polka dot tag. It added the perfect amount of color behind the word.

EllesStudio_MeghannAndrew_GirlyFUN_03.jpg

With all of that bling at the bottom, I had to balance out the top of the layout a bit with some product! The amazing Hello stamp has a fun label that you can add your own phrases and dashed lines to, to create your own custom design! I stamped that and added the word "hello" to the center, then used the bottom corner to stamp my date. To the left of that, I added the purple "fav" die-cut clip from the May kit, then stamped the cute heart with dotted circle from the Hello stamp behind. Below that, I added the "play all day" sticker from the Play All Day phrase stickers (which are almost sold out, so grab them fast!) for another layer. I love this little grouping of product! 

I hope you love this layout as much as I do, in all of its girly glory! Be sure to pick up the products I used to create it before they're gone from the shop forever, by clicking the gallery links below. Thanks for reading and happy weekend creating!

Ali Edwards Story Kit: Documenting Our Home

In the summer of 2016, we were hoping to make a big move to Kentucky. However, for some reason that just wasn't in God's plan, so we ended up staying in Texas. We had spruced up our  home to get it ready to lease out, which included professional photos. So to make lemonade out of lemons, I have a really lovely documentation of how our house looked that summer, and I decided to record it in a pocket page using the Ali Edwards Home Story Kit.  

MeghannAndrew_AE_HomePocketPage_01.jpg

This kit included the perfect colors for documenting our home, and I used the "home is" add-on labels to record what home is, from the perspective of each room that I documented. 

Recording "the story of" my daughter's playroom on the 3" x 4" card was important, as when she became old enough to have enough toys, we decided to forgo a formal dining room to make it her playroom—one of the best decisions we have made in this house! I wanted to get that down in writing.

Even two years later, our bedroom looks completely different now, with new furniture, color on the walls and new bedding. I'm happy to have what it looked like before recorded, and it will be interesting to re-create all of these images again to compare them to our home in 2016.

MeghannAndrew_AE_HomePocketPage_02.jpg

The backside of the layout includes my daughter's room and my creative space—my two favorite places in the house! The teal in the kit worked perfectly with all of the teal in my photos.

This "five senses of home" card was really special to me. I sat down and closed my eyes to think about what home looked, smelled, tasted and sounded like. It makes me happy to have these down on paper.

MeghannAndrew_AE_HomePocketPage_06.jpg

We as a family like to embrace the "less is more" attitude, so it was important for me to add that home is a space that we fill with things that mean something to us, like the Monaco Grand Prix print on the wall in the background of this photo. 

I loved creating with the Home Story Kit, and after creating three projects with it as a guest storyteller, I still have plenty of product to record more memories. I'm so happy to have these photos recorded, as I know that the images and details of each home we've lived in slip away after a few years. 

Thanks so much for stopping by! Happy creating this weekend!

Elle's Studio Let's Go Traveler's Notebook Kit!

I am so excited to introduce you to the Let's Go traveler's notebook kit*—one that Elle and I collaborated on when we were together earlier in the year. We loved creating this fun travel-themed kit, and I know you will love creating with it, just like I did! (*All product links contained in this post are affiliate links. You don't pay any extra, but I get a small percentage of your sale! Thanks for your continued support of my YouTube feed and this blog!)

Getting the physical kit in my hands was such an awesome moment for me, and creating with it was even more special! I decided to document a trip that we took to Seattle last fall, in my new gold dot Webster's Pages traveler's notebook, which is so gorgeous! I love that teal interior!

I kept the title page on the front of my insert quite simple, adding a 3" x 4" photo of my family and my favorite "location" stamp included in the kit, which I stamped with the Stanley Jr. solid and outline stamps.

EllesStudio_MeghannAndrew_SeattleTN_02.jpg

On the first page, I added another 3" x 4" photo with typed journaling above to the "oh the places we go" paper. I love that all of the colors in the kit are on this fun page. I also used the Adventure puffy stickers in my notebook—they work perfectly with the Let's Go kit

EllesStudio_MeghannAndrew_SeattleTN_03.jpg

This spread uses the same piece of paper, halved between the two pages. I love those tags included in the kit—they're perfect for adding journaling to my notebook!

Want to see how these pages came together? Watch my process video, which includes an unboxing of the kit itself! 

Be sure to grab the Let's Go traveler's notebook kit while supplies last! It's perfect for documenting adventures big and small! 

Elle's Studio May 2018 Kit + Amazing Add-Ons!

Hooray for a fresh, new month and a new Elle's Studio kit to go along with it! Take a look at my unboxing video to take a firsthand look at all of the new goodies released in the Elle's Studio shop* today! 

(*All product links contained in this post are affiliate links. You don't pay any extra, but I get a small percentage of your sale! Thanks for your continued support of my YouTube feed and this blog!)

Check out all of the beautiful colors included in this May 2018 kit! I especially love the yellow and greens added this month! The 4" x 6" tags are my favorite, and I've used all of them on the projects that I'm sharing here on the blog this week!

In addition to the kit, there are some fabulous new add-ons this month—ones that will make your projects: whether layouts, pocket pages or traveler's notebooks, truly shine!

EllesStudio_May2018_Add-Ons-2.jpg

In addition to the add-ons, be sure to add the new Hello Good Times printables and May digital cut files to your library!

EllesStudioMay2018Digitals.jpg

I started out with the kit by creating a new 8-1/2" x 11" layout with a big, favorite photo, and a BIG title! I couldn't love it more:

EllesStudio_MeghannAndrew_GoodTimes_01.jpg

Check out how this page came together in a quick process video! Grab a cuppa and take a look:

I have another project to share in a few hours—one that's a first for me: a traveler's notebook with the new Let's Go traveler's notebook kit! Until then, check out the products that I used in this video by shopping the gallery below: 

A Custom Background Using AC Kelly Creates Products!

Hello there! I recently shared a new layout on the American Crafts blog that I just LOVE, using the Kelly Creates products*, and I wanted to share it here too, to show you how easy it was to create a custom hand-lettered background for my 8-1/2" x 11" layout. 

(*All product links contained in this post are affiliate links. You don't pay any extra, but I get a small percentage of your sale! Thanks for your continued support of my YouTube feed and this blog!)

AmericanCrafts_MeghannAndrew_Enjoy_01_squarejpg.jpg

Supplies | Kelly Creates collection: Dream pens8-1/2” x 11” dotted paper pad, acrylic traceable stamps, journal accessory kit; All The Good Things collection: Mixed media foundations paper, Color Pop acrylic paint- set 2, Color Pop acrylic paint- set 3, On a Positive Note paper, chipboard letter stickers, diecut frames, finishing embellishments; Sunshine and Good Times collection: Shoe In paper, sticker book; Star Gazer collection: accent and phrase stickers; Other: Vicki Boutin sticker book, Amy Tangerine sticker book, Bazzill Basics 8-1/2" x 11" white vellum

You may look at this beautiful background, and think, "There is no way that I could create that," but let me show you how simple it is to re-create for even the biggest perfectionist! Ahem, that would be me. 

AmericanCrafts_MeghannAndrew_Enjoy_08.jpg

I began by stamping words that fit the beautiful photo of my daughter, using the acrylic traceable stamps onto a sheet from the 8-1/2” x 11” dotted paper pad.  These dots allowed me to keep my stamped words nice and straight. 

AmericanCrafts_MeghannAndrew_Enjoy_09.jpg

After I filled the page, I added a sheet of vellum over the top and started tracing with the beautiful turquoise blue pen in the Dream pens set. These are double-ended pens, and I used the thicker end for this project. I love how easy they are to work with: even a novice hand-letterer like me can create beautiful lines with them! It was such a relaxing exercise, and I sat at my desk with my cup of coffee and finished off the whole page.

AmericanCrafts_MeghannAndrew_Enjoy_10.jpg

I wanted to back that beautiful sheet of hand-lettered goodness with some additional colors from my photo, so I grabbed the Color Pop acrylic paint- set 2 and set 3. These paints have gorgeous saturated colors, and I used them on the mixed media foundations paper, which does not buckle at all. This is a perfect base for any mixed-media project! I bunched the color around where I wanted my photo to be placed, so that your eye would naturally go to the photo. Once that was dry, I machine-stitched my vellum to this painted background using white thread.

AmericanCrafts_MeghannAndrew_Enjoy_06.jpg

Next, I added my photo, matted with two patterned papers—On a Positive Note and Shoe In
and journaling, which I added to two tags in the diecut frames pack, then started adding embellishment, using the same colors that I painted on my page background. 

So that I didn't cover up any more of that gorgeous hand-lettered background that I worked so hard to create, I added my title directly to the negative space on my photo, using the "let go" sticker included in the Kelly Creates journal accessory kit (so many awesome phrase stickers in here!) and paired that with the black All the Good Things chipboard letter stickers

AmericanCrafts_MeghannAndrew_Enjoy_04.jpg

The beautiful birds and foiled butterfly stickers from the Sunshine and Good Times and the Amy Tangerine sticker book created the perfect accents for this page about living in this happy moment with my family. I also finished off the page with a few All the Good Things finishing embellishments

AmericanCrafts_MeghannAndrew_Enjoy_03.jpg

I can't wait to create more beautiful, bespoke backgrounds using these easy-to-use Kelly Creates products! They're the perfect products to perfect your hand-lettering! 

Thanks for stopping by! Be sure to check out all of the products that I used on this layout at Scrapbook.com via the gallery below, and thank you so much for clicking to support this blog and my YouTube feed! 

AC Sunshine and Good Times: Wonderful Coronado Adventure

Hello there! Last fall we spent five days in beautiful San Diego, California, and I have so many wonderful memories to record from our trip. Today, I'm here to share my latest layout about a gorgeous day we spent bicycling around Coronado Island, using the latest American Crafts and Amy Tangerine collection, Sunshine and Good Times. (*All product links contained in this post are affiliate links. You don't pay any extra, but I get a small percentage of your sale! Thanks for your continued support of my YouTube feed and this blog!)

AmericanCrafts_MeghannAndrew_CoronadoAdventure_01.jpg

Supplies | Sunshine and Good Times Collection: Rainbow Love patterned paper, Shoe In patterned paper, Slice of the Good Life patterned paper, ephemera die-cuts, sticker book, puffy phrase Thickers, glitter alphabet Thickers, washi tape, rotary stamp; Other collections: Box of Crayons photo corners, All the Good Things finishing embellishments, Glitter Girl embellishment pack

These energetic and colorful photos deserved the same vibe of product to work with, and the Sunshine and Good Times collection was the perfect choice! I pulled the blue, green and red hues out of my photos to match with my layout, choosing the Rainbow Love, Shoe In and Slice of Life patterned papers to go with my clean, white background. 

AmericanCrafts_MeghannAndrew_CoronadoAdventure_04.jpg

I had three biking photos that I wanted to use on this page, and only one was a vertical photo. So, I decided to place that in the center of the layout, with the two horizontal photos on either side, tucking them underneath the central photo so that they were essentially squares. Once my patterned papers and photos were in place, I noticed that my page had a central focus with the vertical image placed there, so I decided to create a central column for the title and journaling, with embellishment emanating from them.

AmericanCrafts_MeghannAndrew_CoronadoAdventure_02.jpg

This is where the other colors came in! Once I found the "adventure" die-cut in the ephemera die-cuts, I knew that I wanted to get more colorful on this page, and built a title using it, the glitter alphabet Thickers and the "wonderful" clear sticker from the sticker book, which I adhered to white cardstock before sticking it on with foam adhesive. After my title was in place, I immediately added the colorful manufacturer's strip to the base of the page, then to balance all of the color in the center and the bottom, I added an acetate flower die-cut from the ephemera die-cuts to the top. Balance achieved!

AmericanCrafts_MeghannAndrew_CoronadoAdventure_03.jpg

Adding my journaling in typed strips, the only thing left to do was to embellish! I added larger embellishments, like the "fun starts here" ribbon from the All the Good Things finishing embellishments, and the wooden camera button from the Glitter Girl embellishment pack. Is anyone else hoarding these fun embellishments like me?

AmericanCrafts_MeghannAndrew_CoronadoAdventure_05.jpg

The last step was to add a spray of colorful hearts coming out from my central column, and I did that with the large hearts in the puffy phrase Thickers sheet and small, stamped hearts using the rotary stamp. To add even more hearts to show my love for this day, I also added a row of heart washi tape just below my journaling. 

I love this page, and the fun day with my family that it records! Click the product links below to shop the Sunshine and Good Times collection products that I used on this page to document your own colorful adventures!

Introducing Title Builder Volume 2!

EllesStudio_May2018_MeghannAndrew_BetterTogether_02.jpg

Today is an exciting day, as my second collaboration with Elle's Studio, Title Builder Volume 2, is now available in the Elle's Studio shop!*

(*All product links contained in this post are affiliate links. You don't pay any extra, but I get a small percentage of your sale! Thanks for your continued support of my YouTube feed and this blog!)

EllesStudio_May2018_TitleBuilderVol2Bundle.jpg

I LOVE creating titles! Not only coming up with clever titles, but also choosing the product to make them! When I launched my class, Terrific Titles, at Big Picture Classes, I wanted to create a product that made title building easier, and that's when I paired with Elle's Studio to bring you the original Title Builder products! Now, Title Builder Volume 2 will add even more title possibilities to your stash! Watch this introduction video to see what you can create with this fun product!

I had so much fun creating with these new products last week! I quickly and easily made three simple projects, with beautiful and poignant titles! I love how easily they come together with these Title Builder products! 

EllesStudio_May2018_MeghannAndrew_ThisSweetGirl_05.jpg

Title Builder has been designed to work as a series of a 6" x 8" stamp, acrylic and wood veneer which you can get in a specially-priced bundle for 15% off the retail cost, or you can buy each piece individually. 

EllesStudio_TitleBuilderVol2_PDFsneak.jpg

With your purchase of the Title Builder Vol. 2 stamp or the bundle, you will also receive a PDF via email with over 100 title combinations that you can create with the stamp only! Add on the words from the acrylic, wood veneer or alphas from your own stash, and the possibilities are endless!

I can not wait to see what you create with these fun, new products! Be sure to tag me, @meghannandrew on Instagram, or simply use the hashtag #EllesStudio if you order, when your box arrives, or when you create with Title Builder Volume 2

U.S.S. Midway Layout + Pocket Page with Process Video

The April kit and extras* from Elle's Studio are so fabulous, I've created another project to share with you today, and this is my favorite type of project—a layout and pocket page combination! I created this project about a wonderful day that we spent on the U.S.S. Midway in San Diego, California.

(*All product links contained in this post are affiliate links. You don't pay any extra, but I get a small percentage of your sale! Thanks for your continued support of my YouTube feed and this blog!)

MeghannAndrew_USSMidway_01.jpg
MeghannAndrew_USSMidway_05.jpg

I loved creating this custom embellishment with the April 2018 cut filesCurrently stamp and Adventure puffy stickers

MeghannAndrew_USSMidway_07.jpg

The new Mini Dated stamp was perfect for adding the date to this die-cut from the April 2018 kit.

While creating, I filmed a video so that you could see my process! Grab a cuppa and have a look:

I also added to the pockets on the back side of this spread, and continued the star theme:

MeghannAndrew_USSMidway_02.jpg

With such a fantastic choice of tags, die-cuts and embellishments this month, this spread was easy, and so fun to put together! Be sure to check out all of the new product in the Elle's Studio shop, including the Noteworthy collection! 

MeghannAndrew_USSMidway_09.jpg