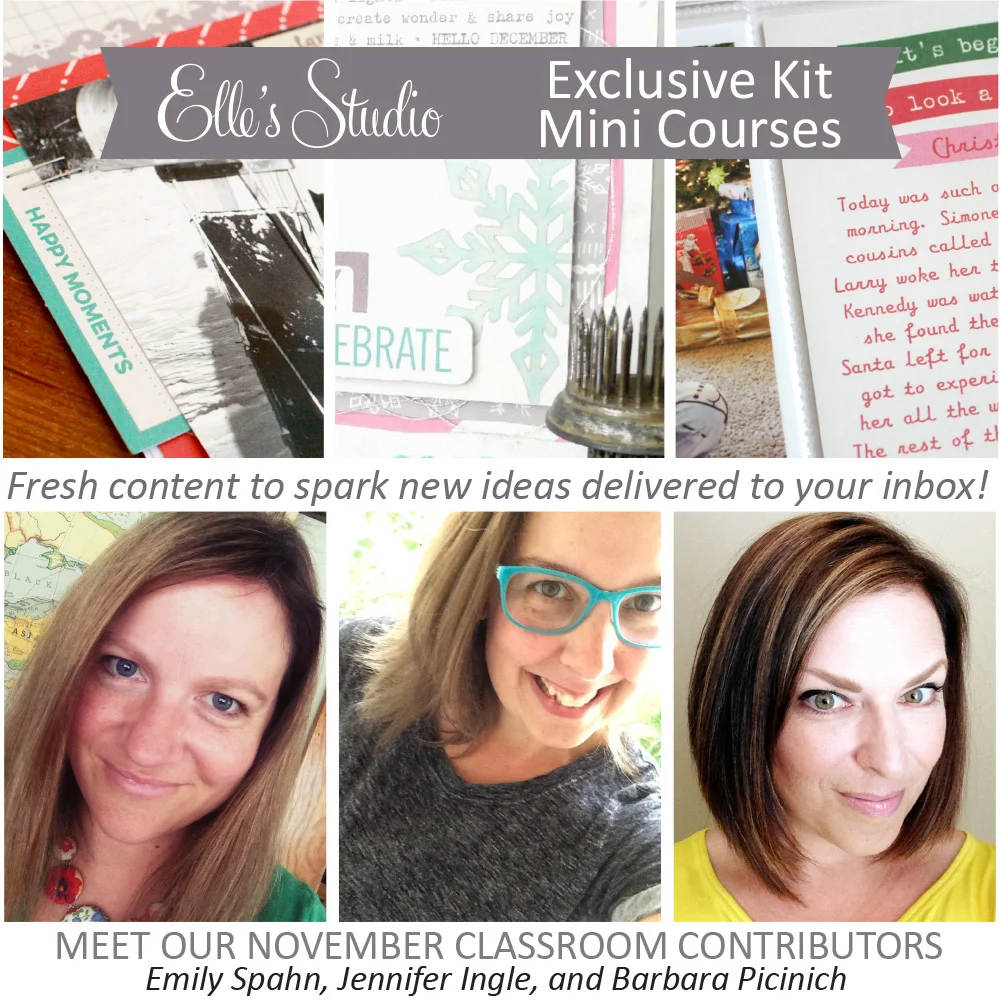
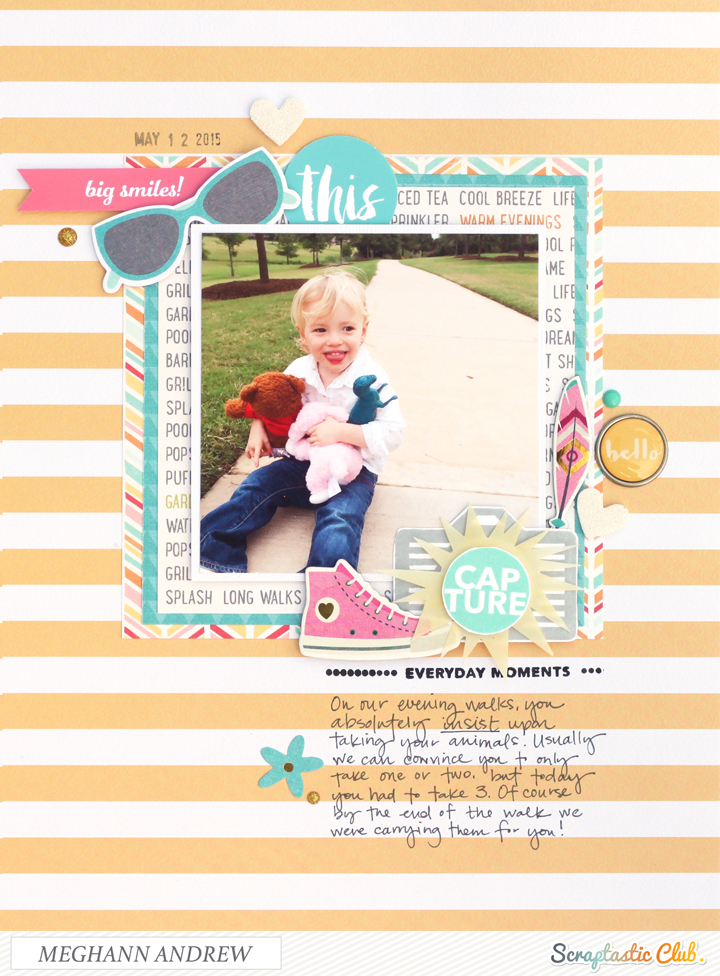
Scraptastic Club Feels Like Home Kits: Just Play
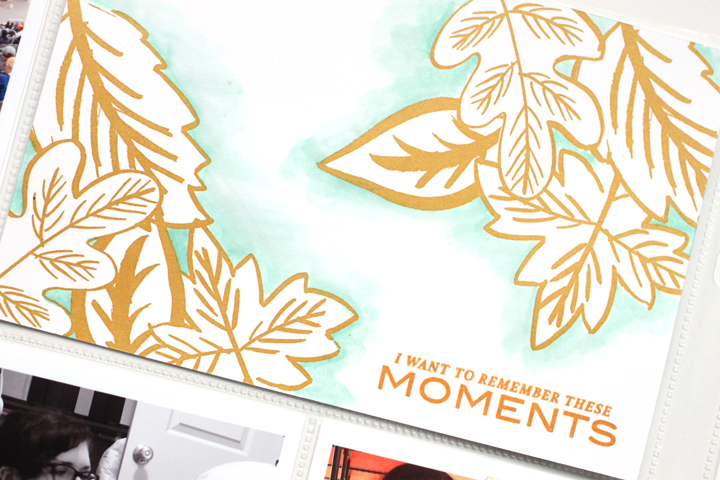
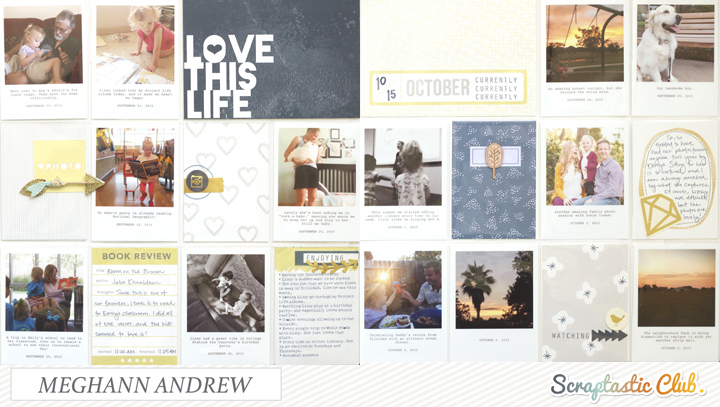
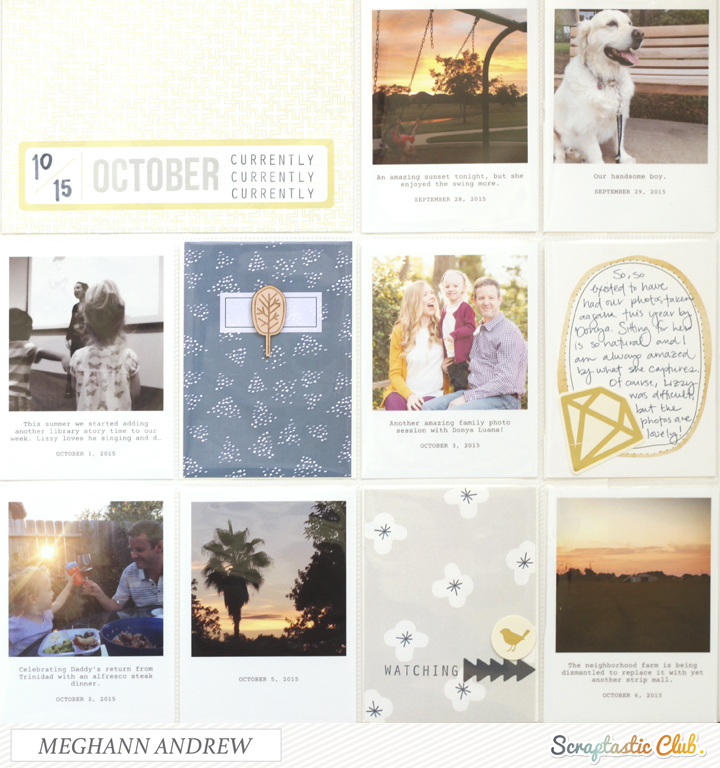
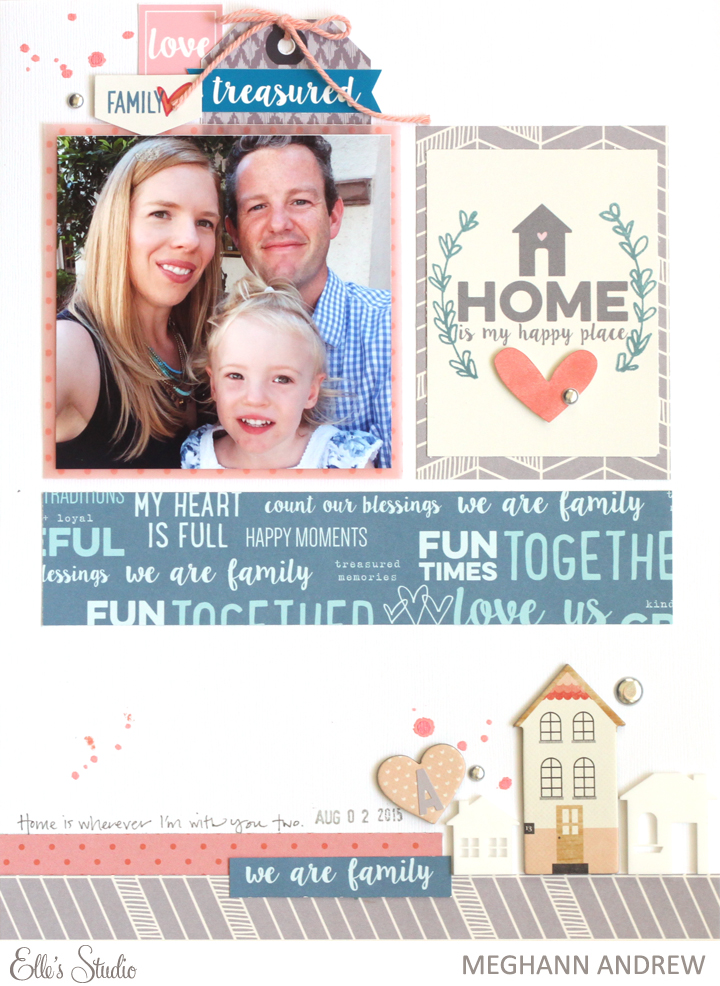
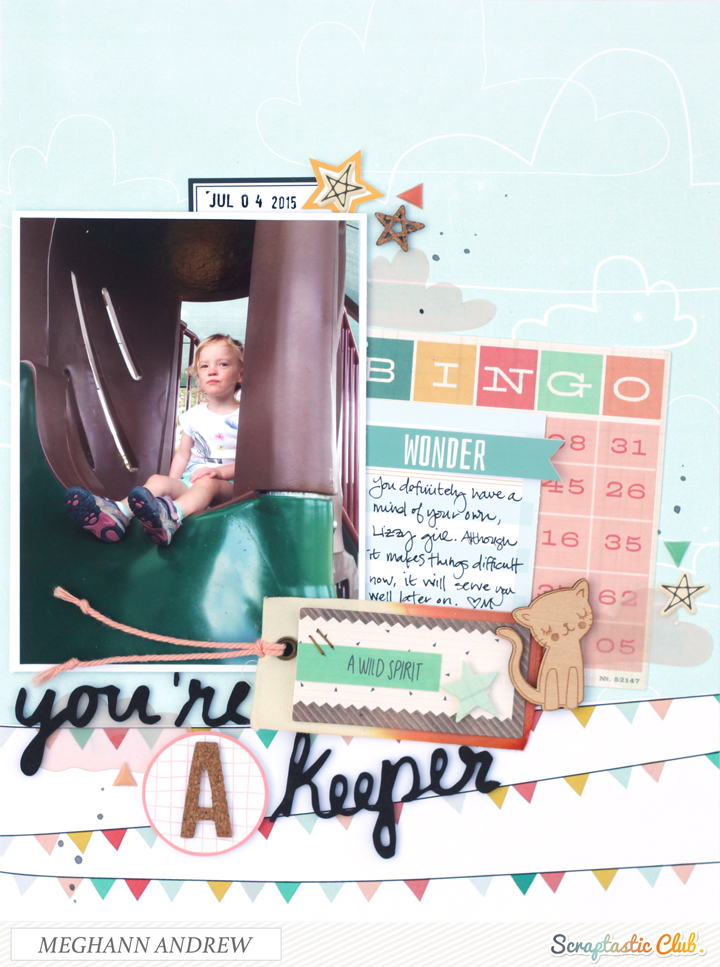
Every month, I go through my Scraptastic Club kit and begin to create layouts, but for my first few layouts, I use the same colors, and in this case, my first three layouts created with the Feels Like Home kit and add-on (sold out) have a fall-like feel. So, for my next layout, I decided to switch it up and really show the versatility in the kit by creating a bright, sunny layout.

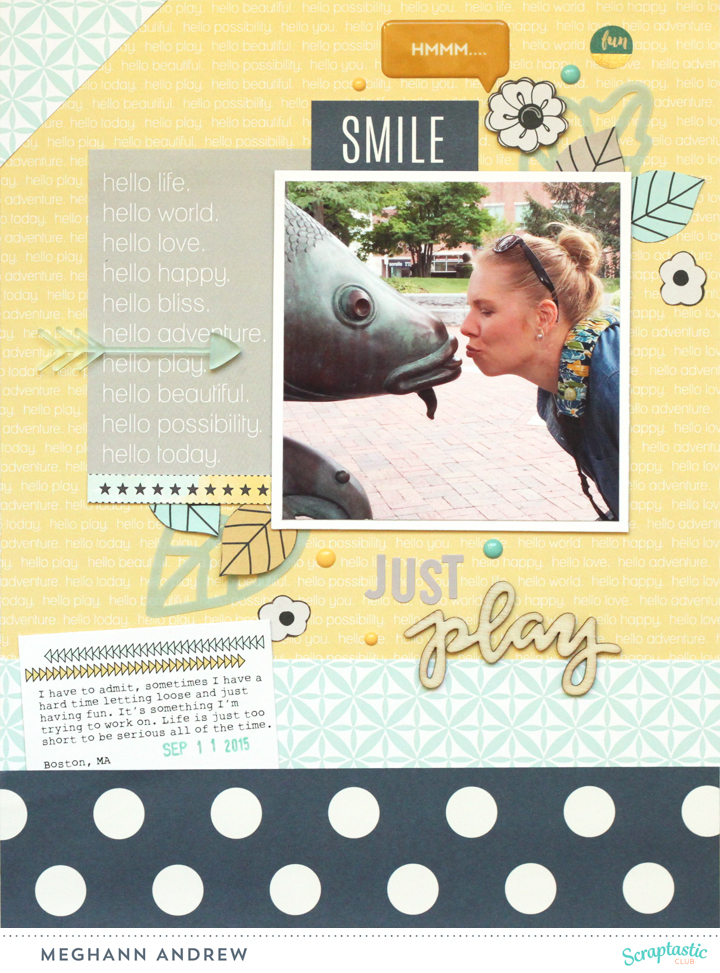
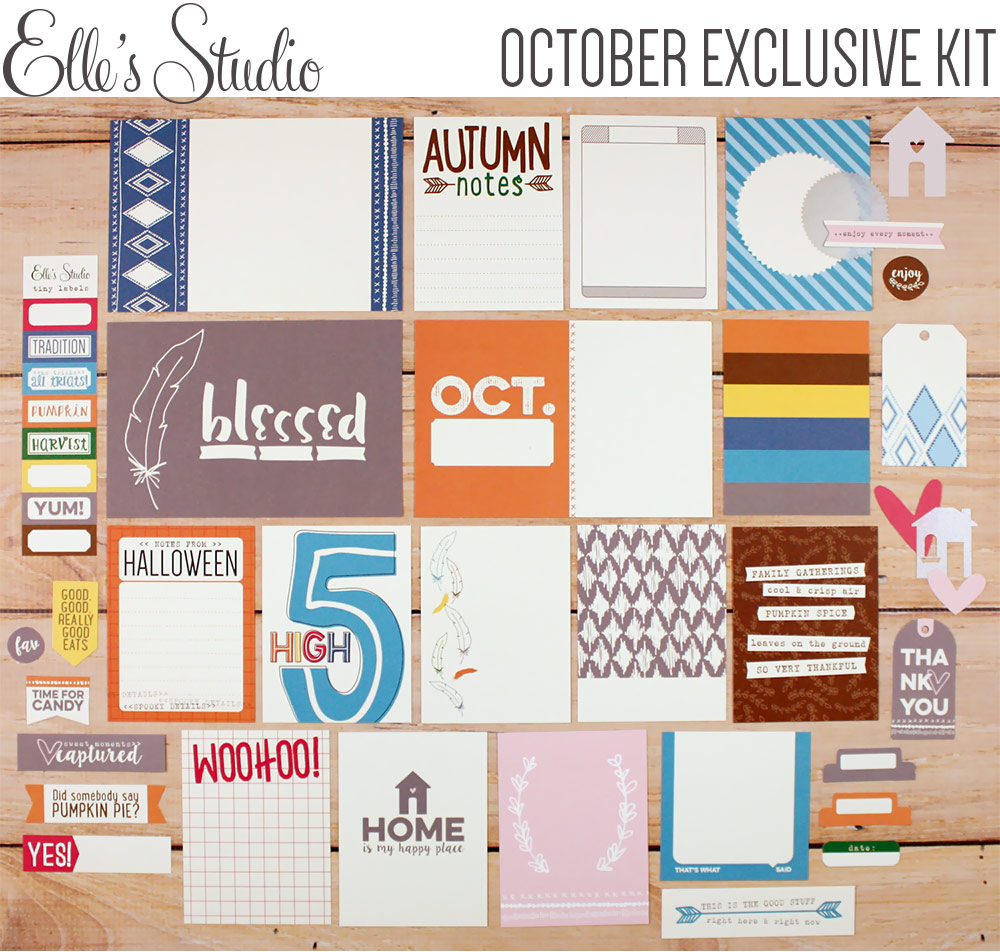
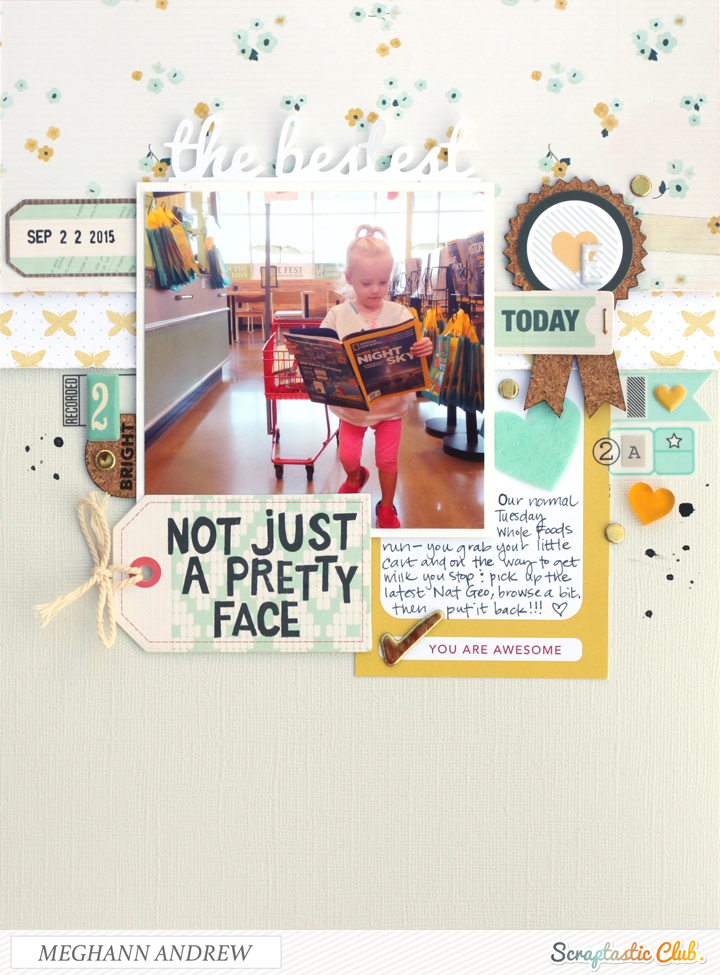
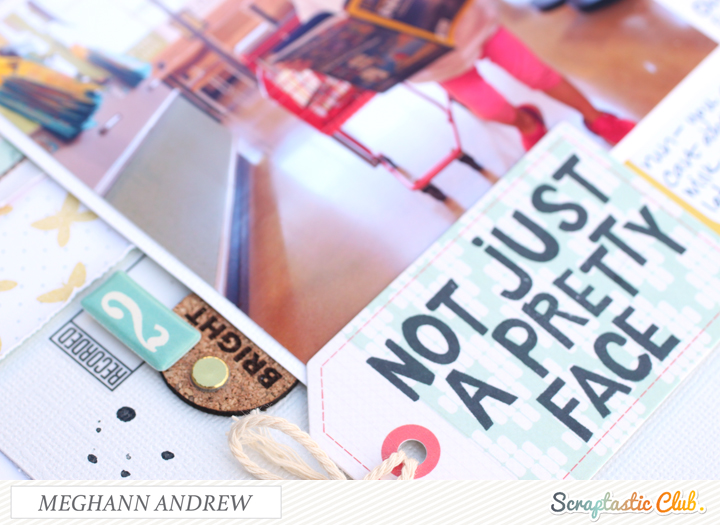
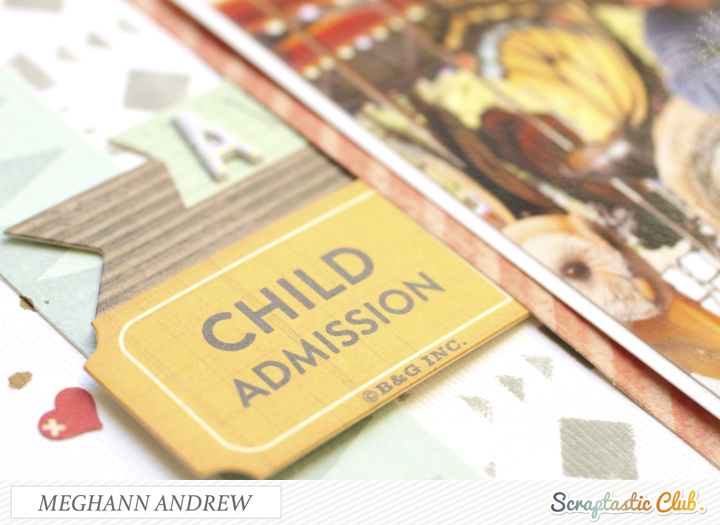
The exclusive papers this month, designed by Kaitlin Sheaffer, were some of my favorites from the entire year! On this layout, two of the three (the yellow and teal) are exclusives. The journaling tag, cut from the exclusive cut-apart sheet in the add-on, is something I look forward to every month.

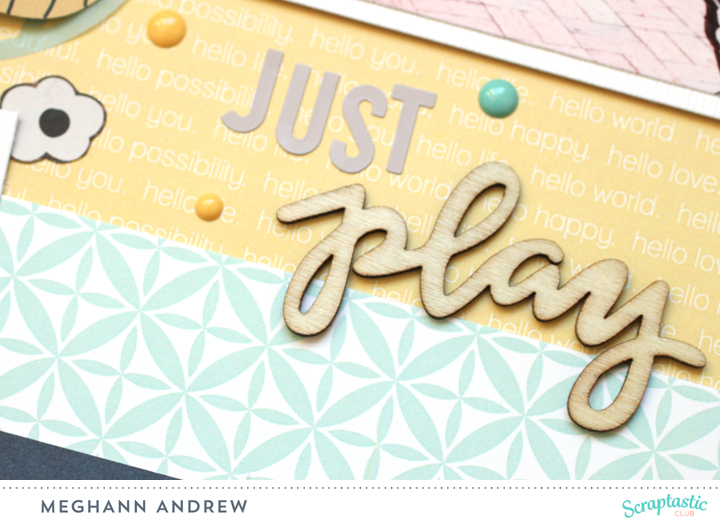
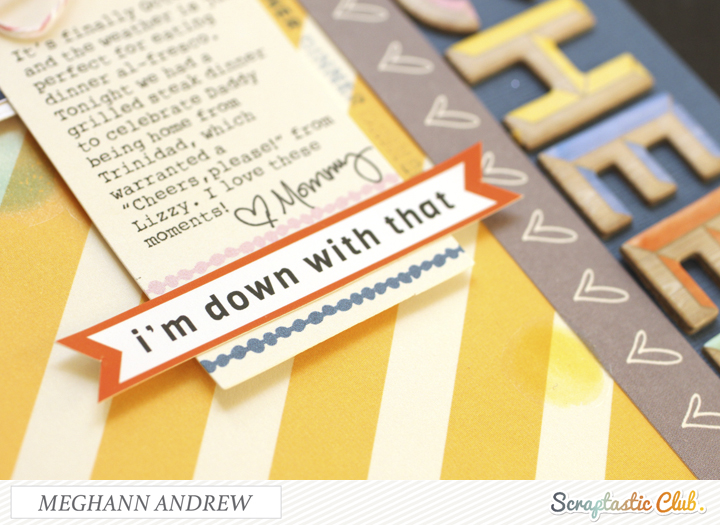
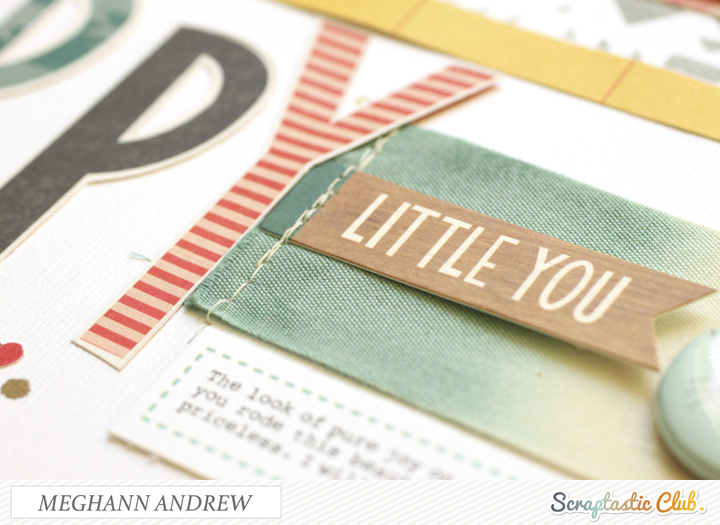
The title was created with the Elle's Studio grey alpha stickers and the "play" wood veneer from Freckled Fawn.

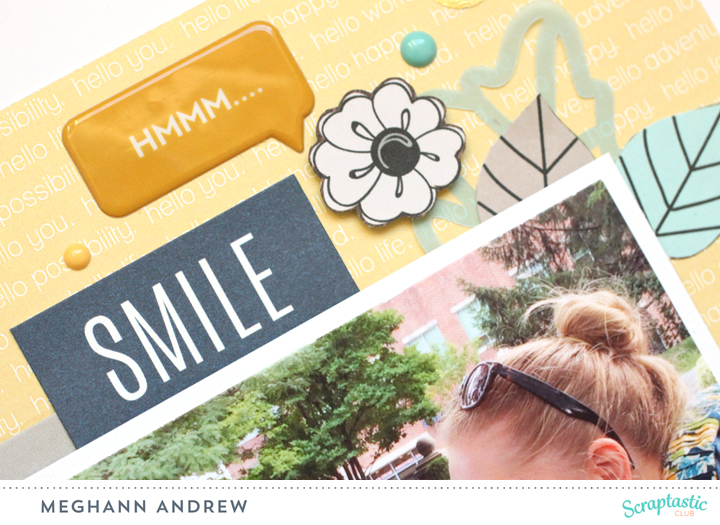
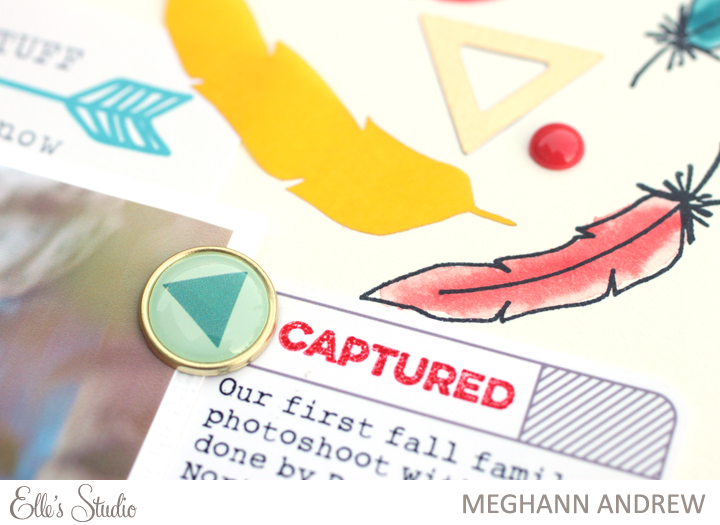
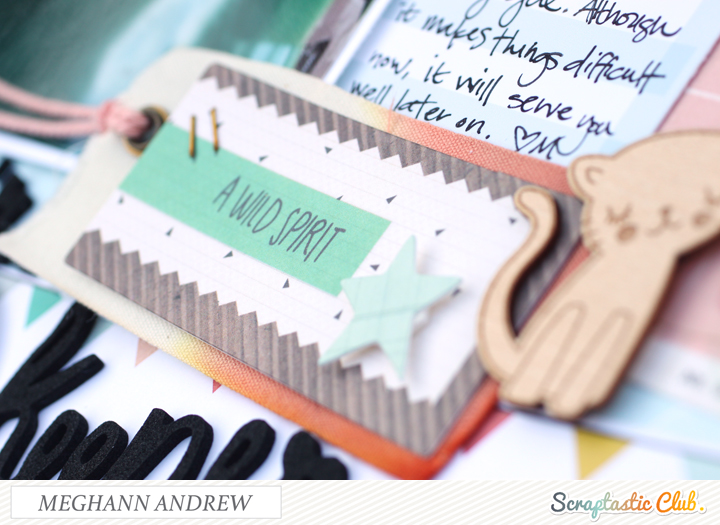
My embellishment from the main kit included the vellum leaves and acrylic arrow. From the add-on, I used flowers and leaves cut from the Pink Paislee Cedar Lane floral paper, and the Heidi Swapp word bubble. From this month's This Life Noted kit, I added enamel dots, a washi tape circle from the Pink Paislee Cedar Lane washi book, and the star strip cut-apart. 

To finish off my layout, I printed my journaling on the exclusive cut-apart journaling tag and tucked it in between the patterned paper layers. All in total, the layout took me about thirty minutes to complete.

Thanks for stopping by! 

October/November Project Life Spread

I have to say, every time my This Life Noted kit from Scraptastic arrives, I'm so excited to flip through the cards to see what color combination I can use on my next spread! What's even more exciting is when two different kits coordinate to create a fantastic spread, like with the October (sold out) and November TLN kits.

This spread documents the end of October and beginning of our November, so I felt it was appropriate to mix both the October and November kits, and uses a gold, orange and teal color scheme. I really wanted to use the big pumpkin 3" x 4" card for our Halloween photo, and I stamped it with the This is Halloween stamp set from October.

My favorite card in the spread is this 4" x 6" leaf card from the October kit, which I added teal watercolor to, to tie into my color scheme. I also stamped "I want to remember these moments" with the November Ain't No Sunshine stamp set.

The right side of the spread continued the color scheme, as well as the watercolor and painted effects that I loved with both of these kits.

The exclusive embellishments in this month's kit were fantastic, especially the puffy stickers, which are also available a-la carte in the shop

It's crazy to think that with a few more spreads, this year will be completely wrapped up in my album! Thanks for stopping by & happy Wednesday! 

Elle's Studio November Exclusive Kit Reveal

The Elle's Studio November exclusive kit is here and perfect for documenting your special memories this month! 

The exclusive add-ons are so fantastic this month, with the Happy Holidays stamp set being my favorite! 

In addition to that, the November digital cut files are so versatile to use on a project of any subject or theme. On my layout, "You Are My Joy," I used the die-cut 'joy' for a non-Christmas themed layout!

On this layout, I paired the kit and add-ons with both the Joyful and Thankful collections, which worked seamlessly. 

The kit and two other add-ons, the Holiday acrylic mix and the Family wood veneer, in addition to the Joyful collection and Jordan alphabet stamps, helped me create this Christmas-themed layout!

If you're looking for inspiration to put your kit and add-ons to work, you will definitely want to check out the exclusive kit mini course for only $4.99! This month's contributors, Emily Spahn, Jennifer Ingle and Barbara Picinich, will definitely leave you wanting to create. 

Be sure to check out all of the new offerings this month over at the Elle's Studio shop! This month you can get free shipping on your $50+ order with coupon code HOLIDAYS. Happy creating! 

September - October Project Life

Life is super busy lately. If you missed my announcement on Instagram, I have an upcoming class in January at Big Picture Classes that I am hard at work on. With that added to the things that I already have going on, as well as general life, I'm finding the need to keep my Project Life pages simple even greater at the moment.

On this spread, which highlights the end of September and beginning of October, I used the October This Life Noted kit and stamp from Scraptastic Club.

Every month when I open my TLN kit, there are so many possibilities for a color scheme on my spread. This month, I chose navy, citrine yellow and grey. I love how clean and modern it feels. 

Left_blog.jpg

I completely allowed myself to have a few filler cards this month with minimal decoration, but I made up with it by adding more journaling to a couple of cards, like the "book review" card, and another which I made my own by stamping "enjoying" on a cut-apart and pasting at the top.  

With the switch to October on the right side of the spread, I created a new month card with the stamp and some grey alphas included in the kit. I put minimal decoration on this page again, just to keep the process quick and simple. 

That's it! Another spread in the books. It's amazing that I'm almost finished with my second year on this project, and I'm loving it more and more every month! 

Thanks for stopping by! 

Scraptastic Club Riptide Kits: Cheers

I am loving the bright, fun colors in the Riptide kit and add-on from Scraptastic Club this month, especially since there is no sign of autumn here in Texas! Lately, I've been feeling the need to make things simple- it could be me just preparing for busy times ahead, or the fact that I'm creating during nap time, but I'm loving this natural progression in my layouts. Today's layout was just that- quick and simple. 

With the start of October here, we saw a slight drop in temperature, enough to allow us to eat dinner outside. I was so lucky to capture this photo on one of those cooler evenings, when we were celebrating having Daddy back after being away two weeks on business.

On this layout, I utilized the power of the diagonal line to draw your eye right through the photo, with the placement of embellishment, tags, and rub-ons. I love the mix of Amy Tangerine Finder's Keepers and Elle's Studio Thankful- the two collections just work so well together! 

Along with the kits, I used the Riptide digital files, Riptide stamp set, and Planner stamp set (which I am loving the small size to just add little bits to my layout- like I did here with "dinner" next to my journaling tag.) 

Thanks for stopping by today! Check out more inspiration using the Riptide kits here on the Scraptastic Club Riptide pin board.

Elle's Studio Exclusive Kit Reveal!

The Elle's Studio October exclusive kit is live and in the Elle's Studio shop! The kit is lovely, colorful and perfect for documenting your memories, whether fall related or not. 

In addition to the kit, the gorgeous Tradition stamp set is the perfect addition to the kit contents. 

This month, when you purchase both the October exclusive kit and the Tradition stamp set, you will receive this month's Exclusive Kit Mini Course for free via email! The contributors, Leanne Allison, Joy Taylor and Natalie Elphinstone, share some fabulous projects, along with helpful tips and techniques for getting your kit used to document your memories.

In addition to the kit and the stamp, the Home printables and October cut files coordinate nicely with the colors and elements in the kit. 

Also don't forget about the acrylic houses and vellum feather add-ons! Be sure to use code 'Thankful' to get free shipping on your $50 order.

My first layout used the kit along with the new Thankful collection, Home printables, Tradition stamp set and acrylic houses. I tried out a new color scheme of salmon pink, grey and navy, and I love how it turned out. 

The only non-Elle's Studio items that I added to this layout were the chipboard heart and house from Crate Paper, and the salmon pink polka dot paper. I love how the kit, add-ons and Thankful collection coordinated with items I already had in my stash!

My second layout, with a completely different color scheme, uses the kit, the diamonds and feathers in the Tradition stamp set, and the vellum feather add-on, along with papers from the Thankful collection. I took the color cues from my photo to challenge myself to create this primary colored layout, and I'm so happy with the say it turned out, especially the memory that it documented.

Photography by Donya Luana. 

Photography by Donya Luana

I have to say that this month's stamp set just may be my favorite Elle's Studio stamp set to date! There are so many possibilities with this one.

Be sure to hop on over to the Elle's Studio shop and check out all of the new goodies available this month. We can't wait to see what you create with the kit! 

Jot Magazine: October Mood Board Layout

Happy October! Not only am I excited about cooler weather, Halloween and pumpkin everything, I'm also excited about the October mood board over on the Jot blog, which released yesterday! 

So many beautiful possibilities! When I first saw the board, I was a bit nervous, as I'm not much of a messy, mixed-media type of gal. I instead focused on the colors and themes from the board, and added "mixed-media looking" products, but in a non-messy way! 

Supplies | Paper: Crate Paper (grid), Fancy Pants (black text), Scraptastic Club (green text), Studio Calico (clouds), American Crafts (green strip). Embellishment: American Crafts (transparent photo overlay, chipboard hearts), My Mind's Eye ("world" rub-on, dashed heart rub-on, dark blue brads, map heart chipboard, gold heart sticker, gold dots), Studio Calico (black mini alpha), Pink Paislee (black "arrivals" chipboard), Scraptastic Club (flair, "hello" tag, "go, see, do" die-cut). Stamps: Scraptastic Club ("travel notes"), Stampin' Up! ("Watercolor Wash"). Other: Stampin' Up! (ink), Studio Calico (black mist), sewing machine.

After choosing the paper I would use for the layout, I pulled out my Watercolor Wash background stamp from Stampin' Up! and stamped it twice on my background grid paper, giving the appearance of a painted background without the mess. I had originally placed the painted black chipboard hearts on the layout and planned to watercolor with green paint inside of them, but once I moved the chipboard heart, I loved the look of the green watercolored hearts on their own! 

With the world map image in the mood board, I knew I wanted my layout to have a travel theme, but I didn't want it to be overly "travel," so I pulled papers and embellishment with subtle map prints, and travel words. The pale green and white graphic paper from Scraptastic Club is one of my favorite exclusive prints that I have received in my kits!

I also loved the contrast of having some black on the layout, especially the "arrivals" chipboard from Pink Paislee's Atlas collection.

Be sure to create your project using the mood board as a starting point by October 31st, and post to the Jot blog post to win a fabulous prize. The Jot Girls love seeing all of the beautiful project each month!

Scraptastic Club Skinny Love: 1st Pony (with process video!)

The first day I put my daughter's hair in a pony tail was a pretty monumental day for me. I knew I definitely had a little girl! All she wanted to do was look in the mirror that morning because she wasn't sure what the heck I had done to her hair, and so I snapped a cute photo of her making a funny face while she was brushing her teeth. When I received my Skinny Love kit and add-on from Scraptastic Club, I knew this would be one of the photos that would work perfectly with the kits.

The photo and this layout just makes me insanely happy! I love the mix of patterns, color and whimsical embellishments. While I created the layout, I filmed a process video so that you could watch my decision making process and get a close-up view of some of the awesome items in the kits this month.

While you are at my YouTube feed, please be sure to leave a comment with any ideas or suggestions of things you'd like to see more from me! If you like my videos, be sure to subscribe so that you will be notified each time a video is released. 

Happy Monday! Have a great week!

Scraptastic Club Skinny Love: Not Just a Pretty Face

Remember that on my last post, I said that I created two layouts in one day? That's how much I love the Skinny Love kits from Scraptastic Club and today I'm here to share the second layout with you. 

Because I love these kits so much, this layout came together quite easily. The photo, taken only a few days ago, was just screaming to be paired with the Skinny Love stamp sentiment, "not just a pretty face," as my daughter, at the age of two, picked up a National Geographic in Whole Foods and started browsing. Taking cues from the colors in my photo, I decided on a yellow and teal color scheme, with black and brown neutrals.  The patterned papers, floral from Crate Paper and the butterfly print a Scraptastic exclusive, topped my layout. A yellow exclusive journaling tag from the add-on, along with the die-cut tag which houses my title, surrounded my photo on the bottom, while the exclusive "the bestest" die-cut topped it.

Now for my favorite part - the embellishment - which flanked my photo on the right and left sides. I layered a printable heart circle on top of the Scraptastic exclusive cork ribbon piece and added a puffy "E," my daughter's first initial. I tucked the Crate Paper "today" tag just behind my photo and layered it on top of the ribbon. To the right of my journaling tag, I added the Studio Calico washi tape and topped with a Crate Paper puffy heart and mini letter "A." A felt and acrylic heart and a few gold chipboard dots and a splatter of black mist finished off the right side.

On the left side, I tucked a date tag under my photo at the top. I then used the Studio Calico washi strip again, and topped it with an exclusive "bright" cork circle, then a puffy "2" from the Crate Paper Wonder collection. On my title tag, I tied a thick piece of baker's twine.

I have to say that this layout, in terms of the photo, the product and colors, may just be my favorite of the entire year, and it was created in about 40 minutes. 

Thanks for stopping by! Have a great weekend. Make some memories to document!

Scraptastic Club Skinny Love: You're A Keeper

Last month, I celebrated my one year anniversary with Scraptastic Club, and believe me when I say that the kits just keep getting better and better. And no, I do not get paid to say this. I just get the kits to work with each month. 

Kits.jpg

For some reason, fall kits have always been my favorite, and the September Skinny Love kit and add-on is proving to be my favorite kit from my tenure with Scraptastic. The colors, themes and especially the exclusive patterned papers are all just Meghann Andrew. I'm finding that when creating a layout, I'm not hesitating whatsoever when choosing my product. I made TWO layouts today- one during nap time and one after bedtime, which I will share tomorrow!

Today, I'd like to share my second layout created with this kit, You're a Keeper.

First, let me say that the exclusive cloud paper on the background, created by Kaitlin Sheaffer, I by far my favorite exclusive paper from Scraptastic, ever. It's simple, and perfect for a background, and the color is just beautiful. The bunting paper at the bottom of the layout is also an exclusive paper this month, and I cut it along the bunting line to give the layout a bit of whimsy. The lines created by the bunting were perfect to line up my title, using American Crafts Thickers.

I love layering my embellishments- it almost creates an entirely custom embellishment by putting the Pinkfresh dip-dyed tag, the Crate Paper Wonder "a wild spirit" tag and the star die-cut together, directly next to the exclusive wood veneer kitty cat. A journaling card, also an exclusive, and the Crate Paper Wonder bingo card grounded my main embellishment grouping. 

In addition to the larger embellishment, I also created small groupings of the exclusive cloud vellum pieces, Skinny Love printable labels (the date label and the yellow star) and the Crate Paper wonder puffy triangles. I finished these groupings off with a few small drips of mist. The only thing on the layout not from the Skinny Love kits is this lone cork star, which I took from an older Scraptastic Kit because I felt that I was missing a small piece of brown at the top of the layout. 

I absolutely love the way the layout turned out, and it only took about 30 minutes. Win-win. The Scraptastic Club site is down at the moment because the new website is coming soon, hopefully within the next week, but until then, check out the Scraptastic Club Facebook page for more inspiration and kit info!

Jot Magaine Issue 11: Favorite Photo

Jot Magazine issue 11 is currently available and full of inspiration from the Jot Girls, as well as reader's submissions. Today I'm sharing with you one of my layouts featured in the magazine, showcasing one of my favorite photos from the summer.


Supplies | Cardstock: Bazzill. Patterned papers: Doodlebug Designs (polka dot vellum), Studio Calico (background), Heidi Swapp (yellow/grey polka dots), Crate Paper (floral). Journaling tags: Elle’s Studio (‘summer moments’, pink tag, ‘today’ date). Embellishment: Crate Paper (chipboard butterfly, ‘2 tag’), Simple Stories (yellow butterfly sticker, ‘i am simply me’ tag, enamel dots), Heidi Swapp (flair), My Mind’s Eye (yellow brad), American Crafts (mini staples, letter stickers). Other: Stampin’ Up! (die/embossing folder), Basic Grey (digital die cut butterfly), baker’s twine.

This photo is so special to me because it embodies my daughter at this age- big smile, wild hair (always!) and her favorite butterfly t-shirt. It was taken on our trip back home to Kentucky to see my parents this summer. 

The layout itself came together quite easily. As soon as I saw the Studio Calico background paper in my stash, I knew it would be perfect, as I wanted to incorporate bright yellow and pink on my layout, and the mixed-media texture on the patterned paper was an added bonus. I didn't even have to get my workspace dirty! I kept the yellow manufacturer's strip on the right side and decided to butt my photo mat, which included vellum, three different patterned papers and an Elle's Studio journaling tag, up to it.

The first embellishment that I added came about merely because it was laying on my desk in front of me - the big, grey butterfly die-cut from Basic Grey. I layered it onto a Heidi Swapp circular journaling card and topped it with an "embosslit" (embossed and die-cut) butterfly from Stampin' Up, and a Heidi Swapp "bliss" flair badge.

I added my title in a natural space that was created in the gap between my polka-dot vellum and patterned paper with grey Thickers. Tip: You can see here that my "Y" is cut in half- that's because I didn't have a "Y" left on the sheet, so I used an "I" and a "W" to make a "Y" for my title. To the right of my title, I added my handwritten journaling, and above this space, I placed three different, layered butterflies, using vellum, paper, and printed chipboard.

You closeup_blog.jpg

My third embellishment cluster, placed at the bottom right of my photo, included the "I am simply me" tag from Simple Stories, backed with a pink Elle's Studio tag, and topped with another layered butterfly. To the right of that I added a "2" tag from Crate Paper (my daughter's age) and below, the "today" tag from Elle's Studio, stamped with the date. A splattering of enamel dots, always a must for me, finished off the page.

Thanks so much for stopping by and checking out my layout! Be sure to download the entire Jot Magazine issue 11 to view so many beautiful projects!

Scraptastic Club September Main Kit: Using the Stencil

Each Scraptastic Club main kit includes a stencil, and the pattern on the Skinny Love stencil this month is perfect for creating a background! I decided to use it in two different ways. First, on my layout, I repeated the pattern four different times to create a background for my photo mat, using a grey ink pad and a sponge dauber. 

After I sponged my background, I framed it with strips of patterned paper, also from the Skinny Love main kit, and added my photo mat on top.

To create my title, I cut the word "happy" from the Crate Paper Wonder "Bright Paper" pattern and added the "little you" banner on top of the Pinkfresh dip-dyed tag.

The exclusive, along with Crate Paper embellishments in the kit helped me to add the final perfect touches, along with a few drips of mist.

I had so much fun with the stencil, I decided to use it in a different way to create a card, outlining it with fine-tipped markers, and then coloring in some random bits with a blender pen.

There you have it! Two great ways to use an awesome stencil in a lovely kit! Thanks for stopping by. 

Elle's Studio September Exclusive Kit Reveal

Hello there! Wow, the 10th sure comes around quickly! Today is the September exclusive kit reveal at Elle's Studio and there is SO much to check out! 

The kit is a mix of lovely bold colors and neutrals with everyday sayings, as well as some fun cat and dog tags! 

The "For the Record" printables and digital cut files will stretch your kit even further! 

The coordinating stamp set and acrylic stars are sure to put the perfect finishing touch on your project! 

When you purchase your kit, be sure to check out this month's mini course to give you more ideas and inspiration on how to kill your kit and get your memories documented. At only $4.99 for 11 pages of inspiration, it's a bargain! The contributor's projects are amazing! 

Elle's new collections, Thankful and Joyful, are also in the shop today! Be sure to bundle them with the kit to save on shipping! 

This month, I paired the exclusive kit with the Thankful collection to create a page about my daughter's love for her surrogate grandmother- our close family friend, since both sets of grandparents live far away. 

Elle's Studio Supplies: September exclusive kit, Thankful (paper collection pack, cork pieces, bits & pieces, cutouts), Jordan solid alphabet stamp, September cut files, Adorbs stamp set. Other supplies: Crate Paper chipboard pennants and ampersand, Studio Calico enamel dots, Stampin' Up! ink.

I love that the Thankful collection can be both soft and feminine and boyish, as you will see in my next layout about our lovely Golden Retriever, Toby.

Elle's Studio Supplies: September exclusive kitThankful (paper collection pack, cork pieces, bits & pieces, word labels, grey letter and number stickers), Adorbs stamp set, acrylic stars. Other supplies: Studio Calico chipboard shapes & enamel dots.

Thanks for coming by to see what Elle's Studio is offering this month to help you document your stories! Be sure to follow Elle's Studio on Instagram to keep up with the latest news and exciting giveaways coming up! 

Jot Magazine September 2015 Mood Board Layout

Welcome back after a long, Labor Day weekend! I was busy in my studio, creating with the Jot Magazine September mood board.

It is so refreshing to see such a different color palette, with some amazing patterns! It only took me about 30 minutes to complete my layout, and I also have a process video to share with you!

LittleRed_blog.jpg

I was so excited to be able to break into my new stash of the Elle's Studio Thankful collection to complete this page. The blue floral and blue ikat papers worked perfectly with the mood board!

Be sure to create your own project using the mood board as a jump-start, and upload to the mood board post before the end of the month for a chance to win a fantastic prize from Elle's Studio

July Project Life Spreads

Hello there! Today I’m sharing a TLN spread that I created with the Scraptastic Kit Club's August This Life Noted and Wednesday Night kits documenting the final days of our July. The green and turquoise cards and paper in the kits worked perfectly with the photos from our trip home to Kentucky. 

To bring attention to our trip to Kentucky, I created two customized cards in the center of my spread with my Silhouette Cameo and papers from the Wednesday Night kit & add-on. I topped the cards with a flair badge and "long way home” cutout from the TLN kit.

In between the left and right sides of my spread, I added a hand-sewn pocket, sized 3-1/4” x 8” to house a photo of my daughter and I from a day of hiking, as well as our hiking trail guide on the back.

The TLN stamp, which I stamped with Staz-On directly onto my photo worked perfectly with the “that was fun” cutout that I punched with a circle punch. To finish off my embellishment grouping, I added the “go somewhere new” banner and a wood veneer heart.

The right side of my spread included some tough days, which required hidden journaling, housed under the “refresh & renew” tag, which I attached with washi tape from my stash.

And that's a wrap with July in our Project Life album! Now, on to August. It feels great only being a month behind! 

Under the Sea Themed Birthday Party

Over the weekend, we celebrated my goddaughter's 7th and my husband's 37th birthday in a big way with an Under the Sea themed party. It took quite a bit of work to pull off, but we were so happy with how it turned out. Today I'd like to share some of the photos with you.

I sewed a 'sailcloth' curtain (just a piece of natural cotton) to create a backdrop for a fishing net (found at Michaels) and paper banners and shells (cut on my Silhouette Cameo). On the ends of the curtain I hung lengths of turquoise tulle.

Banana dolphins jumped out of the fruit salad.

Croissant crab sandwiches filled a platter.

Another crab hogged all of the hummus.

Sand dollar cookies sat in raw sugar sand.

And many chocolate shells were snatched up by little hands.

Tropical fish (cut with my Silhouette Cameo) swam in the blue waters over our breakfast bar.

A big, pink octopus hung out over the table.

Three beautiful, iridescent jellyfish floated around the table, too.

Each child had a chocolate cupcake with buttercream icing to take home.

And then there was the cake- a complete labor of love. Three layers of chocolate cake with a chocolate mousse layer in between, the covered with buttercream icing waves and surrounded by chocolate shells. It was so heavy, my kitchen scale wouldn't weigh it. 

It was the dolphin cake topper, sculpted by my husband from Wilton Shape-n-Amaze, that really stole the show.

The birthday girl, who was in the pool on the blow-up dolphin most of the time, absolutely loved her party.

This guy had a pretty good time, too. Although, I owe him a birthday do-over for all of the hard work he did helping me to prepare. 

How do you prepare for a themed party? How long does it take you to prepare? Thanks for stopping by! 

Scraptastic Club: August Sketch Layout

I am SUCH a huge fan of sketches. So often I feel like I have to come up with something original and out of the box for every layout I create, which can be exhausting! Sometimes, your brain just needs a break from coming up with something completely original. In addition to that, starting with a sketch saves me so much time! I can usually whip up a layout in 30 minutes or less. The sketch from Scraptastic Club this month is a great one to get your creative juices flowing.

My take on this sketch documented a recent photo of my dad and my daughter. I love the mix of yellow, pink and navy on this layout, created with the  Wednesday Night kit & add-on from August 2015.

To twist the sketch up a bit, I used two triangles cut from the Pink Paislee patterned paper, but placed them on the bottom and the right side of my 8-1/2" x 11" layout, grouping my title and all of my embellishment on the right side triangle. Around the edges of my triangles, I stamped phrases with the August 2015 Elastic Heart stamp set (sold out). 

I wanted to use two different fonts in my title, and to make the word 'his' quite masculine, I decided to hand cut my letters from the We R Memory Keepers fabric included in the kit. To ensure that all of my letters were the same size to start, I cut three equally sized rectangles out of the fabric, and then cut my letters from those pieces. To finish off the layout, I created a pocket for my hidden journaling tag under my photo. 

Thanks for stopping by today! How will you interpret this sketch? 

Scraptastic Club Layout: Capture Everyday Moments

Happy Monday! I created a quick, bright and sunny layout over the weekend using the Wednesday Night kit, add-on and stamp set from Scraptastic Club, and today I'm sharing the layout as well as a process video with you!

Thanks so much for watching & I'd love for you to leave a comment or feedback! If you'd like to check out any of my other tutorial or process videos, please click on my YouTube link at the top right of the page. 

Scraptastic Club Layout: Lovely & Mighty

I've been creating away this week with the Scraptastic Club's Wednesday Night kit & add-on, so I have a new 8-1/2" x 11" layout to share with you today.

I love the exclusive papers in this month's kit, and I loved how the shape of the dome on the paper echoed the shape of the playground in my photo. Subtle nuances like this can really bring your layout together into a cohesive, thoughtful design.

One thing I'm really loving about the 8-1/2" x  11" size layout is that I can easily type and print my journaling on the background paper. I created a nice column with journaling, my title and my photo, to stand up to the weight of my patterned paper column on the right. The "adventure" circle was added with the August 2015 This Life Noted stamp set, and I placed a chipboard heart from the Simple Stories So Fancy chipboard in the add-on kit.

I wanted a tall, strong sans-serif font for the word "mighty" in my title, so I cut the word, using Bebas Neue, on my Silhouette Cameo. Above that, I added the "love this girl" banner from the Wednesday Night digital files and the chipboard ampersand, again from the Simples Stories chipboard in the add-on. To finish off the page, I added a cardstock border at the top left corner, a metal brad and a few enamel dots.

Thanks for stopping by & have a great weekend!

Pinhole Press Photo Books

One of the reasons why I scrapbook, not only to allow myself an avenue to express my creativity, is to get photos off of my computer and on paper, to look at, flip through and, most importantly, remember.

There's something really special about flipping through a photo album that cannot be recreated by scrolling through my Photos app.

When I come back from a trip, I'm usually overwhelmed by the amount of photos I have to document, and because on vacation, I'm usually carrying my DSLR camera, the amount of quality photos is huge. Instead of feeling the guilt of not being able to document every one of those memories, I started ordering photo books to document our summer family vacations printed from Pinhole Press, and until August 28th at midnight, you can use the code SMILE15 to receive 15% off your photo book purchase!

The reason why I chose Pinhole Press was because of the Layflat Panoramic Photo Book. I loved the clean, modern look, the fabric spine and the ability to fill the entire cover with an image. I looked around at other similar companies, but this style definitely appealed to me.

As promised, the book lays flat perfectly, just out of the box, allowing you to be able to see a full size image across two pages.

Within the layout editor for the book, there were a lot of different options for photo layouts. I wanted to keep the book clean, without any text, so I opted for the most simple layout styles featuring one, two or three photos.

I can't even tell you how much joy this book gives me!

On top of the beautiful layout, the pages are extremely thick and have a lovely, smooth texture.

Even the inside of the front and back covers can house a photo. I chose this funny one of my daughter as the final image in the book.

I highly recommend Pinhole Press for not only their product, but also their customer service, which I had to take advantage of when I had trouble uploading my photos. They were extremely helpful and helped me get the book completed quickly.

If you'd like to get your photos off your camera, smartphone or computer and into a beautiful keepsake book, check out Pinhole Press. Remember, until August 28th at midnight, you can use the code SMILE15 to receive 15% off your photo book purchase! They have a wide variety of photo book options and styles. I purchased my first book (with my own money, I was never given any product for free) as a gift for my parents, and then loved it so much that I purchased a second book for myself. I plan on doing this every year. 

By using the links provided throughout this post and the Pinhole Press button on the sidebar, you are supporting my blog. Thank you in advance!