Elle's Studio October 2019 Reveal Day!
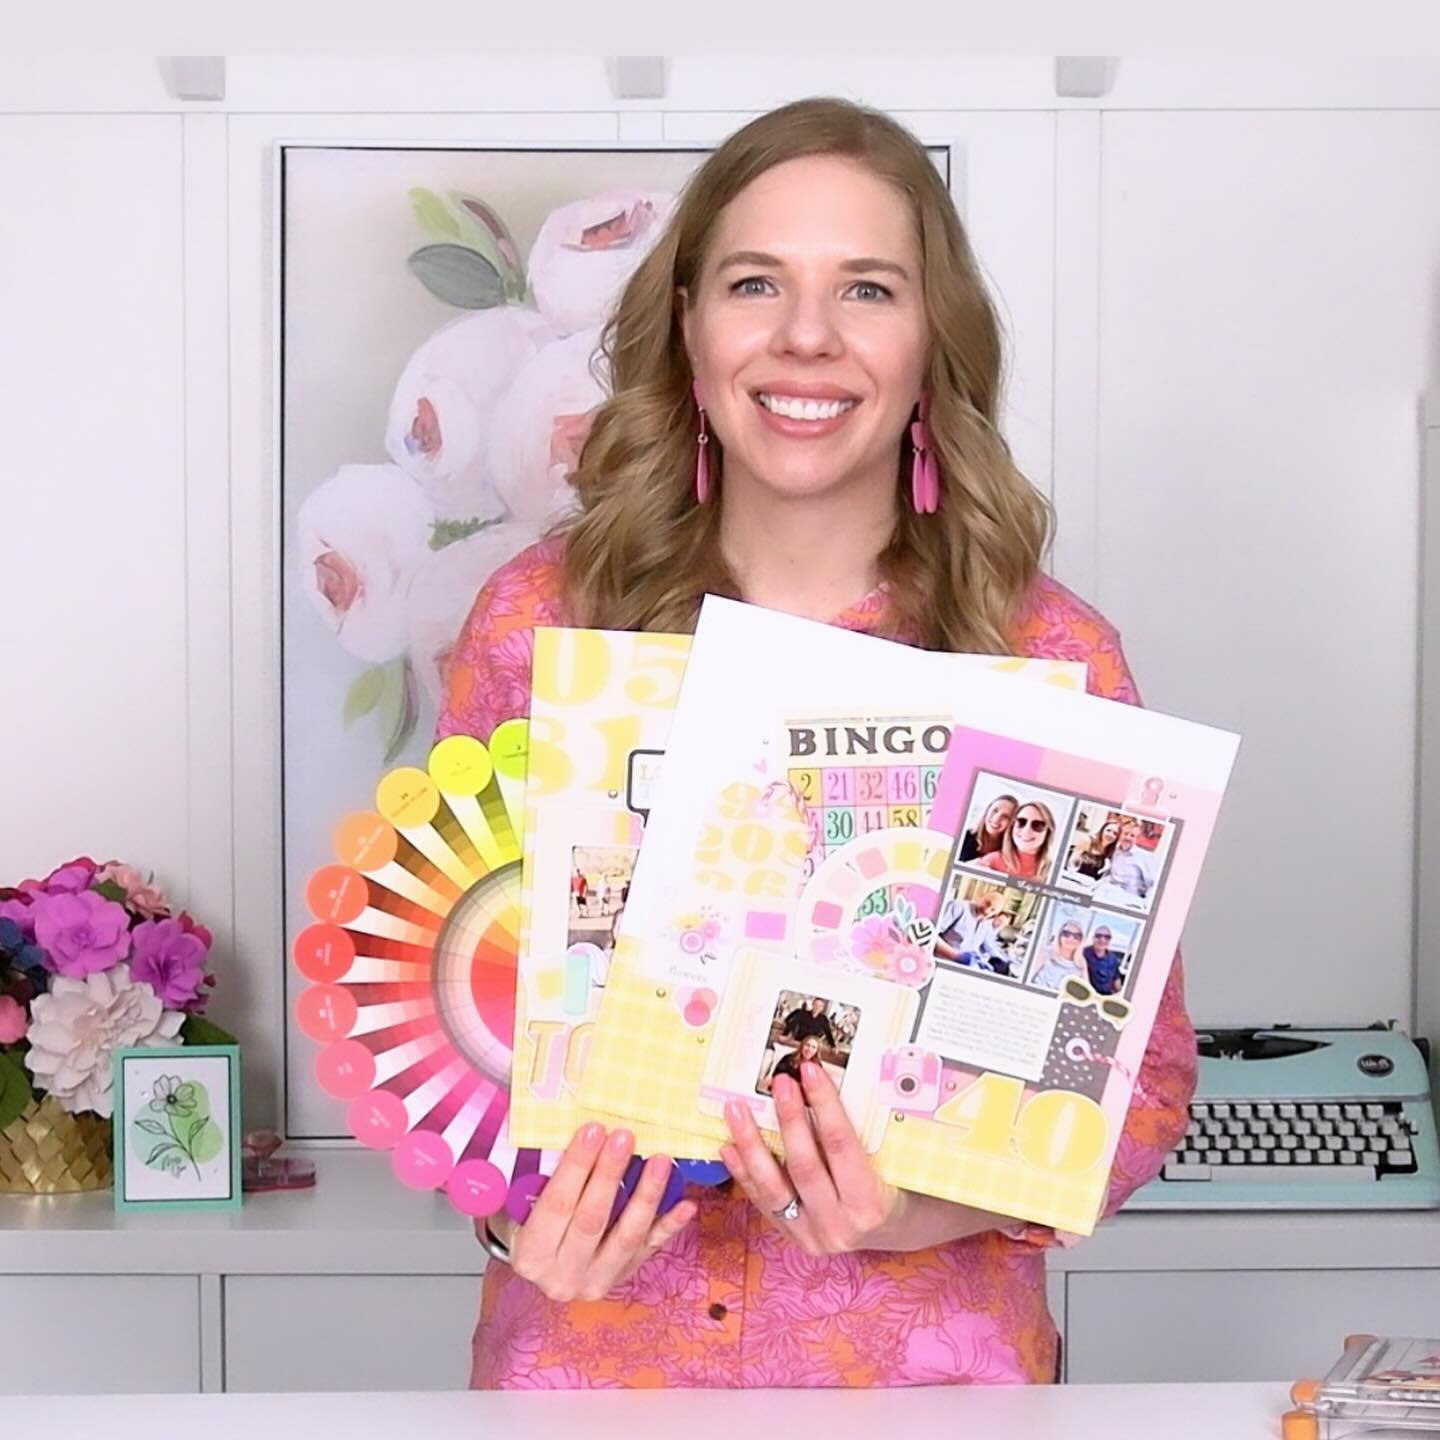
Hello, friend! Today is reveal day at Elle’s Studio, and I couldn’t be more excited to share the new October 2019 kit and add-ons with you in this unboxing video!

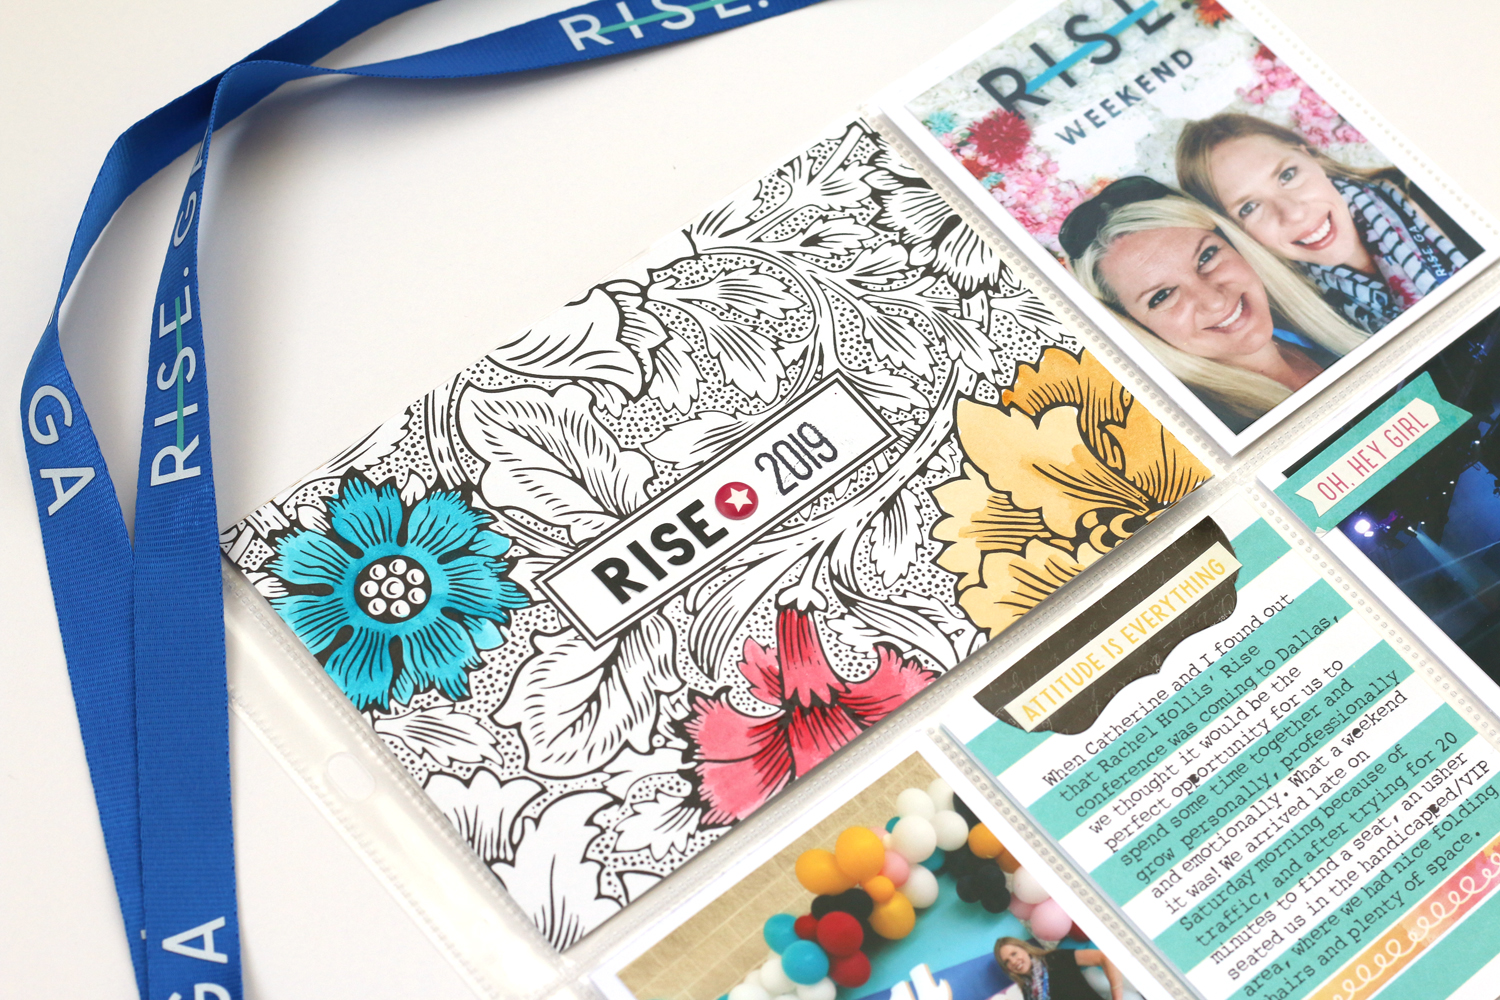
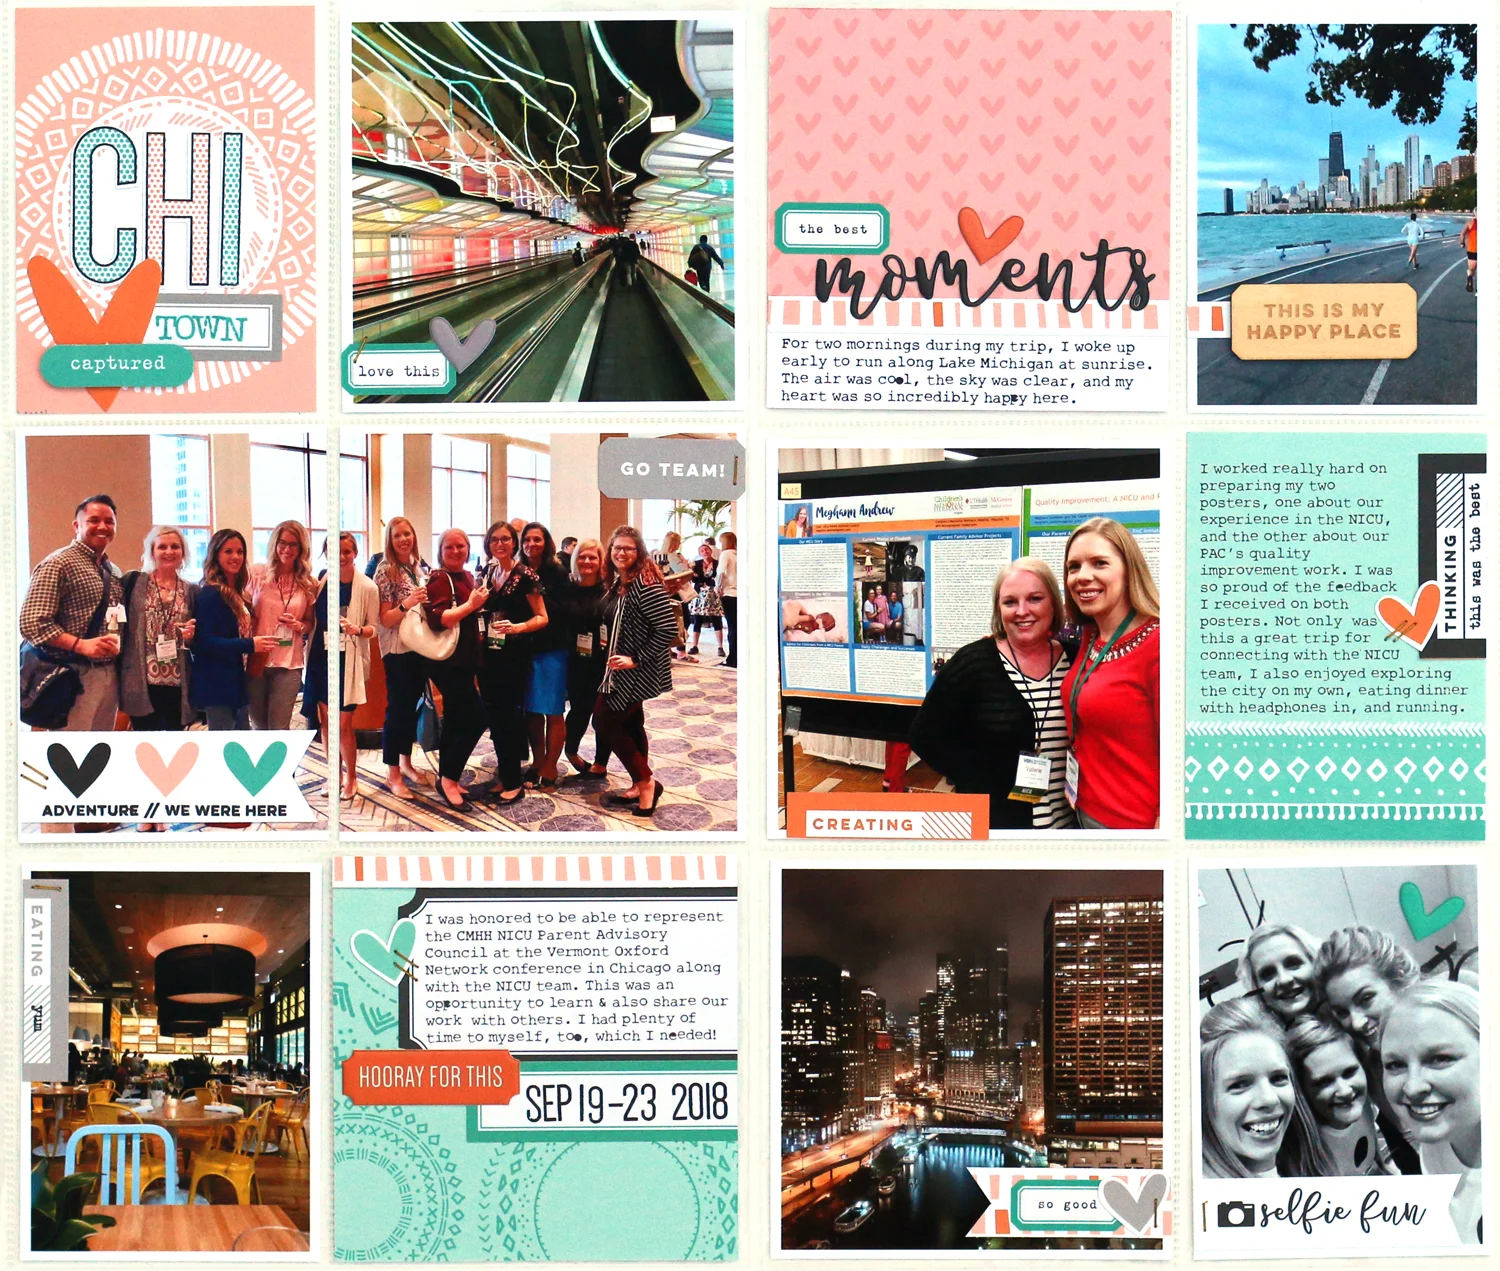
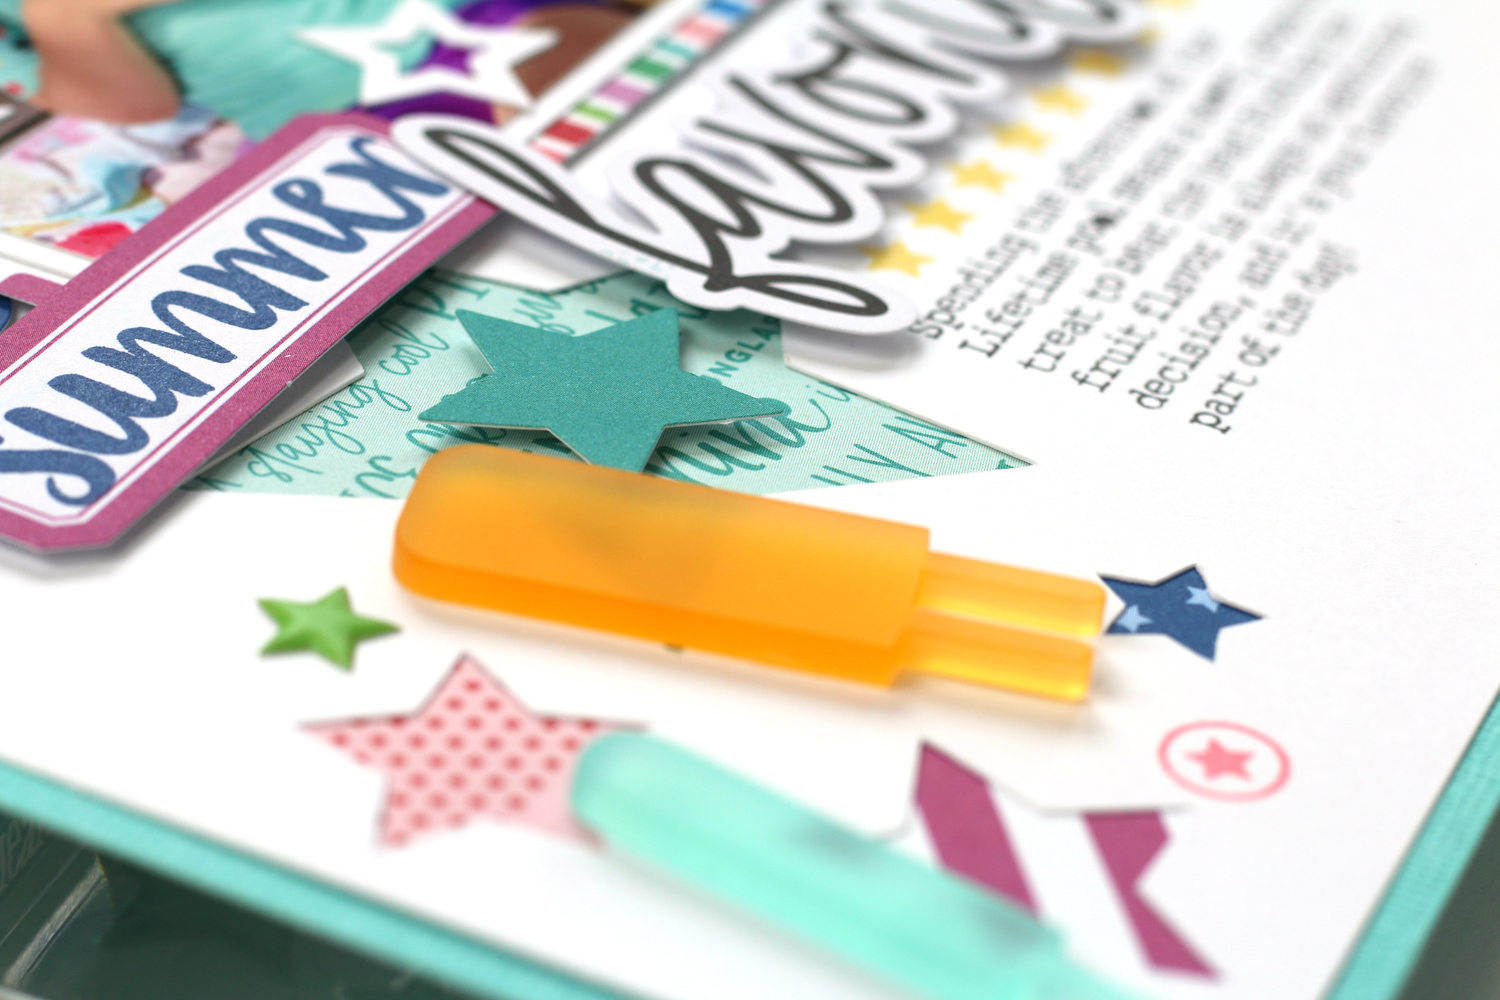
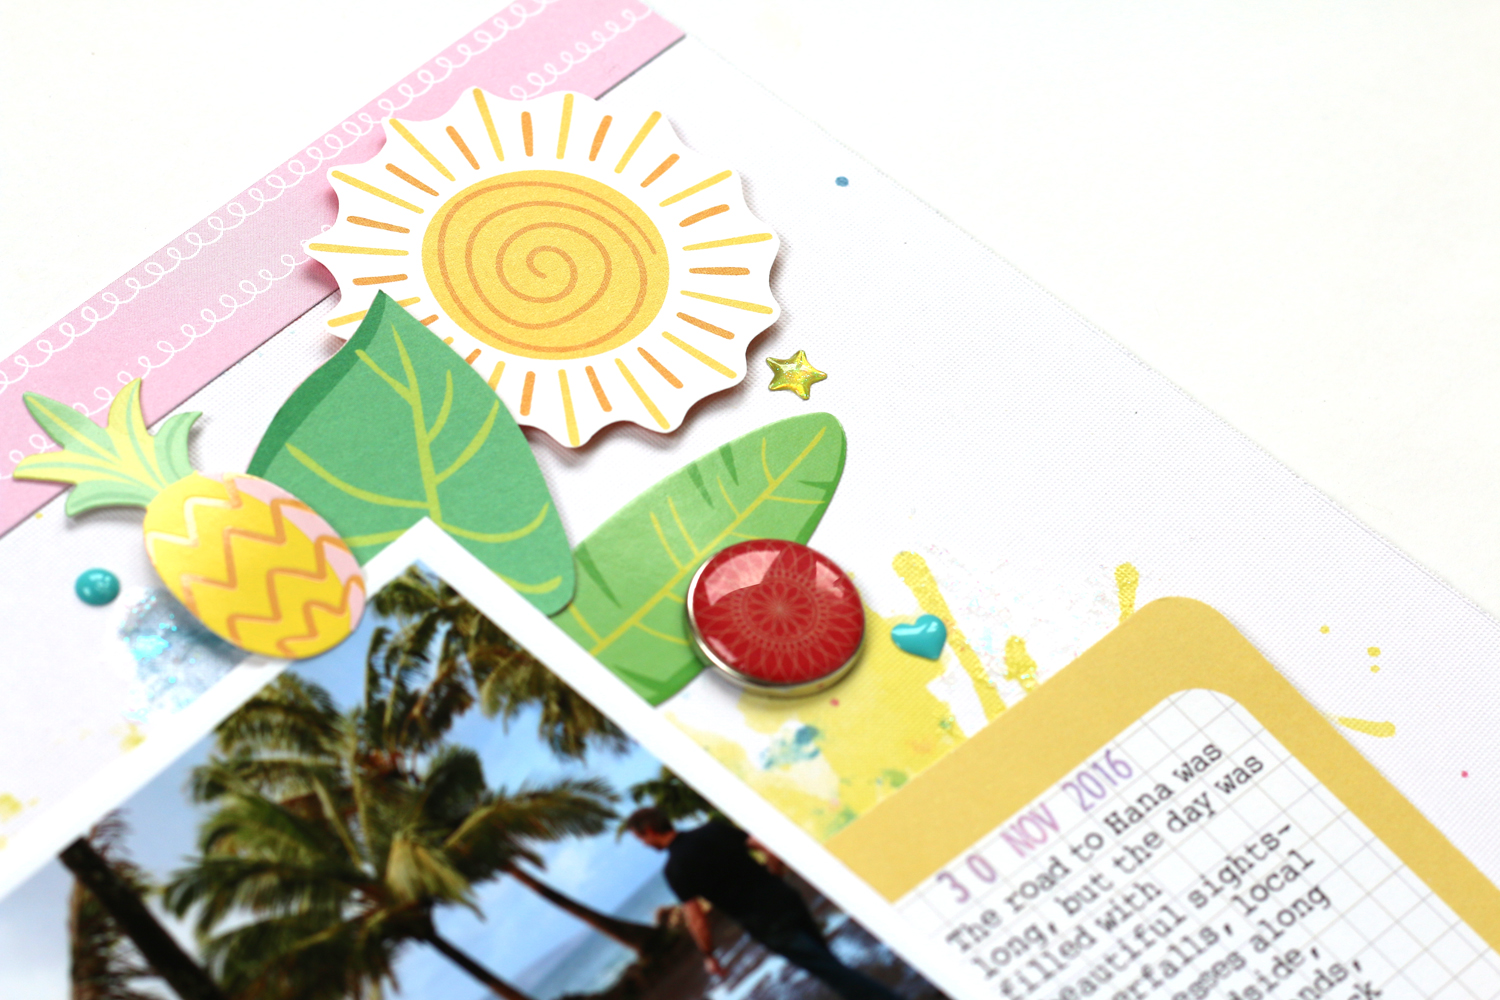
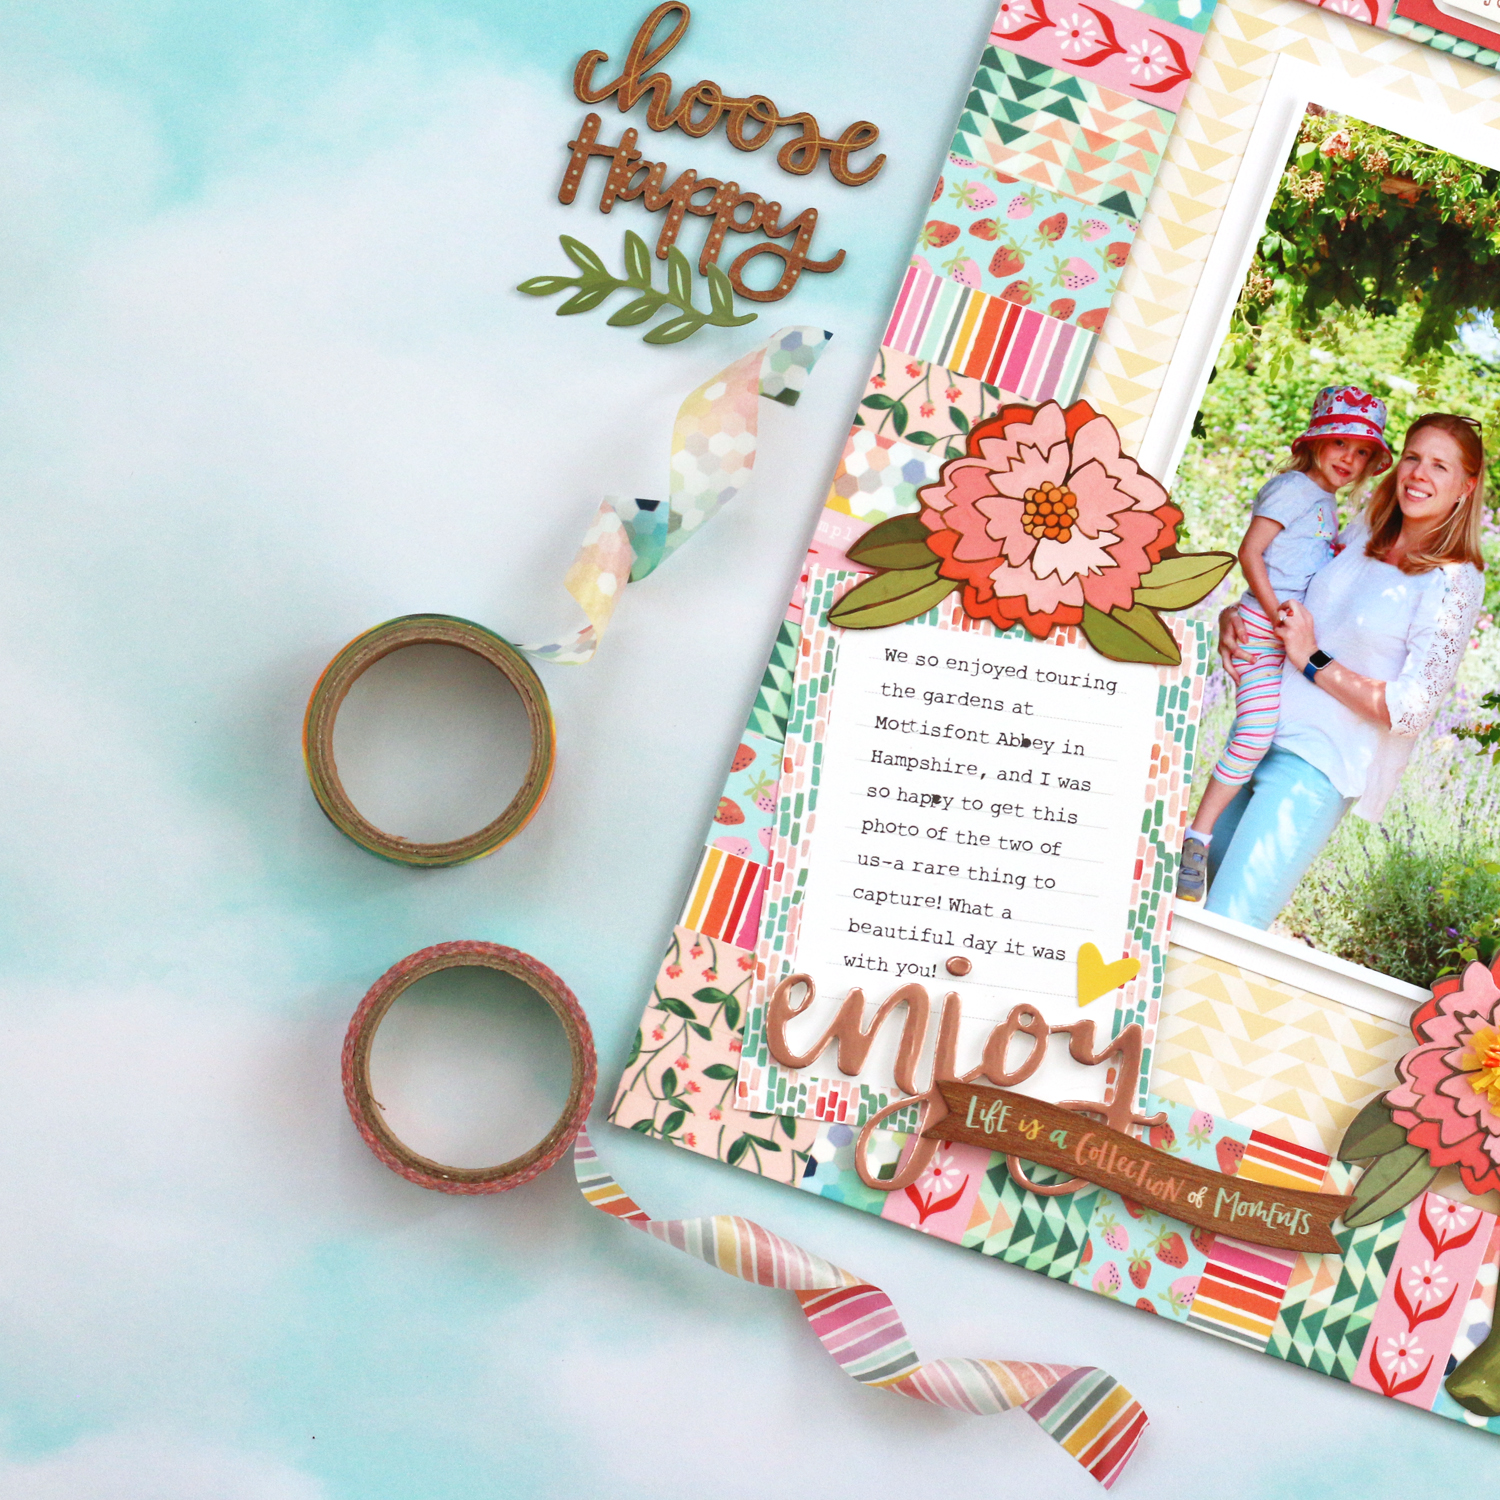
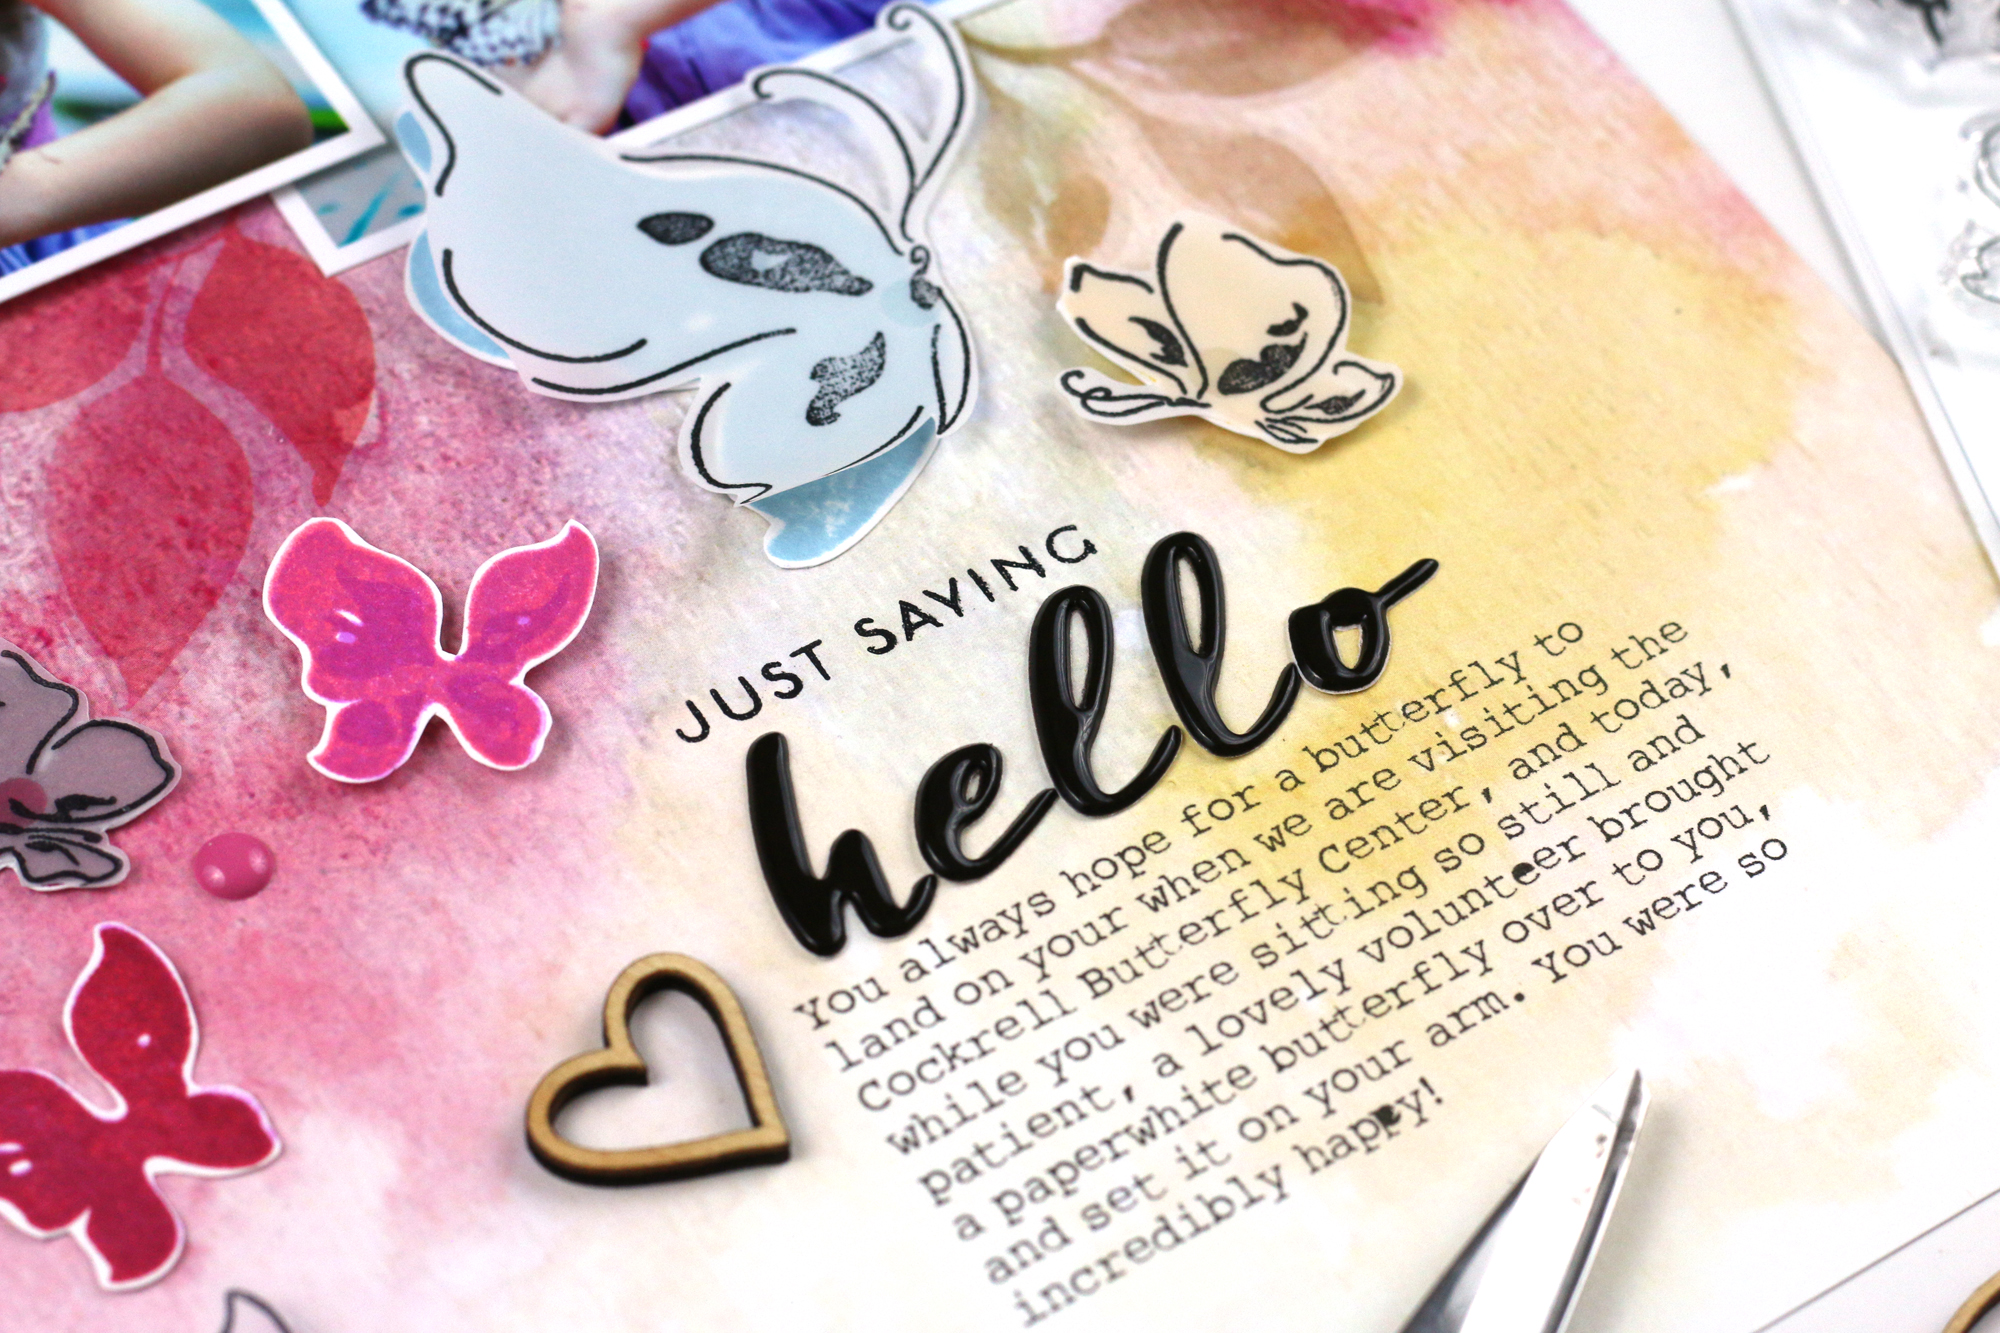
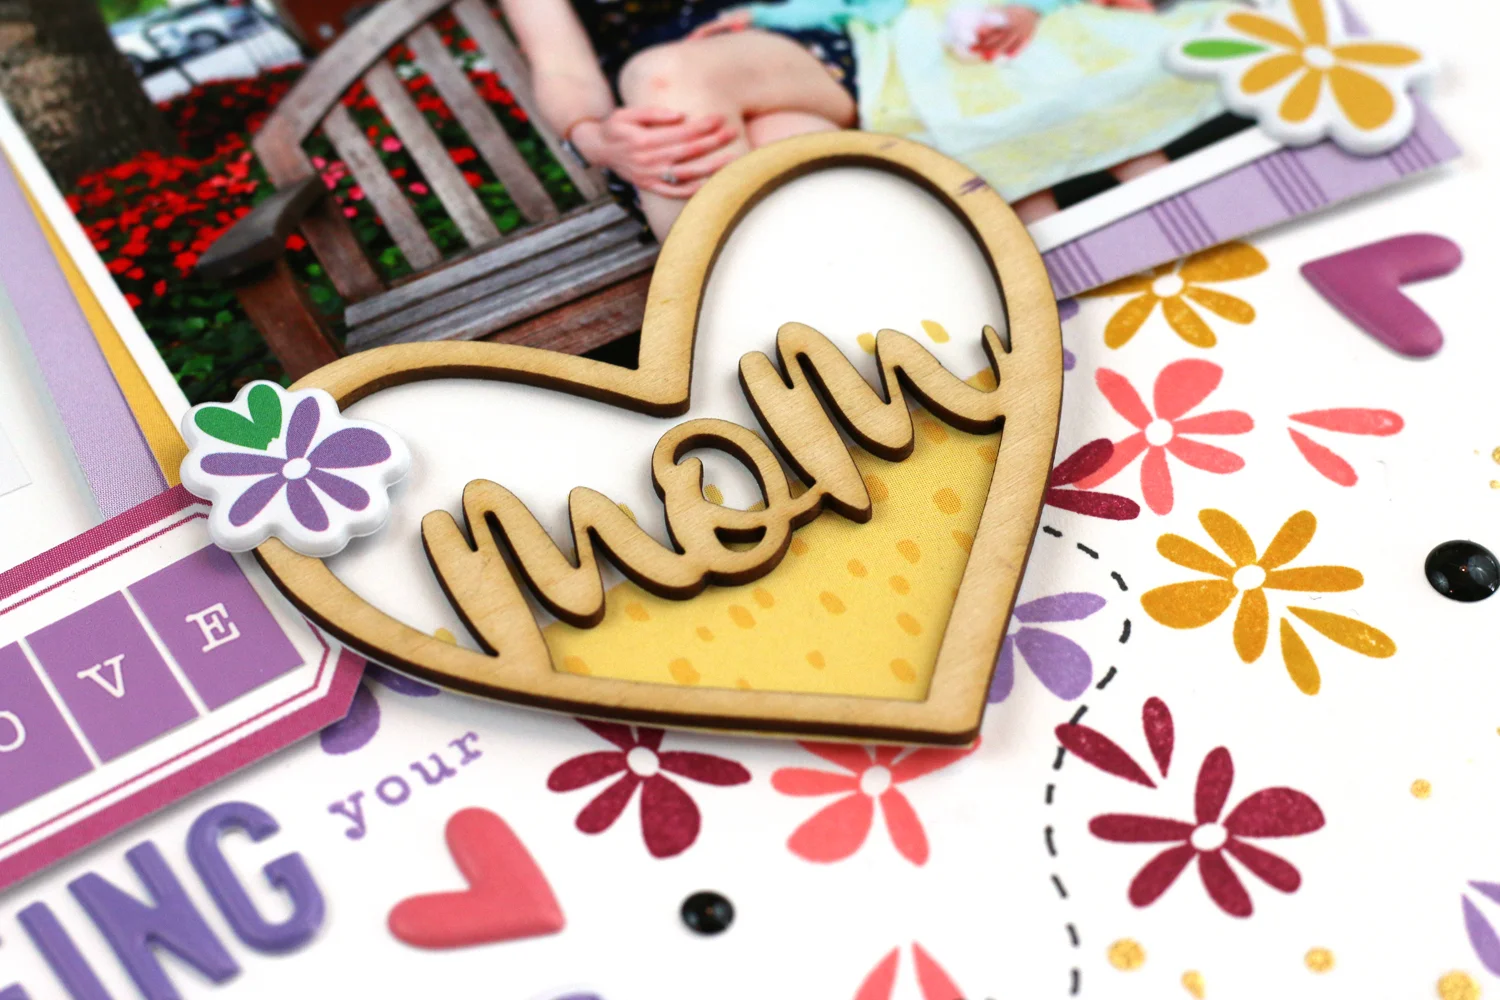
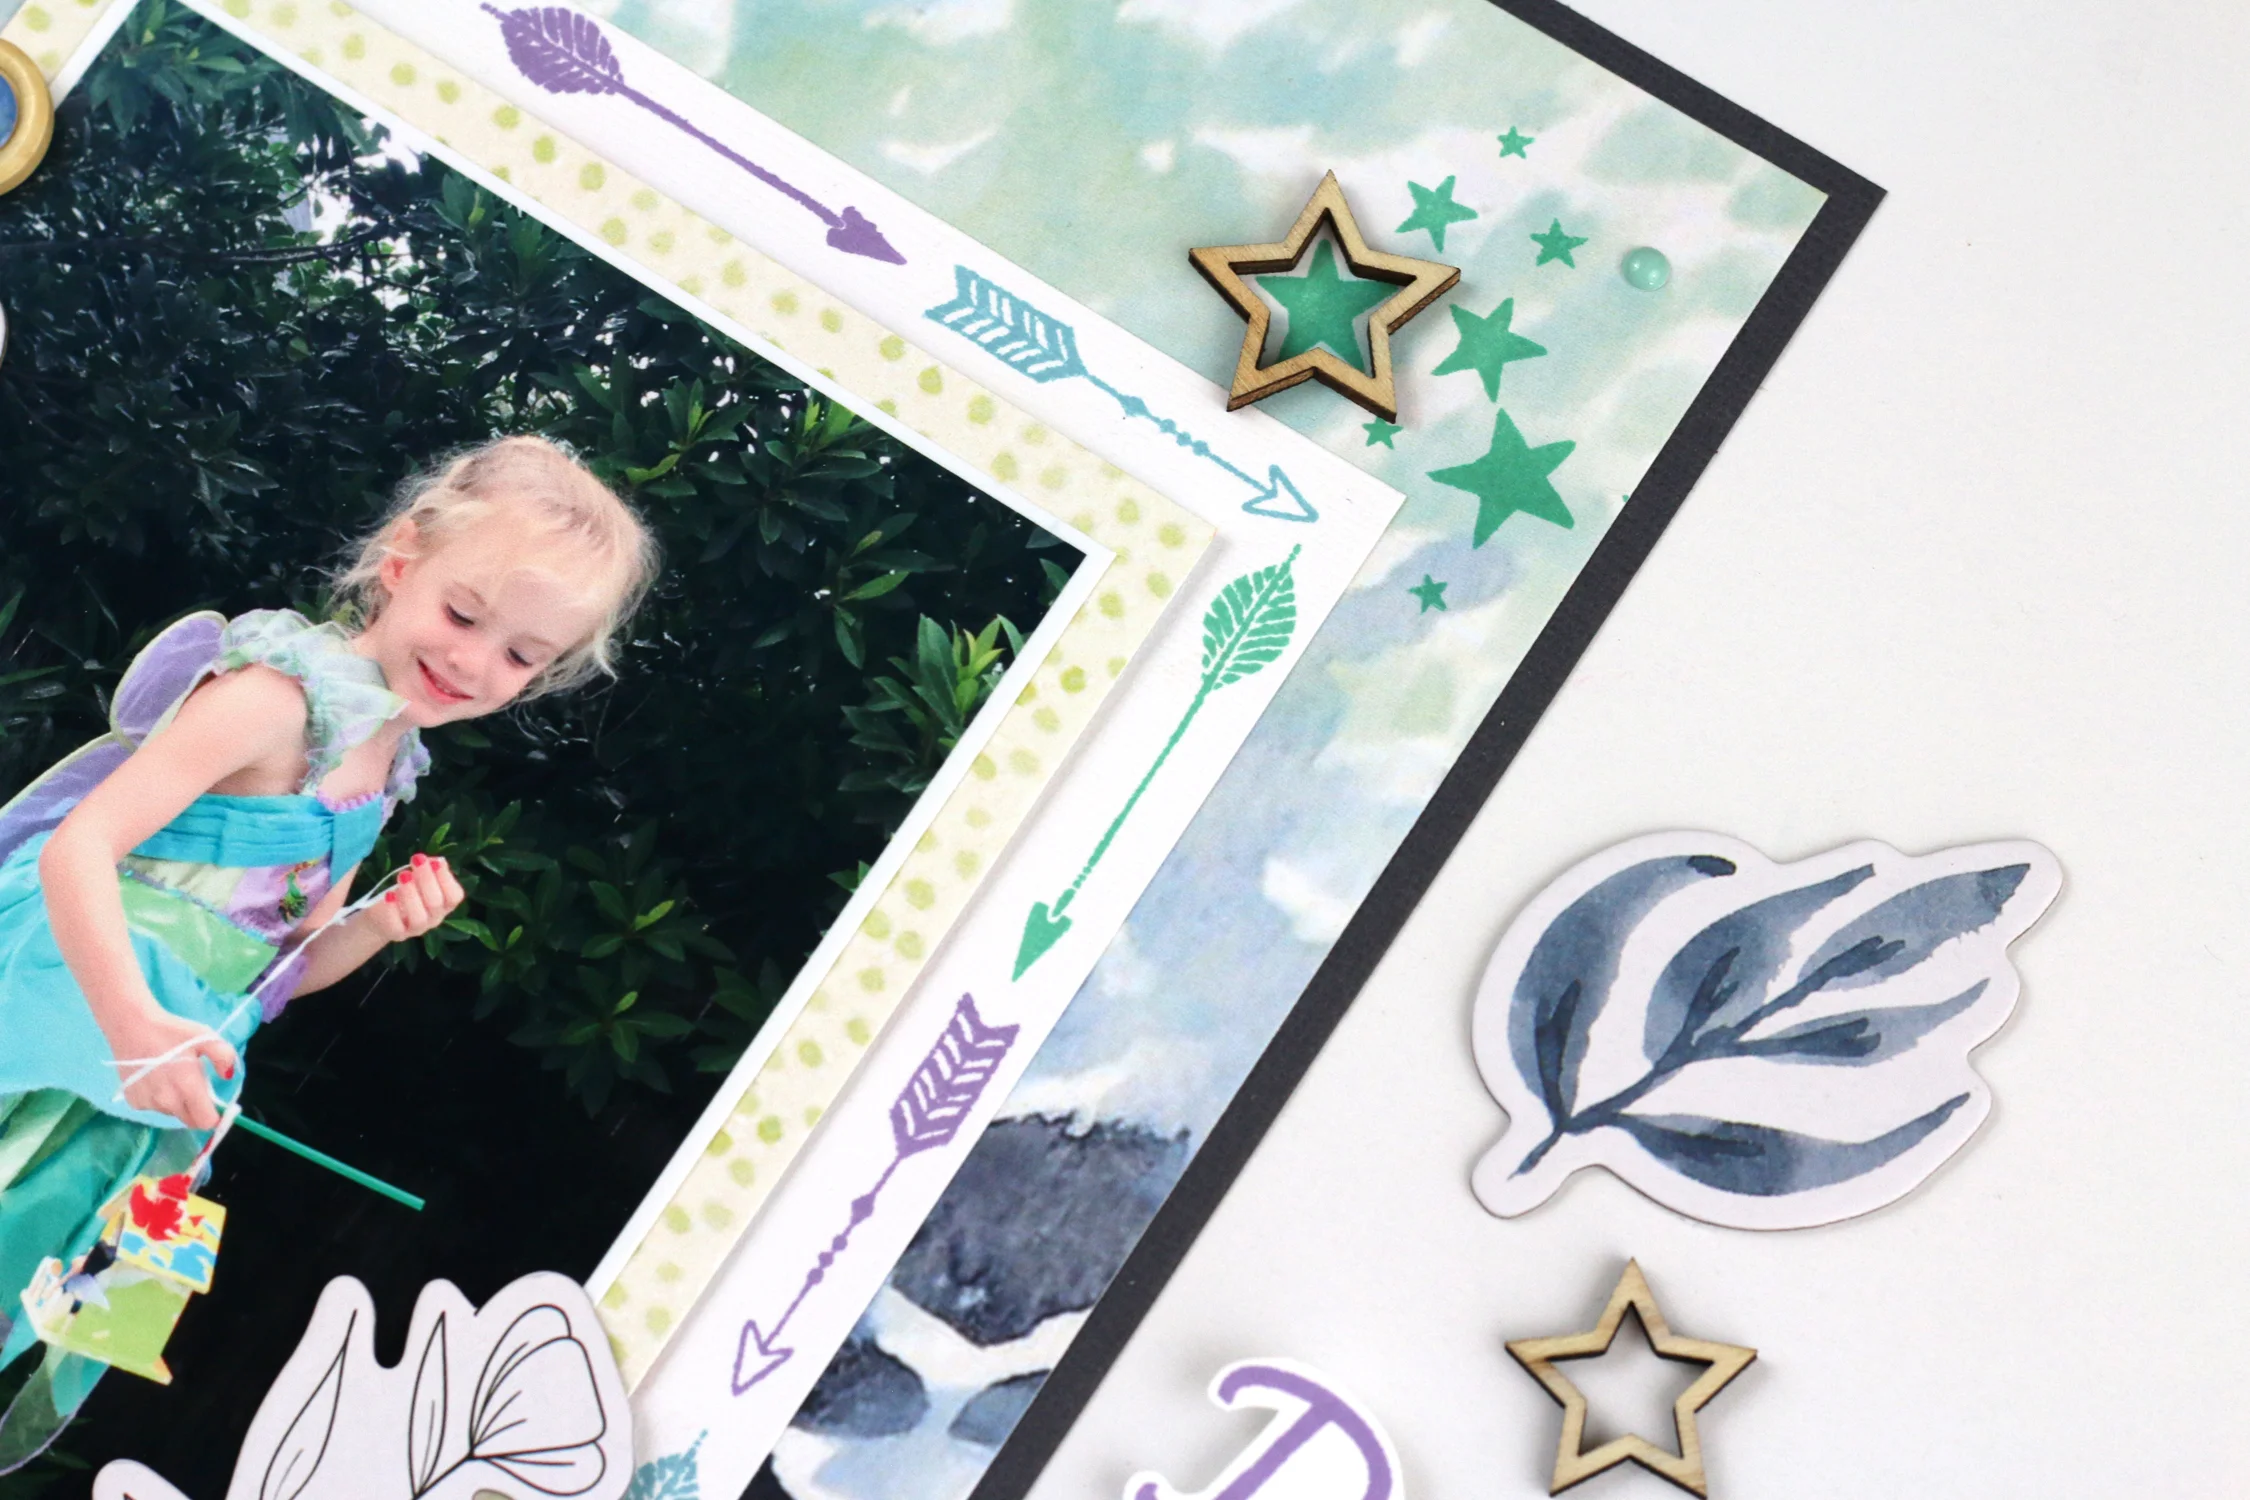
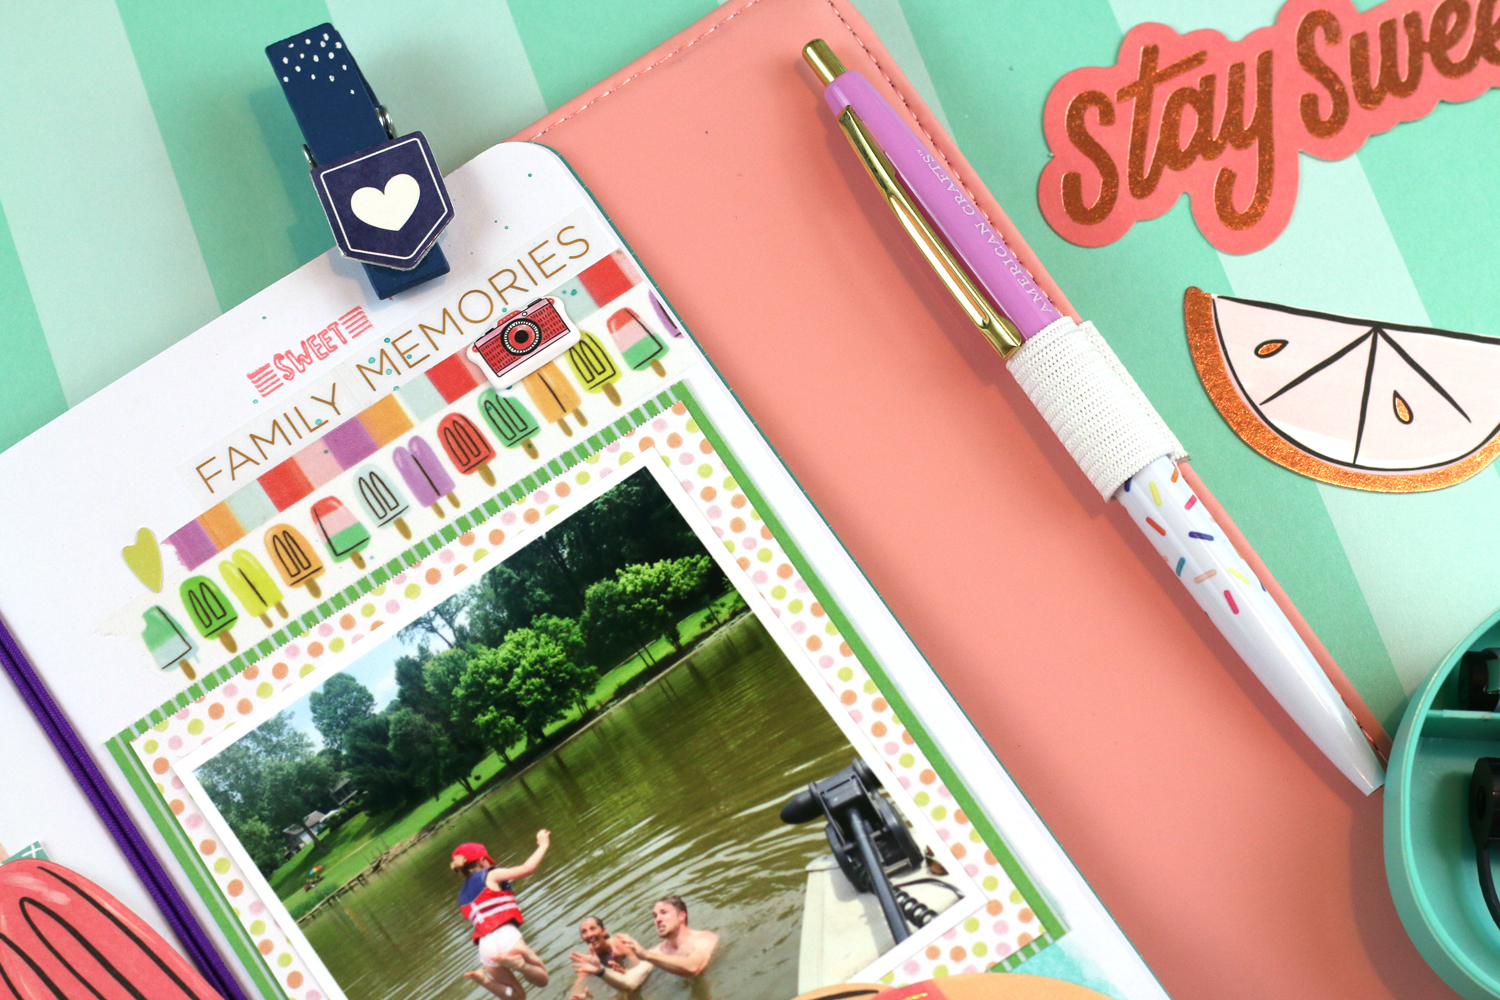
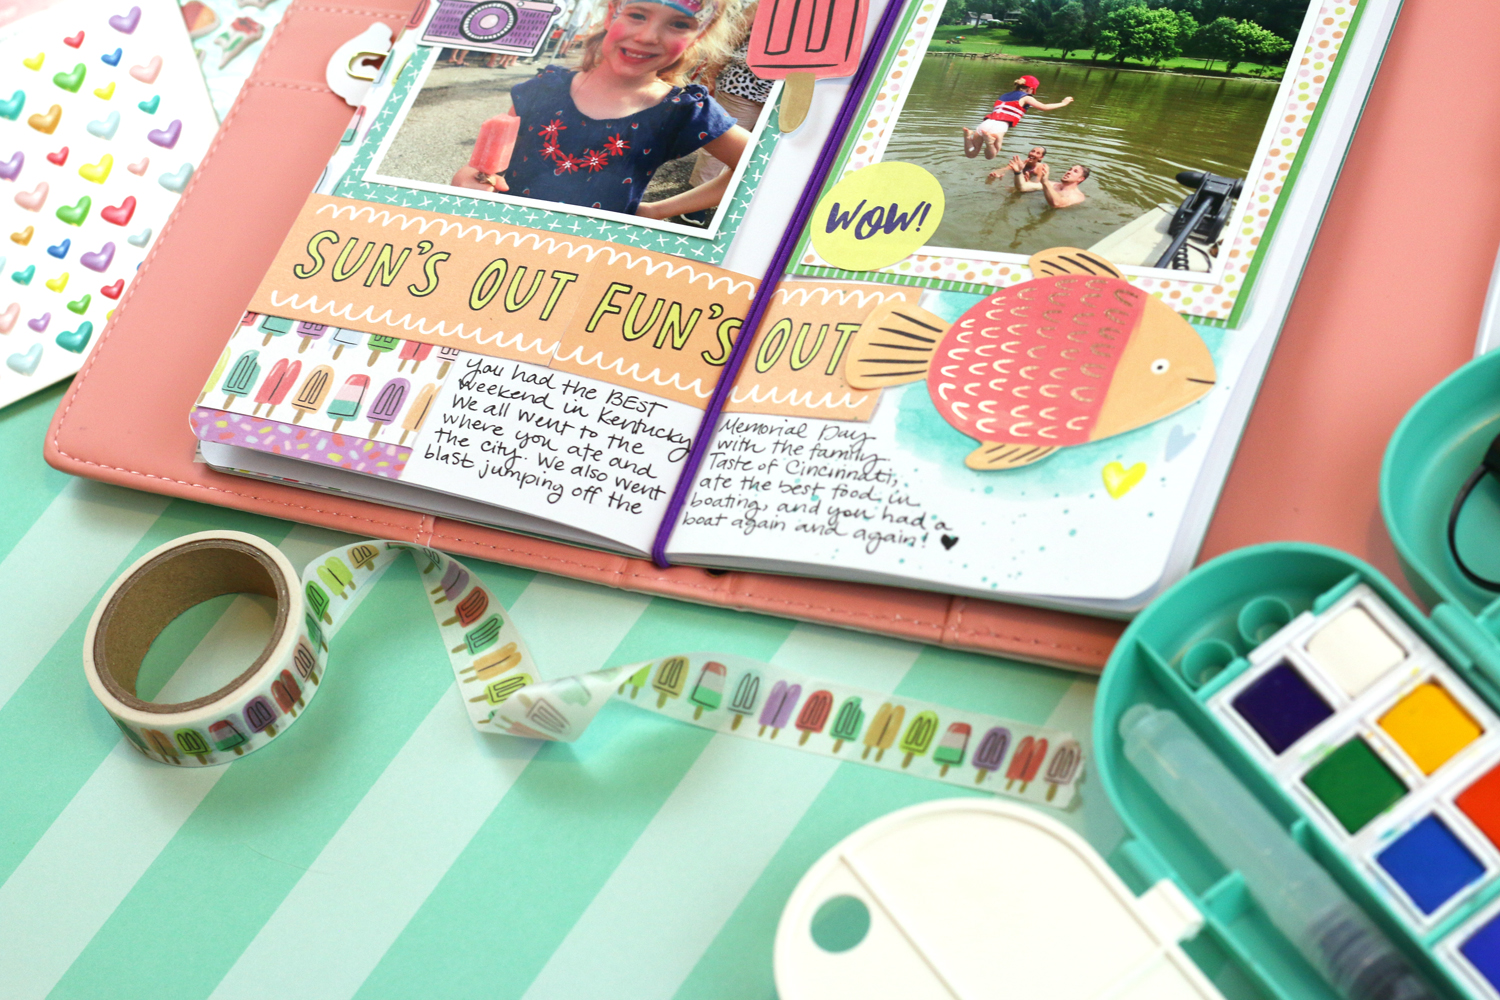
Let’s take a look at the October kit! Stunning autumnal colors, illustrations and warm phrases combine to create a beautiful and useful kit for your layouts, pocket pages, traveler’s notebook spreads and cards!

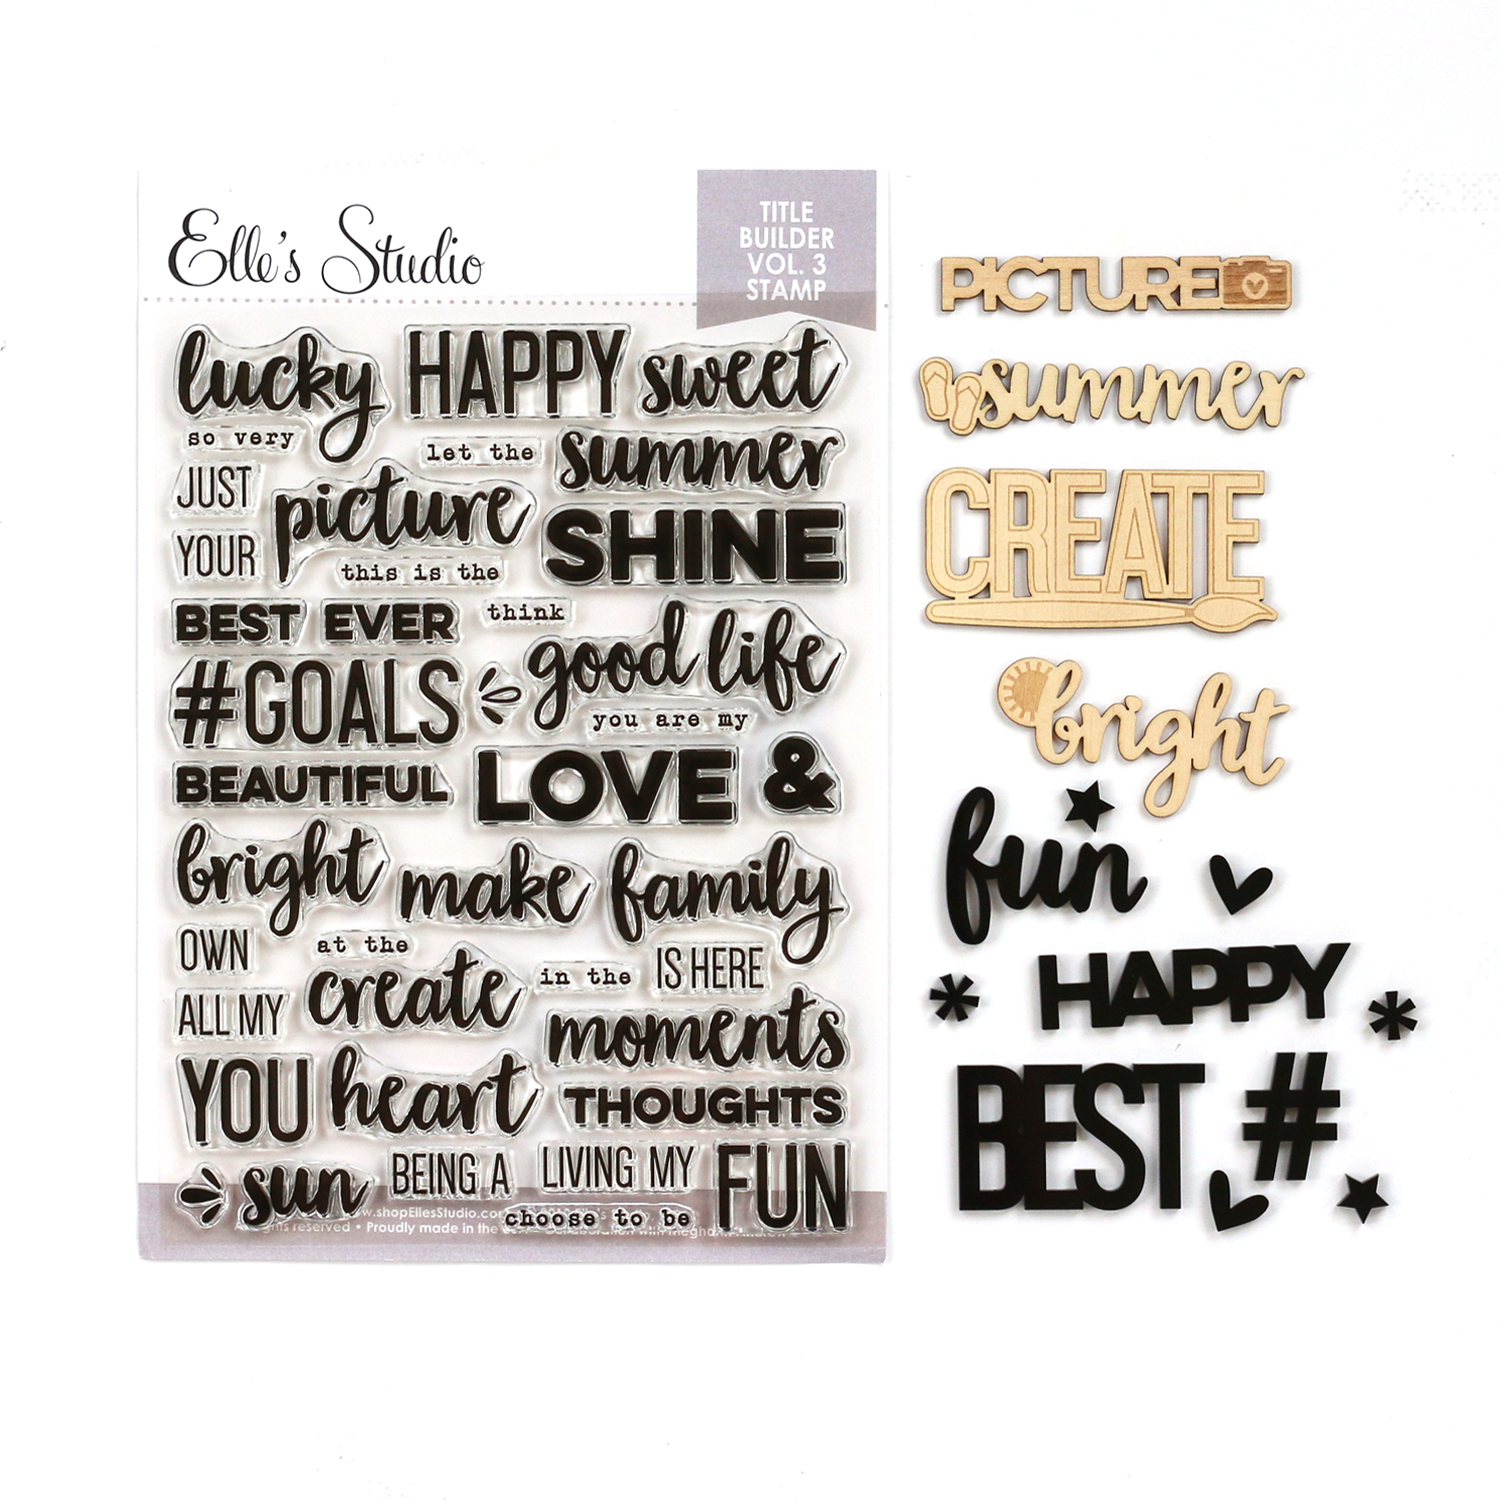
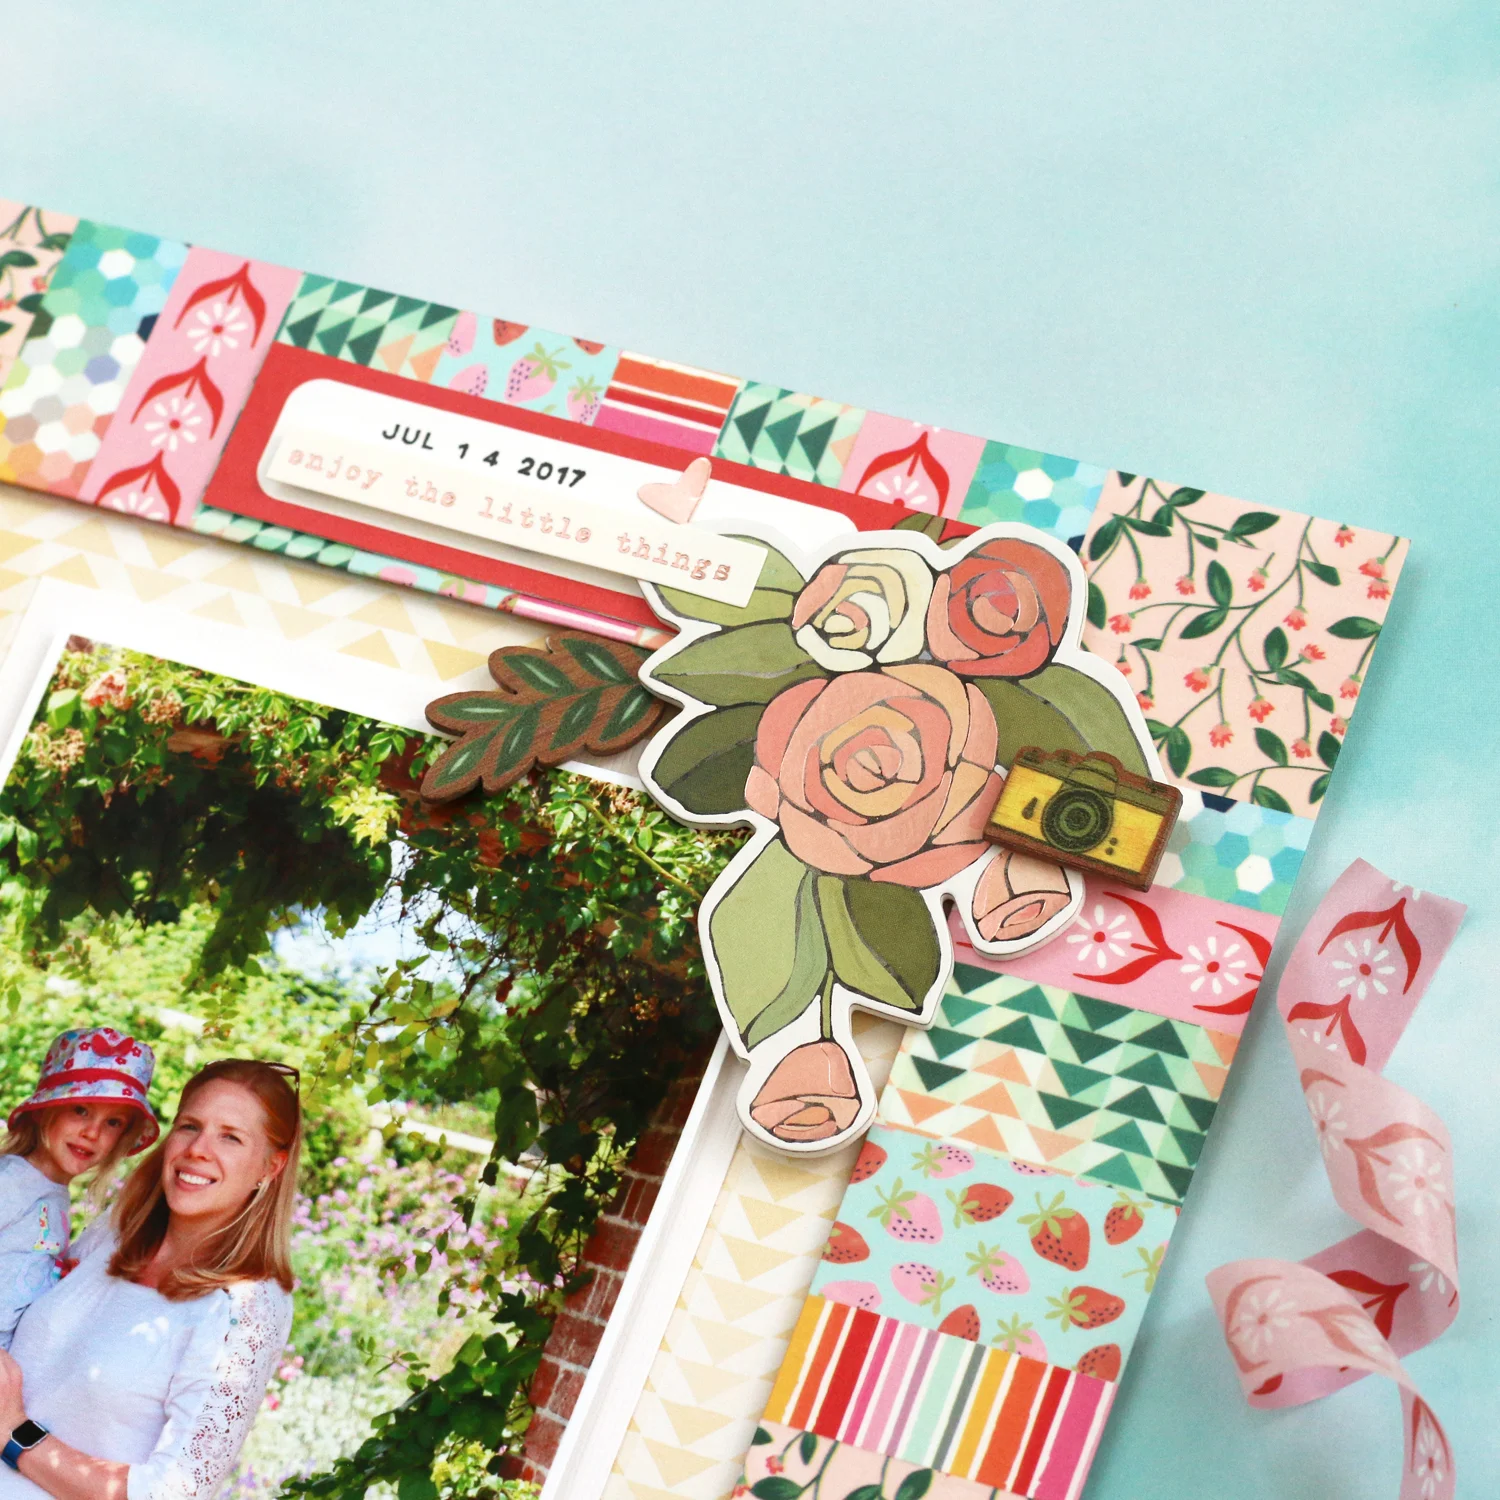
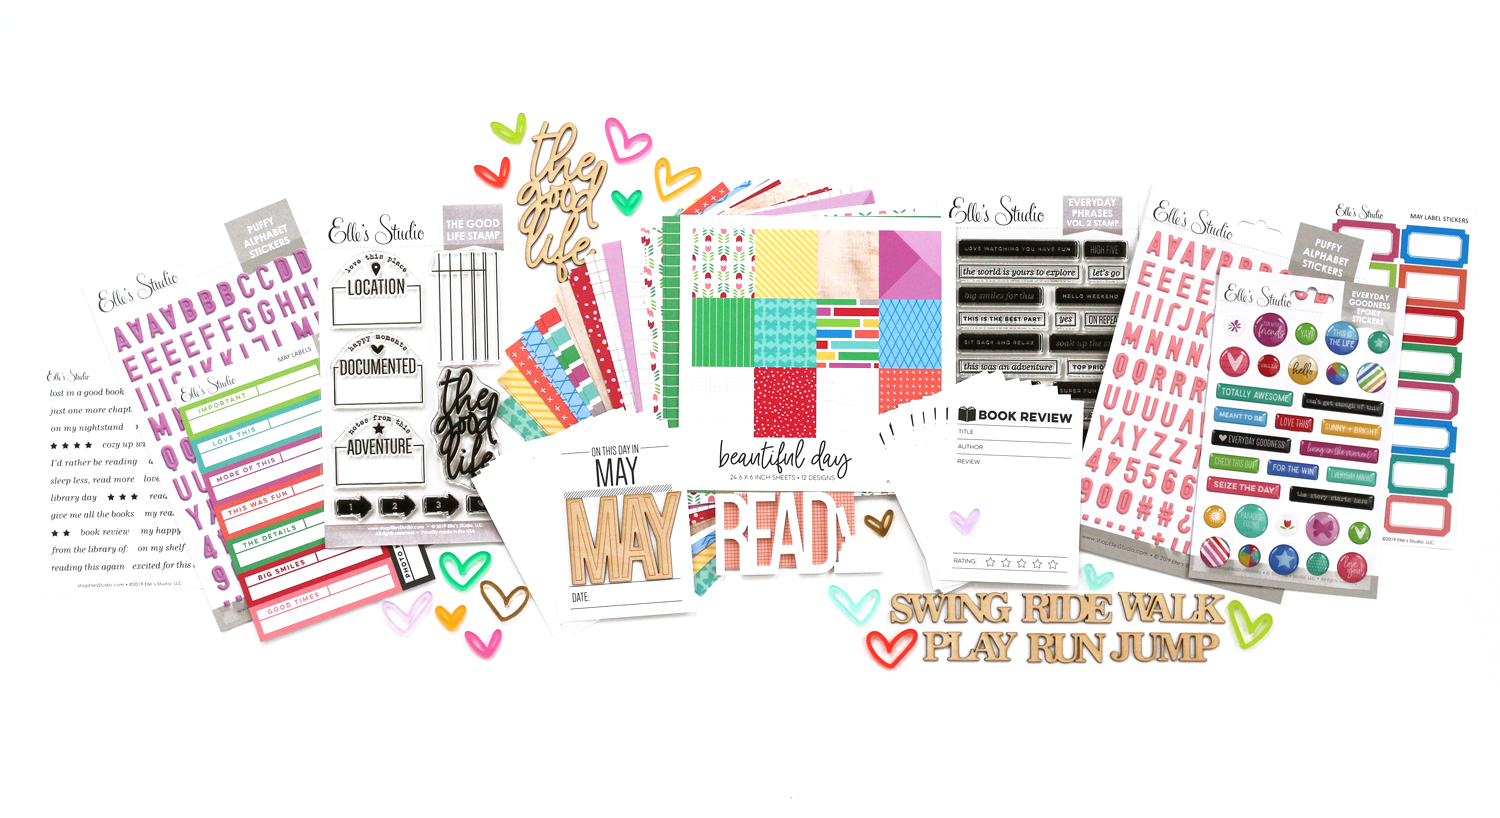
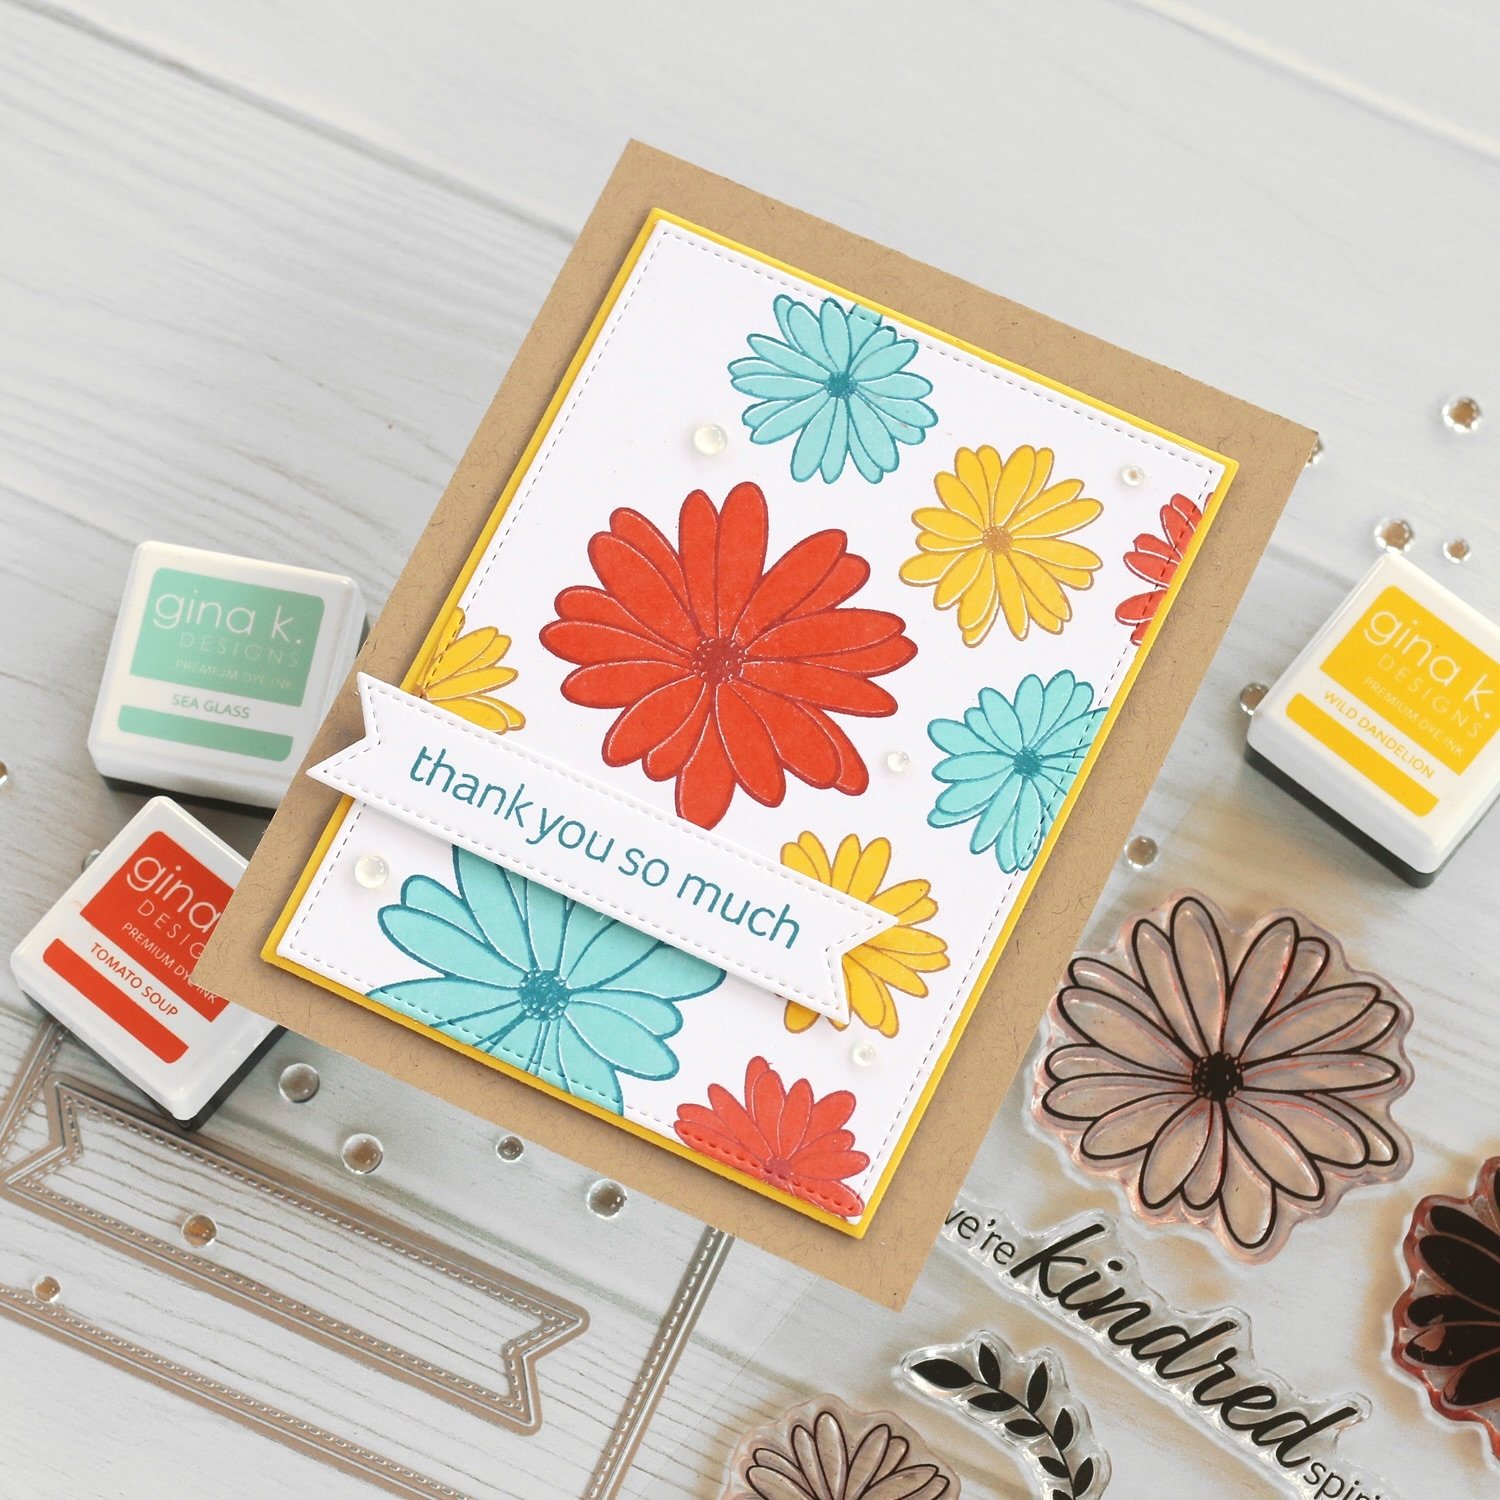
To coordinate with all of the beautiful patterns, colors and themes in the kit, we have a full range of add-ons this month! From spooky journaling tags, to wood veneers, acrylic words, new dies, and spooky puffy stickers, you won’t need an excuse to add embellishment to your projects!

Last, but never least, add to your digital library with coordinated printables, cut files and digital labels! You’ll see how I made great use of the printables below!

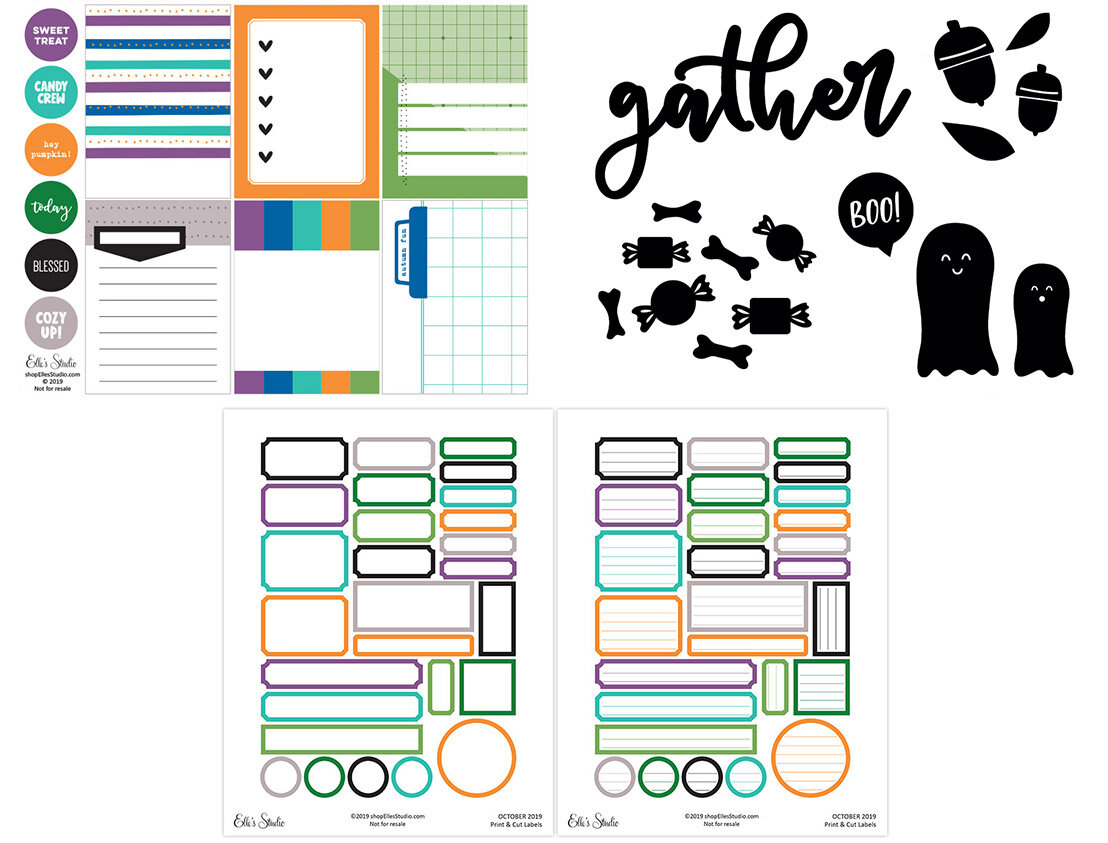
My first project this month is all about a night of Halloween cookie making with my daughter, and the colors in this kit worked perfectly with the colorful calavera (or sugar skull) cookies that we decorated! I started out this page by printing a printable tag from the Autumn Fun Printables at 8-1/2” x 11” to create the colorful background for my page.

EllesStudio_MeghannAndrew_CalaveraCookies_01.jpg

How about a firsthand look at how this page came together? You’re in luck, because I created a process video for you! In it, you will see how I created my title, added that sweet little border of bones and find out where I covered up a mistake on my page background!

Be sure to shop the October 2019 kit and add-ons while supplies last, and find all of the product that I used to create my “Calavera Cookie” page in the gallery below. Thanks so much for stopping by, and happy creating with your new Elle’s Studio goodies!

*Clicking these links will take you to the Elle's Studio shop, and when you purchase, I receive a small percentage of the sale. It doesn't cost you any extra, it’s just a way to say “thanks for inspiring me!”

Rise Weekend Pocket Page

Over the summer, I attended the RISE conference with Rachel Hollis, a life-changing motivational conference featuring speakers that help to put you in the mindset to conquer anything you want to change in your life! I attended with Catherine Tachdijan of Scrapbook and Cards Today, and we had a wonderful weekend of friendship, food and the powerful conference that helped set my soul on fire. I highly encourage attending this conference if you feel like something is missing from you life. I wanted to document my favorite photos and thoughts from this weekend, and I did that in a pocket page that I created while at Crop & Create Cornwall, to share with my make-and-take attendees! I wanted to show them that you can have just as much fun in pockets as you can on a scrapbook layout, and get so much more documented! I’d love to share this special page with you today:

MeghannAndrew_RISEWeekendPockets_01a.jpg

Supplies* | Project Life Stories Value Core Kit, Color Kaleidoscope puffy stickers, Color Kaleidoscope sticker book, Color Kaleidoscope washi tape set, Mini Dated stamp

Created with only a few products (which are all on sale at my links—the Project Life core kit is 50% off!), this pocket page came together so easily because the core kit coordinated beautifully with the Color Kaleidoscope collection from American Crafts and Vicki Boutin. My favorite pocket was the title pocket, which was originally black and white, and I colored in with watercolors to coordinate with the three main colors of my color scheme.

MeghannAndrew_RISEWeekendPockets_03.jpg

The color scheme was easily to come up with—I simply matched the colors of the conference materials! The pocket cards worked perfectly for me to add journaling and minimal embellishments—like washi tape, cardstock stickers and tiny puffy stickers!

MeghannAndrew_RISEWeekendPockets_05.jpg

I kept the back of the pocket page fun and bright, adding small bits of embellishment and two filler pockets for visual interest! I love the bright and bold pops of color from both my products and photos!

MeghannAndrew_RISEWeekendPockets_02.jpg

The “I love this story” card was one of my favorites in the kit, and I had to use it right in the center of the page. My favorite 4” x 6” photo of Catherine and I from the weekend, taken on the “made for more” wall, was divided across two 3” x 4” pockets. I added no embellishment to it—you don’t have to embellish each and every pocket!

MeghannAndrew_RISEWeekendPockets_07.jpg

If you love these products as much as I do, be sure to head to the links below to grab them at great discounts!

If you’re interested in learning how to document in pockets or already do so, but want to take your pocket pages to the next level, check out my self-paced, year-long class with Scrapbook & Cards Today, Inside the Pocket! Each month contains a PDF lesson on a specific topic related to pocket page design, releasing on the 2nd Monday of the month. Then, on the 4th Monday of the month, one of our talented contributors shares their inspiration and their tips with you! As a class attendee, you’ll also receive access to a special Facebook Group, where we share our projects and ideas. I’d love for you to join me in Inside the Pocket! Thanks so much for stopping by, and happy creating!

SCT365_pocket_reg_now_open_square1.jpg

*Clicking these links will take you to the Scrapbook.com and Elle's Studio shops, and when you purchase, I receive a small percentage of the sale. It doesn't cost you any extra, it’s just a way to say “thanks for inspiring me!”

Elle's Studio September 2019 Reveal!

Hey friends! The Elle’s Studio September kit and add-ons* are here and so beautiful! This colorful collection has toned it down, giving you the perfect jewel tones, fresh patterns and homey sayings to document your month beautifully. Take a look at all of the new goods that the shop has to offer in this video:

Amazing stuff, right?! This September kit has all of the beautiful colors that I love to use at this time of year. Plus, the illustrations and patterns are just perfect! Take a look:

But wait! Don’t forget about all of the add-ons that coordinate with the kit this month! From tiny label stickers, to a new, amazing 6” x 6” paper stack, the shop has all you need to create the perfect, coordinated projects!

EllesStudio_September2019_Add-Ons_01.jpg

Don’t forget about these amazing digital files, too! They can easily be cut, printed and altered to fit perfectly for any project!

EllesStudio_September2019_Digitals.jpg

This month, my favorite project created was a pocket page spread about a trip to Chicago that I took last fall, and I just had to work with the beautiful coral, teal and black color scheme that I built from the kit and add-ons:

EllesStudio_MeghannAndrew_ChiTown_01.jpg

I can’t believe that I used my favorite tag from this kit, and didn’t hoard it forever! This patterned circle tag was the perfect one to add my title to, using the Large Jane alphabet stamps!

EllesStudio_MeghannAndrew_ChiTown_04.jpg

I used the Home Sweet Home printables to create this custom 4” x 4” heart tag, which I added the beautiful Happy Moments puffy sticker to. I love the mix of product, along with a bit of journaling in this pocket!

EllesStudio_MeghannAndrew_ChiTown_05.jpg

This is proof that the Home Wood Veneers don't have to be about your home! I used the “this is my happy place” one here to document my runs along Lake Michigan.

EllesStudio_MeghannAndrew_ChiTown_06.jpg

I also loved the September labels this month, and cut them small to add to the sides of my photos.

EllesStudio_MeghannAndrew_ChiTown_10.jpg

I hope that you love this new collection of products as much as I do! Be sure to grab you Elle’s Studio September 2019 kit and coordinating add-ons today, September 10th, while the kit is at its introductory price of $9.99! Or better yet, start a subscription with this kit and be guaranteed your kit each month at this price. Thanks so much for stopping by today! Check out all of the products I used to create this spread in the gallery below, and happy creating!

*Clicking these links will take you to the Elle's Studio shop, and when you purchase, I receive a small percentage of the sale. It doesn't cost you any extra, it’s just a way to say “thanks for inspiring me!”

Summer Treats with the Elle's Studio July Kit + Extras

Hey friends! Today I’m back to share the second project that I created with the Elle’s Studio July kit and extras*, an 8-1/2” x 11” layout to record the summer treat that makes my little girl the happiest: popsicles!

EllesStudio_MeghannAndrew_SummerFavorite_01.jpg

I had so much fun creating this layout, and I’d love to share with you how it came together!

EllesStudio_MeghannAndrew_SummerFavorite_02.jpg

First, I started off with a smooth, white piece of 8-1/2” x 11” cardstock. In Silhouette Studio, I opened the July 2019 digital cut file, which coordinates perfectly with the kit, and created a cluster of three stars at the bottom left and another at the top right before cutting them out and backing them with patterns from the Sunshine 6 x 6 paper stack, which is full of beautiful, colorful patterns!

EllesStudio_MeghannAndrew_SummerFavorite_04.jpg

Next, I backed my photo with the colorful popsicle paper from the Sunshine 6 x 6 paper stack and adhered it using dimensional adhesive. The next step was to add my title! I stamped “summer” using the Title Builder Vol. 3 stamp on a Shine die cut label, and paired it with the “favorite” die cut, also from the Shine die cut pack. I also stamped a row of yellow stars using the You Are My Sunshine stamp before adhering “favorite”, to give it a nice shelf to sit on.

EllesStudio_MeghannAndrew_SummerFavorite_03.jpg

At the top corner of my photo, I added the “photo heart” die cut from the July kit, and a July label to hold the date. Those extra die cuts that I had from cutting out my stars? A few of them were adhered directly to my photo, and I love the way that they carry that diagonal line of stars across the image!

EllesStudio_MeghannAndrew_SummerFavorite_07.jpg

Now came the fun part: embellishing! I had to use the large acrylic popsicles, as well as some puffy star stickers. To add another texture, I grabbed some die cut stars from the Shine die cuts and stamped some of the small circle stars using the You Are My Sunshine stamp before calling this layout complete!

I just love how this page turned out, and I hope I’ve inspired you to get crafty this week to document your favorite summertime treat! Thanks so much for stopping by, and be sure to grab the products that I used to create this layout from the gallery below while supplies last!

*Clicking these links will take you to the Elle's Studio shop, and when you purchase, I receive a small percentage of the sale. It doesn't cost you any extra, it’s just a way to say “thanks for inspiring me!”

Elle's Studio July Kit Reveal Day!

I am so excited to share the July 2019 kit and add-ons* from Elle’s Studio with you! Watch my unboxing video below to see all of the new product!

The July 2019 kit is full of amazing and colorful 3” x 4” and 4” x 6” tags, as well as die cuts. Whether you want to record your 4th of July memories, or your favorite summer activity, we’ve got you covered with the kit contents!

EllesStudio_July2019_Kit_01.jpg

To coordinate with the kit, there is an amazing range of coordinating add-ons on offer this month! From a new 6 x 6 paper stack to a huge pack of die cuts, you’ll find something that you need to finish off the project that’s been sitting on your desk!

EllesStudio_July2019_Add-Ons_01.jpg

In addition to the kit and extras in the shop, the new Title Builder Vol. 3 bundle, which released last month and sold out within 24 hours, is now BACK IN THE SHOP! Don’t miss out on this bundle, which was specially designed by Elle and myself to help you create beautiful and easy titles for all of your projects!

EllesStudio_TitleBuilderVol3_Collection_01.jpg

I fell so in love with the Pool Party wood veneer that I created an entire pocket page spread to use it. The July kit and extras were the perfect supplies to record this fun, summer day!

EllesStudio_MeghannAndrew_PoolPartyPockets_01.jpg

I just had to add some color to that beautiful wood veneer piece, and I balanced it out with several different pockets of color throughout the spread, like with this fun “splash goals” title, which I created using all of my ES puffy alphabet stickers and the new Title Builder Vol. 3 stamp! I just love how it turned out— especially with that little splash!

EllesStudio_MeghannAndrew_PoolPartyPockets_06.jpg

Want to see how this project came together in real time? Click below to watch my process video! You’ll see what I used to color in my Pool Party wood veneer, and how the “splash goals” card came to fruition.

Thanks so much for stopping by today! I hope you love the Elle’s Studio July release as much as I do! Be sure to grab the products that I used to create this pocket page from the gallery below while supplies last! Happy creating!

*Clicking these links will take you to the Elle's Studio shop, and when you purchase, I receive a small percentage of the sale. It doesn't cost you any extra, it’s just a way to say “thanks for inspiring me!”

American Crafts + Damask Love Wild Card: Hana Road

I recently received the Damask Love Wild Card collection* from American Crafts, exclusive to JoAnn Crafts! This collection certainly has a tropical feel which is perfect for summer memories, and, with just a few AC products, I had a great time documenting a beautiful day in Hawaii with it. Take a look!

AmericanCrafts_MeghannAndrew_HanaRoad_01.jpg

Supplies | Wild Card collection: Paper project pad, stickers; Vicki Boutin Color Kaleidoscope: 12” x 12” mixed media paper pad, texture paste; Sparkle City collection: foam Thickers; Head in the Clouds collection: enamel dots

This layout was all about COLOR, and getting that Hawaiian vibe on the page. I started by printing my photos at 3” x 3” and arranged them in a handy grid on a spare sheet of white cardstock. Instead of painting my own background, I started out with a sheet of the Color Kaleidoscope 12” x 12” mixed media paper pad to get all of these colorful, painted splots on the page without the mess!

AmericanCrafts_MeghannAndrew_HanaRoad_02.jpg

I knew that I wanted my title to be about our long day trip to Hana, and I found a great font called Sharkines to cut the word from papers in the Wild Card collection project pad. I cut each letter out twice using different papers, and layered them for a colorful look. In the corner, I added fussy-cut leaves from the Toucan Do It paper in the project pad, then topped them with a toucan sticker from the Wild Card stickers. For the second word in my title, I used the Sparkle City foam Thickers to add a pop of blue.

AmericanCrafts_MeghannAndrew_HanaRoad_04.jpg

Adding my journaling on a pocket card with a nice yellow outline added a bright pop of color and helped to balance the title on the opposite side. I also added another toucan from the Wild Card stickers to the base of the card, facing toward my photos. Do you see that sparkle at the base of my card? I added that with the amazing Color Kaleidoscope chunky texture paste, brushed directly onto the mixed media background paper on top of the paint splatters. It provided the perfect amount of sparkle!

AmericanCrafts_MeghannAndrew_HanaRoad_05.jpg

In the upper right corner, I wanted to balance those big leaves from the bottom left corner and continue that diagonal line through my photos. I used fussy-cut leaves, and Wild Card stickers to create the corner. The pineapple was the perfect touch! I finished it with a fussy-cut sun cut from the So Fresh paper in the project pad.

AmericanCrafts_MeghannAndrew_HanaRoad_03.jpg

To finish off the page with a few different textures, I added some older Crate Paper brads from my stash and Head in the Clouds enamel dots.

AmericanCrafts_MeghannAndrew_HanaRoad_06.jpg

I hope you love this page as much as I do! I feel like it perfectly captures the aloha spirit! If you have your own tropical adventure to record, I highly recommend the Damask Love Wild Card collection, which is on sale at JoAnn Crafts! Mahalo and happy creating, friends!

*Clicking these links will take you to the JoAnn Crafts & Scrapbook.com shops, and when you purchase, I receive a small percentage of the sale. It doesn't cost you any extra, it’s just a way to say “thanks for inspiring me!”

Title Builder Volume 3 is HERE!

EllesStudio_TitleBuilderVol3_Collection_04_withtext.jpg

I am so excited to finally share with you that our newest collection of products designed to help you create thoughtful, eye-catching and story-driven titles, for your layouts, pocket pages and traveler's notebooks, Title Builder Volume 3*, is now live in the Elle’s Studio shop! Watch the introduction video below to find out about this latest volume, which includes a new happy, summery plethora of title possibilities!

The newest volume of the Title Builder collection includes a 6" x 8" stamp, wood veneer and acrylic and is also available as a specially priced bundle!

EllesStudio_TitleBuilderVol3_Collection_01.jpg

I filled this stamp with summery, positive words and phrases, and when combined with Elle’s amazing design skills, the result is a well-designed, beautiful collection of title possibilities. Using the Title Builder Vol. 3 stamp on its own will produce an amazing amount of stunning titles for your projects, and we've made it SO easy for you! When you purchase the Title Builder Vol. 3 stamp or collection bundle, you will receive a printable PDF of the 100+ title possibilities that you can create using the stamp only. Pair these words with alphabet stickers, words and phrases in your own stash, and the title possibilities are endless!

EllesStudio_MeghannAndrew_BrightandBeautifulYou_02.jpg

Whether on a scrapbook layout, in a traveler’s notebook, or in a pocket page spread, these stamps, wood veneers and acrylic will take your titles to the next level! Check out the Elle’s Studio blog tomorrow for my first layout creation using the Title Builder Vol. 3 stamp, and watch my Instagram feed for more inspiration using these fun, new products!

EllesStudio-Video-Slide-TB1_TB2.jpg

But wait! There’s more exciting news! To celebrate our Title Builder Vol. 3 release, our Title Builder Vol. 1 and Vol. 2 stamps are on sale for 20% off! Collect them all and combine them to create even more amazing titles for all your projects! This offer is only available for a limited time and ends on July 1st at midnight PST or while supplies last!

I hope you love them as much as I do, and I can’t wait to see what titles YOU design with them! Happy creating!

*Clicking these links will take you to the Elle's Studio shop, and when you purchase, I receive a small percentage of the sale. It doesn't cost you any extra, it’s just a way to say “thanks for inspiring me!”

Elle's Studio June Kit Reveal!

Hello friends! It’s the 10th of the month, and the June 2019 Elle’s Studio kit and add-ons* have hit the shop! This kit will have you itching to get into the A/C to document your summer memories with its colorful hues, pretty hand lettered words and cute wood veneers! Take a look at my unboxing video to see all of the new goodies:

Oh this June kit! With all of the colors and summery themes, I had to document some equally colorful and fun summer moments with it this month!

The June add-ons are just the best this month! Whether you’re documenting best friends, or creating a big, starry title, you need to create some space in your box for them! (And as a bonus, subscribers can add these add-ons to their box for free!)

With all of the color in the kit, I decided to document a fun family trip to Mexico in my daughter’s 2018 traveler’s notebook.

I was so inspired by the color scheme found on the “relax” journaling tag from the June kit, that I based my spread’s color scheme on it, and created the equally colorful “Mexico” title!

EllesStudio_MeghannAndrew_MexicoTN_02.jpg

Doubling up the Large Jane solid and stars alphabet stamps for my letters created such a beautiful title! Want to see how I created this title, and designed my spread? It would easily translate into a 12” x 12” scrapbook layout! Watch my process video here:

I know you’ll love creating with the Elle’s Studio June kit and extras as much as I did! Find all of the products that I used to create this TN spread in the gallery below, and happy creating this week!

*Clicking these links will take you to the Elle's Studio shop, and when you purchase, I receive a small percentage of the sale. It doesn't cost you any extra, it’s just a way to say “thanks for inspiring me!”

The Perfect Kits for Summer Creating + A Special Discount For My Readers!

SCTDeliveredKit_SummerTimeDreams_IG_01.jpg

Hello and thanks for coming by my blog today! SCT Magazine creates the best kits, and the summer SCT Delivered kits, which include the Summer Dreams scrapbook kit, Make a Wish card kit are now available in the shop! Not only do you receive a kit packed full of product from your favorite manufacturers, you will also receive an exclusive stamp, cut files and printables, as well as full-color instructions for each of the design team projects created using the kit! Buying this kit is a great way to get your layouts created quickly and beautifully!

I was able to work with the Summer Dreams scrapbook kit, and I’m excited to share my layouts and card with you today, as well as a special discount! First, let’s start with my double-page spread:

SCTMagazine_MeghannAndrew_BeachDayFun_01.jpg

This fun page took its color scheme from the multi-colored stripe paper on the left and includes three 4” x 6” and two 4” x 4” photos. To keep your eye moving across the spread, I added the fun cardstock, patterned paper, die cut and tag circles, which add the fun!

SCTMagazine_MeghannAndrew_BeachDayFun_06.jpg

My favorite part is this multi-product title that I created using the exclusive digital die cuts, exclusive stamp and small puffy alphabet stickers. To add more color, I stamped “ beach love” above in several colors.

SCTMagazine_MeghannAndrew_BeachDayFun_08.jpg

The exclusive printables here: the painted yellow tag, “memories” tab, and sweet bikini tag created the perfect group of embellishments and journaling here at the top right corner. I loved creating this fun layout about an awesome day with family and friends at the beach!

SCTMagazine_MeghannAndrew_HelloSunshineCard_03.jpg

How about a sweet and simple card? Layering patterned paper and stitching it together provided some texture on this card. Exclusives in the kit—the “sun” stamp and sparkly “shine” foam word, along with the pink “hello” die cut created the greeting. To amp up the cuteness factor, the bee die cut finished off the card! I love cards that can be used for any occasion, and this is certainly one of them!

SCTMagazine_MeghannAndrew_HelloSunshine_01.jpg

My final layout, a 12” x 12” single page layout, started off with product: the cockatoo card! I knew I had a photo of my daughter in Hawaii holding a white cockatoo, so I printed two 3” x 4” photos and got to work! I decided to go for a BOLD, floral, tropical feel on this page, and I cut the colorful ray paper on the background, leaving only the colors I wanted to show on this page, and backed it with the dark blue pattern. From there, it was all about layering!

SCTMagazine_MeghannAndrew_HelloSunshine_05.jpg

Layers of cardstock, patterned paper, printable tag, die cuts and fussy-cut flowers surround my photos, where the colorful rays draw your eye. I love the exclusive stamp so much, and I used it to stamp “vacation memories” on the rays at the bottom left corner, where I also added the date of our trip.

SCTMagazine_MeghannAndrew_HelloSunshine_02.jpg

My title was fussy-cut with the “hello” patterned paper card, and the “sunshine” exclusive digital die cut word. I love the sweet memory that this page records, and especially when product helps me remember a memory that would have otherwise been forgotten.

Now for your special discount! Purchase either the Summer Dreams scrapbook kit or the Make a Wish card kit today and receive a 10% discount, using the code

Meghann10

Don’t miss out on these beautiful kits, available only while supplies last! Thanks so much for stopping by, and happy summer creating!

Let The Sun Shine In Layout + Process Video

Hello, friends! I’m excited to be back home creating after a long, relaxing holiday weekend, and today I have a colorful page to share with you that combines two of my favorite new collections from American Crafts—Vicki Boutin's Color Kaleidoscope and the Sparkle City collection—all inspired by my daughter’s umbrella.

AmericanCrafts_MeghannAndrew_LetTheSunShine_01.jpg

Supplies | Color Kaleidoscope collection: Kaleidoscope paper, Beyond Words paper, Paper Hearts paper, Flight of Fancy paper, ephemera die cuts, sticker book, puffy sticker phrases, small puffy sticker sheet; Sparkle City collection: 6" x 8" paper pad, cardstock stickers, sticker book, chipboard stickers, glitter enamel dots

The background Kaleidoscope paper provided the perfect place to color-block embellishments and other fussy-cut papers around its colorful rays, which helped me to tell the story of a grumpy girl whose mood was brightened by her colorful new umbrella.

AmericanCrafts_MeghannAndrew_LetTheSunShine_02.jpg

The Sparkle City collection’s 6" x 8" paper pad provided the perfect title for this page, “Let the Sun Shine In,” which I added to the center of the Color Kaleidoscope ephemera die cut frame.

AmericanCrafts_MeghannAndrew_LetTheSunShine_03.jpg

I loved joining the colorful elements from these beautiful collections to get this story in my album. Watch my process video below to see how I pulled it all together:

You can find all of the products I used to create this page at the gallery links below.

*Clicking these links will take you to the Scrapbook.com shop, and when you purchase I receive a percentage of your sale. It does not cost you any extra, it is just a way for you to say, "thanks for inspiring me!

What To Do With All Of That Washi?

Happy Friday, friends! I’m always trying to think of other ways to use my growing stash of washi tape, and in a creative way. Today I have a new layout to share with you that makes the most of your favorite washi rolls, to create a frame for your page!

AmericanCrafts_MeghannAndrew_Enjoy_01.jpg

 Supplies* | Saturday Afternoon collection: Afternoon Clips paper, Afternoon Roses paper, cardstock stickers, foam and cardstock phrase stickers, wood stickers, layered stickers, washi tape, rotary date stamp; It’s All Good collection: washi tape

This layout is not for the pattern faint-at-heart! I took advantage of all of these glorious colors and patterns to document a lovely day at an English garden, and a favorite photo of my girl and I. I was so excited to see that the washi tapes from the Saturday Afternoon and It’s All Good collections from American Crafts worked so well together to create a frame for my page.

AmericanCrafts_MeghannAndrew_Enjoy_02.jpg

I cut my Afternoon Roses background paper to 8-1/2” x 11”, then took a piece of Coconut Swirl cardstock, and cut it to the same size. Using my paper trimmer, I slowly cut the center of the white cardstock page out to create a frame with 1-1/2” on all sides. (Tip: Don’t worry if you accidentally cut too far into your frame—the washi tape will cover up any cutting imperfections!) Once my frame was cut, I started adding washi tape at the square corners, using the same Saturday Afternoon washi tape pink floral at each corner. I then added pieces of washi horizontally on the left side of the frame, filling up the entire side before I peeled the frame off of my desktop and folded the washi edges around the back side of the frame.

AmericanCrafts_MeghannAndrew_Enjoy_03.jpg

I moved over to the right side of the frame, adding washi tape in the same pattern that I used on the left side. Then I moved to the top and bottom, adding the washi tape vertically. (Tip: if you need to trim a piece of washi, put it in place on the frame, overlapping the other washi tape piece to remain, then gently trim with a craft knife and ruler so that you only go through the top layer of washi tape before lifing off the excess tape.) Once my frame was finished, I adhered it using dimensional adhesive to the soft yellow Afternoon Roses background paper.

AmericanCrafts_MeghannAndrew_Enjoy_04.jpg

To help my photo stand out against all of the color and pattern, I backed it with a 4.5” x 6.5” piece of Coconut Swirl cardstock before adding it to the Afternoon Roses background, leaving more room below my photo. I added my journaling about this lovely day spent touring a beautiful English home onto a journaling card from the Afternoon Clips paper, and adhered that at an angle on the bottom left corner of my layout. The base was the perfect place to add my title, a simple “enjoy” word taken from the Saturday Afternoon foam and cardstock stickers. I also layered the beautiful “life is a collection of moments” wood veneer piece overtop of my title. I love the dimension that this adds!

AmericanCrafts_MeghannAndrew_Enjoy_05.jpg

To balance that heavy title corner, I wanted to create a visual triangle of embellishment in two other corners. In addition to the pretty florals found in the Saturday Afternoon collection, I also added the green Wellington boots, shiny metallic hearts and the cutest yellow wood veneer camera in the top corner! 

AmericanCrafts_MeghannAndrew_Enjoy_06.jpg

Last, I added a journaling tag cut from the Afternoon Clips paper, which I added my date to using the Saturday Afternoon rotary date stamp, then topped this pretty grouping with the “enjoy the little things” cardstock sticker

This technique is a great way to showcase a favorite photo, and use some of your washi tape stash at the same time! If you try it out, share on Instagram and tag me @meghannandrew! I’d love to see! Thanks so much for stopping by, and be sure to check out the products I used to create this layout at the gallery below. Happy creating!


*Clicking these links will take you to the Scrapbook.com shop, and when you purchase, I receive a small percentage of the sale. It doesn't cost you any extra, so thanks so much for your support!

Elle's Studio May 2019 Kit Release!

Hello! It’s release day at Elle’s Studio, and I can’t wait to show you the May 2019 kit and extras*! Take a look at my unboxing video to check them out:

Those are some awesome step-into-summer products, right? The May 2019 kit is so bright and sunny, with themes on being outdoors, living in the moment, and reading a good book!

Don’t forget about the amazing add-ons available in the shop this month! From a new 6 x 6 paper stack, full of colorful and pretty patterns, to new epoxy stickers— everything you need to create something beautiful with your May 2019 kit is here:

EllesStudio_May2019_Add-Ons_01.jpg

I am so excited about the first project that I created with these new goodies, an 8-1/2” x 11” layout all about the giant stack of books on my nightstand, and I created my own stack of books on the page!

You can see how I created this layout, and made those sweet books using the new Beautiful Day 6 x 6 paper stack in my short process video!

Thanks so much for stopping by, watching my videos (I hope you’ll give them a “like!”) and checking out the new Elle’s Studio goodies! Be sure to find everything I used to create this layout in the clickable gallery below! Happy creating!

*Clicking these links will take you to the Elle's Studio shop, and when you purchase, I receive a small percentage of the sale. It doesn't cost you any extra, it’s just a way to say “thanks for inspiring me!”

American Crafts Saturday Afternoon Collection: Live a Life You Love

Hey there! I’m here to share a brand new layout with you today, using the beautiful, latest collaboration between 1Canoe2 and American Crafts, Saturday Afternoon*. I grew up in the countryside of Kentucky, and this collection just feels like going home to me!

AmericanCrafts_MeghannAndrew_LiveALifeYouLove_01.jpg

The beautiful naturalistic colors and images evoked the outdoors, and I decided to document my daughter’s first experience holding a turtle, that my brother had found while mowing. The excitement on her face said it all, and I wanted to include three different photos to capture the moment.

AmericanCrafts_MeghannAndrew_LiveALifeYouLove_03.jpg

Printing these photos at 2” x 3” meant that I could fit a column of them on the left side, and accent with a triangle of embellishment around them. To add some color to my background, I used the amazing Vicki Boutin art crayons, which are still a staple in my mixed-media arsenal!

AmericanCrafts_MeghannAndrew_LiveALifeYouLove_07.jpg

It doesn’t get much better than that Mason jar of sweet iced tea for me! These products just scream “summer in the south!” but the beautiful colors and hand-painted patterns can be used for any type of project! Check out the process video that I created here, to see how this layout came together:

Thanks so much for checking out my new layout and video! I hope you’ll subscribe to my feed so that you don’t miss any new videos from me. Happy creating!

*Clicking these links will take you to the Scrapbook.com shop, and when you purchase, I receive a small percentage of the sale. It doesn't cost you any extra, so thanks so much for your support!

Altenew Painted Butterflies: Just Saying Hello

Last week, I was featured as the guest designer on the Altenew blog, and today, I’d love to share my first project with you, a new 8-1/2” x 11” layout all about a trip to visit the butterflies at the Natural History Museum, that turned out exactly as I hoped it would.

Altenew_MeghannAndrew_JustSayingHello_01.jpg

The supplies that I chose to create this layout just fit the photos of my daughter perfectly, so happily holding a butterfly. I wanted a colorful and ethereal feel, and I achieved that with a bit of help from the Live Your Dream Scrapbook Collection*. I started out with an 8-1/2” x 11” background paper from the collection, which gave me the beautiful mixed media feel without any of the mess! From there, I decided that I wanted to match the beautiful colors of the background with anything I added on top.

Altenew_MeghannAndrew_JustSayingHello_02.jpg

Along with the elements in the Live Your Dream Scrapbook Collection, I stamped the beautiful Painted Butterflies onto white cardstock, as well as vellum, to soften them, and placed them in their corresponding color on the background paper.

Altenew_MeghannAndrew_JustSayingHello_04.jpg

My title, “Just Saying Hello” was perfect for this page, and came about simply because it was one of the sentiments included in the Painted Butterflies stamp set! I wanted the word “hello” to be larger, so I swapped out the stamp word with the puffy black alphabet stickers from the Live Your Dream Scrapbook Collection!

Want to see how this layout came together? Watch the video below to see my process!

Be sure to take a look at the Live Your Dream Scrapbook Collection and Painted Butterflies stamp set in the Altenew shop today, to create your own colorful and dreamy projects! Thanks so much for visiting today and happy creating!

*Clicking these links will take you to the Altenew shop, and when you purchase, I receive a small percentage of the sale. It doesn't cost you any extra, so thanks so much for your support!

Elle's Studio April Kit: I Love Being Your Mom

I have loved working with the April 2019 Kit* from Elle’s Studio, and now that the kit is released, I finally get to share the beautiful products, and the projects that I created with them, with you! In case you missed it, I shared my first layout and process video, Go See Do Adventure, earlier this week. Today I’m sharing a completely different layout that celebrates motherhood, with a photo of me and my girl from last Easter.

EllesStudio_MeghannAndrew_LoveBeingYourMom_01.jpg

Supplies | April 2019 KitApril LabelsDays of the Week Phrase StickersHazel Alphabet Stickers – Light PurpleButterflies and Flowers Puffy StickersShapes and Dots Puffy StickersLight Purple Puffy Alphabet StickersMom Wood VeneerSpringtime 6 x 6 Paper StackWander StampTitle Builder StampNoteworthy 12″ x 12″ Paper Collection

I loved this photo that we took together before service last Easter, and I wanted a pretty, springy feel for this layout to go along with it. I started by wanting to create a clean, but springy background for my layout, with lots of pretty color! The Wander Stamp was the perfect product to use to create a custom background of flowers. After backing my photo with yellow and purple papers from the Springtime 6 x 6 Paper Stack, I paired that grouping with the striped journaling tag from the April Kit and then backed my 8” x 10.5” white cardstock sheet with an 8-1/2” x 11” striped patterned paper from the Noteworthy 12″ x 12″ Paper Collection. These elements created my color scheme, and I used the same colors to stamp pink, mulberry, purple and yellow flowers emanating from my matted photo. I also added some of the petals to get movement and make the flowers seem like they were frozen in motion.

EllesStudio_MeghannAndrew_LoveBeingYourMom_04.jpg

Next, I chose to use the beautiful Mom Wood Veneer to start my title! A yellow and white 3” x 4” tag from the April 2019 Kit was perfect for filling in the background on this wood veneer, which I kept natural!

EllesStudio_MeghannAndrew_LoveBeingYourMom_02.jpg

To add to that wood veneer, I built my title using an April Label, Hazel Alphabet Stickers, Puffy Alphabet Stickers and Title Builder Stamp. Using the different elements in the same purple color helped to keep the title less busy, and easier to read amongst all of the colorful flowers.

EllesStudio_MeghannAndrew_LoveBeingYourMom_03.jpg
EllesStudio_MeghannAndrew_LoveBeingYourMom_05.jpg

Now it was time to add a bit more extra embellishment! For a different texture to my stamped flowers, I grabbed the gorgeous Butterflies and Flowers and Shapes and Dots Puffy Stickers to add among the petals. The butterflies came in handy too! I added them to add even more movement, and drew dashed lines behind them using my favorite Elle’s Studio Sharpie pen. I also added a few drops of gold metallic spray, and a few black enamel dots for some contrast to all of that color.

EllesStudio_MeghannAndrew_LoveBeingYourMom_06.jpg

This photo, and now this layout, makes me so happy, and it was so fun to create with the April 2019 products from Elle’s Studio! Thanks so much for stopping by, and I hope you’ve been inspired to create your own spring layout! Be sure to shop the products that I used on this layout in the gallery below, while supplies last!

*Clicking these links will take you to the Elle's Studio shop, and when you purchase, I receive a small percentage of the sale. It doesn't cost you any extra, so thanks so much for your support!

Elle's Studio April 2019 Reveal Day!

I’m so excited to share the latest products for April* just released from Elle’s Studio today!

Check out this beautiful, new April Kit! All of the beautiful colors and spring illustrations on these 3” x 4” and 4” x 6” tags, along with fun die cuts, combine to bring beauty to your layouts, cards, traveler’s notebooks and pockets!

Don’t forget about the amazing add-ons this month! There are some wonderful wood veneers, THREE new puffy sticker sheets, new scripture tags and more to add to your projects along with the kit contents!

This month, I started out creating a fun 8-1/2” x 11” layout that began with the Wander printables, which is just one of the four new digital files that you can find in the shop this month! I loved the design of that green “adventure” tag so much, I decided to make it into a layout, so that’s just what I did!

I used the digital file of that single tag, scaled it to 8-1/2'“ x 11'“ and printed it for a really fun and graphic layout background!

EllesStudio_MeghannAndrew_GoSeeDoAdventure_01.jpg

When paired with my photo, and the awesome add-ons from this month’s new product, including my favorite Go See Do acrylic, this layout turned out to be so special! And it all started with a digital printable! Take a look at my process video to see how the entire page came together in just a few minutes!

Thanks so much for watching! Be sure to subscribe so that you don’t miss out on any future ES process videos! You can find all of the product that I used on this layout at my shoppable gallery below, and thanks so much for stopping by today!

*Clicking these links will take you to the Elle's Studio shop, and when you purchase, I receive a small percentage of the sale. It doesn't cost you any extra, so thanks so much for your support!

Altenew 5th Anniversary Blog Hop Day 3 + Giveaway

2019-Anniversary-BlogHop-Graphic.jpg

Hello friends! Today I’m excited to be joining on the Altenew 5th Anniversary Blog Hop on day three! Be sure to check out the Altenew blog for the full hop details, but you can also find all of the stops for today’s hop listed below!

Today I’m sharing a new layout with you, created with the lovely Live Your Dream Scrapbook Collection*!

Altenew_MeghannAndrew_FairyHome_01.jpg

Supplies | Live Your Dream Scrapbook Collection, Happy Dreams Stamp Set, Our Family Wooden Veneers, Our Family Enamel Dots

Combining the Live Your Dream Scrapbook Collection with the Happy Dreams Stamp Set created a dreamy, ethereal layout to document my daughter, dressed as a fairy, hanging her newly-built fairy house.

Altenew_MeghannAndrew_FairyHome_02.jpg

Around my photo, I created a frame of patterned paper, then white cardstock, stamped with the fun arrows from the Happy Dreams Stamp Set. The cute teapot planter chipboard sticker was perfect for adding to the corner of my photo.

Altenew_MeghannAndrew_FairyHome_04.jpg

I love my title, which I created with the black alphabet stickers in the Live Your Dream Scrapbook Collection and the “home” wood veneer word found in the Our Family Wooden Veneers. I added this title to the bottom left corner of my photo, just below my journaling, which I printed onto vellum, and backed with a Live Your Dream Scrapbook Collection paper.

Altenew_MeghannAndrew_FairyHome_05.jpg

In the corners of my layout, I stamped the star clusters from the Happy Dreams Stamp Set, then embellished further with Our Family Wooden Veneer stars and Our Family Enamel Dots. All of these products came together so perfectly to create a magical page!

Now for the fun part! Leave a comment here on this blog post by 4/12/2019 for a chance to win! 33 winners will be chosen at random from the comments left on any of the blogs listed below to win a plethora of amazing prizes and the winners will be announced on the Altenew Blog on 4/20/2019. Be sure to stop by each participant’s link below and leave a comment for the most chances to win:

Altenew
Laura Bassen
Erum Tasneem
My Sweet Petunia
Virginia Lu
Nathalie DeSousa
Heather Hoffman
Scrapbook & Cards Today
Anna Kossakovskaya
Amanda Baldwin
Galina Filippenko
Irit Landgraf
Simply Cards & Papercraft
Kelly Griglione
Meghann Andrew
Olga Moss
Heidi Jakobs

Thanks so much for stopping by and happy creating!

*Clicking these links will take you to the Altenew shop, and when you purchase, I receive a small percentage of the sale. It doesn't cost you any extra, so thanks so much for your support!

American Crafts Journal Studio Notebook: Sun's Out, Fun's Out!

I’m still working on the traveler’s notebook project that records my daughter’s favorite memories from 2018, and today I’m here to share May’s installment with you! This fun traveler’s notebook spread, created with the American Crafts Journal Studio* and Amy Tangerine Stay Sweet collection, records a wonderful Memorial Day weekend spent in Kentucky with my family.

AmericanCrafts_MeghannAndrew_SunsOutFunsOutTN_01.jpg

Supplies | Journal Studio collection: Watercolor Stripe journal kit, Hello journal insert, Amy Tan sticker book, Amy Tan sticker book, Journal Studio sticker book, Good Vibes Only gel pens; Stay Sweet collection: Summer Love paper, 6” x 8” paper pad, ephemera pack, sticker book, mini puffy stickers, epoxy heart stickers, washi tape, rotary phrase stamp, watercolor set; Other: Dear Lizzy clothespins (I like to keep my notebooks open with these when photographing)

These little spreads are really growing on me, and I am loving creating them with similar products each month. I typically start with some of the Journal Studio products that work perfectly with anything I wish to document, then I match those with a current AC collection. The Stay Sweet collection, with it’s summer vibe and bright, fun colors worked perfectly for this start-of-summer spread.

After my photos were printed and layered with papers from the 6” x 8” paper pad, including that fun popsicle print, I chose my title, “sun’s out, fun’s out,” which I cut from the Summer Love paper. This bold, fun strip of my title brought my left and right sides together right away.

AmericanCrafts_MeghannAndrew_SunsOutFunsOutTN_03.jpg

Above that title, I added my photos, which I topped with an ephemera popsicle, camera and fun fish, which was perfect to use with the photo of my daughter jumping off of the boat into the river.

AmericanCrafts_MeghannAndrew_SunsOutFunsOutTN_04.jpg

Before I adhered my fish down, I added a bit of turquoise watercolor paint from the amazing travel watercolor set. I just can’t get enough of this compact paint set! I also added some splatters on the right side using the water brush included in the set. The “wow” sticker from the Journal Studio sticker book coordinated perfectly with the yellow found in the Stay Sweet collection, and was perfect for adding to the corner of my photo.

AmericanCrafts_MeghannAndrew_SunsOutFunsOutTN_05.jpg

The final touches that I added were two strips of washi tape at the top of my photo. The popsicle washi tape matched the pattern on the left side, again tying the two sides together. On top of the striped washi, I added the stickers “family” and “memories” from the Amy Tan sticker book, then stamped “sweet” using the Stay Sweet rotary phrase stamp.

AmericanCrafts_MeghannAndrew_SunsOutFunsOutTN_07.jpg

That’s another fun memory documented for my daughter in such a fun and easy way using Journal Studio and the Amy Tangerine Stay Sweet collection! Thanks so much for stopping by. Be sure to check out the products that I used in the Scrapbook.com gallery below! Happy creating!

Gina K. Mega Wreath Builder Template: Wish Upon a Star

GinaKDesigns_MeghannAndrew_WishUponAStar_02.jpg

When I attended Creativation this year, I saw Gina K. Design’s Mega Wreath Builder* Template in action for the first time. Just like the Mini Wreath Builder template, which is perfect for creating a precise circle of stamped elements on cards, the Mega Wreath Builder does the same in a larger size! I immediately thought that it would be perfect for a scrapbook page, and I paired it up with Shimelle’s Head in the Clouds collection to create a new layout to share with you today.

GinaKDesigns_MeghannAndrew_WishUponAStar_01.jpg

Supplies | Gina K. Mega Wreath Builder template + Memory Misti or Mega Wreath Builder template (if you already have a Memory Misti), All Star stamp, Head in the Clouds Let’s Dream paper, Look to the Stars paper, Believe in Magic paper, Kiss a Frog paper, Head in the Clouds ephemera, Head in the Clouds cardstock stickers, Head in the Clouds chipboard stickers

Creating a wreath for my photo made it the perfect focal point for this layout that records a special moment at Disney World, and the “Wish Upon a Star” title was perfect for this magical page!

GinaKDesigns_MeghannAndrew_WishUponAStar_08.jpg

I took my color inspiration from the Head in the Clouds Look to the Stars paper. This colorful striped pattern was perfect for adding to my page background.

GinaKDesigns_MeghannAndrew_WishUponAStar_03.jpg

To add a diagonal line of embellishment on my page, the Head in the Clouds cardstock stickers, chipboard and ephemera added more magical touches, and spread those stars that I started with in my wreath, around the page.

GinaKDesigns_MeghannAndrew_WishUponAStar_04.jpg

Watch how I created my star wreath using the Gina K. Mega Wreath Builder template + Memory Misti. This bundle is currently on sale at Gina K. Designs for only $99, the price of the Misti itself! In this video, you’ll see how I built my wreath of stars around my photo, adding different colors and mediums to really bring your eye to my photo on the page:

Thanks so much for stopping by my blog today! I hope you loved seeing this page, as much as I loved creating it with the Mega Wreath Builder template! Happy creating!

*Clicking these links will take you to the Gina K. Designs shop, and when you purchase, I receive a small percentage of the sale. It doesn't cost you any extra, so thanks so much for your support!

Elle's Studio February Reveal!

Hello and happy Sunday! Today is the day of the Elle’s Studio February 2019 kit and add-on* reveal, and I couldn’t be more excited about what I’m showing you today! First, let’s take a look at all of the new goodies in my unboxing video:

Take a look at the rainbow of colors in the February kit! There are so many color possibilities here:

EllesStudio_February2019_Kit_01.jpg

If you thought that the kit was full of possibility, take a look at the February add-ons! From a wide range of stamps, labels, puffy stickers and acrylics, there are so many beautiful additions that can be combined with the kit to create something wonderful.

EllesStudio_February2019_Add-Ons_01.jpg

The digital files this month are also perfect to add to your digital library. With a wide range of cut files, labels and printables that coordinate with the kit, you won’t want to miss having them on your desk while creating.

EllesStudio_February2019_February-Digitals.jpg

Now that I’ve shown you all of this beautiful project, let me share what I created with it!

EllesStudio_MeghannAndrew_Tate_01.jpg

The Wonderful Colors at the Tate by Meghann Andrew – supplies used | February 2019 KitFebruary 2019 Digital Cut FileFebruary LabelsBright Die Cut LabelsReal Life Phrase StickersWood Veneer ConfettiPuffy Icon StickersLight Purple Puffy Alphabet StickersBlack Puffy Alphabet StickersLittle Acrylic StarsOh Happy Day StampLarge Jane Alphabet Stamp – OutlineLarge Jane Alphabet Stamp – StripesLarge Jane Alphabet Stamp – Polka DotHazel Alphabet StampNoteworthy 12 x 12 Paper Collection

This fun and bold layout records a day spent at the Tate Modern Museum in London, and the bold colors in my photos were the perfect match to the rainbow of colors in the kit. I started off my layout with the “wonderful” die-cut included in the February 2019 Digital Cut File, and continued to build my title with the Large Jane Alphabet Stamps (the outline, and new stripes and polka dot!) Black Puffy Alphabet Stickers and Hazel Alphabet Stamp.

EllesStudio_MeghannAndrew_Tate_05.jpg

On the left side of my page, I added ALL OF THE COLOR; in a rainbow of tags and die-cuts coming from the left side of my photo strip. I accented with embellishment, like the Puffy Icon Stickers and Little Acrylic Stars to match the colors along the edge of the page.

EllesStudio_MeghannAndrew_Tate_03.jpg

Want to see how all of these beautiful products came together to create this page? Take a look at my process video:

Thanks so much for stopping by today, and I hope you’ll check out all of the new Elle’s Studio product that I used to create this layout by clicking through the gallery below. Happy creating!

*Clicking these links will take you to the Elle's Studio shop, and when you purchase, I receive a small percentage of the sale. It doesn't cost you any extra, so thanks so much for your support!