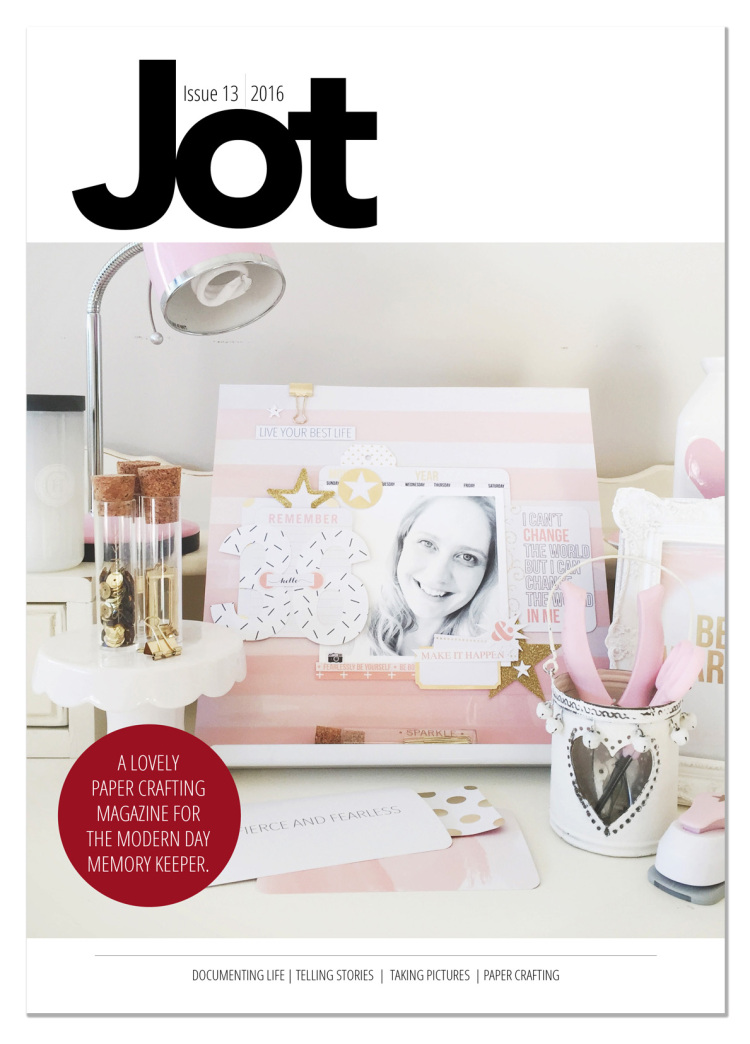
Jot Magazine Issue 13: Greatest Adventure
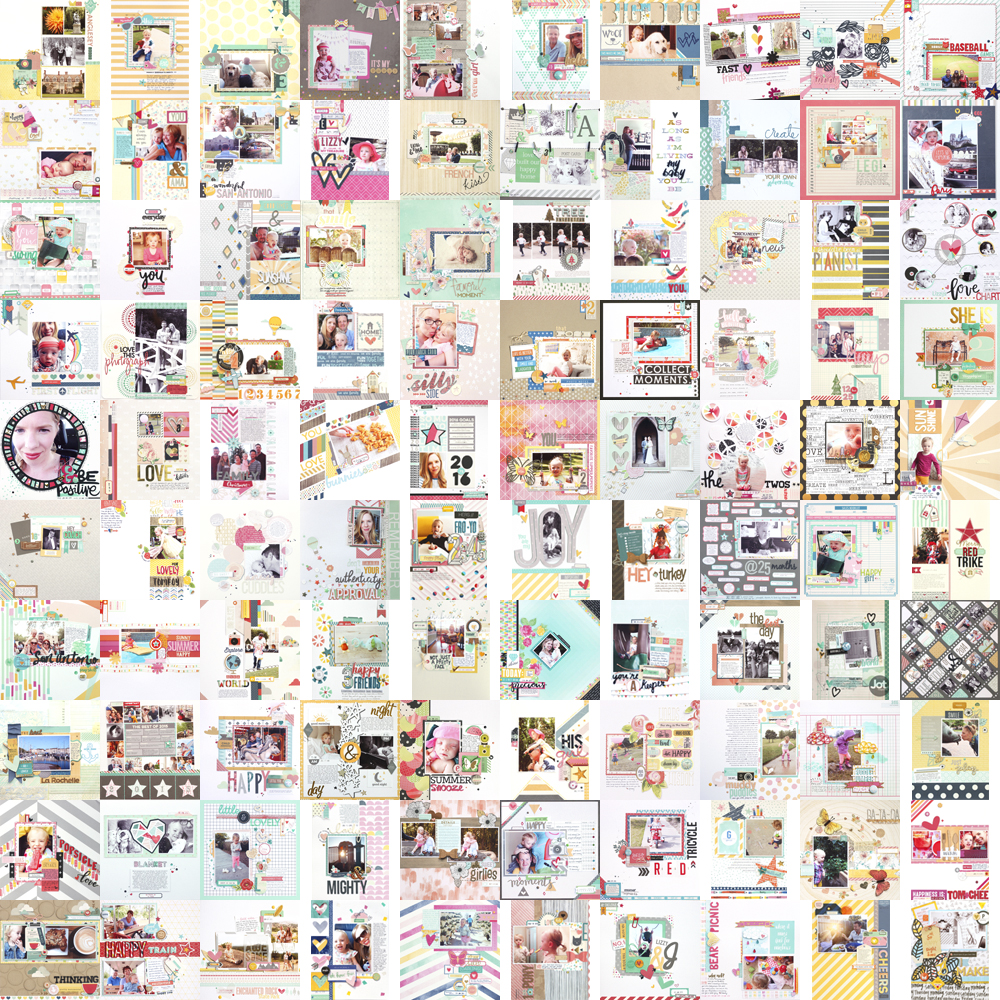
Jot Magazine Issue 13 is live, and it may just be the most beautiful issue yet! 

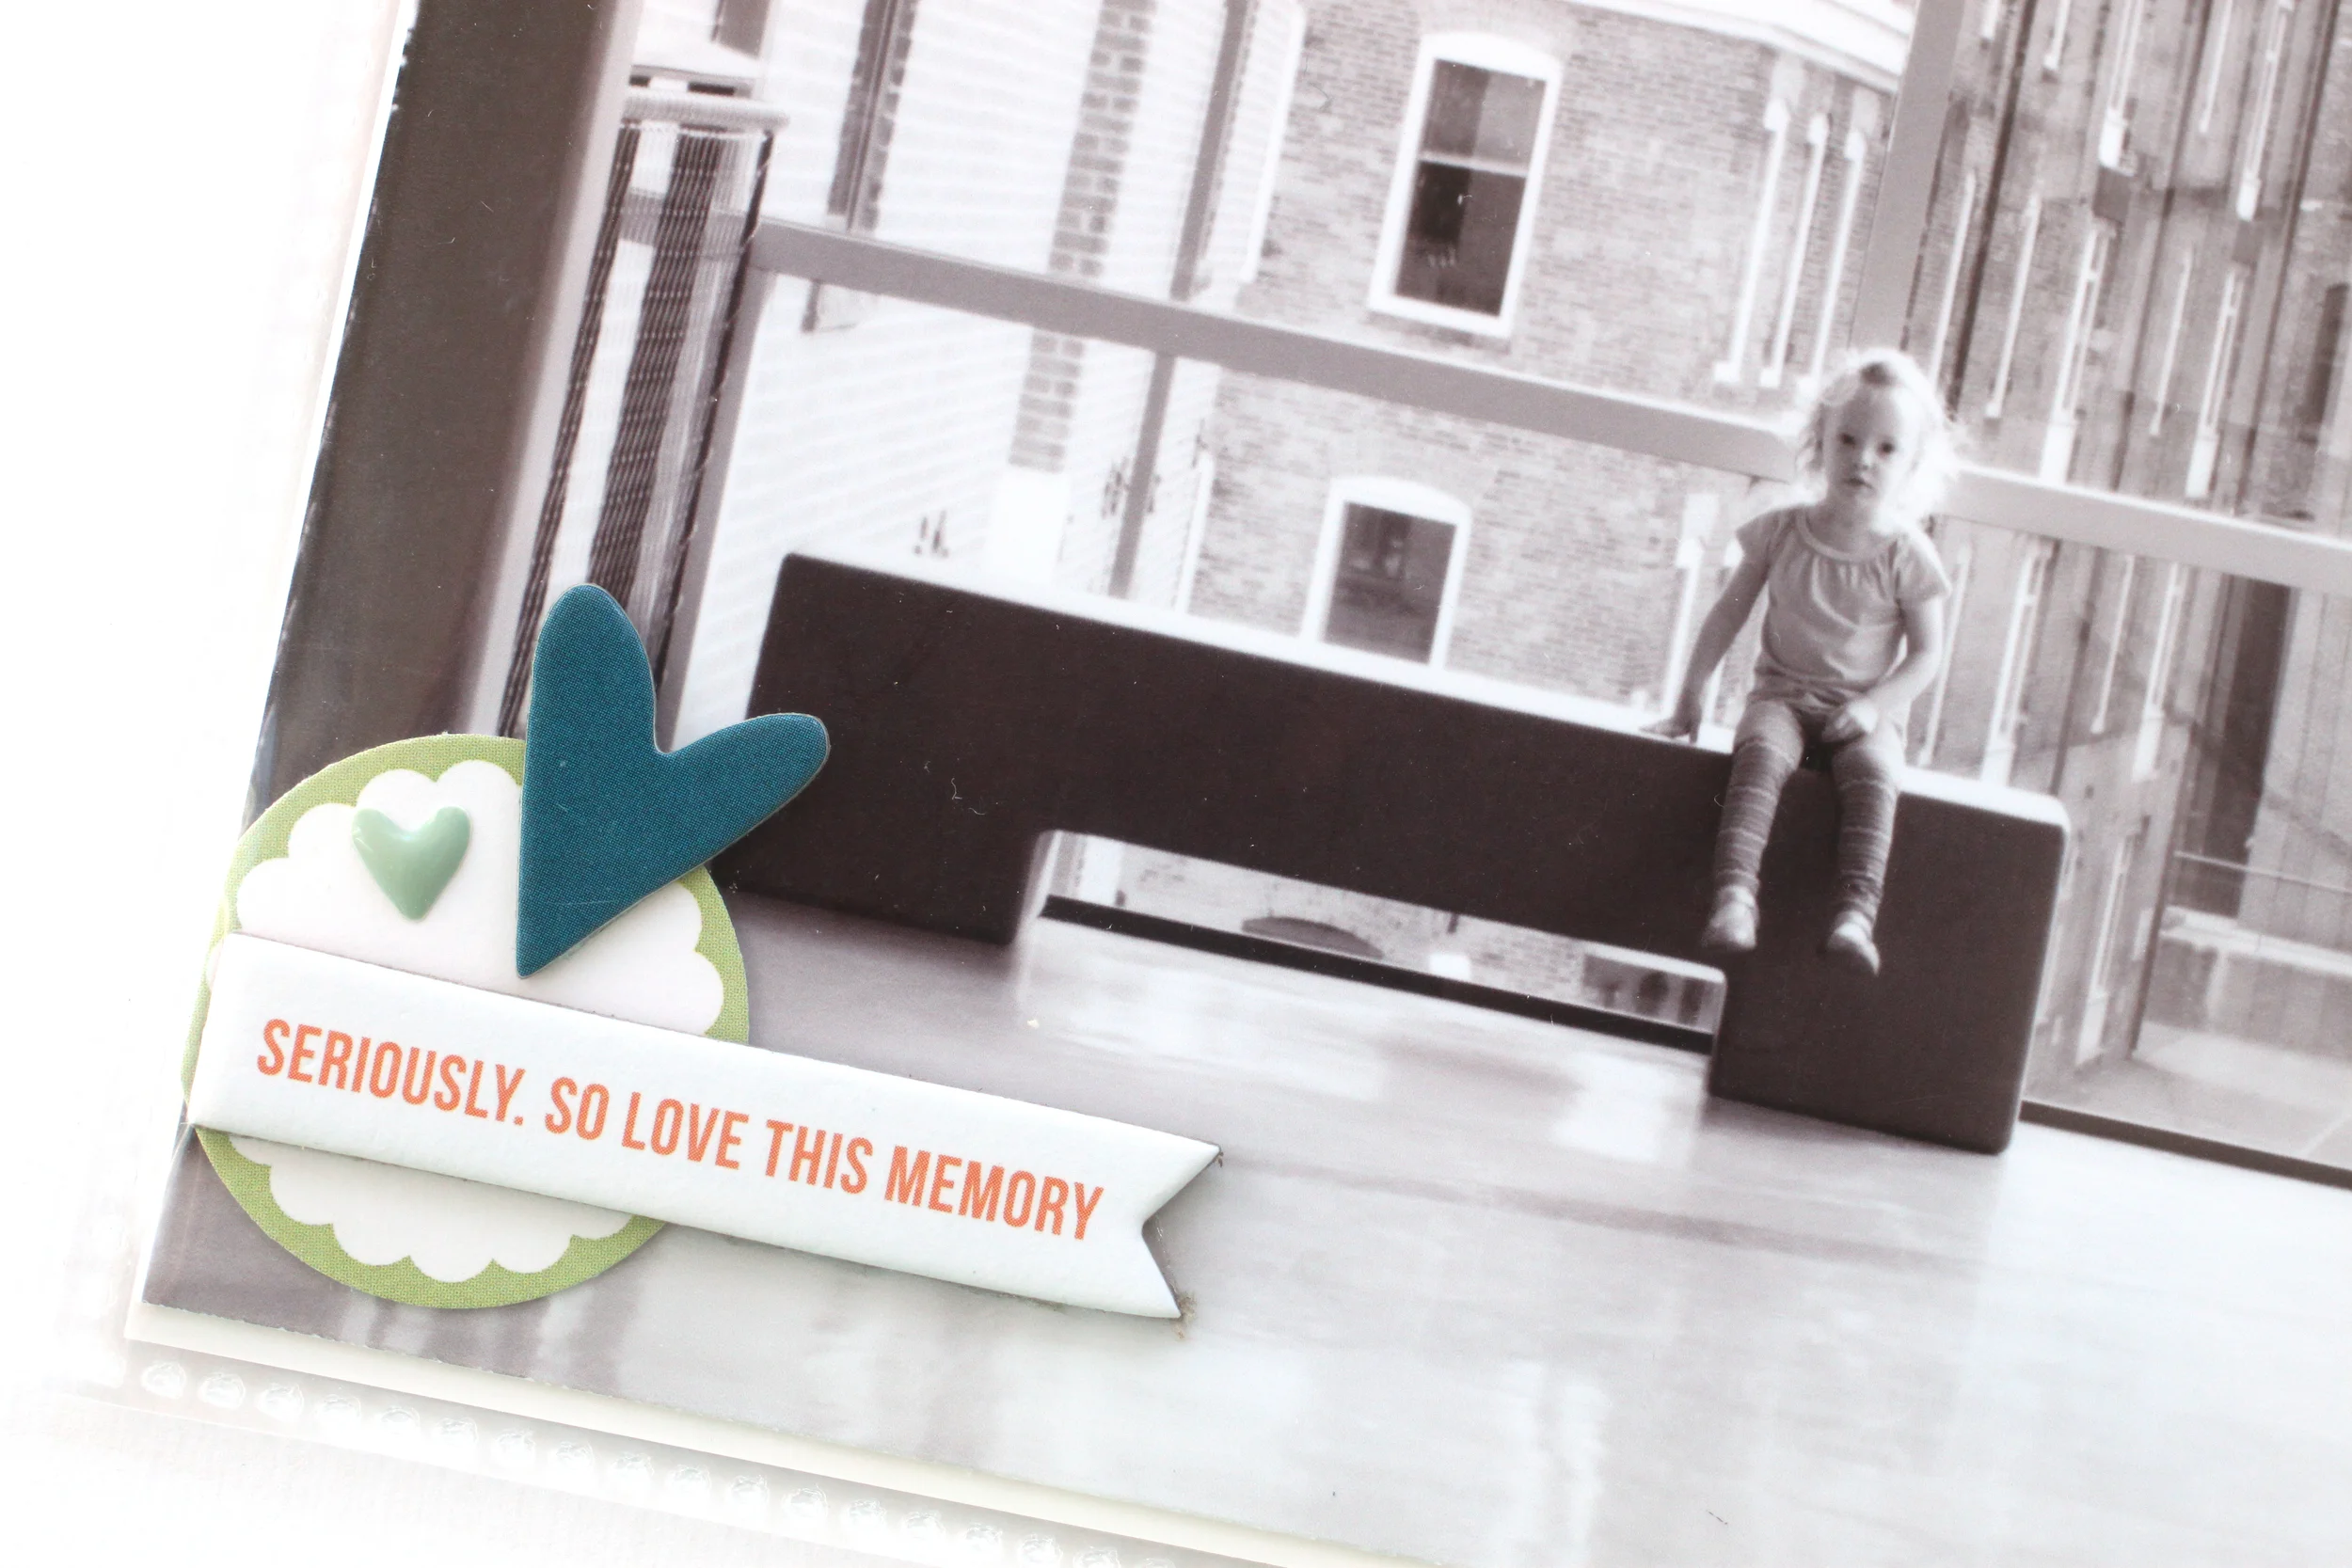
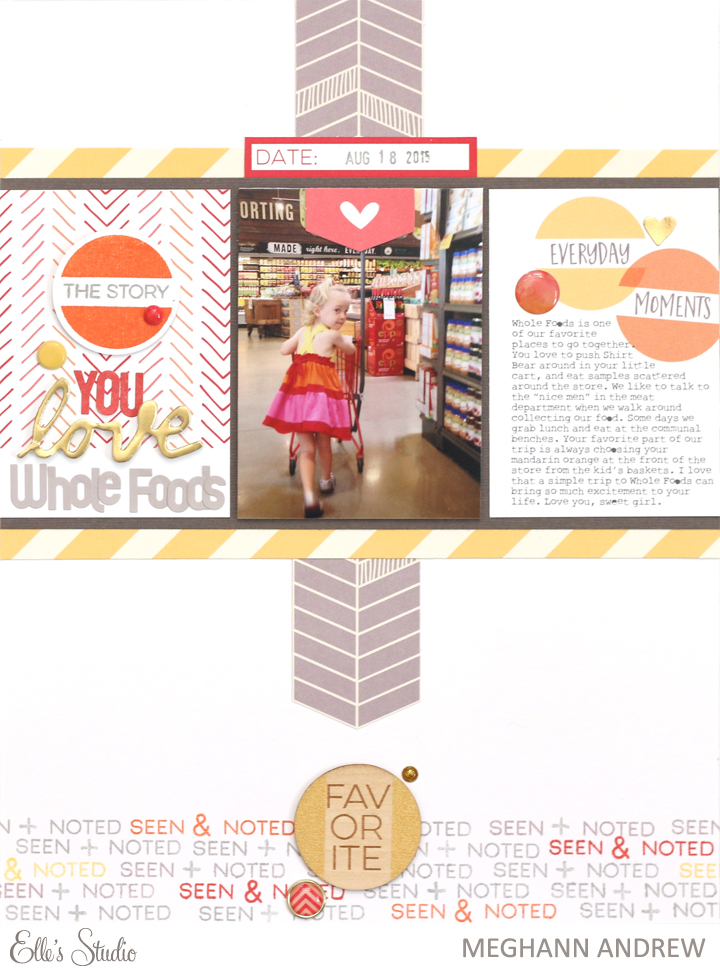
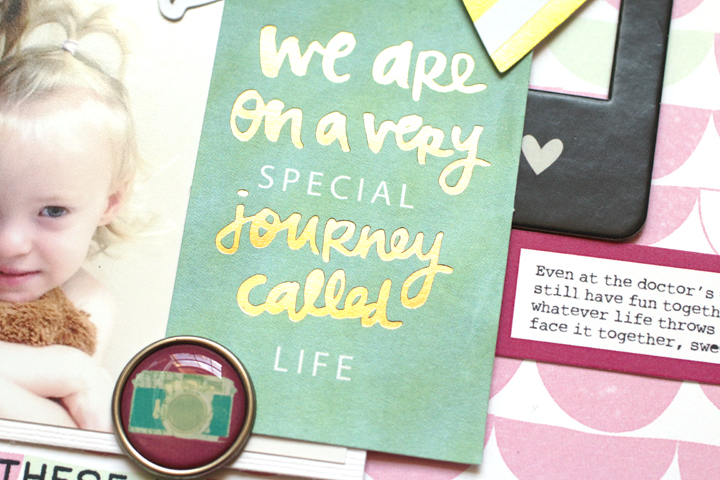
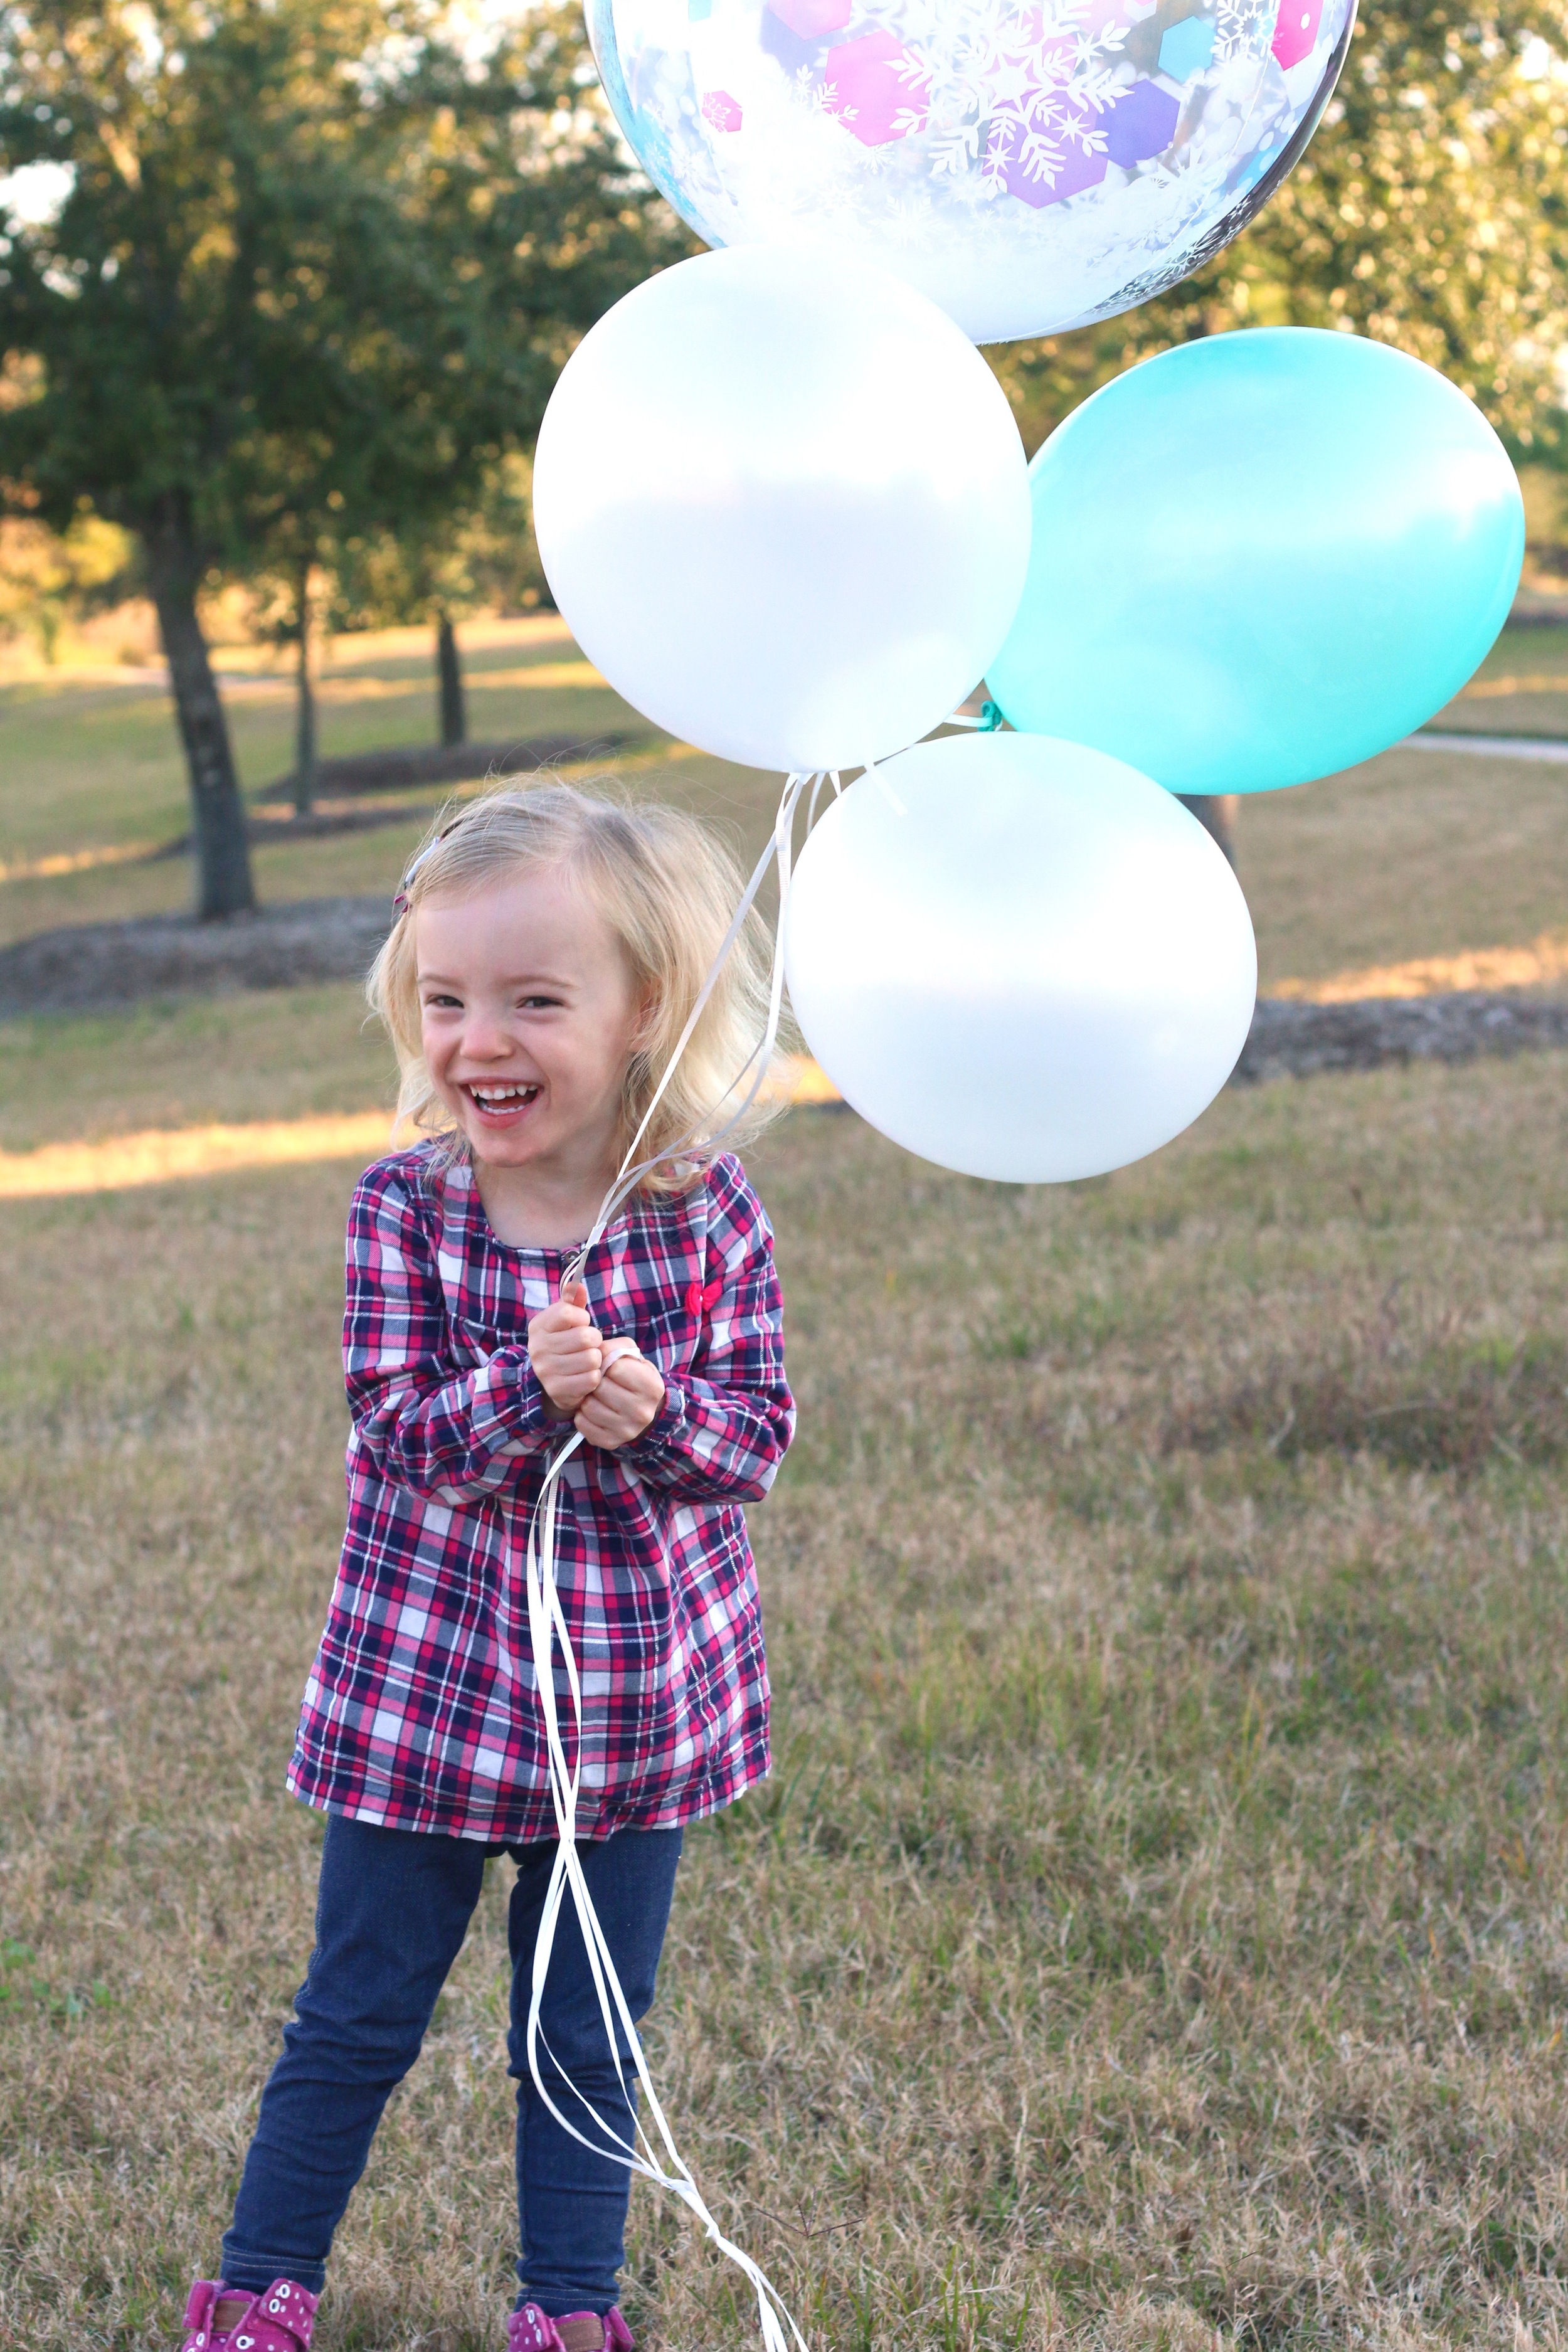
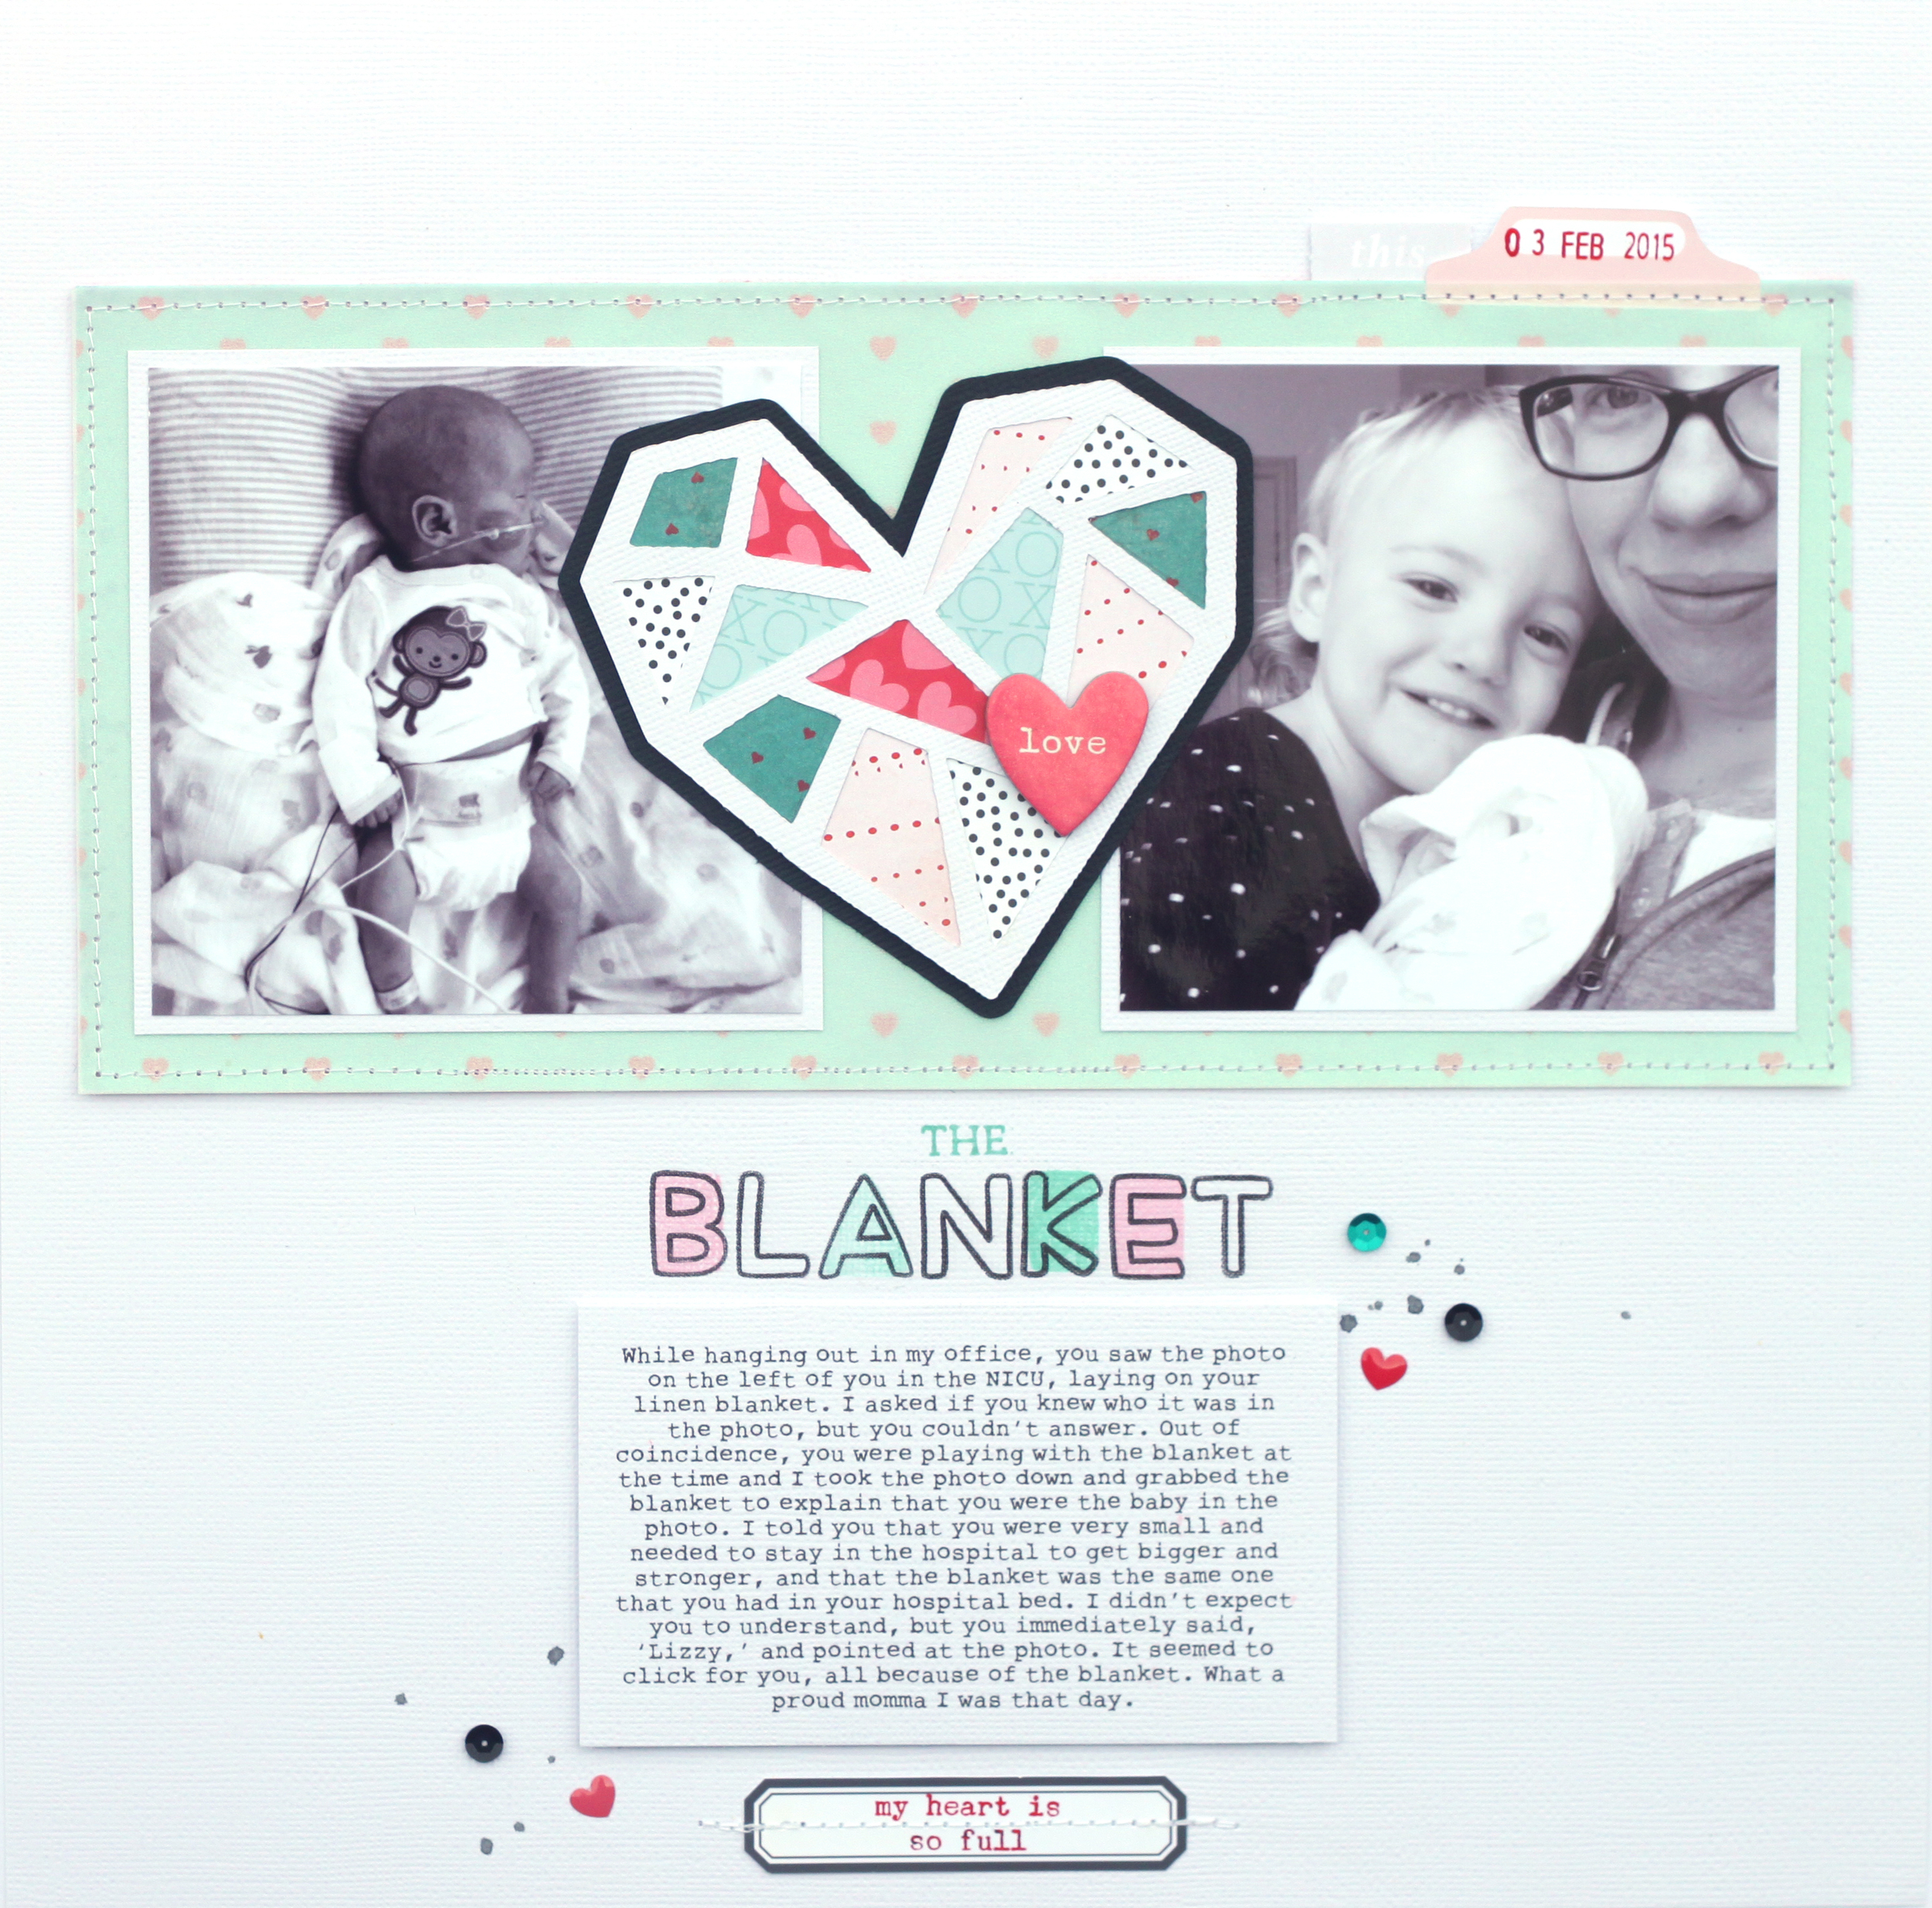
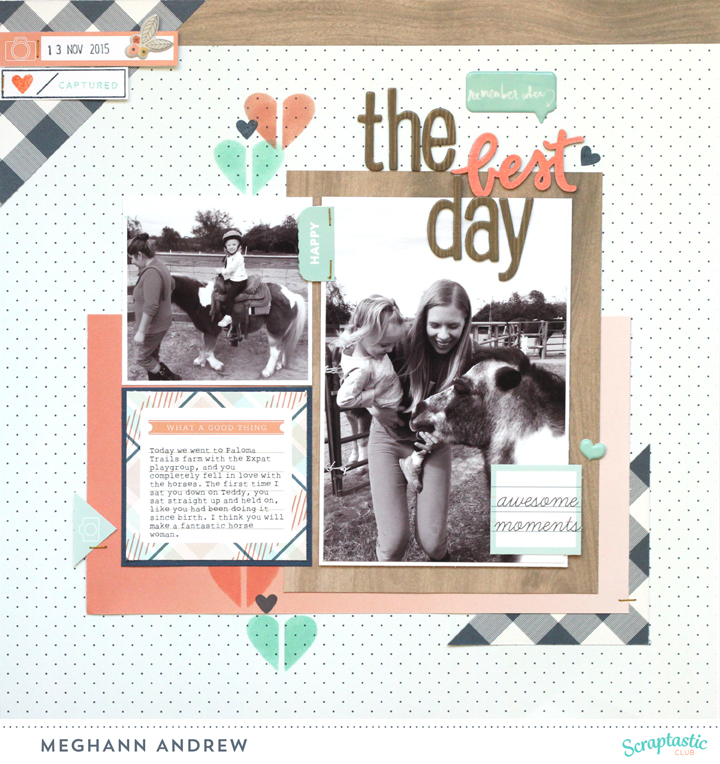
There are so many beautiful projects to inspire you in this issue, and today I'd like to share my favorite project that I submitted, from the Mothers gallery. I knew I wanted to journal about my own journey as a mother, and my friend, Donya Luana Photography, gave me the perfect photo in which to document.

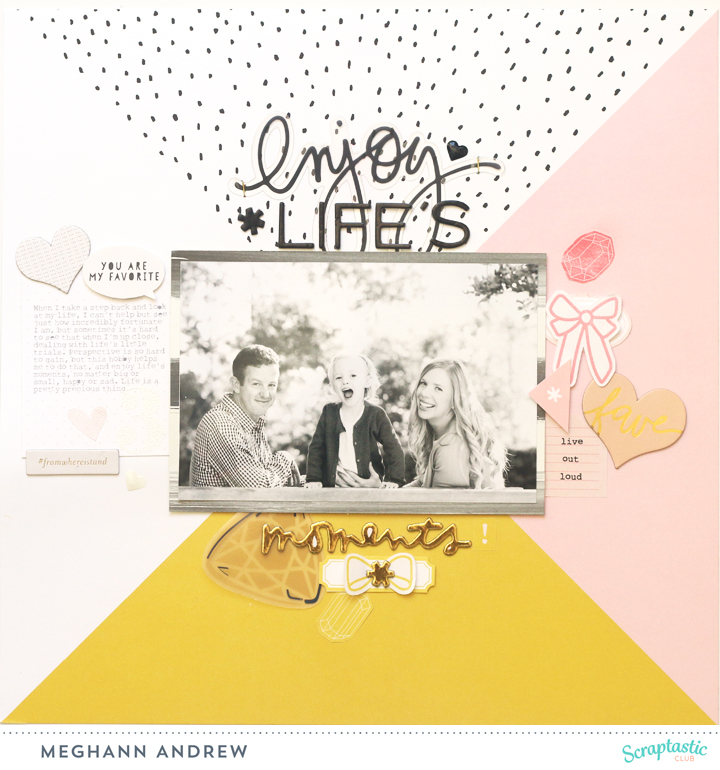
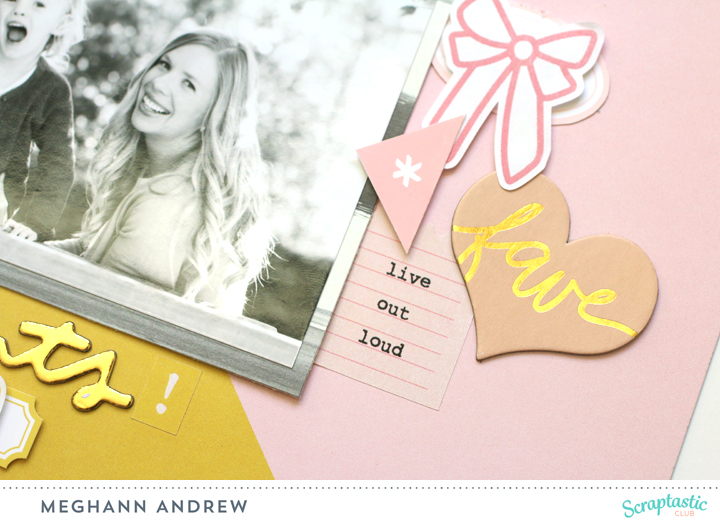
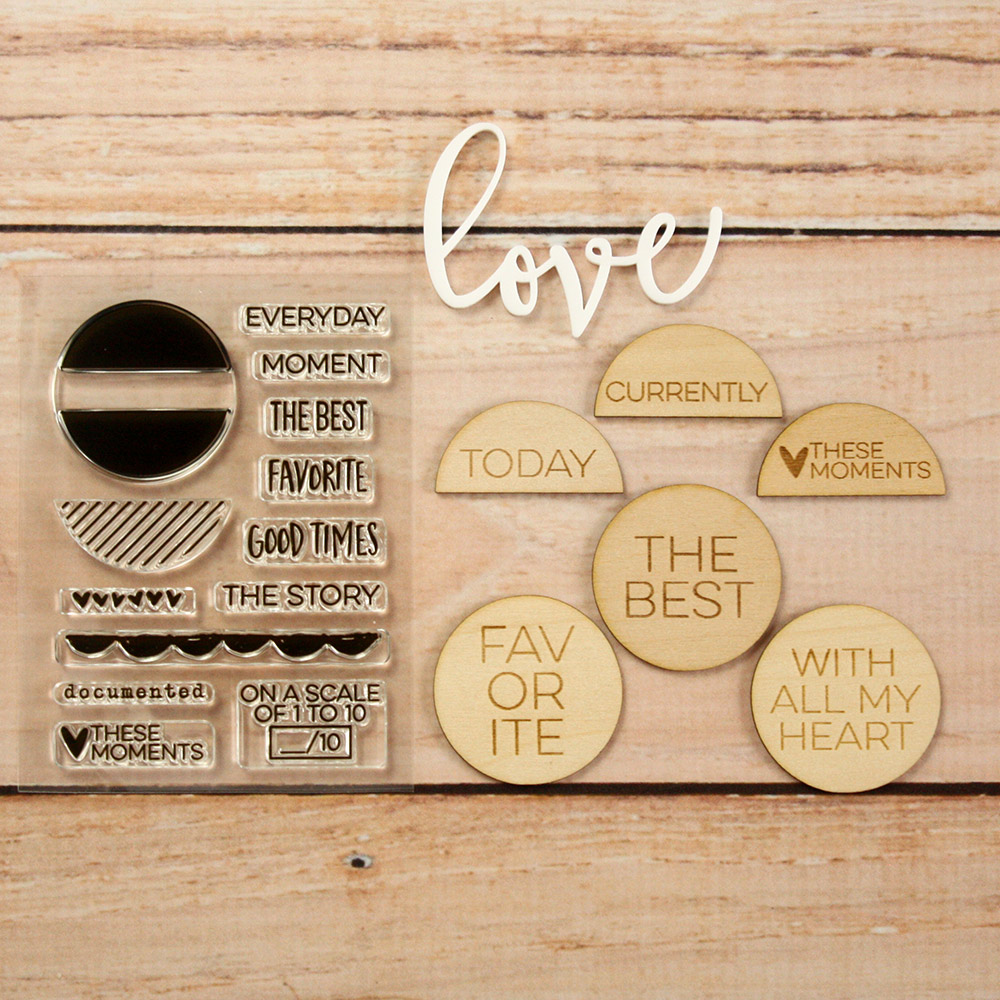
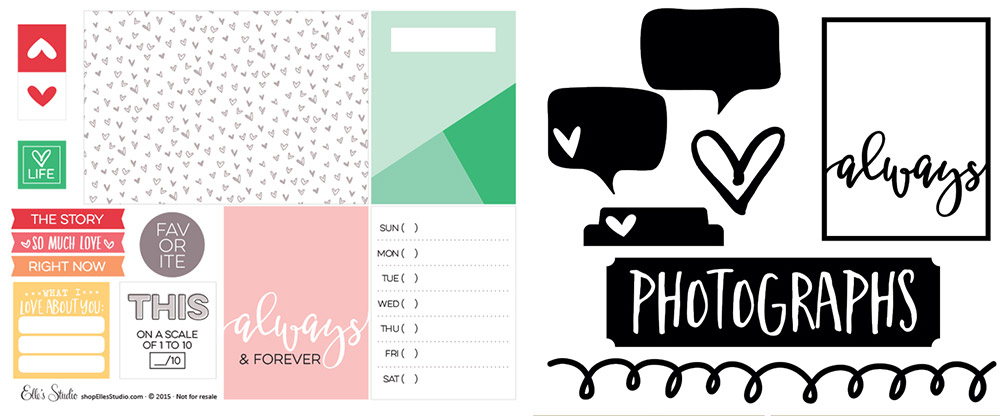
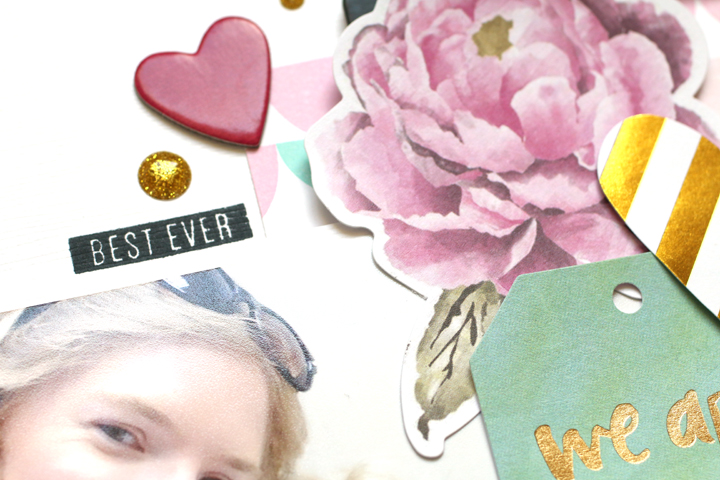
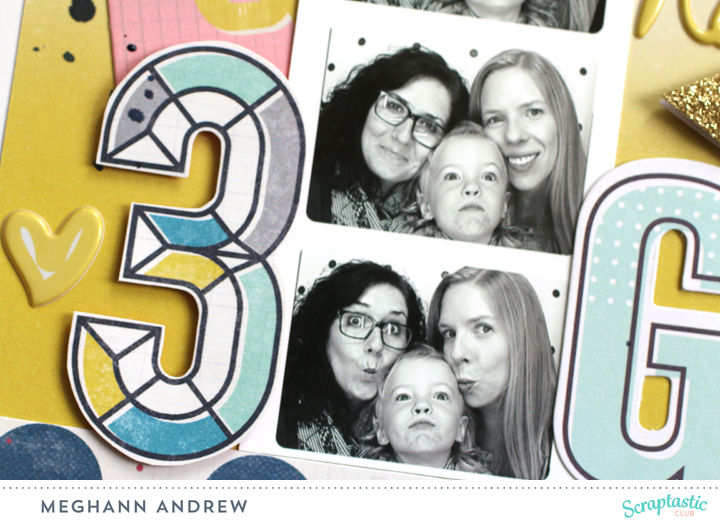
"Greatest Adventure" supplies | Paper: Bazzill Basics avalanche cardstock, American Crafts (pink polka dot), Crate Paper (green grid), Carta Bella (green floral, yellow hearts). Embellishment: Carta Bella ("the best" & heart stickers), American Crafts (large floral sticker, small, and black foam alphabets), Crate Paper (metal clip, kraft alphabet & stitching rub-ons), Elle's Studio (yellow tag). Other: Studio Calico Stamp ("everyday").

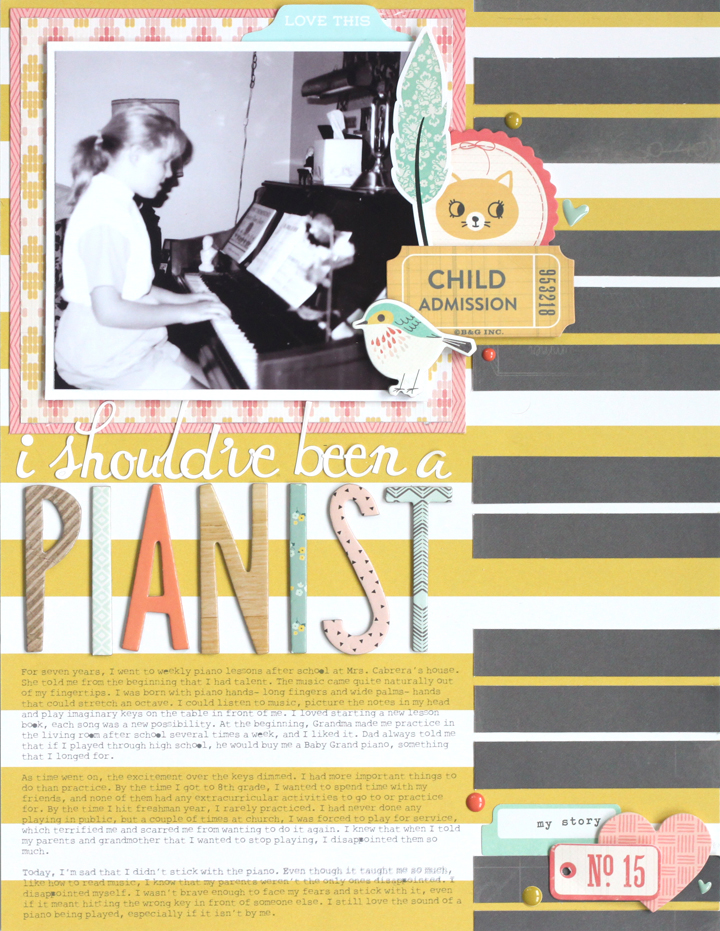
I'm not completely sure how this color scheme came together, but it is definitely not one I have ever used before. I started with older papers from Carta Bella that I had in my stash, and wanted to use. Given that my photo was black and white, I could have started with any product! The yellow, geometric hearts were a must-use on this layout, and it felt entirely wrong to cut the paper horizontally, so I opted to cut the top edges of the heart out, framing the bottom of the layout. 

Once my papers were selected, I went through my stash to find pieces of embellishment that fit the color scheme. I wanted the layout to be quite bold, so I chose a contrasting black as my neutral. I love that this layout feels simple and graphic, yet feminine and detailed at the same time. That's a perfect combination in my mind! 

Be sure to check out Jot Magazine Issue 13 in its entirety to be amazed by the gorgeous inspiration provided by the Jot Girls, as well as contributing designers! 

Jot Magazine: Boston Pocket Page Spread

The next issue of Jot Magazine is due to release tomorrow, but before you have a brand-spankin' new issue to drool over (I've seen some of the projects from my DT members, and you will be so inspired!) I'm here to share a pocket-page spread from Issue 12 that may be my favorite in my 2015 album.

If you've ever had a look at my pocket pages before, you would see that I use a monthly format and the Collect App for my journaling. With this spread below, I'm documenting in more detail a trip that we took, so I tend to go with full-size photos and longer journaling. This isn't something that I can keep up with on a weekly, or monthly basis, but I love doing it for special events throughout the year when I have a lot of photos to document. 

Boston supplies | Ali Edwards Go Story Kit, Cards: Scraptastic Club ("today & days of the week); Embellishments: Scraptastic Club (labels), Pink Paislee (star, arrow & "itinerary"), Studio Calico (flair, chipboard hearts); Stamps: Elle's Studio ("love you and me" & cutlery), Scraptastic Club ("today's story").

This spread documents our trip to Boston in September, and I took cues from my photos when choosing my color scheme. It's quite photo-heavy, and embellishment light, which I prefer. I typically only embellish my filler cards and small amounts of the negative space in my photos. 

The Ali Edwards "Go" Story Kit was perfect for these photos- both in the color scheme and in the theme to document our long weekend away in a city that we loved. I also used a lot of labels to jot down specifics from my photos. I get coordinating labels with my Scraptastic Club kits each month, but you can also find some (for free!) from Kaitlin Sheaffer

Boston Right.jpg

To add embellishment to the "Go" kit, I used pieces from the Pink Paislee Atlas collection- it paired perfectly with the kit and worked well with the travel theme. 

Negative space in my photos were the perfect place to house small groupings of embellishment. This photo is one of my favorites from the entire trip, and printing it in black and white made it really stand out in the spread.

Be sure to check out the Jot Magazine home page tomorrow, when Issue 13 will be ready to peruse with a cup of coffee! You will be amazed at what the Jot Girls have in store for you! 

Principle Power Preview Process Video

Hi there! If you need a quick tip to create emphasis on your layouts, and have 5 minutes to spare with a cup of coffee this weekend, check out my new process video and preview of my class, Principle Power, at Big Picture Classes.

This class, which includes 5 lessons, 14 layouts and 5 videos, will walk you through the principles of design, and teach you how to use these principles to create well-designed, intentional layouts that get your stories told!

You can start your free month-long trial to Big Picture Classes by clicking through to the Principle Power classroom, creating a new member account and using the promo code LOVE.

Have a great weekend & I hope to see you in the classroom!

Tangerine and Vanilla Bean Marmalade

There are a few things that I look forward to in winter: cooler temperatures, allowing us to spend extended periods outdoors, winter holidays, and citrus fruit. Here in southern Texas, our winters are quite mild, and come December and January, the tangerines and lemons are ripe for picking. Having a good friend with a humongous tangerine tree definitely has its perks, and I don't mind picking for a couple of hours in the beautiful weather to take home a few bags of the sweet, juicy fruit.

Now, if you're one of my British friends, who are often marmalade purists, you appreciate the bitterness that comes with traditional marmalade. I, however, do not, which is why I was on the hunt for a different recipe. After a bit of searching, I found the best solution to my marmalade malady and tweaked it a bit to fit my tastes. Be warned, that when you finish the last jar, tears will be shed, and you will be wishing for winter's return.

Tangerine and Vanilla Bean Marmalade

(recipe adapted from Lemons and Lavender)

Ingredients:

  • 4 lbs. tangerines, washed, blemishes cut off of the skin, and cut in half lengthwise
  • 2 Meyer lemons, washed and cut into quarters
  • 9 cups of water
  • 4 vanilla beans, cut in half and split down the center with a sharp paring knife
  • 6 cups sugar
  • 8 8oz. canning jars, seals and rings

Process: 

  • Put the tangerine halves cut side down on the board and cut into 1/8" slices. Do the same with the lemon slices and place all of the fruit in a large bowl. I like my tangerine rind to be quite thin, but if you like your marmalade quite chunky, you can made the slices wider, at 1/4"

  • Add 9 cups of water, cover with plastic wrap and allow to sit at room temperature overnight.

  • Transfer fruit & water mixture to a large pot (mine is 8 quarts and it works well for when the marmalade is boiling.)

  • Using a sharp knife, open up the slit that you made in the vanilla bean & scrape out all of the seeds, placing them in the pot with the fruit and water. Don't worry that they are all stuck together- when the mixture boils, the seeds will separate. Add the vanilla beans themselves into the pot as well. 

  • Bring the mixture to a boil, then reduce the heat and allow it to simmer, uncovered for 1 hour and 15 minutes.

  • Remove the pot from the heat and add in all 6 cups of sugar. Stir well, and the sugar will dissolve in the hot mixture. Add a candy thermometer on the side of the pot so that you can check the temperature of the marmalade. Put the pot back on the stove and bring to a rolling boil, until the thermometer reads 220 degrees Fahrenheit, which will take about 1 hour and 15 minutes. You will start to hear that the boiling sounds differently, since the mixture is getting thicker. Start watching it closely around the 1 hour mark, and as soon as it reaches 220, take the mixture off of the heat. When it is getting close, you will want to get another large pot of water up to a boil, so that you can process your jars in the next step.

  • Divide the hot marmalade into eight 8oz. canning jars, placing a vanilla seed pod half into each jar. Put the seal on top and tighten the ring. Bring another large pot of water to a boil and place the jars of hot marmalade into the boiling water for 5 minutes. Remove from the boiling water and place on a rack to cool. You will hear the tops pop as they come down in temperature. By the time they are room temperature, you shouldn't be able to pop the top of the seal, and they are safe to keep in the cupboard. If you prefer to skip this step, you can keep your marmalade in air-tight containers in the fridge for 2 months.

Off the Cuff Video Series: Be You

Have you ever had a photo that just seemed like it was "made" for a certain kit or scrapbooking product? That's how I felt putting together this layout with the Just a Girl kits from Scraptastic Club

This layout was so fun to put together! Want to know why I did what I did? Check out my YouTube feed for the process video in my new series: Off the Cuff. In these videos, which I hope to do once a month, I will show you my process from start to finish, on a layout that I have not designed beforehand. I just have a photo and a kit, and I'm starting without a plan in mind! 

So, if you have about 30 minutes to spare, grab a cuppa and join me for Off the Cuff: Be You. 


Color-blocking with Scraptastic's Just a Girl Kits

I'm still enjoying the lovely January 2016 Just a Girl kit & add-on (both are sold out, but click on the links to see contents!) from Scraptastic Club, and today I'm here to share a new layout with you that utilizes a fun technique: color-blocking! 

I absolutely loved the background paper from Studio Calico, and wanted to use the four different triangles of color as a starting point in designing my layout. 

There were so many pieces of embellishment in the kits to be able to create a color-blocked design, keeping the pink embellishments in the pink triangle, the yellow embellishment in the yellow triangle, and so on. The 'live out loud' sticker was absolutely perfect for the photo of my daughter shouting during our family photoshoot last fall. 

To make my photo stand out, I backed it with a Scraptastic exclusive black painted stripe patterned paper and adhered it with dimesional adhesive.

EnjoyMoments_closeupblog.jpg

The white triangle was the most difficult to fill. Using a 3" x 4" journaling card from the cut-apart sheet, I cut off the colored top and kept the white polka-dot bottom. I typed my journaling in a light grey instead of black & embossed a '3' from the Just a Girl stamp set in the bottom corner. A few Project Life chipboard pieces, a speech bubble cut from patterned paper and an enamel heart later, I was finished.

If you don't have the Just a Girl kits, or the Studio Calico patterned paper to create this quadrant-designed layout, it would be easy to duplicate with four triangles of cardstock or patterned paper! Happy creating! 

Elle's Studio February Kit Reveal!

Welcome! Today is the day for the February Elle's Studio exclusive kit reveal, and I'm excited to show you my projects! But first, let's take a look at the exclusive kit and add-ons:

There is such a great range of colors and themes in this kit to document any story. Plus, there is huge amount of content here with 3" x 4" cards, smaller tags, and even tags perfect for embellishment. 

The Everyday stamp and The Best wood veneers add-ons this month just knocked my socks off! I love the circle shapes and the clean font. 

The amazing digital cut file and Always printables are so versatile, and perfect for using over and over again on your projects! This month, I started with the "always" frame cut file to get one of my favorite photos of my daughter in my album.

"Always Follow Your Heart" Elle's Studio supplies | February exclusive kit, February digital cut file, The Best wood veneers, Cienna paper collection pack, Thankful Bits and Pieces, Thankful stickers, Hugs and Kisses printables, letter and number stickers- yellow. Other supplies: Heidi Swapp cardstock die-cuts and chipboard, enamel dots, Martha Stewart acrylic paint. Photo credit: Donya Luana Photography.

I absolutely love how the "always" frame worked with the "follow your heart" die-cut to create my title. This layout was really created as an excuse to print the photo, so there isn't much journaling required. I only added a row of embellishment along the right side, which included both Elle's Studio product, as well as some Heidi Swapp chipboard and die-cuts from my stash to bring in the plum color in my daughter's sweater.

"You Love Whole Foods" Elle's Studio supplies | February exclusive kitThe Best wood veneers, Love You stamp, Everyday stamp, letter and number stickers- grey, letter and number stickers- red, Thankful paper collection pack. Other supplies: American Crafts gold Thicker word & large enamel dot, My Mind's Eye brad and gold heart sticker, Studio Calico puffy dot and enamel dots, Stampin' Up! ink, Martha Stewart acrylic paint.

This layout definitely feels a bit more "me" than my previous project, although I love them both! This layout records a story about my daughter's love for our weekly trips to Whole Foods, and I also stamped a lot on this layout, something I love to do! I love the versatility of the mid-month release Love You stamp, which I used to stamp "seen & noted" along the bottom of my layout- almost like adding a strip of patterned paper! The Everyday stamp can also be used to create patterns with the broken circle, or to make an embellishment, like I did here. 

This month Elle also has a free shipping special! Orders of $50 or more ship for free with coupon code LOVEYOU and this includes international orders! 

Be sure to check out the design team gallery for new inspiration on how to use your February exclusive kit! Happy creating! 

Jot Magazine February Mood Board: "You & Me Until Forever"

It's a new month, which means that Jot Magazine has a new, beautiful mood board to inspire you! 

Now, if you're not a purple kind of gal, don't be scared. I have to admit, that I was when I first saw this board, because I thought that I didn't have any of the purple tones in my stash. However, I was surprised to find quite a few items that bordered on purple that worked perfectly. 

"You & Me Until Forever" supplies | Cardstock: Bazzill Basics (avalanche). Patterned Paper: Scraptastic Club, Crate Paper. Embellishment: Simple Stories (chipboard heart, chipboard framebrad, heart die-cut, enamel dots), Heidi Swapp (transparent words, flower die-cut), Amy Tangerine for American Crafts (die-cut tag), Elle's Studio (stamps).

To create the layout, I used quite a few items from the Scraptastic Club Wednesday Night kit (sold out), which featured a lot of the Simple Stories "So Fancy" collection, which matched the mood board colors perfectly. I kept the layout simple, using pretty, feminine layers and just a bit of stamping. At this point, keeping things simple means that they are getting done, and I'm okay with that!

I love this tag from the Amy Tangerine Finder's Keepers collection, and feel like it was just waiting for this photo and this layout! 

My title, which I placed at the bottom of my layout, was made up of the "you and me" globe from the Simple Stories chipboard, and the Heidi Swapp transparent script, which I used because of the script saying in the mood board. I put them on top of two pieces of Crate Paper, the floral of which I am down to my last scraps.

Be sure to check out the other Jot Girl's creations and link up your own design, based on the mood board, to the Jot Magazine February mood board page to be entered to win a prize from Jot! 

Jot Magazine Issue 12: "I Should've Been..."

As I prep my project for Issue 13 of Jot Magazine, today I'm here to share a layout with you that was featured in the storytelling gallery of Jot Magazine issue 12. Our theme was, "when I grow up," and the phrase made me think of myself as a child, and what I didn't want to be when I grew up: A pianist. The photo used on the layout is me at age 7, taken by my piano teacher.

I don't have many regrets in life, but one of them is that I didn't continue taking piano through high school and into college. From the age of seven to fourteen, I went to weekly lessons, practicing for hours in between. The piano always came quite easy for me, and I wish I would have taken advantage of my natural ability. 

The yellow and white stripes on my background paper reminded me of the white keys on the piano, so I adhered black sharp and flat keys along the right side of the layout.

I couldn't quite pass up these chipboard alphas or fun patterned paper from the Crate Paper Wonder collection. I just love those big, skinny alphas! I paired them with the white script alpha from October Afternoon, so that I had a lot of contrast between the two fonts. Because my layout was 8-1/2" x 11", it was easy for me to print my journaling in the bottom left corner of my layout just under my title, once I knew where all of the other elements on the page would be placed.

A few child-like cardstock and chipboard embellishments from Crate Paper and Simple Stories were all I needed to finish off this page, which I wanted to focus more around the story, and how I now feel about giving up on something that I worked so hard on for seven years! 

Thanks for stopping by and be sure to check out all of Issue 12 today! It is full of inspiration! 

Lizzy Turns Three!

On Sunday, we celebrated Lizzy's third birthday, and for the first time, we had a big party with family and friends. Lizzy chose a Frozen theme this year, and for the first time, I didn't have much trouble finding store-bought items, however, I still made a lot for the party! Finding so much snow-themed items on 80% off clearance at Michaels definitely helped keep costs down as well.

My most time-consuming project was the "love is an open door" wreath to greet our guests. The wire mesh and ribbon were all included in the Christmas clearance items at Michaels, so it was a relatively low-cost project! 

As I have done in the past for all of our parties, I bought a couple of yards of cotton fabric from JoAnn Crafts, hemmed it on all sides, added ribbon trim to the bottom and hung it up as a backdrop for Lizzy's birthday banners, which I cut on my Silhouette Cameo. The glittery branches, which were originally $10 each, were only $2 each in the Christmas clearance, and flanked the backdrop on either side in glass vases.

Thanks to some spare cardboard boxes lying around, we created a North Mountain centerpiece and covered the entire island with white tablecloths. Elsa's ice castle topped the North Mountain and held birthday cupcakes, while the entire island had a glittering of snowflake confetti.

IMG_0030.jpg

Over the breakfast bar, we used the same curling ribbon curtain that we created for the Under the Sea themed party that we threw last year for my goddaughter, only we replaced the fish with foam snowflakes purchased at Michaels. 

Snowflakes, tissue paper pompoms and teal balls hung over the breakfast and entry tables, while Frozen swirl hangings hung throughout the kitchen.

In the doorways into the living area and the kitchen we also hung the same snowflakes on fishing line to create a curtain.

My favorite craft project for the entire party were the three centerpieces I created for the tables and breakfast bar, using paper and foam snowflakes, a #3 cut from American Crafts POW! paper with my Silhouette Cameo, and some floral picks in a Ball jar. 

Most of the food at the party had a Frozen theme, like "we finish each others" sandwiches, melte Olaf Greek yogurt cups and Anna's popcorn snowballs.

The chocolate and vanilla cupcakes with teal buttercream went over really well, and I was so pleased that Lizzy wanted cupcakes instead of the typical large cake I usually create. 

On the way out the door, the kid's favor bags were waiting for them on a tulle embellished table. 

I dressed the part, and wore an Anna-inspired outfit for the day. I really do love hosting parties, no matter how little sleep I get the week beforehand!

At the end of the day, after she had a much needed nap, I had just enough energy to take Lizzy's third birthday photos. What a difference a year makes. I know it goes without saying, but man, I love my sweet girly. Happy birthday, my little Lizzy! 

Scraptastic Club 'All of You' Kit Layout: 3 Happy Girls

I'm just finishing up with the "All of You" kits from Scraptastic Club before I break open my new January kits, and I have a new favorite layout to share with you today! 

I broke down and used one of my favorite papers in the "All of You" add-on, the yellow Maggie Holmes background paper. I wanted this layout to look different than all of the others that I created with these kits, so I decided to keep the color pink to a minimum, and emphasize yellow, teal and navy. 

All of this color was perfect for this black and white photo booth photo strip taken while a good friend was visiting from the U.K. To create my title, I hand-cut the "3" from the Maggie Holmes number paper in the "All of You" main kit, and paired it with the Fancy Pants Happy Place script word puffy stickers, which were a shop add-on for December, as well as the Fancy Pants Happy Place alphas & numbers die-cuts in the "All of You" add-on.

The Pink Paislee Cedar Lane arrow was a perfect embellishment to add in my title and added a small touch of pink.

I love printing out the kit digital files every month to add to my stash, ready to add to a project. The "no.3" and "love it here" tags were printed from the "All of You" digital files, and the exclusive flair badge finished off the corner.

That finishes it off with my "All of You" kits. To see the other layouts I created with the kit, check out my gallery link at the top of the page & keep a look out here for my projects using the new January 2015 "Just a Girl" kits! 

Elle's Studio January Exclusive Kit Reveal

Happy Sunday! It's the 10th, which means the Elle's Studio January kit and add-ons, along with the new design team gallery, are now live!

This kit, which will help you document a story, or show someone how much you care, is full of colorful tags, as well as versatile neutrals that you can use with any other product!

My favorite tags in the kit this month are definitely the black, white and grey tags, and especially the doughnut and coffee 4" x 6" tag seen here.

The add-on stamp, acrylic and vellum hearts coordinate perfectly with the kit to help you embellish your project. Hands down, my favorite new product this month has to be the 'You're the Sweetest' stamp. On my first project, I used the stamp and the kit to create an 8-1/2" x 11" layout documenting a late night treat with a friend in New Orleans, with hidden journaling underneath the coffee and doughnuts tag, which I cut to 4" x 4" and hinged with a piece of washi tape.

CoffeeDoughnuts_blog.jpg

To create those fun coffee rings, I made a little pool of black watercolor on a paper plate and dipped the bottom of my coffee mug in the liquid, then stamped it on the background cardstock.

Supplies: January exclusive kit, You're the Sweetest stampvellum hearts add-on, Thankful bits and pieces, Cienna collection paper pack

My second project of four easy Valentine's Day cards is a perfect example of the versatility of this kit! I used only tags from the kit, 1 small piece of patterned paper, 1 piece of watercolor paper, 'You're the Sweetest' stamp the vellum hearts add-on, and a few enamel dots. I only made 4 cards in one sitting, but with this kit, I could have made so many more! 

I especially loved the more masculine tags in the kit to create a Valentine perfect for that special guy in your life.

Also in the new products category this month are the 'This is Love' printablesJanuary cut files, and 'All My Heart' 12" x 12" cut file, so be sure to check them out too! 

Remember that the kit is available today for the launch price of $9.99, and after midnight PST, the price increases to $11.99. The kit and add-ons are limited, so once they've sold out, they are gone for good, so be sure to pick up your kit today! 

Coming soon: Principle Power at BPC!

Since I began designing with product in the scrapbooking industry, I knew that I ultimately wanted to teach others how to get there memories down on paper and really be proud of the outcome. Now, I'm so excited that I have that opportunity with Big Picture Classes. My course, which directly relates to my professional interior design career, Principle Power, will be released on Monday, January 11th, and I'd love for you to join me in the classroom! 

Swing_closeup2_BPC.jpg

In this five lesson course, I will be explaining the principles of design, and how they directly relate to your scrapbook layouts, with 14 projects and a process video for each lesson. By the end of the course, you will understand:

  • Balance: how to use the three different types of balance on your layout.
  • Contrast: how it relates to each design principle.
  • Emphasis: by using the design itself, you can show the viewer what is most important on your page
  • Repetition and rhythm: to keep the viewers eye moving around your page
  • Unity and harmony: to tie all of the principles together to make a pleasing visual statement.

I am extremely proud of the content of this course and the layouts I created for it are some of my favorites... ever. If you're already a member of Big Picture Classes, go to the Principle Power page and click 'save for later,' which will put the course in your 'classes' tab under your profile. If you are not currently a member, click the 'start a free trial to take this class' button at the bottom right corner of the Principle Power page. You will have a two week, free trial period, and can cancel at any time without any cost!

All of the lessons will be available starting Monday, January 11th, and you can take this class at your own pace. I will always be available to answer any questions you may have & I'm even planning a live chat to get the class participants involved together! 

I am so excited to start the journey into passing this knowledge onto others memory-keepers, and I hope you will join me in the Principle Power classroom! 

Elle's Studio 2016 Design Team

Hello and happy 2016! I have exciting news to share today...

I am so honored to be representing Elle's Studio again for 2016, along with other amazingly talented ladies: Alissa FastAllie StewartCandi BillmanDaniela DobsonGina LiderosJamie LeijaJen SchowJill SprottKay RogersMaggie MasseyMeghann AndrewMelissa MannMichelle WedertzNancy Damiano, and Toni From

Be sure to check out the January 2016 exclusive kit, add-ons and new design team gallery which will be revealed on January 10th at 8am PST. Here's a little sneaky sneak from one of my gallery projects this month.

All kits and extras (stamps, acrylics, etc.) are only available while supplies last, so be sure to pick up your kit on the 10th for only $9.99 for the launch day special price. After midnight, the kit price goes up to the regular price of $11.99. 

Be sure to check out all of the links above to see design team project sneaks, as well as the Elle's Studio blog to see January kit sneaks. Be sure to stop back here on the 10th to see my projects in full, too. 

Happy Monday! 

100 Documented Memories of 2015

This is what 100 documented memories look like, all created in 2015. Since I started scrapbooking in 2008, my process has evolved in major ways, and I feel like this year I can say that I'm finding my 'niche.' This year, my layouts have been much more simple, and have focused more on telling a story than in years past. One thing that hasn't changed is my love of color, pattern, and white backgrounds. Here are a few of my absolute favorites from this year's layouts:

"As Long As" feature in Jot Magazine Issue 9 | This layout tops my list mainly because of the photo and the stamped title. I had the image of this layout in my head, and I executed it exactly as I had hoped.

"Collect Moments" from Jot Magazine July mood board | This photo of my husband and my daughter just gets me. Pair it with coordinating supplies and it's an instant favorite layout.

"Love Built Our Happy Home" created for Chickaniddy Crafts | This is one of those layouts that features a photo of the three of us, a rare occurrence since I'm usually behind the camera. I love how happy it makes me, especially with a grey, green and orange color scheme.

"Muddy Puddles" created for Elle's Studio | The story takes center stage in this layout, and this action shot of my daughter jumping in a puddle just makes me think of her at the age of two. 

"Blanket" created for Scraptastic Club | This layout is easily my favorite of the year. The photos and the story, along with another stamped title, solidify this decision for me.

"Tom + Chee" created for Elle's Studio | This layout came together so quickly for me, using my favorite kit from Elle's Studio for the entire year. The process & the fun I had creating this layout make it a favorite. 

"The Twos" created for Scraptastic Club | I've been experimenting a bit with paints this year, and I loved the process of painting the background for each of these little pie-chart cut files. The photo of my daughter is just classic, too.

"Genius" created for Scraptastic Club | Over the course of the year, I've gradually become an 8-1/2" x 11" scrapbooker. There is something about the ratios that just make me happy with this size as opposed to 12" x 12". I love this layout, not only because of the memory it documents, but also because of the energetic color scheme and the custom stamped stars that I used as embellishment.

"Hello Beautiful" created for Elle's Studio | There aren't many words that I can use to describe how much I love this one, mainly because of the photo, taken on my daughter's second birthday. I used the Elle's Studio Cienna collection, my favorite from ES for the year.

If you've made it this far, thank you so much for reading this blog and supporting me in 2015! I can't wait to share what is happening for me in 2016, including a new class at Big Picture Classes, debuting next month! Stay tuned for details! 

Have a happy and blessed 2016! 

Scraptastic Club 'All of You' Kits Layout: Fro-Yo Time

Hey there! The end of the year is near, and I'm creating my final pages of 2015, although, we've made so many memories this year that I could document them through 2016! Today I'm here to share another layout using the Scraptastic Club December 2015 'All of You' main kit + the add-on

How fun are these kits, right? I LOVE this photo of my daughter eating her favorite frozen treat in her Halloween costume, and it was just waiting for some fun product to match it with. 

I used the transparent overlay from the Maggie Holmes Shine collection over the watercolor Studio Calico paper, which made it super easy to print my journaling directly on the background paper before adhering the polka-dot overlay.

FroYo_closeup2.jpg

My initial idea for this layout included the numbers cut from a piece of the Maggie Holmes Shine paper included in the main kit. I love the color and playfulness they add to the layout.

In addition to the main and add-on kits, I also printed the 'All of You' print and cut digital page and used the 'hooray' tab. The 'hers' 3" x 4" card came from the December This Life Noted kit. I also had to use the awesome exclusive word puffy stickers to add 'time' to my title.

So that's another favorite memory from 2015 in the books! I'm working on knocking out a few more layouts using the 'All of You' kits before we ring in 2016 and start a whole new year of memories! Thanks for stopping by! Check back tomorrow for a look at all of the layouts I have created this year, and a re-cap of a few of my favorites! 

Scraptastic Club 'All of You' Kit Layout: 3 Happy Friends

Help there! I am trying to get back into the swing of things after a long break from scrapbooking to visit Disneyland, then my parents house for Christmas! Whenever I take a break, I feel a bit rusty pushing paper around for the first time, but the 'All of You' main kit from Scraptastic Club helped me get right back into my groove.

Here's the layout I created. Although the kit seems to include a lot of pink, I created a layout without a touch of it to coordinate with the colors in my photo.

I've had this photo of my daughter's three favorite infant toy sitting around for quite some time, just waiting for the perfect supplies. Putting them up in the attic for storage was hard for me- it meant that I no longer had a baby and had a little girl. Before I packed them away with the other infant supplies, I snapped a photo of them on our breakfast table. These were the toys that were always on the diaper bag, the ones that she always reached for and played with while teething, while riding in the car, etc.

To create this layout, I used the 'All of You' main kit and the word puffy stickers, an add-on item for December. I loved adding them underneath my title. 

When you subscribe to the club, you get a member exclusive every month, and this month it was a fantastic pie shape stencil. I used my inks and foam daubers to add these shapes along the left side of my layout, and one by my title. I love the playful nature it adds to the page. 

I'm a big fan of making things work, so when I was looking for a folder tab to put at the top of my photo, I noticed this exclusive rectangular tag in the kit. It was exactly the color and sentiment that I needed, so I just trimmed it to the tab shape with some scissors. It was the perfect addition to my page.

I love that I've documented these toys that mean so much to me, and the 'All of You' kit was just perfect for doing that. Thanks for stopping by! Be sure to stop back before the new year to check out my favorite layouts from 2016! 

Elle's Studio December Exclusive Kit Reveal

Today is the December exclusive kit reveal at Elle's Studio and I am so excited about this reveal for many reasons! 

EllesStudio-Dec-Kit1web.jpg

The add-ons this month include the Love & Thanks stamp set and the white acrylic stars.

EllesStudio-Dec-Extras.jpg

And don't forget the digital cut files and Holiday printables

EllesStudio-DecDigitals.jpg

Now on to my layouts this month, which I really love! 

This layout uses the exclusive kit, Tis the Season stamp set and Joyful collection paper to document our Christmas Day 2014. My daughter was released from the hospital on Christmas Day, so it was a pretty exciting day for us.

I am so excited about this layout, that I created with the exclusive kitTis the Season stamp set, and Joyful collection paper. As soon as I saw the "Best of 2015" tag in the kit, I knew I had to create this layout. These photos are my absolute favorite from the year, so looking at this layout just makes me happy.

Not only am I excited about my layouts, but I am also excited about the exclusive kit mini course that I've been putting together for the past week. It includes three amazing contributors- Missy Whidden, Carson Riutta and Karen Baker- and so much inspiration to put your kit to good use! 

Remember that the kit is $9.99 today only and you can also add the exclusive kit for only $4.99! Happy creating!  

Scraptastic Club "Feels Like Home" Layouts

Since it's the last day of the month, I wanted to share my November "Feels Like Home" kit layouts from Scraptastic Club!

"The Best Day" supplies | Feels Like Home kit, Feels Like Home add-on, Feels Like Home digital files, Ain't No Sunshine stamp set

This layout was actually created for the Sketchy Thursday blog post, but as it was the week of Thanksgiving, I completely forgot to post it to the Scraptastic Club blog! Here's a look at the sketch: 

Hey Turkey supplies | Feels Like Home kitFeels Like Home add-onFeels Like Home digital files, This Life Noted November 2015 digital filesNovember 2015 This Life Noted kit

This fun layout documents a Thanksgiving craft that my daughter created, with my help. I love adding in bits from the This Life Noted kit and digital files. 

"Girlies" supplies | Feels Like Home kitFeels Like Home add-onAin't No Sunshine stamp set, Feels Like Home stamp set

This cute layout was featured on the Scraptastic Club blog as a challenge to use two 4" x 6" photos on a layout. 

"Just Play" supplies | Feels Like Home kitFeels Like Home add-on, November 2015 This Life Noted kit

This layout, which turned out completely different from the rest (I love how you can get such a different feel from the same kit!), was shown in a previous blog post. Check it out for more info! 

Thanks for stopping by. Be sure to check out all of Scraptastic Club's kit subscriptions for more info! 

Three Years of Christmas Cards

It's almost December 1st, so it's about that time to mail your Christmas cards! Once Lizzy was born, I stopped making my own stamped, layered cards to purchase photo cards. I love sending a visual update of us to our friends and family every year. While researching the multitudes of companies that offer them, I came across Minted.

This is what our past three years of Christmas cards look like! Every year, I have loved our card even more than the previous one. Today is the first day of the Minted Black Friday sale, which runs through Friday 11/27, and offers 15% off your purchase, so I'm here to tell you three reasons why you should take advantage of this great deal to order your cards from Minted!

1. No matter what style you like for your cards, Minted has something for you. From clean and graphic, to whimsical, they have you covered. Plus, there are fantastic options created by independent artists in both foiled and flat designs. Don't want to send Christmas cards? No problem. You can choose more general holiday cards or even New Years cards instead.

2. The quality of the cards are amazing. The thickness and texture of the paper is great, and the colors are spot on to what you see on your screen. They actually feel much more expensive than what you pay for them. (That is, if you're a sucker for stationery, like me.)

3. The Minted website makes it so super easy to choose a card that is perfect for you. When you set up a profile, you can upload your photos and see multiple options on your screen. I especially love all of the different filter options, especially the one that allows you to choose where your greeting appears on the card front.

Once you select a card design, you can customize it and save it, so that you can compare all of your favorites side-by-side. How easy is that?

I have been so impressed with Minted's quality and service, that I just keep going back to them each year. Do you take a while to decide? Not to worry! You can opt not to receive a digital proof, which takes a few days off your order. I just made sure that everything was spelled correctly on the screen and chose "express service," which also saved $10 off my order. I ordered my cards on Sunday evening and they arrived on Thursday afternoon. 

Be sure to order your cards between 11/25 and 11/27 to receive 15% off your order with no minimum purchase, or 20% off your order of $150+. No code needed! 

Check out the past designs that I've chosen here: 

Note: This blog post contains affiliate links, as I am an affiliate for Minted.com. I have not been paid by Minted, and every order placed has been paid fully by myself, with no special discounts. I just like to share products and companies that I love with others! By clicking on these links, you will not be paying any more, but a small percentage of your purchase will go towards this blog. If you order, and love your Minted experience, I'd love to hear about it! Thanks!