Elle's Studio January 2018 Reveal!

Wow! I'm so excited to be a part of Elle's Studio, a company that I truly love, for another year! 2018 is going to be great for ES. There is a brand new team and so much good stuff on the horizon. For now, let's talk about the brand spankin' new January 2018 kit and add-ons* that just hit the shop! I've shown all of the new product in the following unboxing video. Grab a cuppa and take a look! (*All product links contained in this post are affiliate links. You don't pay any extra, but I get a small percentage of your sale! Thanks for your continued support of my YouTube feed and this blog!) 

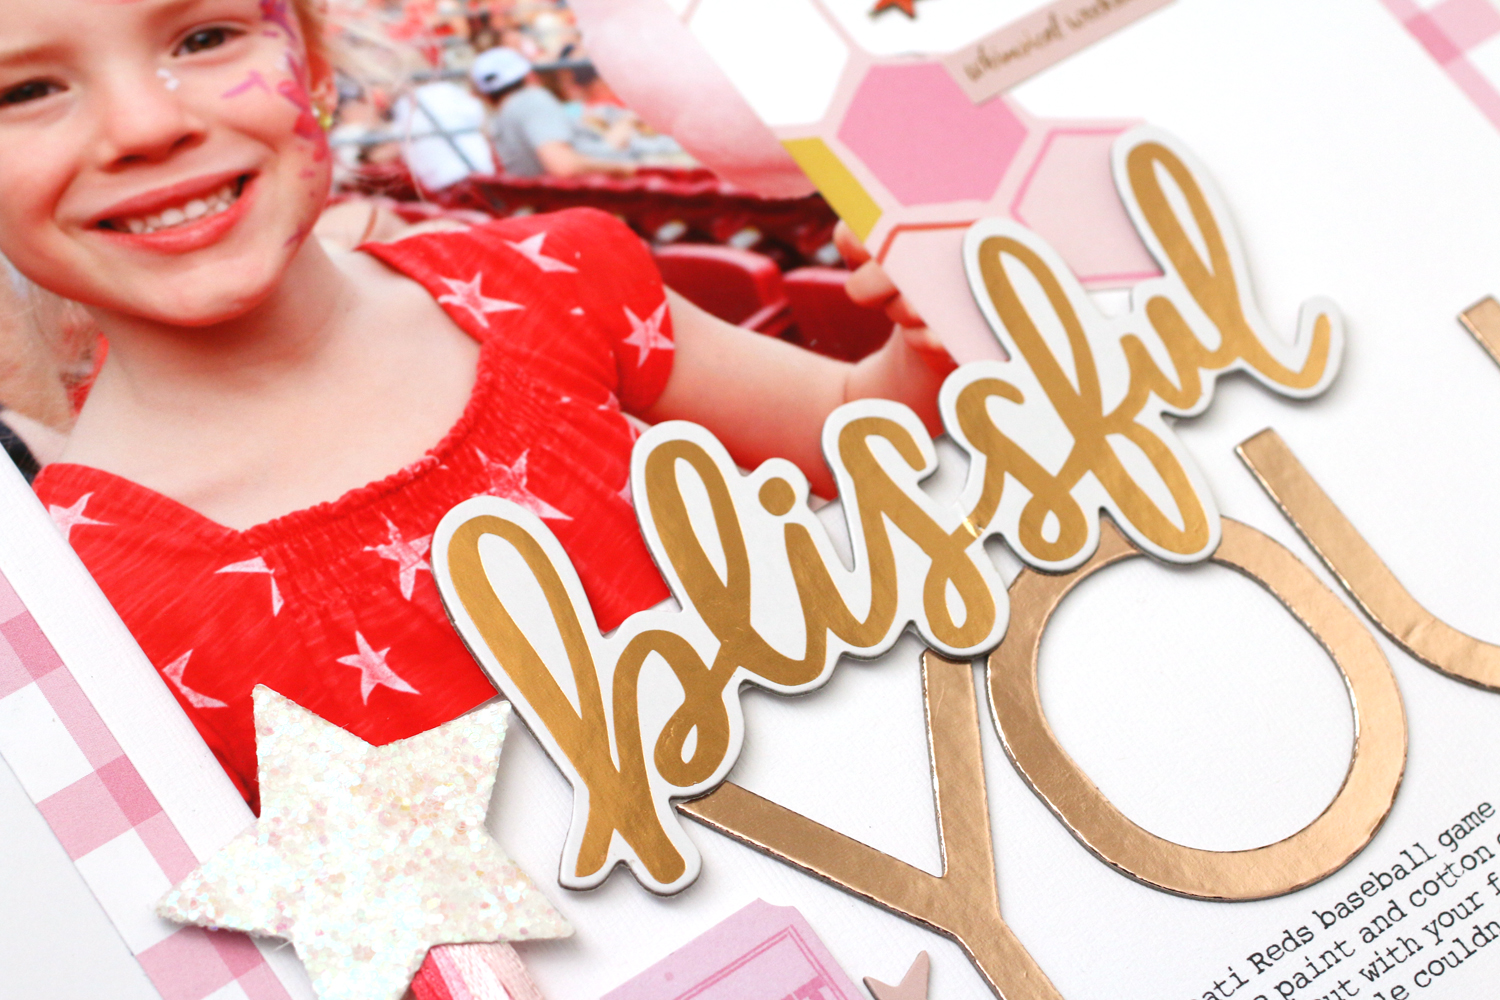
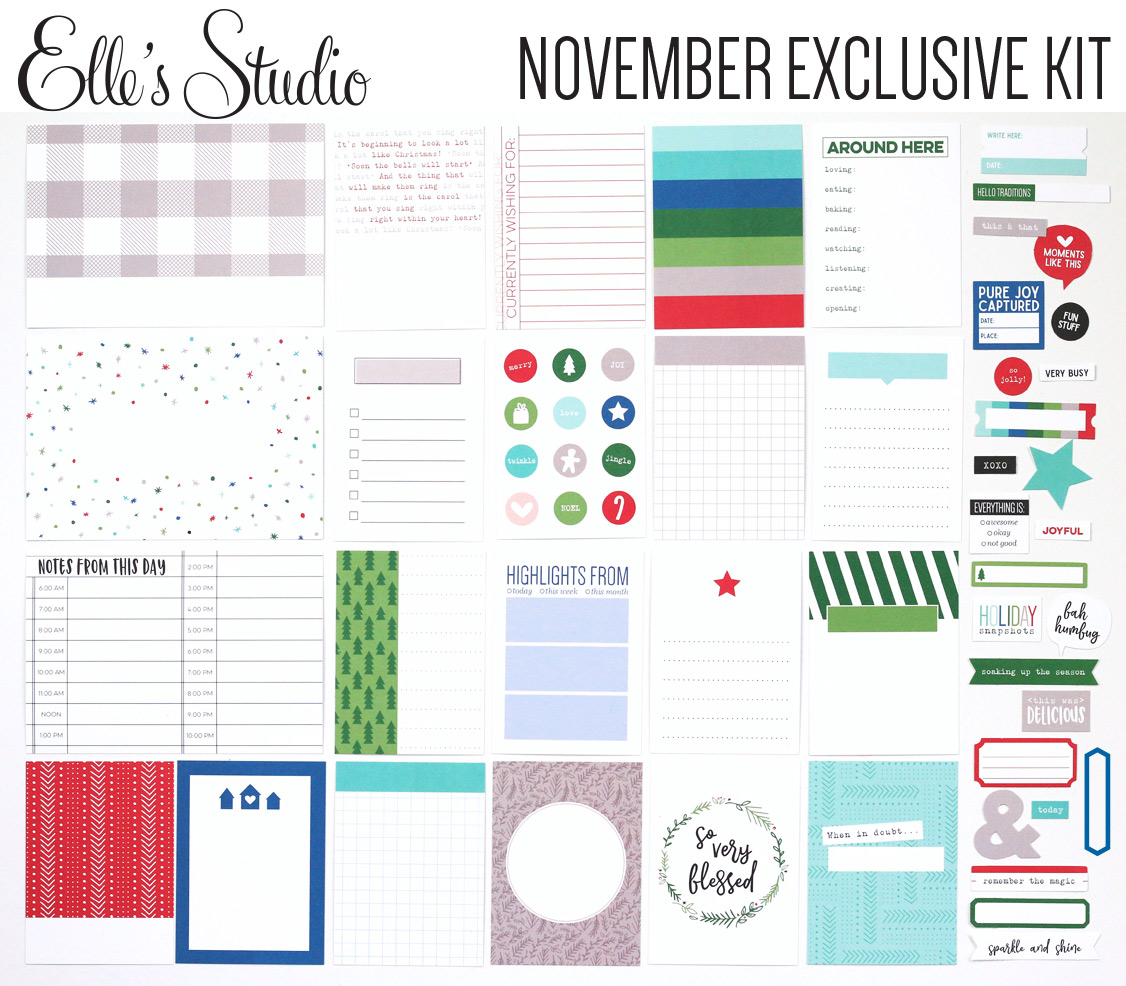
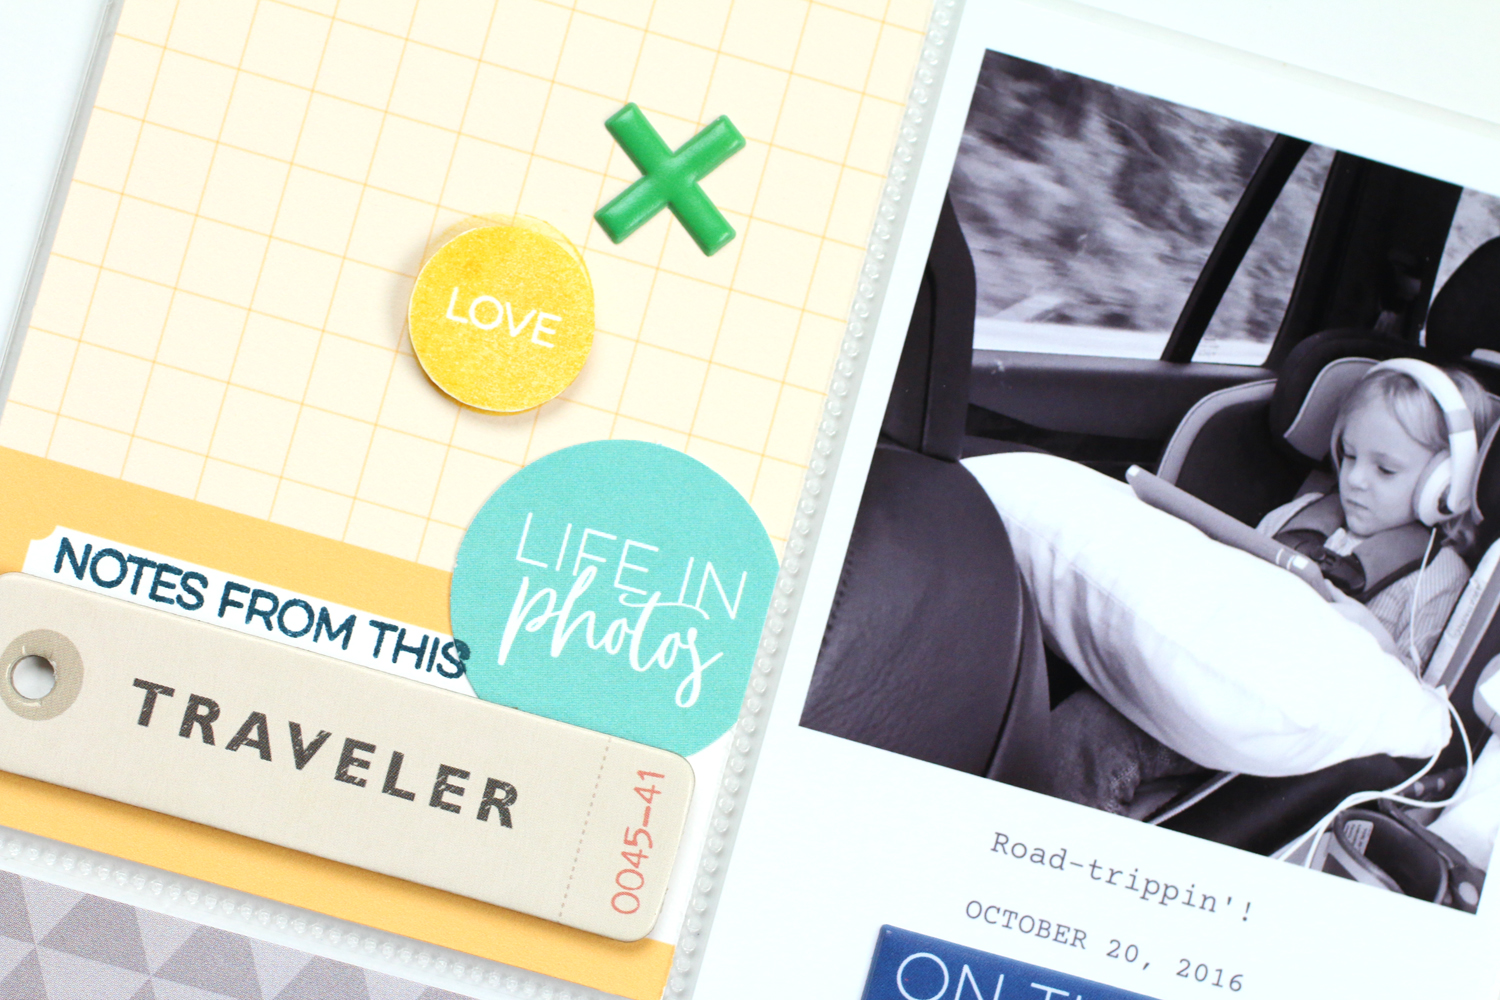
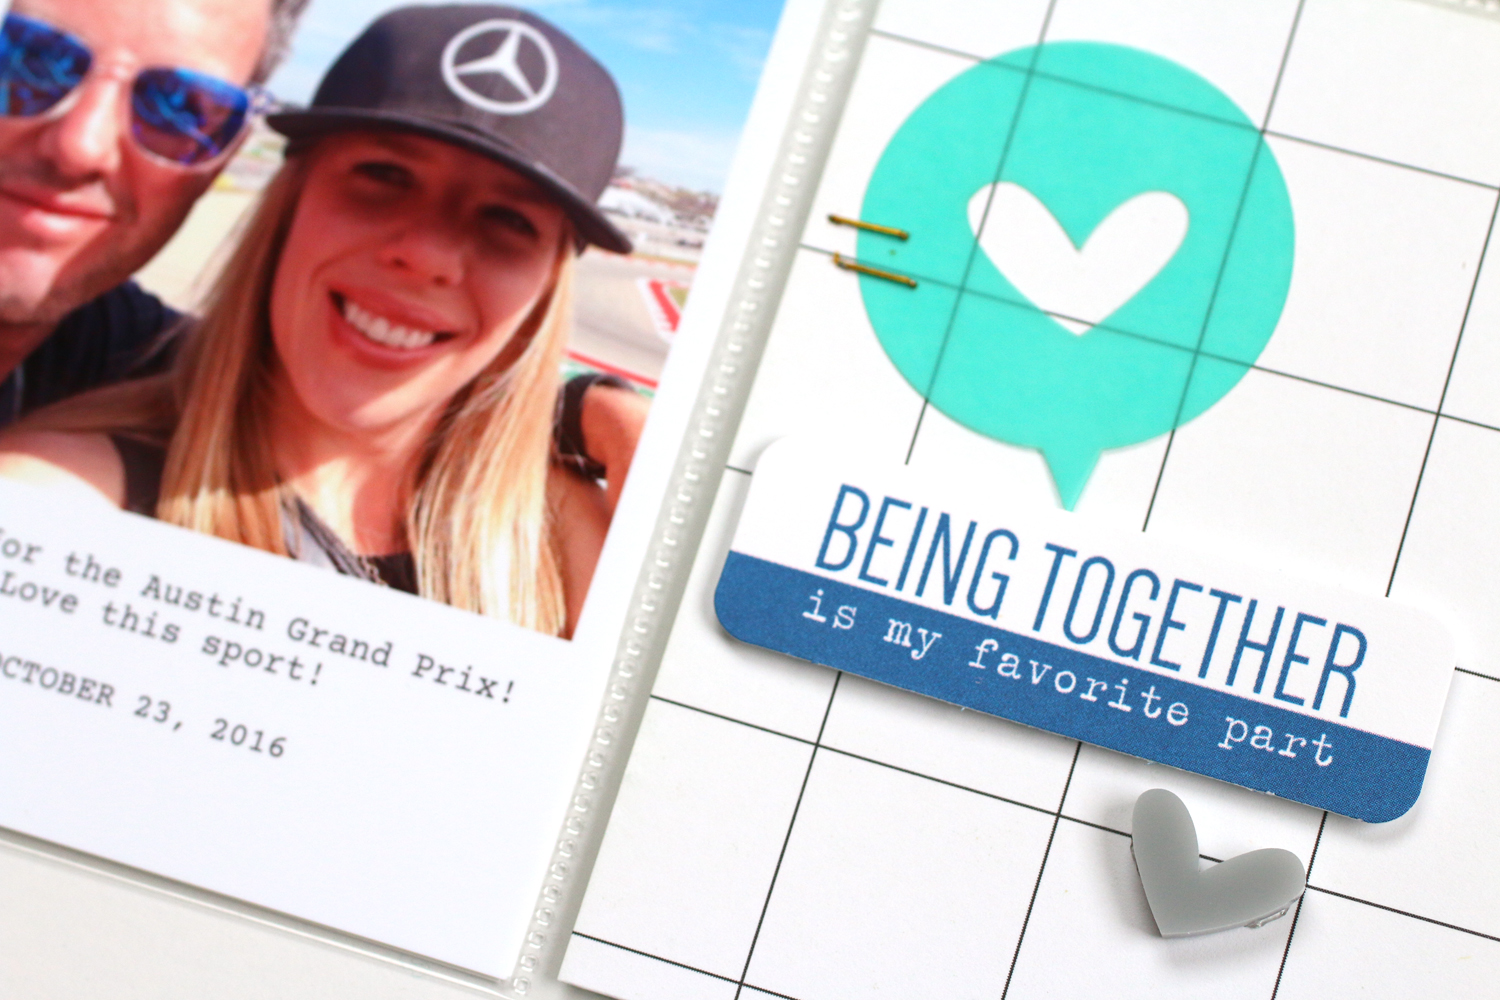
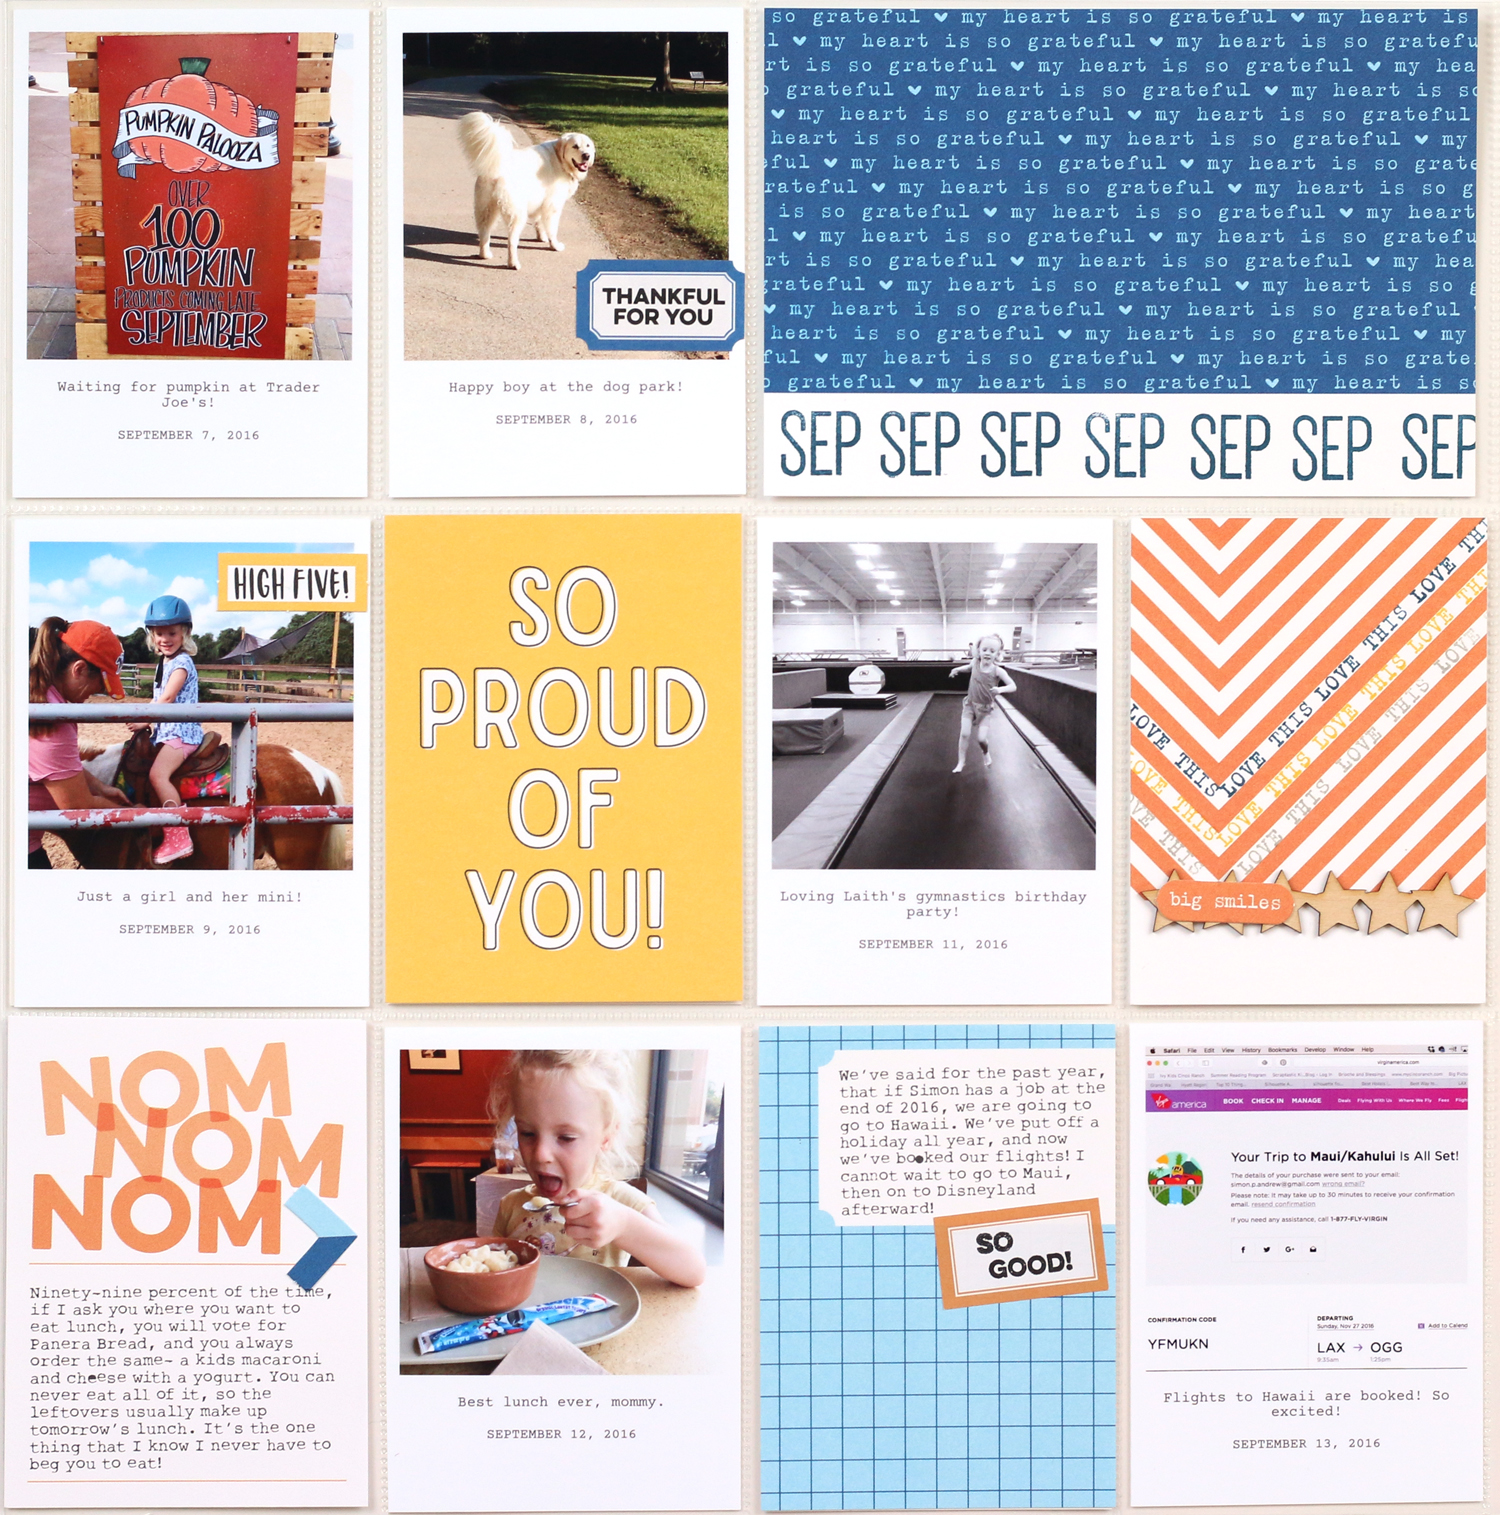
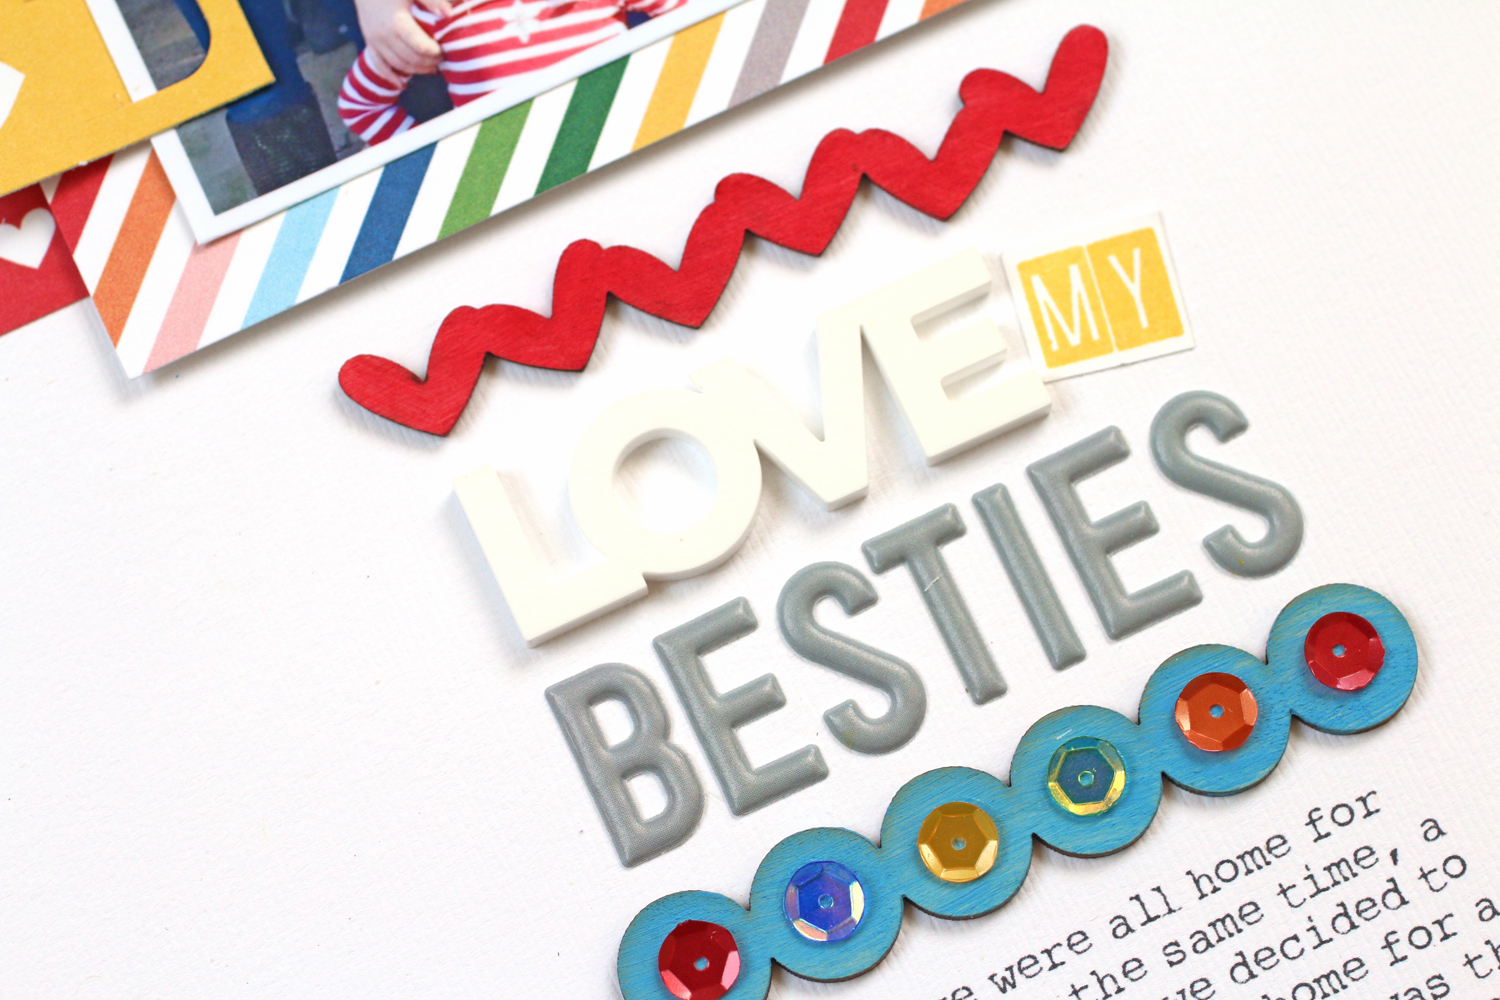
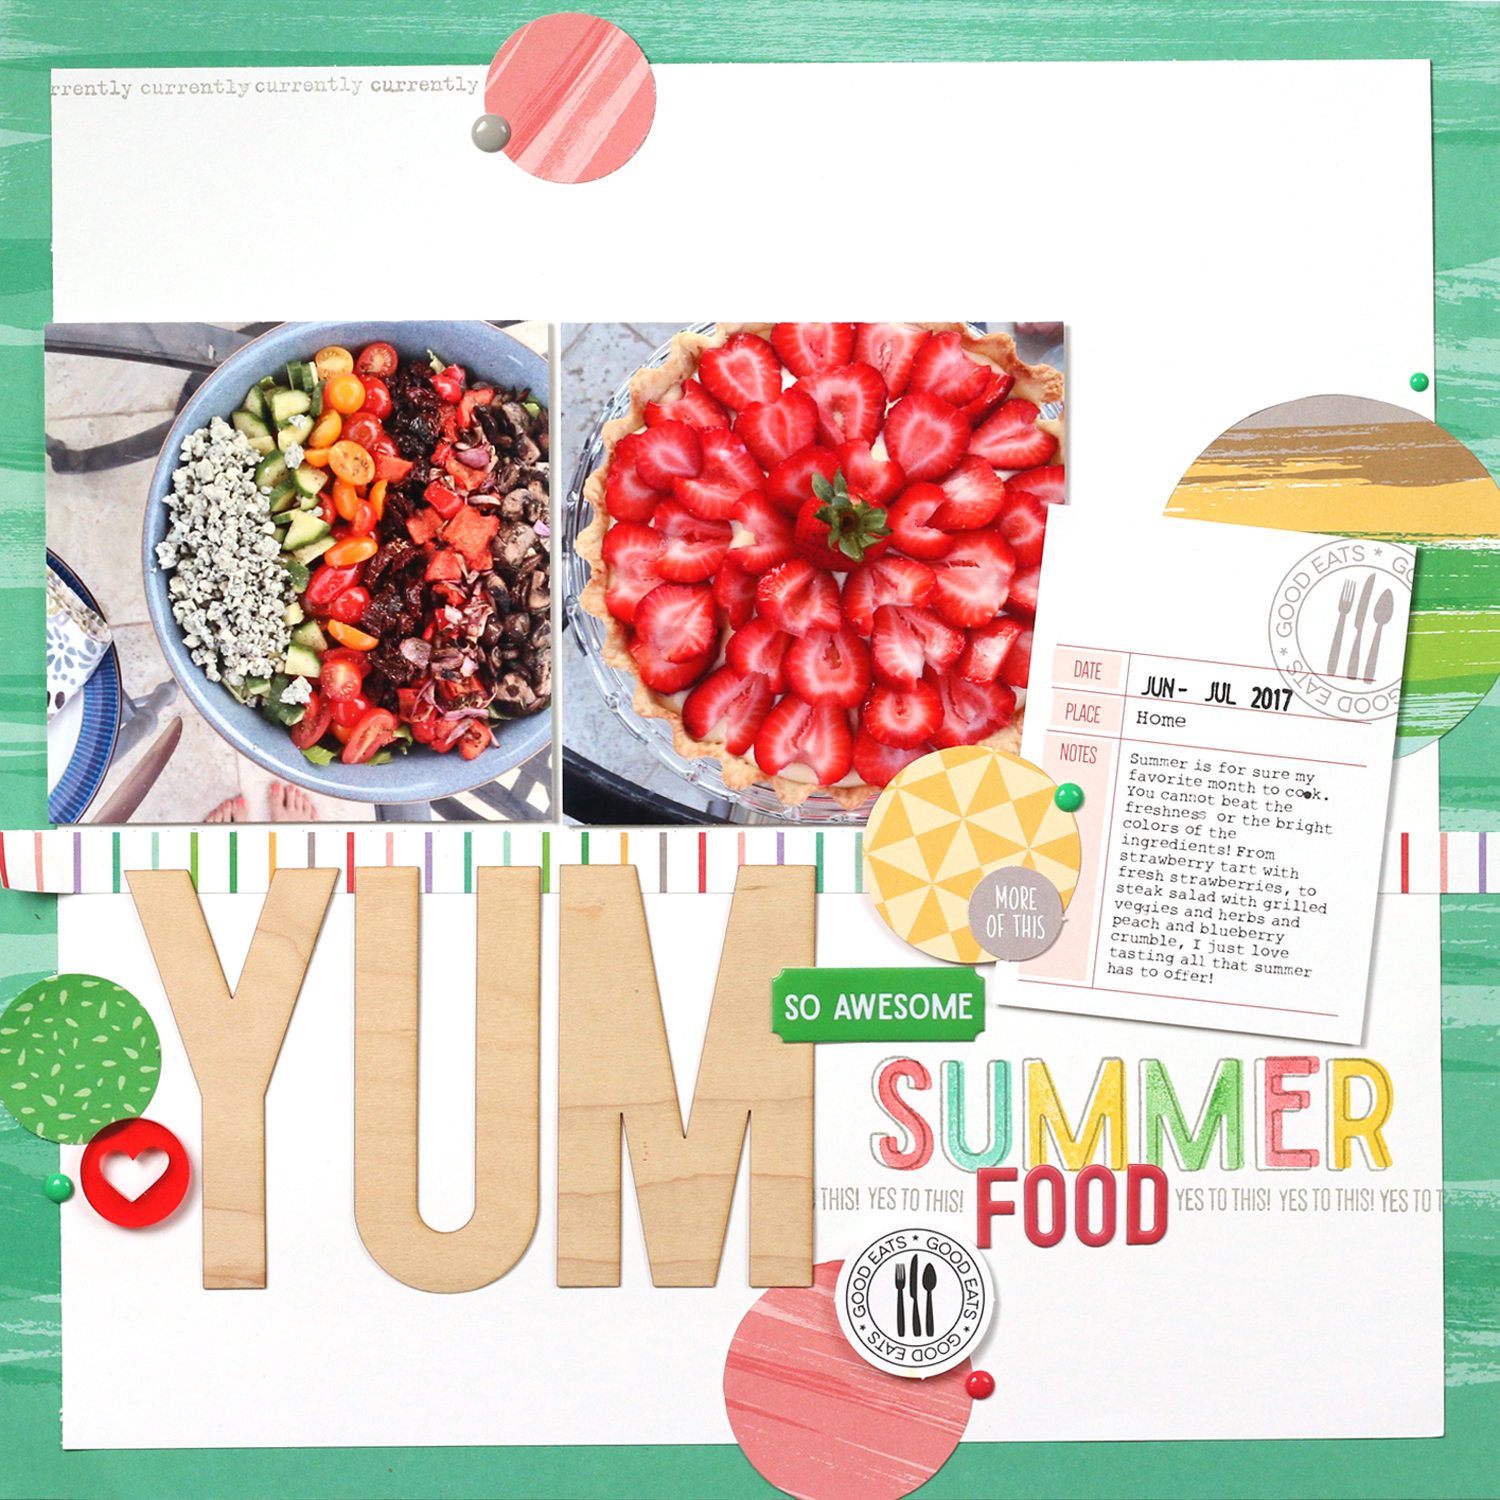
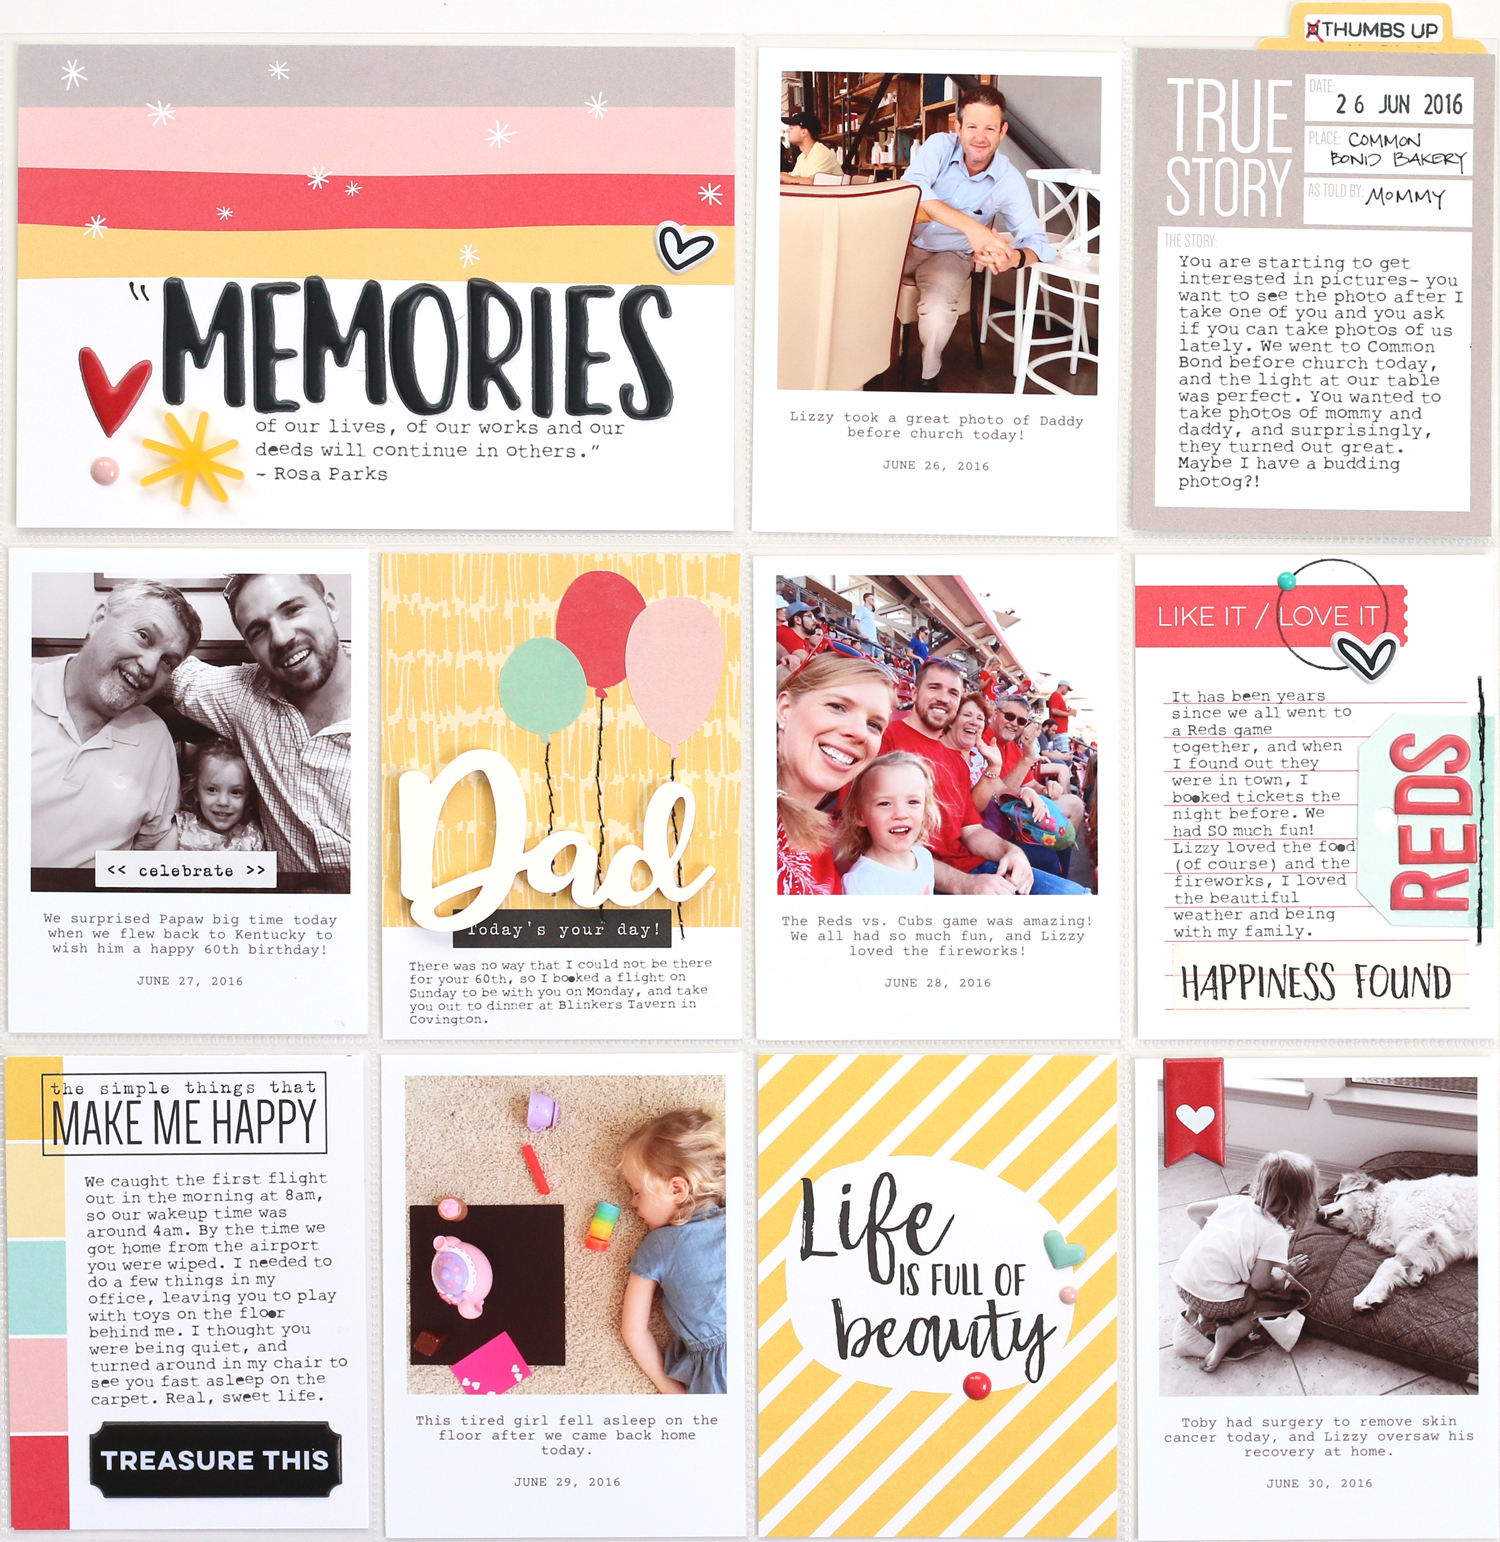
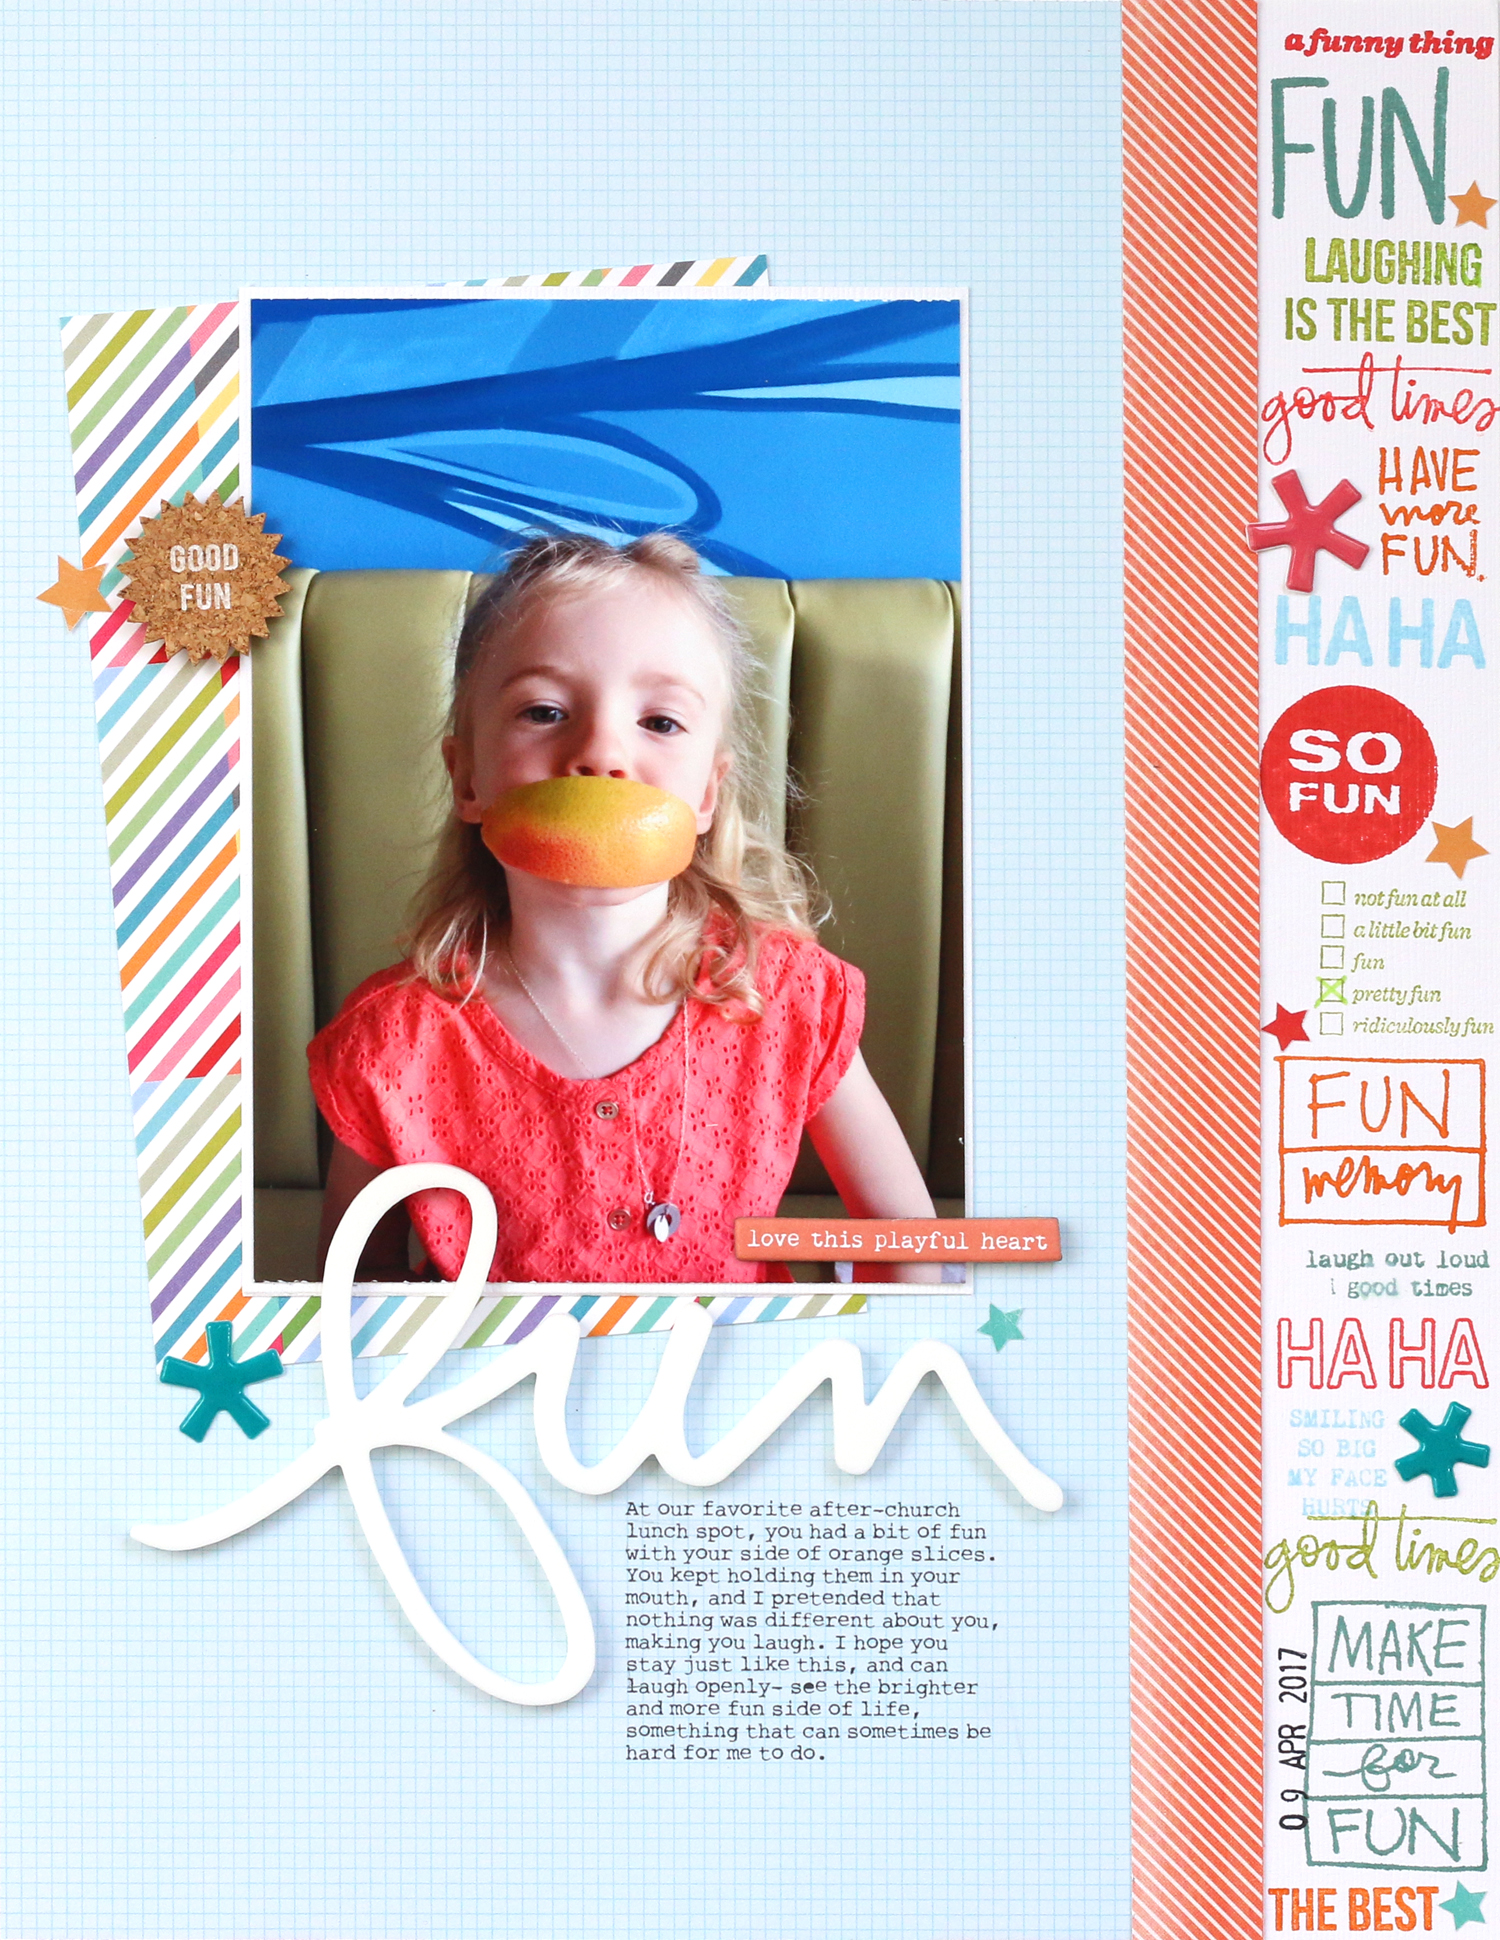
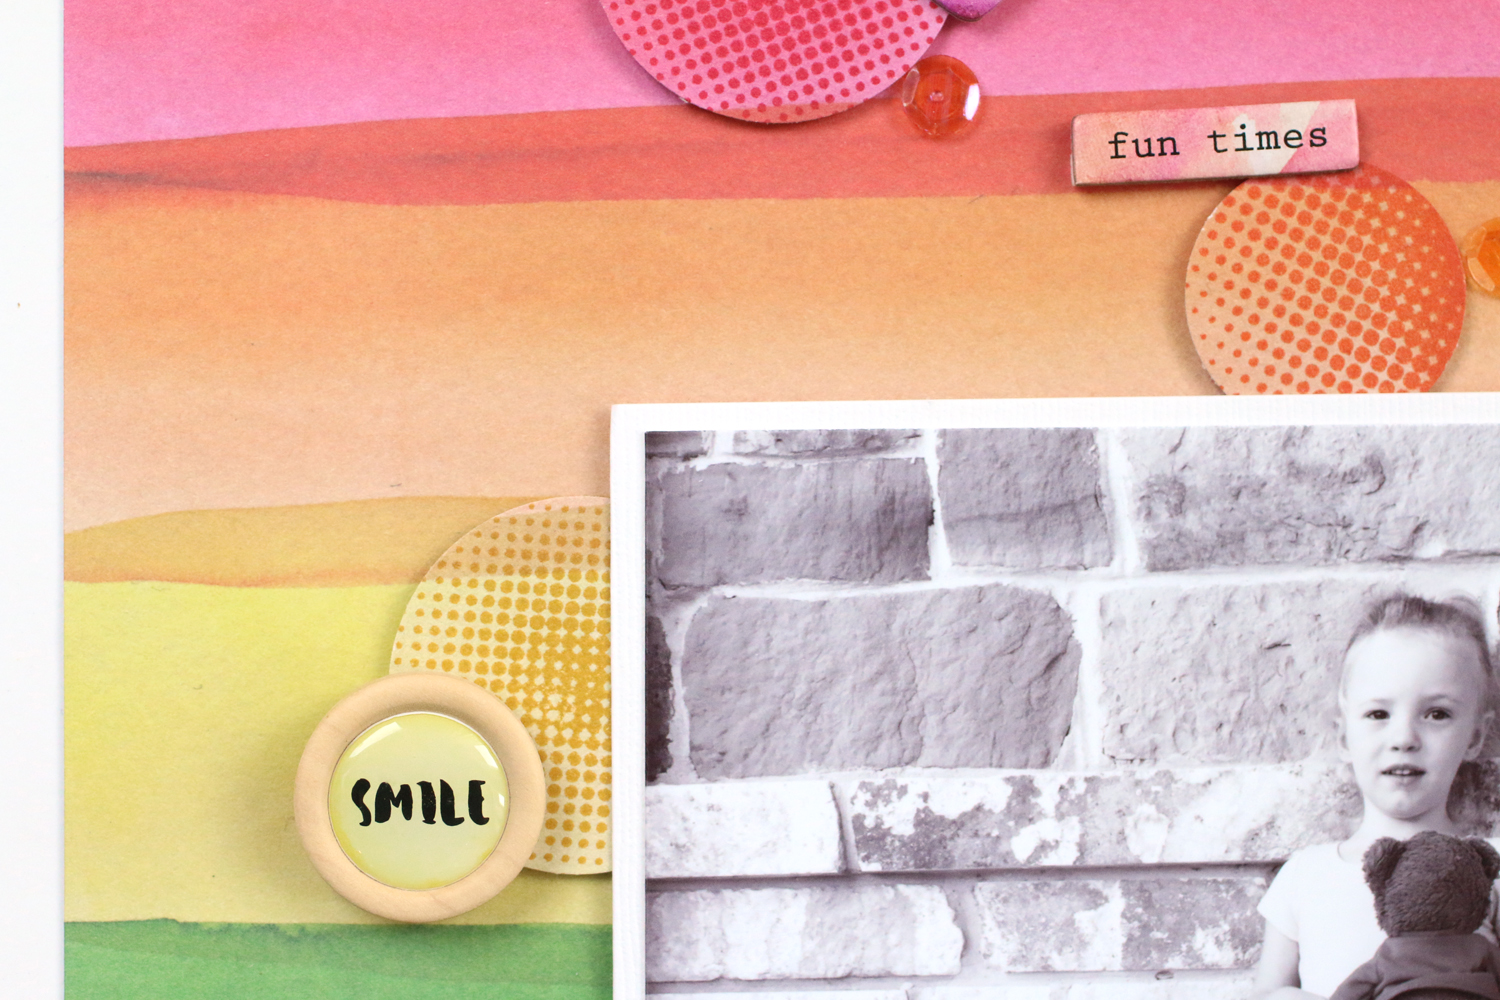
This beautiful and packed January 2018 kit features a royal color palette of reds, dark blue, purple and seafoam green—a perfect palette to document your January! 

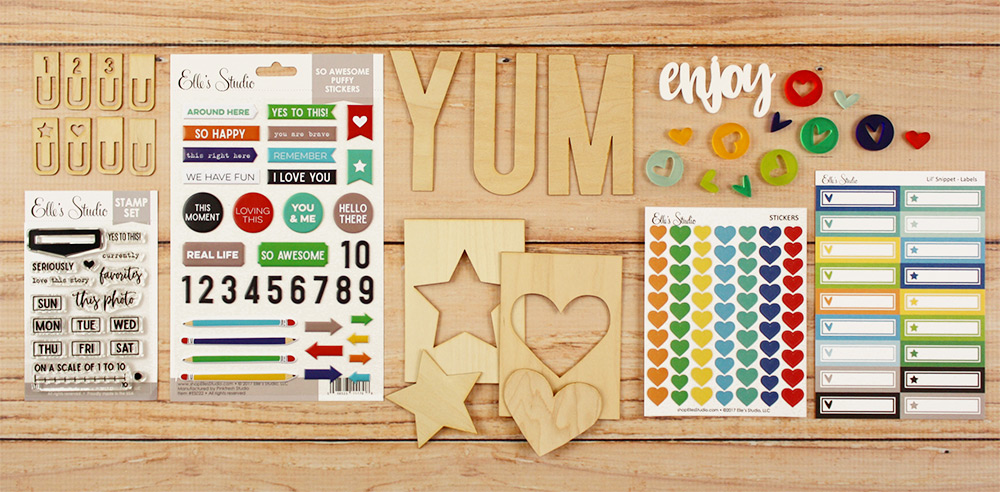
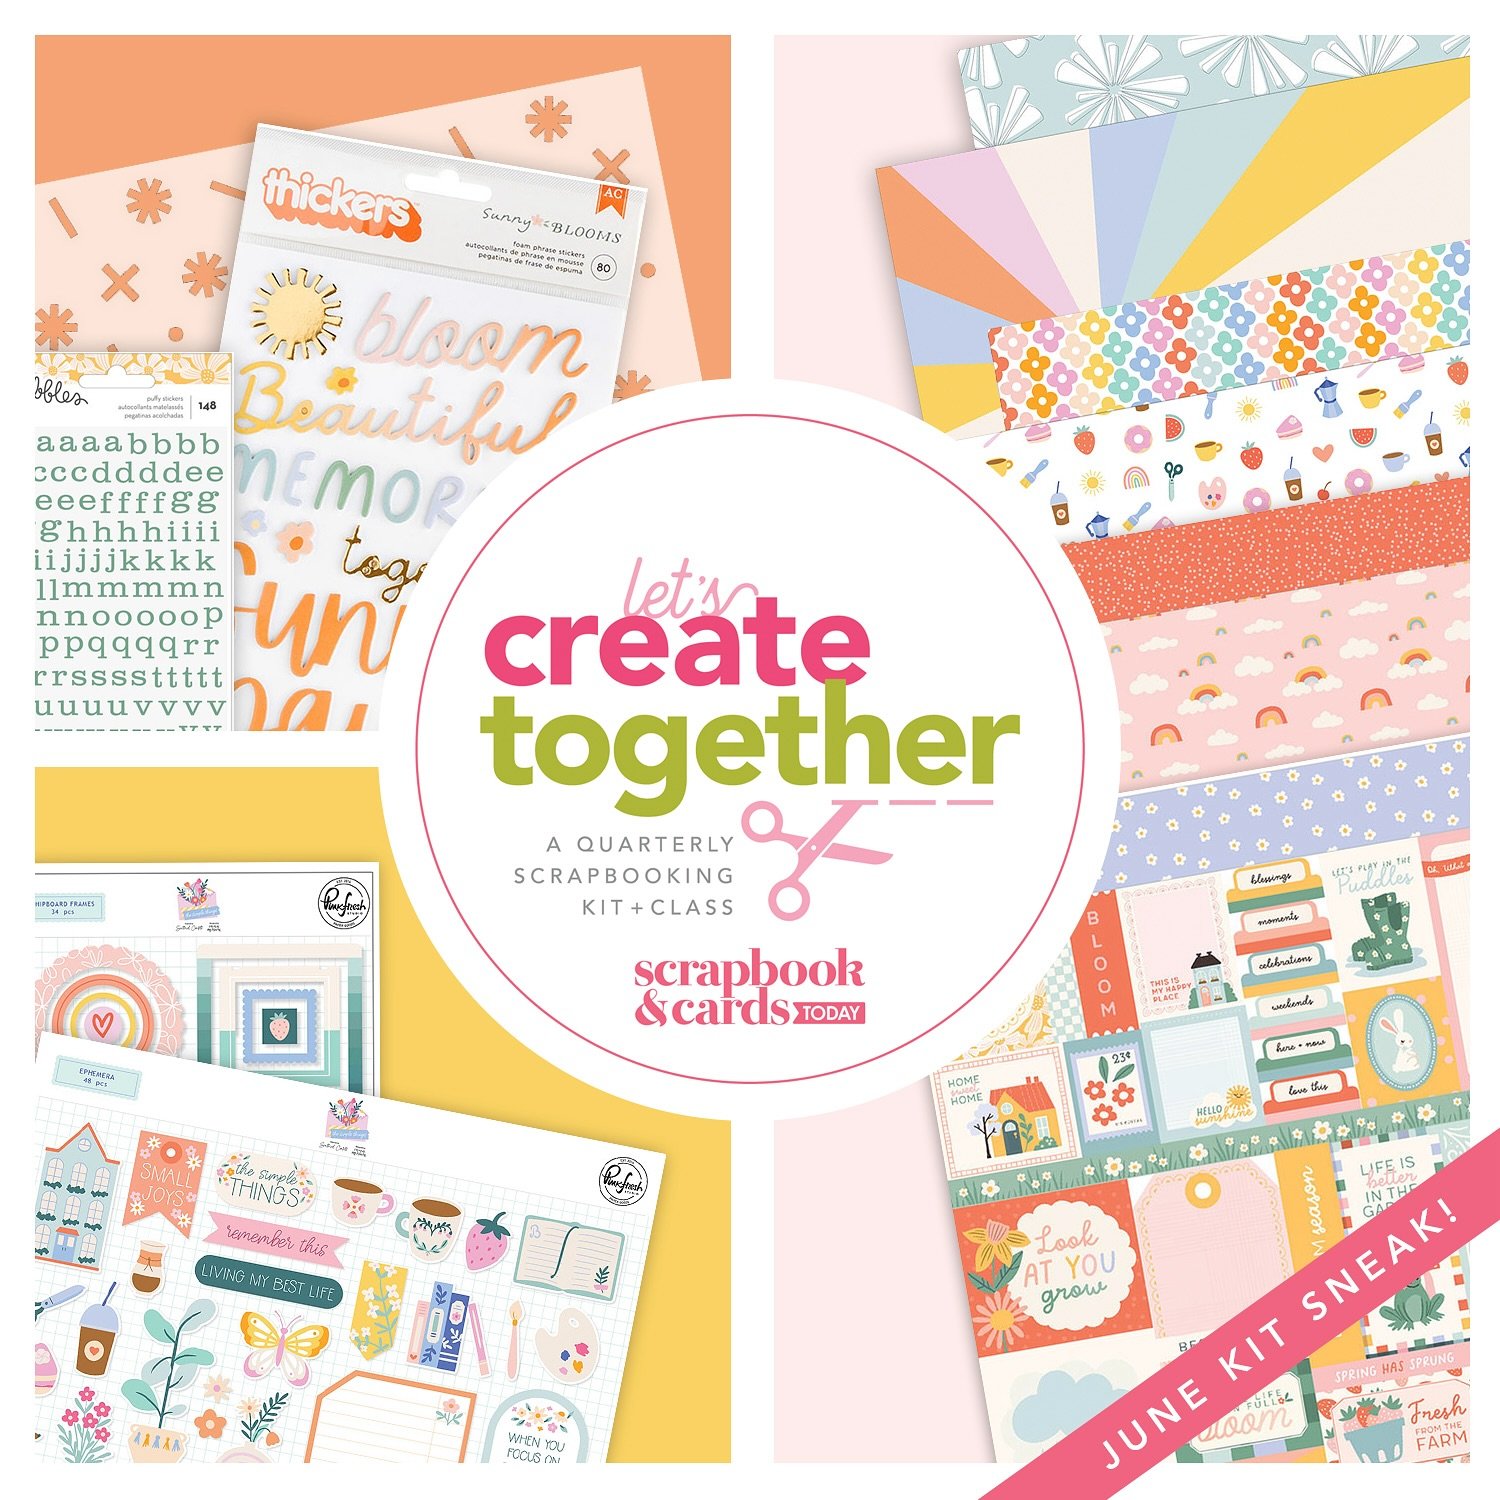
In addition to the kit, there is a whole selection of add-ons this month, including a die-cut package, something ES has never offered before, and a new coordinating 6" x 6" paper stack!
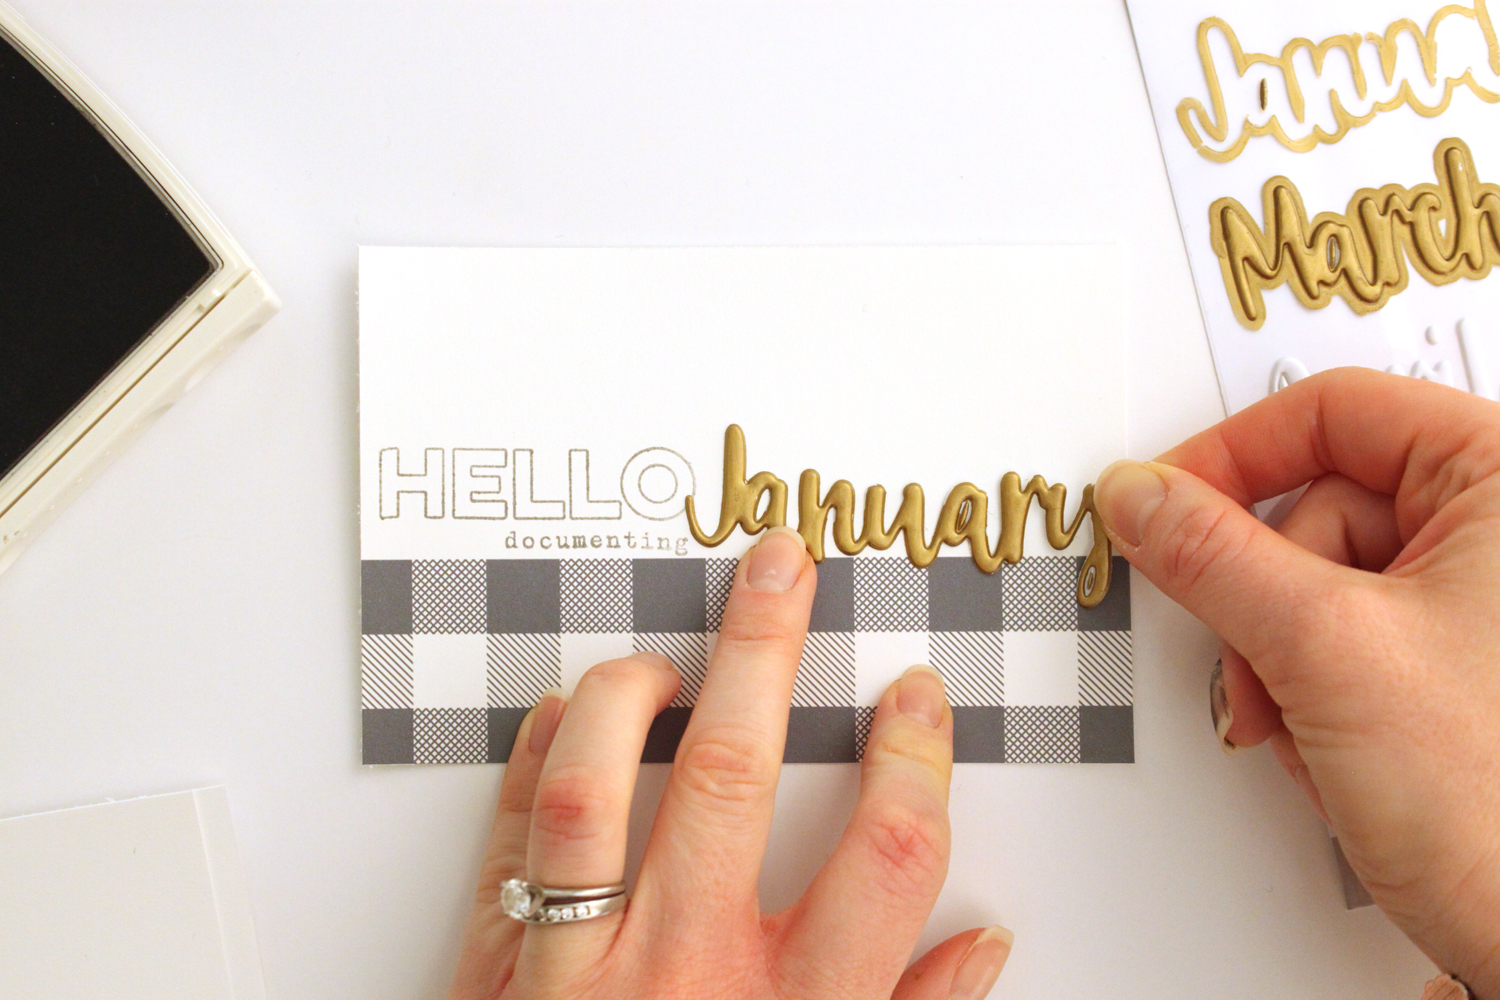
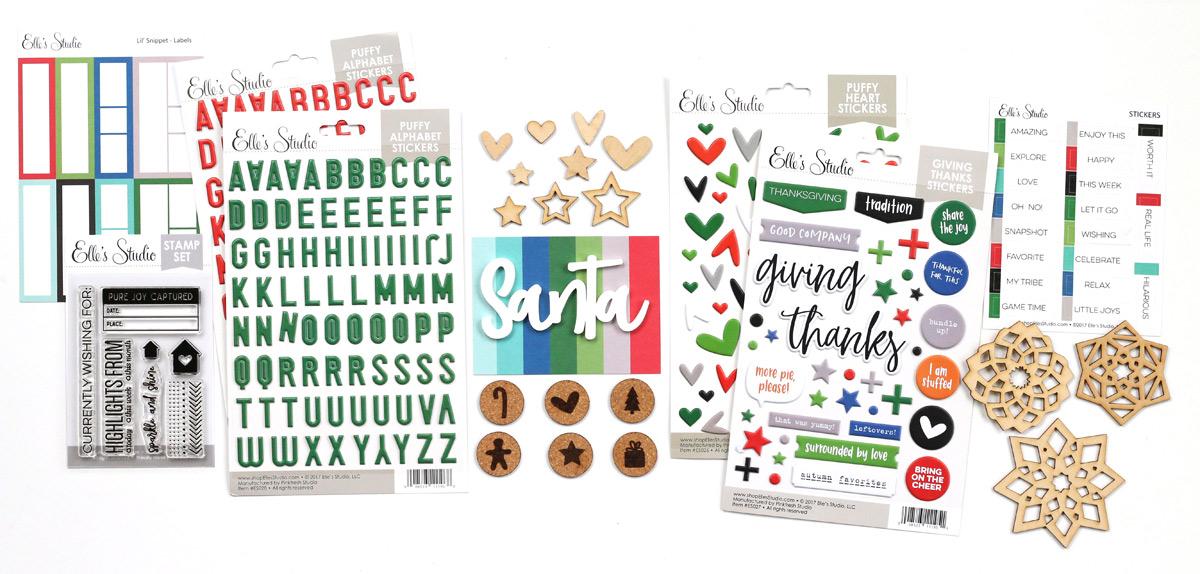
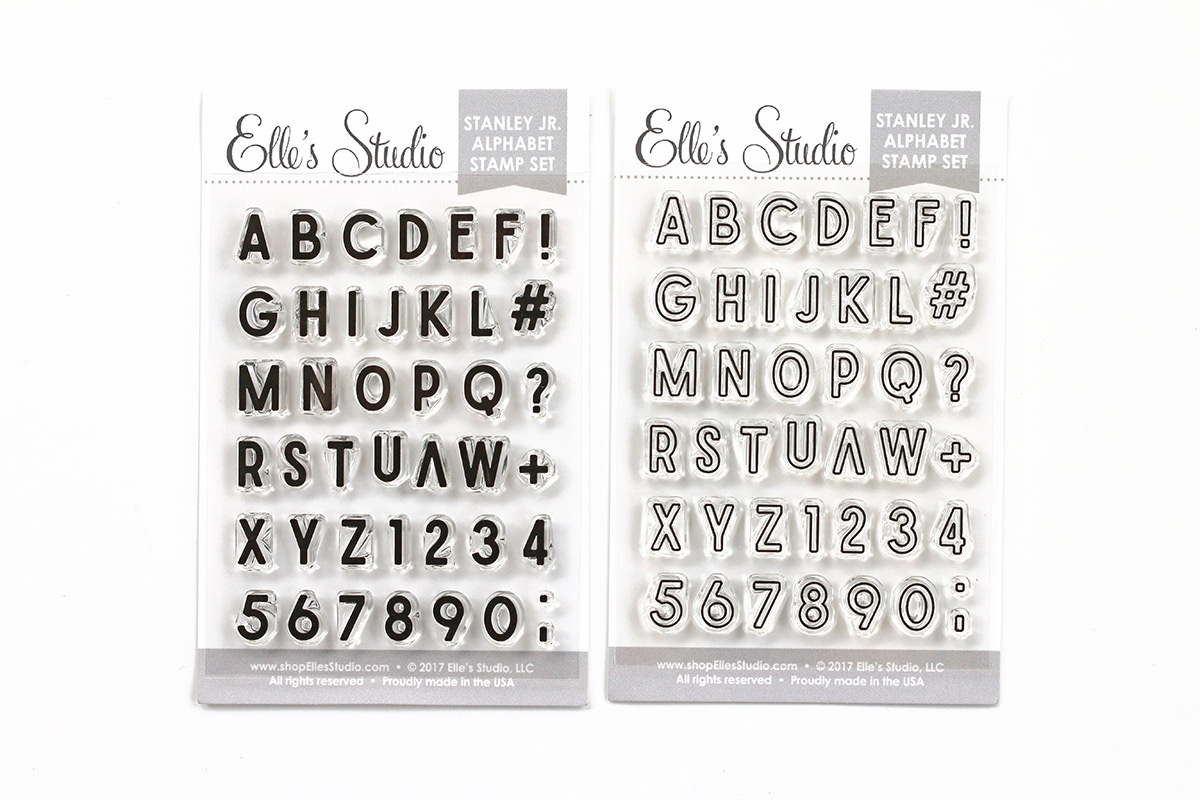
EllesStudio_January2018_AddOns.jpg
26678386_1830876060256833_4084796128122171869_o.jpg

Plus, don't miss the amazing Heart of Gold Chipboard Stickers! They are just beautiful! Last but not least, there are new digitals in the shop today!

EllesStudioJanuary2018Digitals.jpg

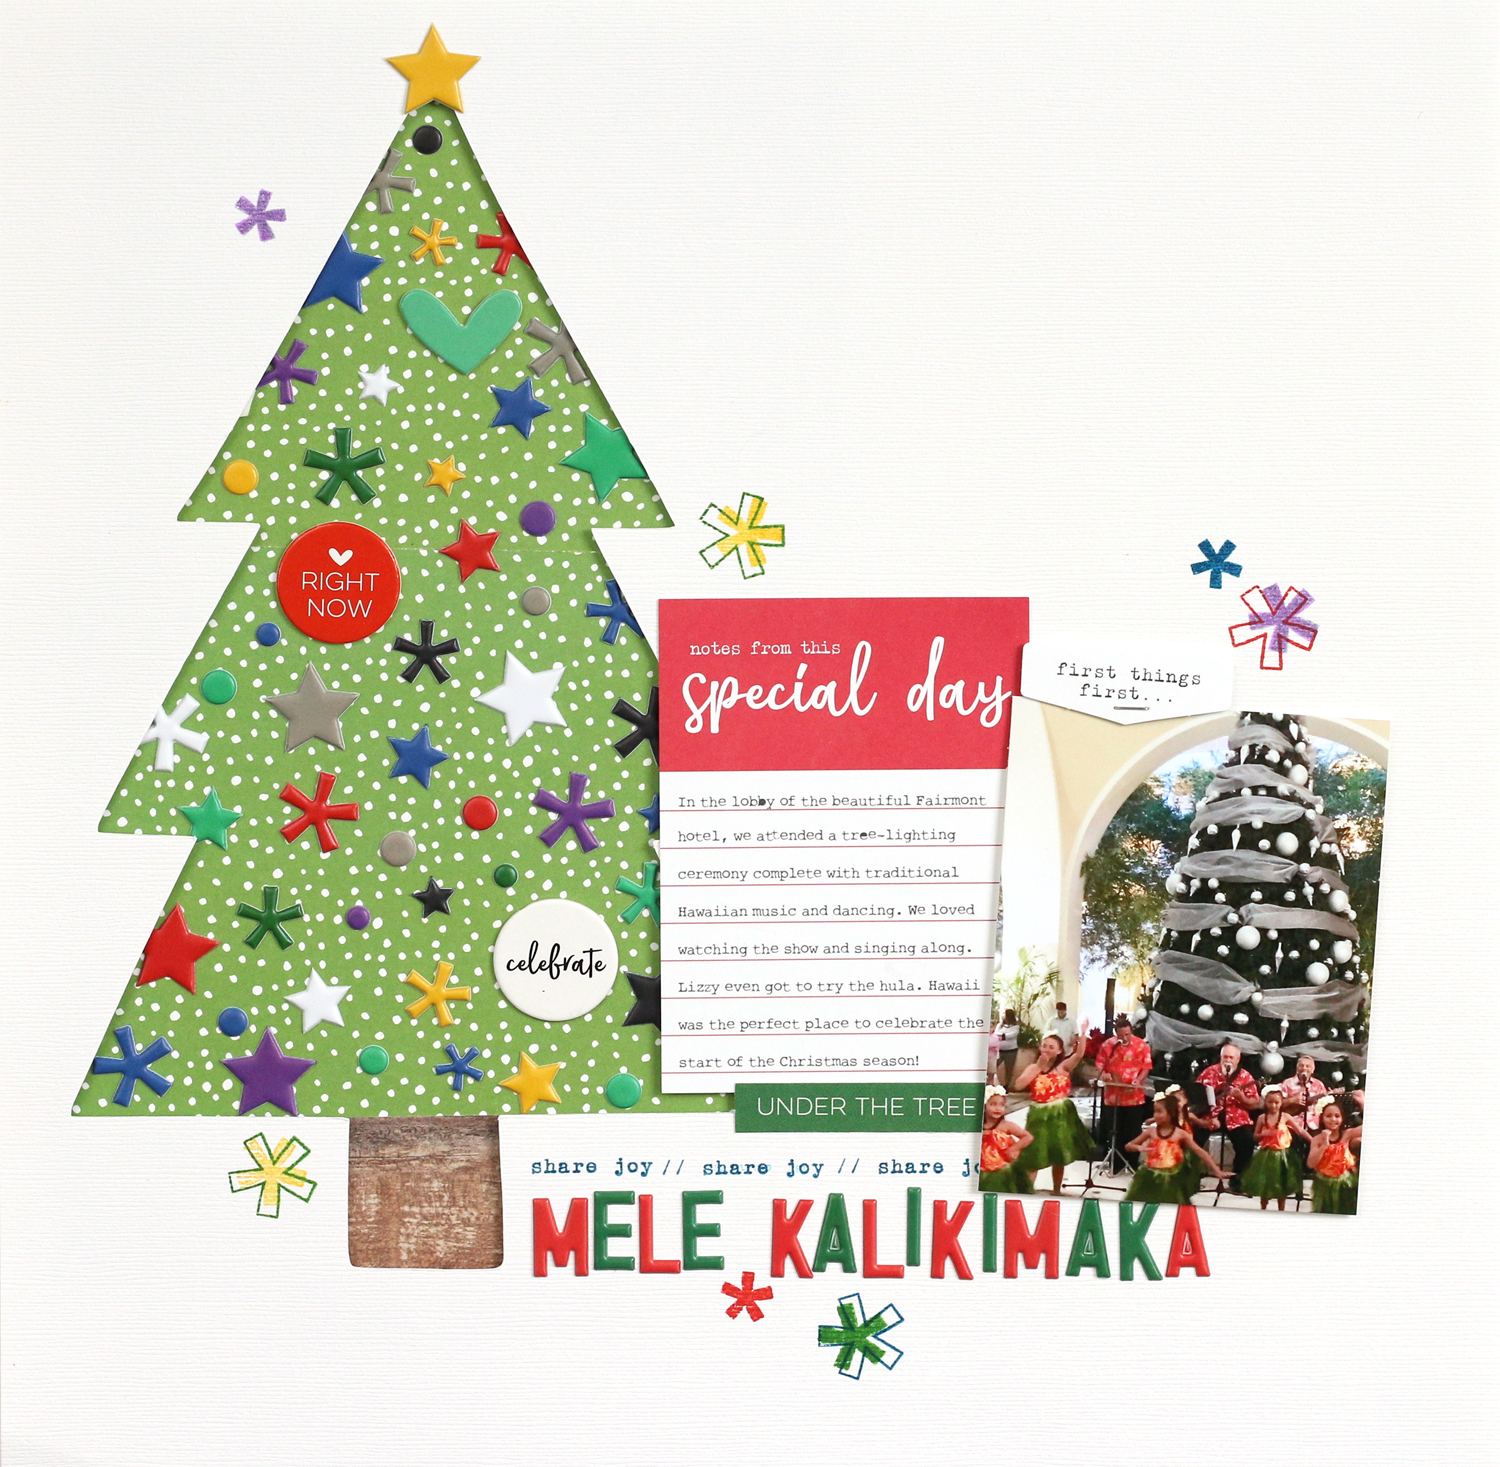
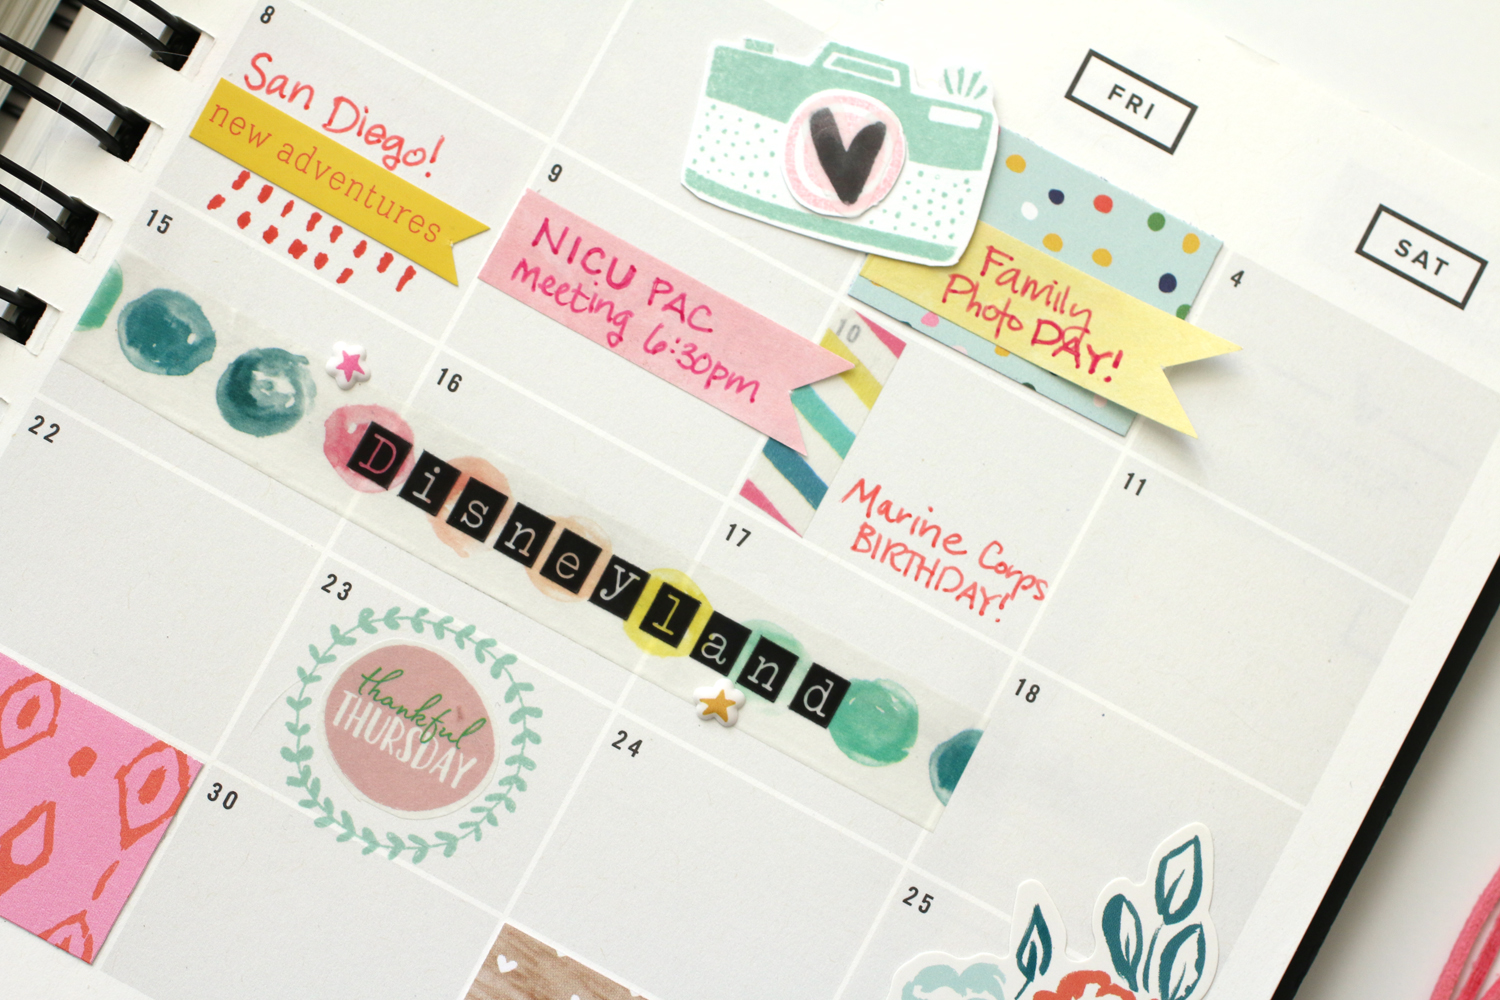
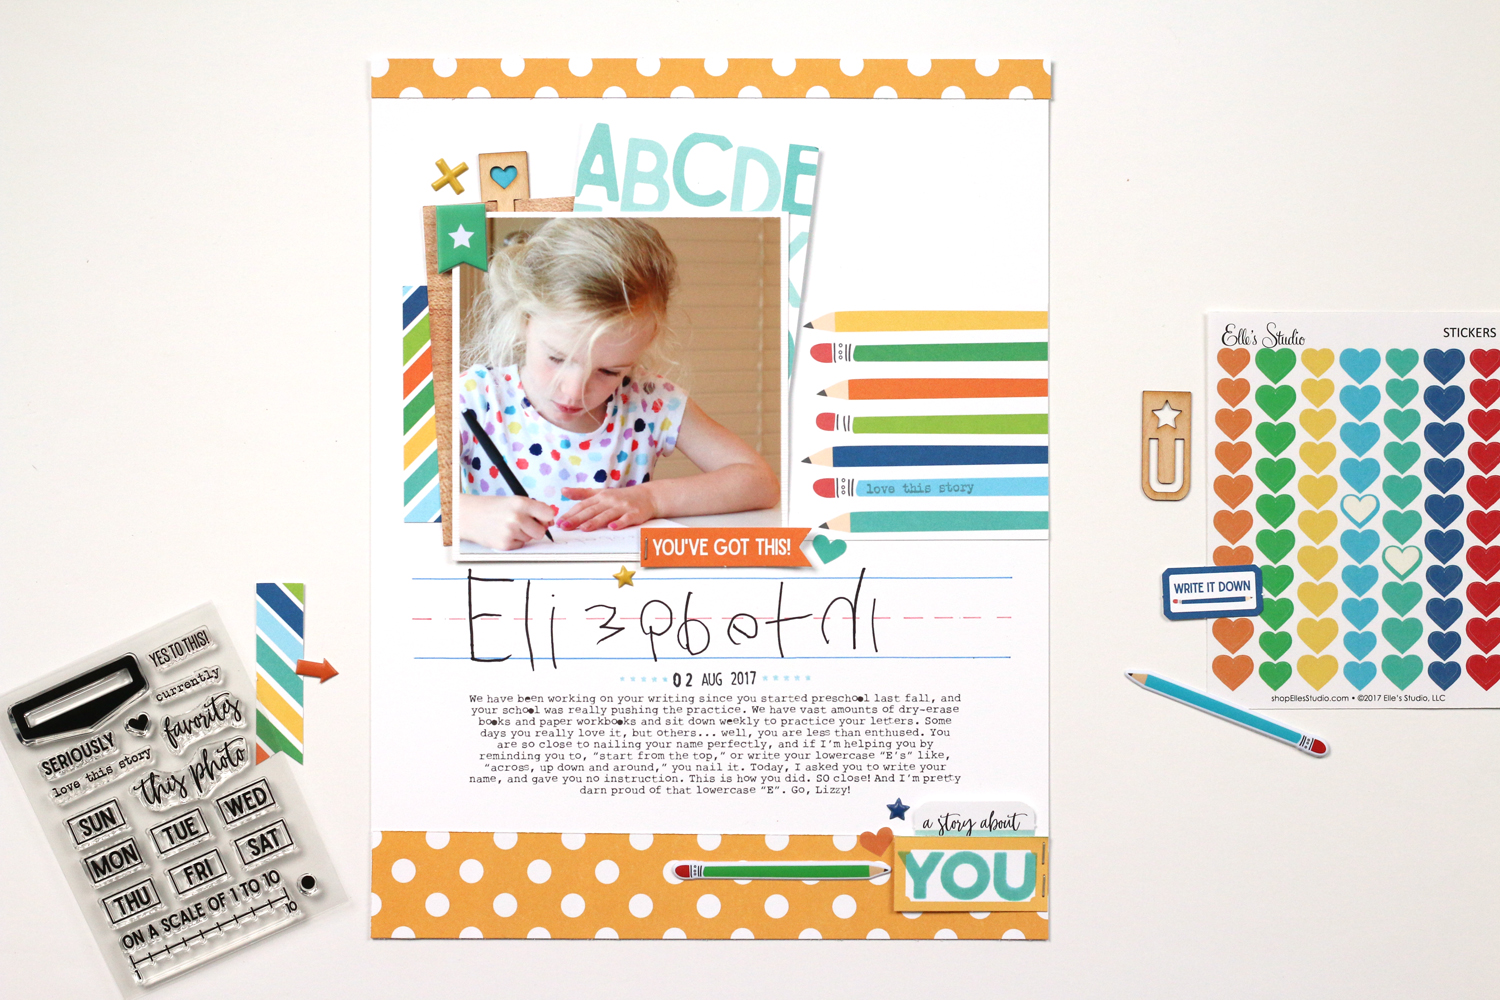
The All My Love Printables and January Digital Cut Files will be the perfect addition to your digital library! I was so inspired by the "I love you more than" saying in the digital cut file, that I decided to create a layout around it, with a really fun and beautiful mixed-media page background.

EllesStudio_MeghannAndrew_ILoveYouMoreThan_01.jpg

"I Love You More Than" Supplies | January 2018 KitJanuary Digital Cut FilesHugs and Kisses Puffy StickersStar Chipboard StickersXOXO 6" x 6" Paper Stack, Family Fun 12" x 12" Paper Collection

You can see exactly how I created my page background, and how the rest of my layout came together in this short process video:

Stop back by the blog later today, at 3pm CST to see my second layout created with the newest goods from Elle's Studio! It's all about getting right to work! In the meantime, pick up your kit at the introductory price of only $9.99 today only! I have a feeling this one is not going to be around for long! 

Going BIG with Dear Lizzy Star Gazer

AmericanCrafts_MeghannAndrew_BlissfulYou_03_BLOG.jpg

Hello, hello! I've not yet gotten into the Christmas mood over here, so instead of a festive red and green creation this week, I'm here to share a bright and colorful page using the Dear Lizzy Star Gazer collection* from American Crafts. (*All product links contained in this post are affiliate links. You don't pay any extra, but I get a small percentage of your sale! Thanks for your continued support!) 

AmericanCrafts_MeghannAndrew_BlissfulYou_01_BLOG.jpg
AmericanCrafts_MeghannAndrew_BlissfulYou_04_BLOG.jpg

On this layout, I wanted to show you that you CAN certainly pull off big alphas and embellishments on an 8-1/2" x 11" layout, as long as you keep enough white space on the page. Watch this process video to see how the layout came together—quickly and easily!

Love this collection? It's on sale! Shop via these links to pick up Star Gazer while supplies last!

2018 Monthly Pocket Page Tags with Elle's Studio

Hi there! Since I'm so far behind on my 2017 monthly pocket page documentation, I want to set myself up early for 2018. I plan to stick with monthly spreads, using only phone photo per day, journaled and printed from my Collect App. 

Yesterday, Elle's Studio released a set of new products* for December, and included in those products were the Monthly Puffy Stickers*. White in color, they are perfect for re-coloring, and I was so excited to use them to create 4" x 6" month markers for my pocket page album! (*All product links contained in this post are affiliate links. You don't pay any extra, but I get a small percentage of your sale! Thanks for your continued support!) 

MeghannAndrew_EllesStudio_MonthPuffyStickers_PocketPageTags_02.jpg

I started off these tags by re-coloring my Monthly Puffy Stickers, using one of my favorite products, a Sharpie oil-based marker in metallic gold. These markers are amazing, and I've used them for a number of craft projects—even painting ceramics! I highly recommend them! I left the stickers on the backing and covered them with the oil-based paint, which went on beautifully.

MeghannAndrew_EllesStudio_MonthPuffyStickers_PocketPageTags_04.jpg

Next, I chose the 3" x 4" buffalo check journaling tag from the Love This Printables, opened it in Photoshop Elements, and re-sized it to 4" x 6", placing the check pattern on the base. I also de-saturated the color 100%, making the check pattern gray, a great neutral, which will work with any spread from next year's album. Once the tags were printed on thick, smooth white cardstock, I stamped "hello" and "documenting" in gray using the Title Builder Stamp.

MeghannAndrew_EllesStudio_MonthPuffyStickers_PocketPageTags_03.jpg

Next, I adhered my gold monthly puffy "January" sticker next to my stamped words. I love the way that it looks against the gray buffalo check pattern! 

MeghannAndrew_EllesStudio_MonthPuffyStickers_PocketPageTags.jpg

Since January is the kick-off to a new year, I also re-colored and added "2018" from the Monthly Puffy Stickers to this tag. I created all twelve of the tags for my 2018 album, and I am so excited to have a head-start on an important part of this big project! 

Thanks so much for stopping by today! Check out the products that I used in this simple and easy project below: 

Elle's Studio December 2017 Reveal!

We at Elle's Studio are so excited to finish of 2017 on a high note with a new exclusive kit and coordinating add-ons! Take a look at all of the new product on offer with this unboxing video! (*All product links contained in this post are affiliate links. You don't pay any extra, but I get a small percentage of your sale! Thanks for your continued support!) 

This month, there are so many products to get your December memories documented, as well as get ready for a new year to begin! Let's take a look at the December 2017 Kit:

What a great mix of 3" x 4", 4" x 6" and die-cuts to use on any project! To coordinate with the kit, we also have some great add-ons to add to your box this month.

Also on offer this month: the great Winter Favorites Printables and December 2017 Digital Cut File to use over and over again on your projects!

I started out with the Christmas tree from the December 2017 Digital Cut File on my background when I created this layout about our kick-off to Christmas last year in Hawaii. 

I was completely inspired by the Twinkle Puffy Stickers to create an oversized, colorfully decorated tree on my layout to document this colorful celebration of Christmas in Hawaii. 

MeleKalikimaka_02_BLOG.jpg

I absolutely had to use the lyrics to one of my favorite Christmas songs by Bing Crosby, Mele Kalikimaka, for my title. You can see how this layout came together in the following process video!

You can find all of the product used on this layout in this easy-to-shop gallery:

Thanks so much for stopping by, and happy creating! 

American Crafts Vicki Boutin Mixed Media Layout: "Hello Princess"

Hello there! I'm constantly trying to push myself in my designs, and this week I decided to switch things up and get a bit messy in my studio with the new Vicki Boutin All the Good Things collection* from American Crafts. (*All product links contained in this post are affiliate links. You don't pay any extra, but I get a small percentage of your sale! Thanks for your continued support!) 

HelloPrincess_BLOG.jpg
HelloPrincess_Closeup01_BLOG.jpg

This mixed-media challenged girl (yes, that's ME!) had SO much fun playing with the mixed media products in my friend Vicki's new collection! I just love how simple and easy the process was after I watched the videos on her YouTube feed on how to use the art crayons and glaze.

HelloPrincess_Closeup02_BLOG.jpg

The Dear Lizzy Star Gazer collection paired so well with the All the Good Things collection on this layout. I was so excited about the mixed-media background, that I created a process video to show you how you can do it, too! Take a look:

I hope this layout inspires you to break out of your scrappy comfort zone and try something new today! Be sure to check out all of the product I used on this layout at Scrapbook.com via the gallery below:

Elle's Studio November Release

Not only is it an exciting day because it is Friday, but also because the Elle's Studio November 2017 Kit is here, and available today for the introductory price of $9.99! Grab a comfy chair and a cuppa while I take you through all of the new goodies in this unboxing video! (*All product links are affiliate links. You don't pay any extra, but I get a small percentage of your sale! Thanks for your continued support!) 

This kit includes such a great mix of colors, graphics and sayings, perfect for documenting everything about the upcoming holiday season!

EllesStudio_November2017Kit.jpg

My favorite part of reveal each month, the add-ons, will embellish your pages perfectly! This month, we have the November labels, Pure Joy stamp, puffy alphabet stickers in both red and green, wood veneer hearts and stars, Santa acrylic, cork circles, Christmas puffy heart stickers, Giving Thanks puffy stickers, Everyday banner stickers and wood veneer snowflakes.

EllesStudio_November2017_AddOns.jpg

But, the most exciting part about this release are the new Stanley Jr. alphabet stamps, which come in both a solid and outline.

I had to use these little guys as soon as my package arrived, and I created a fun, 8-1/2" x 11" Christmas layout about the best Santa Claus my daughter met in Disneyland last year.

BestSantaEver_BLOG.jpg
BestSantaEver_04_BLOG.jpg

I started my layout by creating the amazing buffalo check pattern along the left side of the page with the From Sketch to Finish Vol. 3 Stamp. I'm certain that I will use this stamp often this year! I topped that with two patterns from the Family Fun 12" x 12" Paper Collection  and added the star die cut and "remember the magic" tag from the November 2017 Kit

BestSantaEver_02_BLOG.jpg

My title was created with a mix of both the Stanley Alphabet and Stanley Jr. Alphabet stamps, in both the solid and outline, flanking the Santa Acrylic. I love the way those colorful letters pop alongside the white acrylic. I also created a Mickey head on top of one of the November Labels by using a Cork Circle and two circles cut from a tag in the November 2017 Kit

BestSantaEver_03_BLOG.jpg

At the top, I backed my photo with one of my favorite tags from the kit this month, the multi-colored stripe, which I punched on each color with a small star punch. I also stamped the word "highlight" from the Pure Joy Stamp onto a tag from the kit and added the date. Some Family Fun Puffy Stickers scattered about finished off the page nicely. 

Want to see how I created this layout step-by-step? Watch the process video below! In it you will see how I stamped the buffalo check pattern (and covered up the unevenness with strips of paper!), how my title came together using the new Stanley Jr. alphabet stamps, and how I stamped a partial image withe the Pure Joy Stamp.

Thanks so much for watching and stopping by! This kit is sure to be a hit, so be sure to grab yours, along with the coordinating extras while they're still available in the shop and only $9.99 today! Stay tuned for my second project, a double-page layout, coming to the blog tomorrow! 

November Monthly Planner Spread with Creative Devotion

Last Friday, I was up on the American Crafts blog, talking about how I wanted to start using my monthly overlook pages in my planner for 2018. At the moment, I've only been using my weekly pages, leaving my monthly overlook completely bare. Since I've decided that that monthly-view is quite important, I've decided to combine my love of paper crafting with planning for these pages only, and I've done that, starting with my November monthly spread in my Get to Work Book

When I saw the Creative Devotion collection amongst my product box of American Crafts supplies, I wasn't sure how I would use it at first—I haven't really carried around my bible since I became an Episcopalian, and writing in my bible at home is a hard notion for me to conquer, but once I started looking at the products, I saw how perfectly they would work for planning pages! That, combined with the beautiful colors and patterns in the Dear Lizzy Star Gazer collection, created a perfect monthly view for November.

(*All product links are affiliate links. You don't pay any extra, but I get a small percentage of your sale! Thanks for your continued support!) 

MeghannAndrew_AmericanCrafts_NovemberPlanner_01BLOG.jpg

A mix of Dear Lizzy Star Gazer and Creative Devotion products helped this spread come together. I'm not much for over-embellishing in something I like to keep quite flat, so I used quite a few stamps, washi tape and patterned paper to add color and pattern.

All of the products used can be found in the gallery below, ON SALE now at Scrapbook.com!

The cute Dear Lizzy cardstock stickers and patterned paper helped me to mark important dates, like daylight savings time ending and our week in Disneyland! I also used the Creative Devotion washi tape sets to mark important birthdays, especially the Marine Corps birthday on the 10th!  There are so many beautiful tapes in those sets, it was hard to choose which to use!

MeghannAndrew_AmericanCrafts_NovemberPlanner_04BLOG.jpg

One of my favorite products in the Creative Devotion collection is the Sticky Note Dashboard. It includes sticky notes in various sizes and colors, perfect for adding notes to your planner pages! I used it to mark meetings and our family photo day this month.

MeghannAndrew_AmericanCrafts_NovemberPlanner_02BLOG.jpg

There could not have been a more perfect way to mark Thanksgiving than using the Dear Lizzy Star Gazer "Thankful Thursday" washi tape saying, which I cut into a circle and placed inside a stamped wreath from the Creative Devotion stamp set. I finished off the page with the same Star Gazer patterned paper and a strip of copper washi tape, which matched the beginning of my monthly spread and balanced out the layout. 

MeghannAndrew_AmericanCrafts_NovemberPlanner_06BLOG.jpg

Would you like to see how I put this planner spread together? I have a process video for you to check out! Sit back and watch how I combine my own paper crafting style with my planner! 

Don't forget to check out the beautiful Dear Lizzy Star Gazer collection and Creative Devotion collection, because it can be used for so much more than Bible journaling!

Thanks for stopping by today, for your support in using the affiliate links, and happy planning! 

Scrapbook and Cards Today Fall Issue: Happy Are We

If you receive the Scrapbook and Cards Today weekly newsletter to your email, you may have noticed a little sneak of the layout that I'm about to share. (If you don't receive the newsletter, why not? It's easy to sign up for here, at the very bottom of the page.) This layout was featured in the 3Ts section of the fall issue (available for free here!) and is all about repetition! (*All product links are affiliate links. You don't pay any extra, but I get a small percentage of your sale! Thanks for your continued support!) 

Supplies | (all from the Maggie Holmes Carousel Collection from Crate Paper and ON SALE!) Marquee Patterned Paper, Sweets Patterned Paper, Dazzle Patterned Paper, Festival Patterned Paper, Ephemera with Glitter Accents, Cardstock Stickers, Chipboard Stickers, Clear StickersGold Foil Thickers, Clips

Since this layout was all about repetition, I began with my photos! With a 4 year-old, it's necessary to take at least 5 photos at a time because: A) they're not looking, B) they talk and C) they're not looking! Ha! So I generally have several photos that I end of deleting. On this layout, I used all of the photos— the one where my daughter wasn't looking, but I could see her sweet profile, the one where she is doing the "scrunchy face" and the great photo. They're similar enough to be like a "repeat" across the page. I added interest to the top of the photo mat with a flower, tag and button from the Ephemera with Glitter Accents pack. 

HappyAreWe_closeup2.jpg

Next, I wanted to add repetition in my journaling! To separate the great photo on the right, I repeated small, rectangular journaling spots cut from the Festival Patterned Paper, down the length of my photos, mixing it up a bit with the colors and patterns. I topped this journaling off with my title, which I created using Cardstock Stickers and Gold Foil Thickers.

HappyAreWe_closeup1.jpg

To add some balance to the left side of my journaling stack, I grouped the other half of the beautiful black and white flower and camera from the Ephemera with Glitter Accents pack with the bow from the Chipboard Stickers at the bottom of my journaling. I loved that feminine touch it added. The "happy little moments" sticker was from the Clear Stickers and I added it to a piece of white cardstock before adding it to my page.

HappyAreWe_closeup3.jpg

Repetition is a technique that I love using on my pages, and it just so happens to be one of the topics that I discuss in my class at Big Picture Classes, Principle Power! I'd love for you to check it out and learn how to use repetition in your layout designs! 

Be sure to shop the Crate Paper Carousel collection while it is still on sale, via the links in the supplies above, or the gallery below. Thanks for stopping by and happy creating!

From Sketch to Finish Vol. 3 NOW AVAILABLE!

I am so excited to announce that our newest class, From Sketch to Finish Vol. 3, is now available in the Elle's Studio shop(*All product links are affiliate links. You don't pay any extra, but I get a small percentage of your sale! Thanks for your continued support!) 

EllesStudio-FromSketchToFinishVol3-MeghannAndrew.jpg

Not only did I coordinate and edit this class, which features 50 pages of sketch and layout inspiration, I was able to contribute two layouts to the class as well, along with 9 of my favorite scrapbookers.

EllesStudio-FromSketchToFinish-Vol3-Contributors.jpg

One of the best parts about contributing to this class was playing with the amazing exclusive stamp that is bundled into the class price, and is 20% off until October 28th at midnight PST! This stamp is so lovely, and there are so many possibilities to create with it! I had fun today by using it to create a few images, and I took a little video, too! 

Click to the Elle's Studio classroom shop page to find out more about the class, and see both the class + stamp and without stamp options! I can't wait to see what this class will inspire you to create! Happy creating! 

Scrapbook and Cards Today Magazine: Wild and Wonderful

In the latest issue of Scrapbook and Cards Today magazine, I created a double-page layout that I just love, using the new Fancy Pants Dream Big collection, and I'm sharing it with you today! This layout documents an amazing hike that I took with my brother last fall in the Daniel Boone National Forest in Kentucky. I'm loving creating double-page layouts lately, and it's a design challenge for me to tie the two pages together in a successful way! (*All product links are affiliate links. You don't pay any extra, but I get a small percentage of your sale! Thanks for your continued support!) 

Supplies | Fancy Pants Dream Big Collection Kit, Fancy Pants Dream Big Cork Stickers, Fancy Pants Dream Big Collection Puffy Stickers, Becky Higgins Everyday Edition Core Kit, Ali Edwards "Wild" Story Stamp

The coolest part about this layout happened when I first started creating. I glanced at the map paper background, and realized that I recognized the names of the towns. It turns out that on our day of hiking, we were just south of where this map print ended at the base of the page! What a coincidence!

I started out with my left page, including one 4" x 6" photo and two 4" x 4" photos, overlapped in the center. To cover up that gap, I added a Project Life Everyday Edition "Adventure" card that I punched into a circle, then topped with one of the Dream Big collection die-cut wreaths.

Above it, I tucked a red Becky Higgins Everyday Edition Core Kit behind my photo, and added a puffy sticker from the Dream Big Collection Kit, and stamped with the "wild and free" phrase from Ali Edwards. On this side, I also started my title, which I cut from Dream Big patterned paper with my Silhouette Cameo using one of my favorite title fonts, Bebas Neue. I also cut the same size letters out in dark gray cardstock, creating a shadow on the title.

WildWonderful_Right_BLOG.jpg

I continued my title to the right side of my spread, just below my 4" x 12" photo. Here's a little trick for you: I don't have a printer that will print a 12" wide photo, so to get this panoramic image, which I took with my iPhone, I opened the JPG in Photoshop Elements and cropped the image to 4" x 12". I then added a guide line at the 11" wide mark on the ruler and cropped to 4" x 11" before printing that out on an 8-1/2" x 11" page. Then I hit "undo" and cropped the last 1" x 4" portion of my photo, on the right side of the guide line before printing that small piece onto a 4" x 6" sheet of photo paper. Once I trimmed that tiny section, I adhered both to a white photo mat that was 4-1/4" x 12" before adhering that to my layout. You can barely see where the two pieces of the photo meet! 

WildWonderful_closeup1.jpg

To each side of my title, I added a beautiful spray of flowers and leaves using the gorgeous Dream Big die-cuts, included in the Dream Big Collection Kit. This was my favorite part of the layout! 

My journaling was typed using the Rough Typewriter font and printed on a Becky Higgins Everyday Edition Core Kit journaling card, which couldn't have been more perfect for what I wanted to say about this day. 

WildWonderful_closeup3.jpg

My last area of embellishment just above my photo on the right side includes the bottom of the Becky Higgins Everyday Edition Core Kit red card from the left side of my layout, which completed the red visual triangle across my spread, with the red arrow being the middle of the triangle. (To learn more about visual triangles, check out my class, Terrific Titles, at Big Picture Classes! You can find that link on the sidebar. >>>) I also added the Fancy Pants Dream Big Cork Stickers and Puffy Stickers, along with an Ali Edwards stamp and a couple of die-cut from the Dream Big Collection Kit

I SO love how this layout turned out, and I love that it documents a really amazing day even more. Be sure to check out all of the awesome Fancy Pants products I used on this layout in the gallery below:

Documenting October with Elle's Studio October Kit + Add-Ons

Hi there! The Elle's Studio October 2017 kit and add-ons went live yesterday, and I shared a new layout and process video with you, but today, I'm switching things up a bit and showing you just how perfect the ES products can be in pockets! I documented our October 2016, and this kit was just made for my photos. (*All product links are affiliate links. You don't pay any extra, but I get a small percentage of your sale! Thanks for your continued support!) 

October2016_Page3_Blog.jpg

At the beginning of the page, we were headed back from a road trip to the mountains. The "life in photos" die-cut circle from the October kit was perfect for dressing up this yellow tag from the Favorite Season printable, and I also added a stamped "love" circle from the So Cozy stamp and a green "x" from the Summer Puffy Stickers. I'm still using them on my layouts! Below that, I added the "notes from this" phrase from the So Cozy stamp, then a piece of chipboard from my stash below. 

October2016_Page3_Closeup3_Blog.jpg

October usually means racing for us, as we go to the Austin Grand Prix each year here in Texas. I loved the way that the diagonal striped 4" x 6" tag from the October kit pointed directly to my "F1 Grand Prix" journaling tag. I also added the "play" stamped circle from the So Cozy stamp in the top corner, to add a little bit of orange.

October2016_Page3_Closeup4_Blog.jpg

 I was happy to get myself in this page, too, sporting my favorite driver, Lewis Hamilton's gear. The next tag's background was created with a piece of the Family Fun 6" x 6" Paper Stack, and was perfect for the "being together tag" from the October Kit, an acrylic heart from the Stars and Hearts Mixed Acrylic and a the heart Vellum Speech Bubble.

October2016_Page3_Closeup2_Blog.jpg

How awesome is this little frame included in the So Cozy stamp? I stamped the frame, then "so cozy" inside of the frame before cutting it out and adhering it directly to my photo with dimensional adhesive. It was the perfect saying for this photo! 

October2016_Page3_Closeup_Blog.jpg

Thanks so much for stopping by today! The new products in the Elle's Studio shop this month are just perfect, and with them I created one of my favorite pocket pages to date! Later, I'll be sharing how I'm doubling this page up with another layout to finish off the month. Until then, be sure to shop these supplies from the gallery below before they're sold out of the shop! Happy creating! 

Elle's Studio October Reveal!

It's amazing that October is already here, and since it is the 10th, I'm sharing another amazing Elle's Studio kit with you! I thought this month I'd share the kit contents and add-ons in video form, so grab a cuppa and watch this quick run-though of all of the new product available in the shop! (*All product links are affiliate links. You don't pay any extra, but I get a small percentage of your sale! Thanks for your continued support!) 

The first project I created with the new goodies had to use the Wood Veneer Leaves and the leaves included in the So Cozy Stamp! I loved creating a colorful, stamped wreath around my circular photo using the leaves from the stamp, as well as the Stanley Alphabet Outline, and accenting with tags from the October Kit and the "I love autumn" Vellum Speech Bubble

The layout turned out exactly as I had hoped, and I'd love to share how it all came together with you in this process video! 

Stay turned until tomorrow, when I will share a 12" x 12" pocket page layout that I created, using the new October Kit and add-ons! Until then, happy creating! 

All of the product that I used on the layout can be found in the Elle's Studio shop:

September Pocket Pages Using the New Elle's Studio Kit!

There are so many project possibilities available with the new September Kit from Elle's Studio! Yesterday, I shared an 8-1/2" x 11" layout, and today, I wanted to show you a double pocket page spread that I created, documenting September 2016. When I create my pages, I carry the same color scheme across a double page spread, and for this layout I chose dark blue, light blue, yellow and orange. (*All product links are affiliate links. You don't pay any extra, but I get a small percentage of your sale! Thanks for your continued support!) 

Sept2016PocketPages_Spread_Blog.jpg

Supplies | September 2017 Kit, Sweater Weather PrintablesDate Night Stamp, Wood Veneer Borders, Thankful Sticker Labels, Autumn Sequins, Happy Birthday Stickers (balloons), Acrylic Summer Shapes (glasses), Foodie Journaling TagsFamily Fun Journaling Tags, Family Fun Bits and Pieces, Family Fun Acrylic Shapes ( blue heart), Family Fun Stamp, Olivia Alphabet Stamp, Dated Stamp, Title Builder Stamp, Happy Birthday Stamp

I love all of the energy in this page, and I really kept the embellishment to a minimum, but it doesn't appear so! On the left side, I used the blue 4" x 6" tag from the new Family Fun Journaling Tags to top my spread, stamping "SEP" over and over in blue ink using the Dated Stamp

The embellishment I used on this side was only the Date Night StampThankful Sticker LabelsWood Veneer Borders and die-cuts from the kit.

Sept2016PocketPages_Closeup1.jpg

I also had to use one of the new Foodie Journaling Tags to document a favorite lunch spot! 

Sept2016PocketPages_Closeup2.jpg

On the right side of the page, I used the Sweater Weather Printables to create a customized 4" x 6" tag for the top of the spread. By taking a 3" x 4" tag from the digital file, duplicating it and mirroring it on a 4" x 6" page, then re-colored it to match my spread.

The entire process only took about three minutes, and I created a tag that works perfectly for this spread! Because a birthday photo was next to the tag, I added the balloons from the Happy Birthday Stickers and Happy Birthday Stamp, along with some Autumn Sequins. I carried the "SEP" title from the left side and added "story" using the Title Builder Stamp

On this side, just like on the left, I used very little embellishment— mainly stamps and die-cuts from the September kit. On this journaling tag placed next to a photo of my new goddaughter, I added "I love being your" and "mother" from the Family Fun Stamp, and added "god" using the Olivia Alphabet Stamp, along with a Family Fun Acrylic Shape heart.

Sept2016PocketPages_Closeup4.jpg

This page came together quickly and easily because the September Kit coordinates so well with the new Family Fun collection. Check out all of the new product in the Elle's Studio shop today to help you document your September memories! 

The Elle's Studio September Reveal is Here!

I know I say this every month, but we at Elle's Studio are so excited about the September reveal! Not only do we have a new exclusive kit and add-ons, as we always do on the 10th of each month, but the new Family Fun collection is now available in the shop! (*All product links are affiliate links. You don't pay any extra, but I get a small percentage of your sale! Thanks for your continued support!) 

Family Fun is such a beautiful collection of deeper colors in versatile patterns, with lots of awesome embellishments! I absolutely loved working with this new product to create a new 8-1/2" x 11" layout about my family.

MomentsTogether_Blog.jpg

Our new September 2017 Kit coordinates with the Family Fun collection for endless papercrafting possibilities! This kit includes the perfect mix of journaling and filler tags, with smaller die-cuts.

Along with the kit, the add-on embellishments; Autumn Sequins, Wood Veneer Borders, Thankful Sticker Labels, Autumn Wood Veneer Words, Date Night Stamp, Acrylic Buttons, and Favorite Acrylic will finish off your layouts and pocket pages perfectly!

Your digital library will love the new Sweater Weather Printables and September Cut Files

As another added bonus, the new Foodie mini collection is now available in the shop to document all of your eating adventures! These products include the Foodie Puffy Stickers, Foodie Journaling Tags and Foodie Stamp.

I loved creating a new 8-1/2" x 11" layout using the September Kit and Family Fun collection. As soon as I saw the 4" x 6" multicolor striped tag in the kit, I knew it would be perfect for a photo of us with my besties from university and their families. The new woodgrain in the Family Fun collection is just perfect, and I love the contrast it provides against the bold colors and white background. 

Besties_Blog.jpg

When I opened my packet of Wood Veneer Borders, I immediately knew that I wanted to paint them, and incorporate them into a central column on my layout, allowing spots for my title and journaling. Stay tuned for my process video of this layout!

Be sure to check out all of the new goodies in the Elle's Studio shop before they're gone, and happy creating with your new supplies! I'll be back tomorrow with a new pocket page using the new kit and add-ons!

Instagram Hop: Back to School with BPC

I am so excited to announce a fun blog hop happening over on my Instagram account today called "Back to School with Big Picture Classes!" I am participating with my class, Terrific Titles, and each of us has taken a class taught by one of the other contributors, then made a layout based off of what we learned, or what we were inspired by! I can't wait to share the class that I took for the hop! 

BPCIGHop_image1_blog.jpg

This hop includes 10 amazingly talented Big Picture Classes instructors, some of my favorite scrapbookers! 

BPCIGHop_image2_complete_blog.jpg

Here is the hop order, with links:

  1. Raquel Bowman  | Subtle Details
  2. Pam Baldwin | Text Tricks
  3. Michelle Wedertz | School Time Solutions 
  4. Becki Adams | Line it Up
  5. Ginny Hughes | From A to Z
  6. Kim Jeffress | Journal Your Story
  7. Zinia Amoiridou | Mixed Media Texture
  8. Neela Nalam | Big Impact
  9. Paige Evans | Paige's Pages 13
  10. Meghann Andrew | Terrific Titles

At each of the stops along our Instagram hop, listed above, you can enter to win a free month's subscription to Big Picture Classes! That's 10 different winners who will be chosen! Just think of all of the great classes you can take with your free membership! To be entered at each of the stops along the hop, all you have to do is: 

  1. Follow my account, @meghannandrew , and all of the other accounts along the way.
  2. Like my Instagram post, and all of the other 9 posts on the hop.
  3. Leave a comment on my post, and each of the other hop posts about what you want to learn over at BPC, and in your comment, tag a friend who you think would be interested in the giveaway, too! You can leave as many comments as you would like at each stop to increase your chances!

*Per Instagram rules, we must mention this is in no way sponsored, administered, or associated with Instagram, Inc. By entering, entrants confirm they are 18+ years of age, release Instagram of responsibility, and agree to Instagram's term of use.

Here are a few sneaks of what you'll see when you hop over to my Instagram feed.

HappyGirl_closeup1_blog.jpg
HappyGirl_closeup2_blog.jpg

And, for an additional bonus, I created a process video while I created my layout! Thanks for watching, and I look forward to reading your comments on my Instagram post! Happy creating!

Elle's Studio August Reveal Day!

We at Elle's Studio are so excited about the August kit and add-ons! With fun graphics and beautiful colors, you will definitely want to create with these goodies! (*All product links are affiliate links. You don't pay any extra, but I get a small percentage of your sale! Thanks for your continued support!) 

The August Kit has so many amazing tags this month. I didn't know where to begin when I started my layouts! There is a perfect mix of journaling and filler tags, perfect for any type of project.

In addition to the kit, you'll find the perfect coordinating add-ons in the shop: (from left to right) Wood Veneer Clips, Yes to This Stamp, So Awesome Puffy Stickers, Wood Veneer YUM, Wood Veneer Pocket Fillers, Enjoy Acrylic, Hearts and Circles Acrylic, Tiny Heart Stickers, August Labels

You'll also find the The Story printables and August 2017 cut files in the shop as well!

Extra, extra! Read all about it! We have a new mini-collection in the shop, too! The In the News journaling tags and stamp will help you document what's happening in your life and the world around you.

In other news, the Title Builder stamp and bundle have been RESTOCKED! Get them before they're gone! We completely sold out last month, and they're not guaranteed to be restocked again.

Now for my projects!

This was most definitely my favorite project this month. I LOVED the colorful pencil journaling tag and puffy stickers in the August Kit and So Awesome Puffy Stickers, and as soon as I saw them, I knew I wanted to document our struggles with teaching my daughter how to write. To begin the page, I drew a handwriting guide on a piece of 8-1/2" x 11" white cardstock, and just asked her to write her name with a felt-tip pen. While she was writing, I took photos. Within a few hours, I had this page completed! Scroll through the gallery to see all of the product that I used.

My second layout is just an ode to my foodie nature, and a celebration of my love for summer food! The "good eats" die cut and journaling tag from the August Kit, along with the wood veneer YUM were perfect for this page! I also had to use the Stanley alphabet stamps for my title. I LOVE them! Check out the product I used on the gallery below.

Thanks so much for stopping by to check out all of the new goodies! June and July kits have sold out, so be sure not to miss out on this one! Start a subscription today to guarantee that you don't miss out on any future kits, and lock in your reveal day price of $9.99. Plus, subscribers will also receive FREE SHIPPING on any other products that are purchased during the 24 hour bundling period starting each month on the 10th at 8:00 am PST and ending on the 11th at 8:00 am PST. These products will be shipped with your subscription. Happy creating! 

SCT Summer Edition: Pocket Play

I was so excited to be featured twice in Scrapbook and Cards Today's summer issue, and I loved being a contributing writer for the Pocket Play column. It it, I described how I finally found a way to make pocket page scrapbooking work for me, and I shared a new favorite layout with a favorite color scheme for me: yellow and red with a touch of teal. You can find this color scheme often in my albums. (*All product links below are affiliate links. You don't pay any extra, but I get a small percentage of your sale! Thanks for your continued support!) 

My title pocket was created with the fun, colorful tag from the Happy Birthday Journaling Tags. I started the quote out with the word "memories" from the Live Laugh Love Puffy Stickers and searched online for a quote about memories, finding this one from Rosa Parks. I loved it, and typed it in Photoshop before printing it on the tag. A few more puffy stickers and an Acrylic Birthday Confetti piece finished off the pocket, which introduced the page.

This page documented a surprise trip to my mom and dad's for my father's 60th birthday. I had to create a tag that documented that, and the balloon Happy Birthday Stickers and Dad acrylic and word set helped me add a bit of embellishment to the Happy Birthday Journaling Tags. This may be one of my favorite ever embellished tags in my album, although my sewing machine was acting up that day when I sewed the balloon strings!   

Summer to me means baseball games. I love going to them with my family, and our hometown stadium is so fun to visit. I used the "like it/love it" tag from the April 2017 Kit as a base for my pocket, typing my journaling and adding a cut tag from the Live Laugh Love Bits and Pieces and a piece of printed Live Laugh Love washi tape stickers

Check out the FREE Scrapbook and Cards Today summer issue to red my full article and get loads of summer scrapbooking inspiration! Happy creating! 

AE Story Kit | Fun

I had a few moments this weekend to open my June 2017 Fun Story Kit and Stamp from Ali Edwards. As soon as I saw the colorful journaling cards and embellishments in the kit, I knew exactly which photo I wanted to scrapbook.

By adding a few scraps of paper and some colorful ink pads to the kit and stamp, I had this fun page created in no time. To see how this layout came together, watch the process video below!

Thanks for watching! What fun memories have you documented lately?

Summer Mini Tag Album

I am excited to share the inside of my summer mini tag album, created with the new products in the Elle's Studio shop*, with you today. (*All product links are affiliate links. You don't pay any extra, but I get a small percentage of your sale! Thanks for your continued support!)

When I saw the new Cork Tags, I immediately thought of a mini album, and knew I had to create one. So, I chose the "summer" tag, which meant that I set to work choosing photos from our summer to document. 

Supplies | July 2017 Kit, Cork Tags, Love This Life StampSummer Puffy Stickers, Everyday Circle StickersSummer Journaling TagsSummer Stamp, Dated Stamp, Live Laugh Love 6" x 6" Paper Stack, Live Laugh Love Small Blank Labels, July Labels

I began with the Cork Tag itself; backing it with a piece of patterned paper from the Live Laugh Love 6″ x 6″ Paper Stack and stamping "documented 2017" with the Dated Stamp. Just a few of the Summer Puffy Stickers finished off the front cover! 

After choosing my photos, I sized them to match the tag, at 1-7/8" high and 3-1/2" wide. Three images fit on each 4" x 6" photo print. After I trimmed them down, I simply lined it up with the cork cover as a template and snipped the edges and punched the holes.

On the inside of my cover, I added another piece of the yellow pattern from the Live Laugh Love 6″ x 6″ Paper Stack and stamped "around here" with the Love This Life Stamp, adding a die cut from the July 2017 Kit in the center of the words. My first photo, taken of my daughter swimming to my husband, only needed a few Summer Puffy Stickers to finish it off. 

Summer2017Mini_Page02_blog.jpg

On the back side of the swimming photo, I used the perfect water tag from the Summer Journaling Tags, adding my typed journaling and a date stamp. On the opposite page, I documented an afternoon play date, again adding only the Summer Puffy Stickers to the image.

The back side of the playdate photo was created with the red stripe tag from the July 2017 Kit and the circle heart from Love This Life Stamp, adhered with dimensional adhesive. On the opposite page, the Everyday Circle Stickers and Summer Puffy Stickers embellished a fun photo of my daughter relaxing by the pool.

I had a hard time cutting into the yellow ombre tag from the July 2017 Kit, but I used it on the backside the photo, adding typed journaling and a simple Summer Puffy Star. On the opposite page, I documented a trip to the Museum of Natural Science, adding another Summer Puffy Sticker that said, "around town."

Another tag from the July 2017 Kit that I had a hard time resisting the urge to hoard was the colorful polka dots one. I used it on the backside of the HMNS photo, and added a Live Laugh Love Small Blank Label for my journaling and a July Label for the date.

On the back side of the splash pad photo, I added a Live Laugh Love 6″ x 6″ Paper Stack yellow heart pattern, another Live Laugh Love Small Blank Label and a July Label, stamped with the "hello summer" sentiment from the Summer Stamp. On the opposite page, I used a black and white photo from a trip to TCBY, and added the "favorite snapshot" die-cut from the July 2017 Kit to cover a face in the left corner of the photo. I love the way that blue "pops" against the black and white photo.

To add my journaling to the back side of the image, I printed it directly onto the adorable ice cream tag from the Summer Journaling Tags, then stamped the date. 

I can't wait to add more summer memories to this little tag mini album, and it's easy to do since it's on attached with a binder ring. Thanks for stopping by today, and be sure to pick up these awesome new products to help you document your summer memories! 

Altenew Scrapbook Collection Blog Hop + GIVEAWAY

I am so excited to be back with you again for another Altenew Scrapbook Collection blog hop! I have had so much fun working with the Reflection Scrapbook Kit*, and I can't wait to show you what I created. (*All product links are affiliate links. You don't pay any extra, but I get a small percentage of your sale! Thanks for your continued support!)  

First, let's have a look at the kit itself:

If you purchase a Reflection Scrapbook Kit, you also get a free gift! 

The Reflection Scrapbook Kit is completely filled with paper (2 pieces for each double-sided pattern), stickers, chipboard, die-cuts, wood veneer, puffy alphabet stickers, transparent die-cuts, wooden buttons, acrylic frames, and more! There is so much here that I've barely dented my kit. I've created soft dreamy layouts with it, as well as this new bold and vibrant layout for the hop today:

I've seen some amazing, bold creations using the Halftone Circles Stamp Set, but I wanted the circles on this layout to be a little more "low-key." When I trimmed my 12" x 12" painted rainbow patterned paper down to 8-1/2" x 11", I made sure to leave a bit of space on the side that I could stamp the circles on with the coordinating ink colors. I then used circle punches to cut out the circles and adhere on my page with dimensional adhesive.

Along with the stamped circles, I also added coordinating embellishments from the Reflection Scrapbook Kit, along with sequins from my stash in their respective colors on the background.

My title was so easy to piece together using the transparent die-cut word "beautiful" from the kit, along with the puffy alphabet stickers. 

My favorite part of the layout is the wood veneer butterfly that I colored in with a water pen and the same ink colors that I used on the Halftone Circles. To create a boundary between the colors, I colored the division between the sections with black permanent pen  and added a few sequins for sparkle. I love the way this colorful butterfly looks at the bottom of the page, pointing up toward my title, photo and journaling. 

Now for the exciting part! I am giving away a $30 gift certificate to one lucky winner who comments on this blog post! Just tell me what your favourite part of summer is in a comment (don't worry- you can also comment as a guest on this blog) and I will choose a winner on Friday July 21st at 10:00am CST.

Altenew is ALSO giving away a $50 gift certificate to THREE lucky winners! Please leave a comment on the Altenew Scrapbook Blog by Wednesday July 19th at 11:59pm EDT for a chance to win. Winners will be announced on the Altenew blog on Saturday July 22nd.

Thanks so much for stopping by! To see more of my work, follow my blog here, via the links on the right sidebar, and check out my Instagram account! Next, head over to see what Stefanie Reid has created, and if you get lost along the way, here is the full list:

Altenew

Enza Gudor

Paige Evans

Missy Whidden

Sandra Dietrich

Meghann Andrew

Stefanie Ried

Flora Monika Farkas

Claudia van Rooijen

Elsie Robinson

Kymona Tracey
Irit Landgraf

Elena Morgun

AhSang Jung

Eunyoung Lee

Anna Komenda

Lilith Eeckels