Elle's Studio: Sunshine Girl

Yesterday on the Elle's Studio blog, I shared a layout inspired by the April exclusive kit and cut file, and I'd love to share it with you today! 
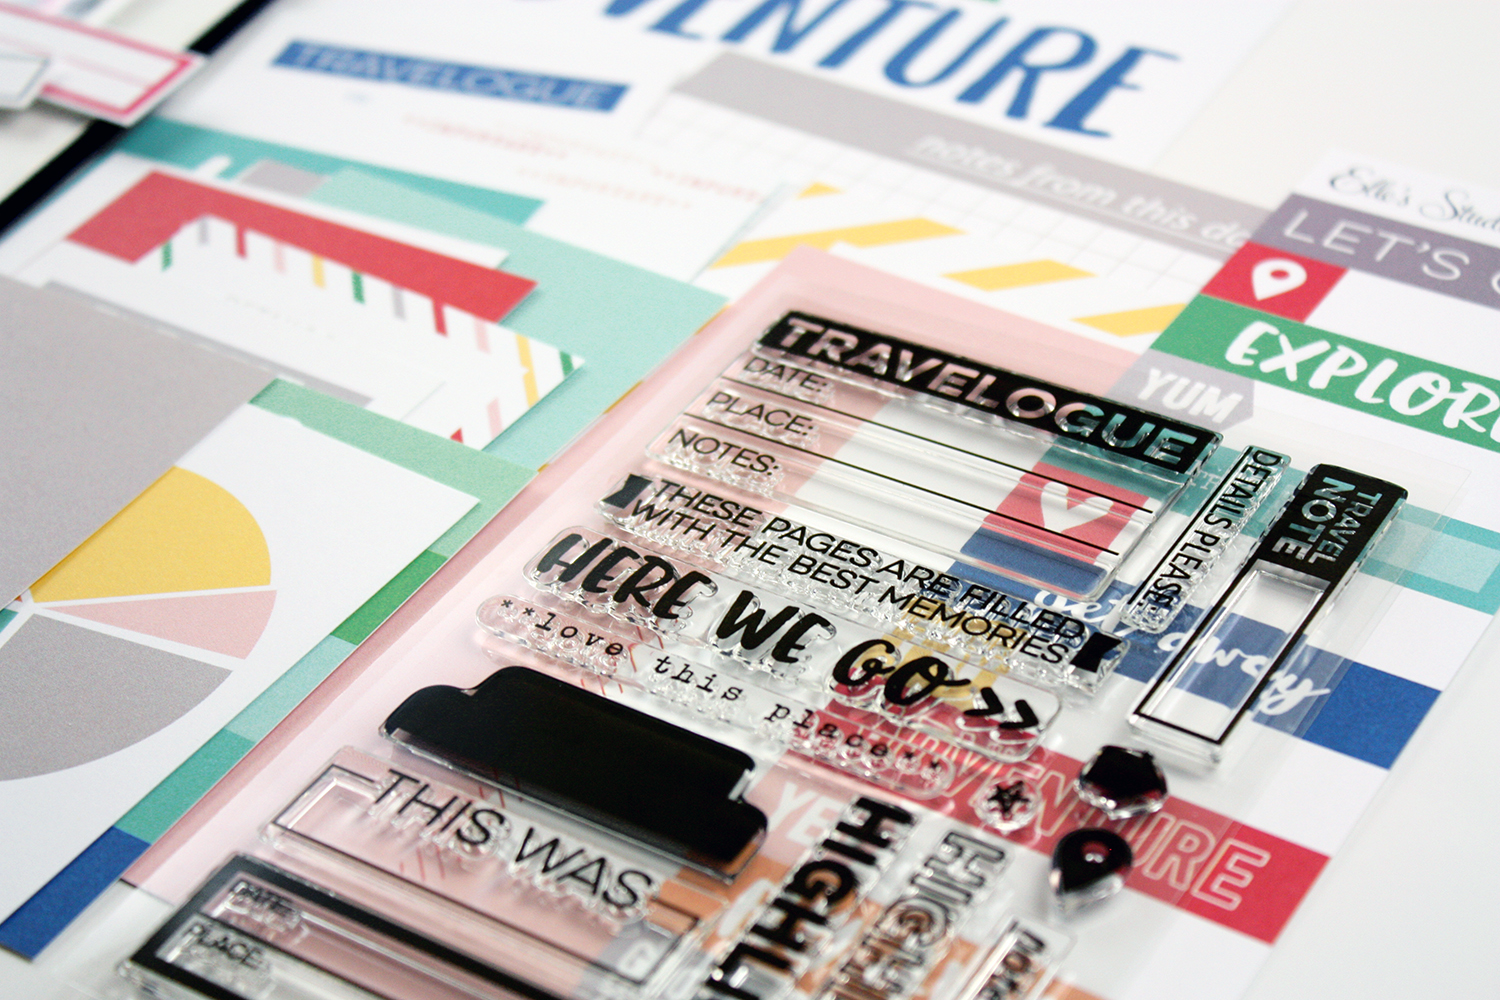
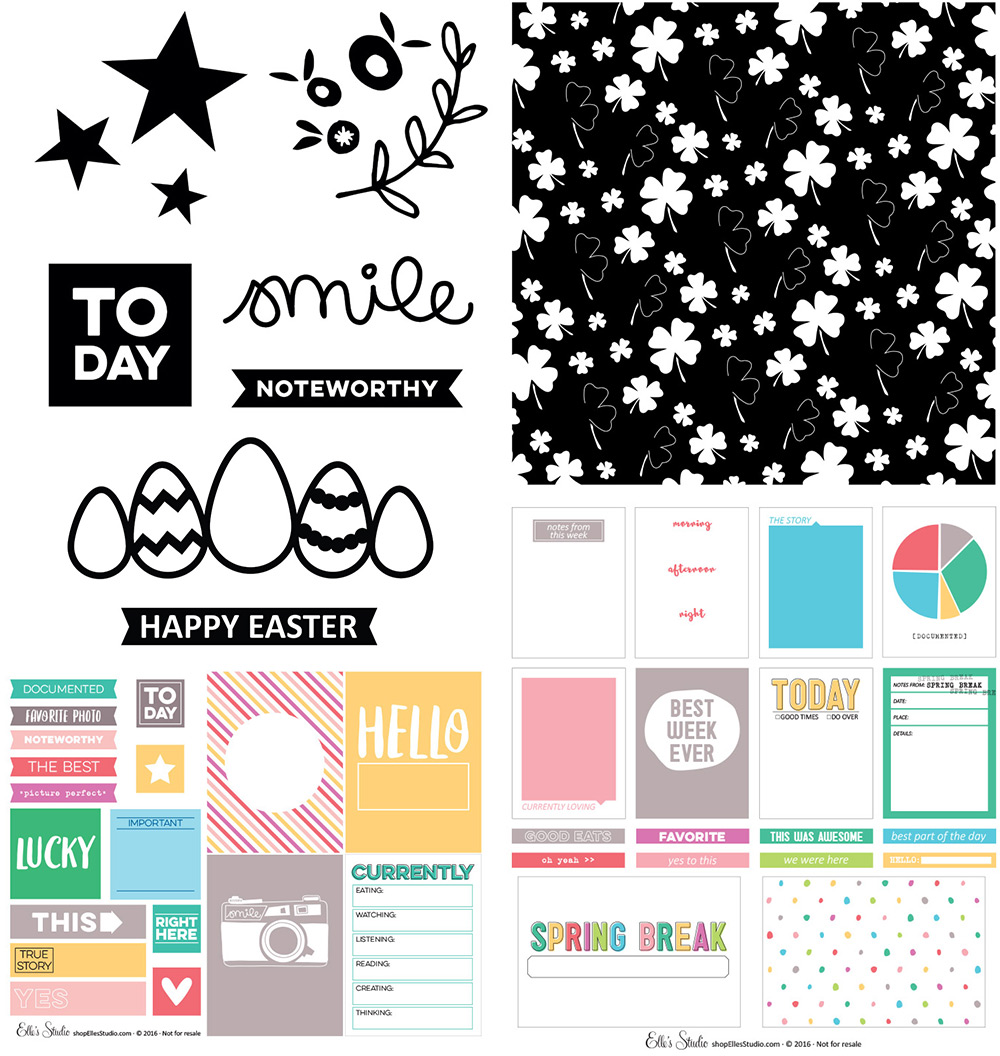
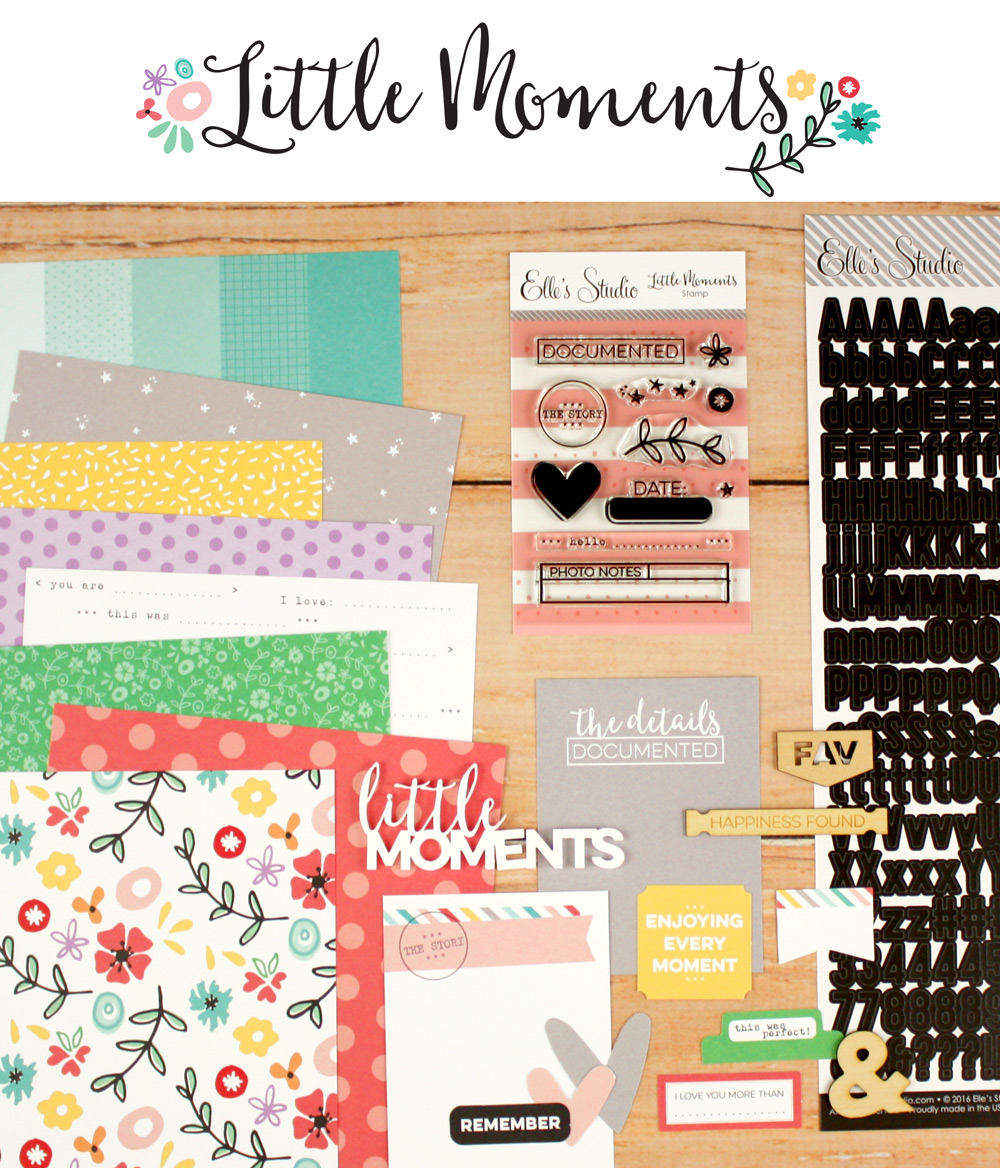
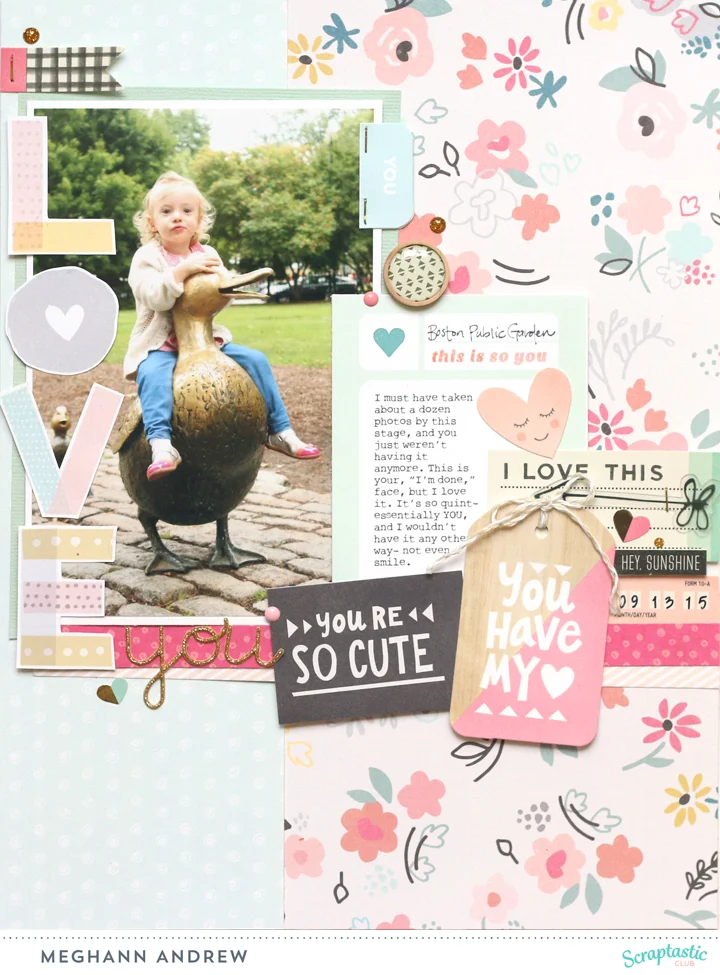
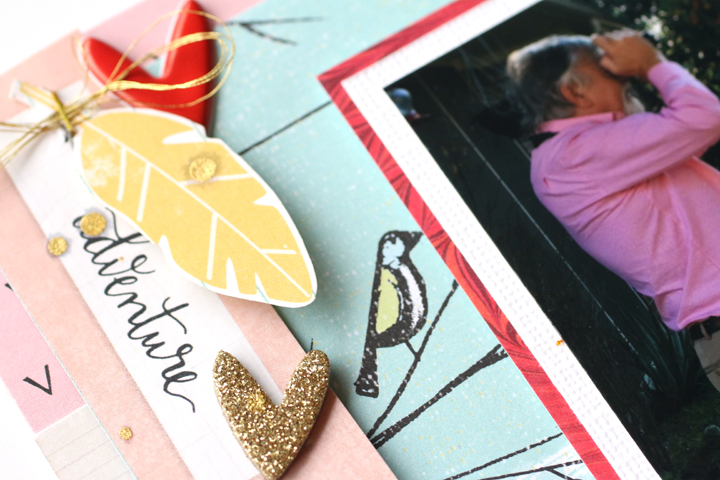
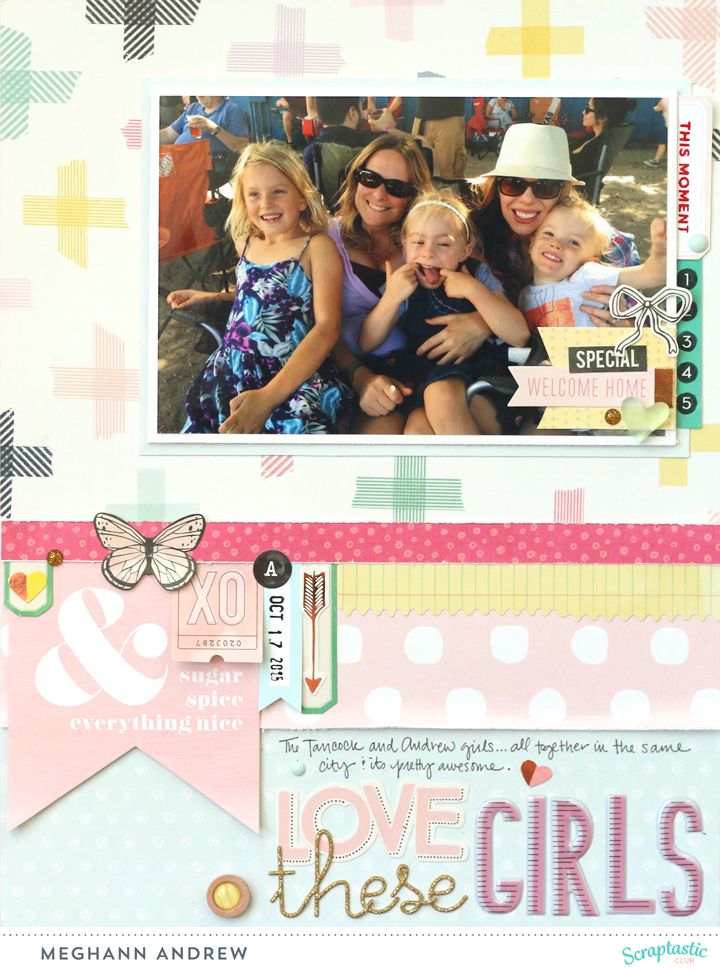
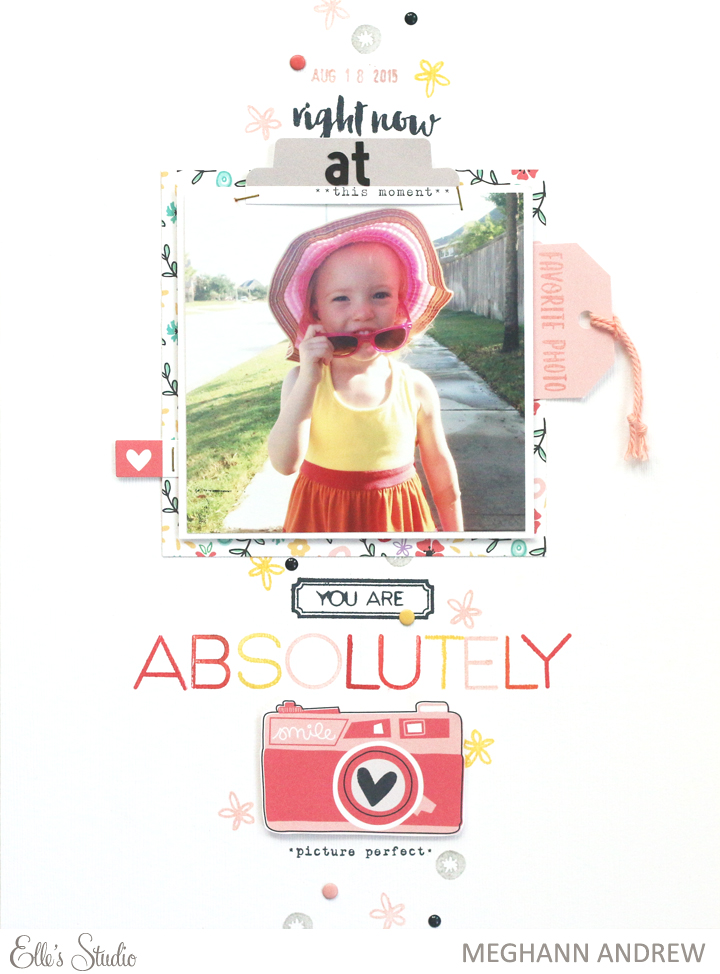
It was the "remember when" tag from the April exclusive kit that started the idea for this layout. I knew that I wanted to use an older photo of my daughter as a baby. Because I was using a circle, I wanted to find other circular elements from the kit and add-ons, and that led me to the sun cut file from the April cut files. As a baby- not so much now as a toddler- my daughter was smiley and happy all of the time, so it was easy to find a happy photo that I could size to fit inside the sun cut file. The awesome, colorful striped 4" x 6" tag from the kit draws your eye directly to the photo to make it the focal point of the layout.

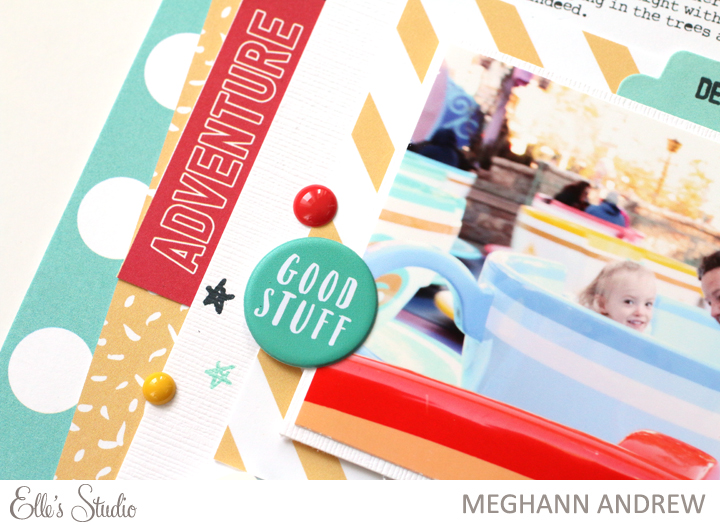
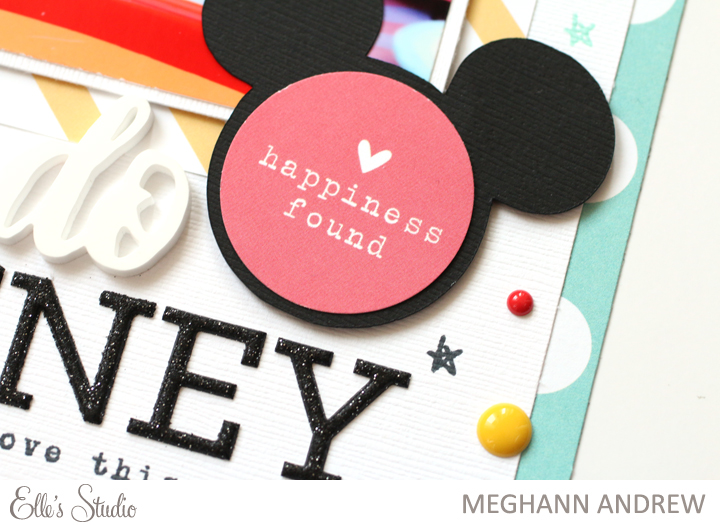
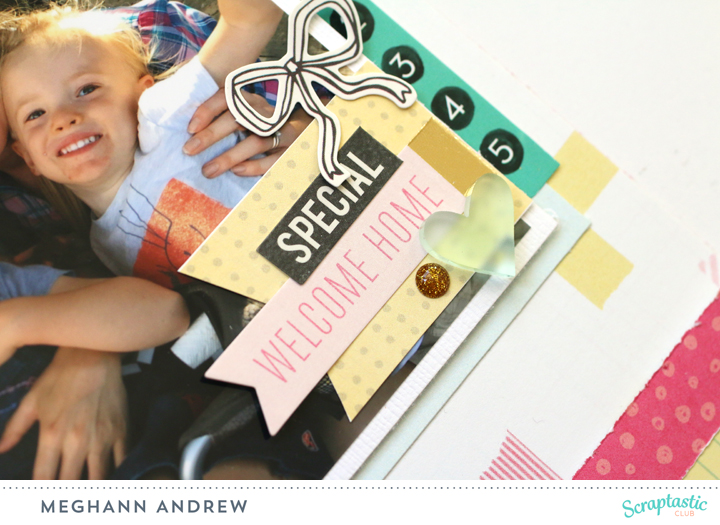
One more small circle created the base for another small embellishment grouping which included a grey circle from the Little Moments bits and pieces and another awesome puffy sticker from the Good Stuff puffy stickers.  

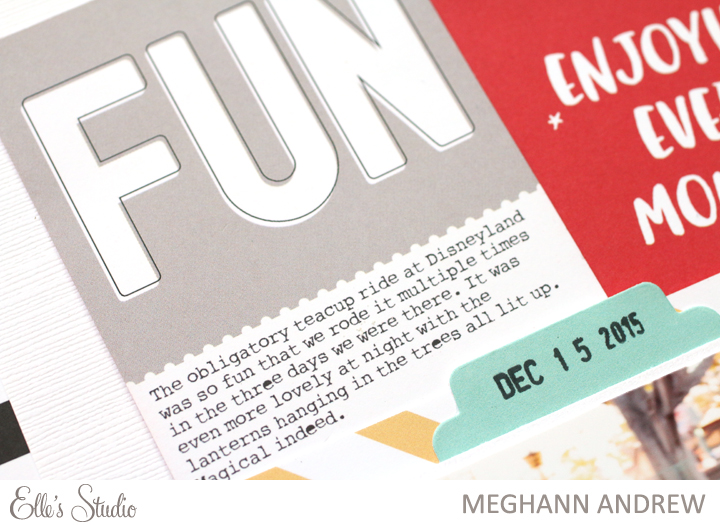
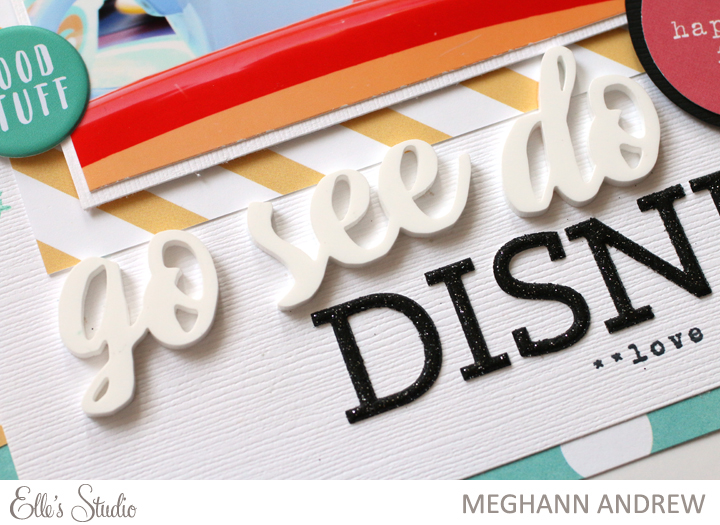
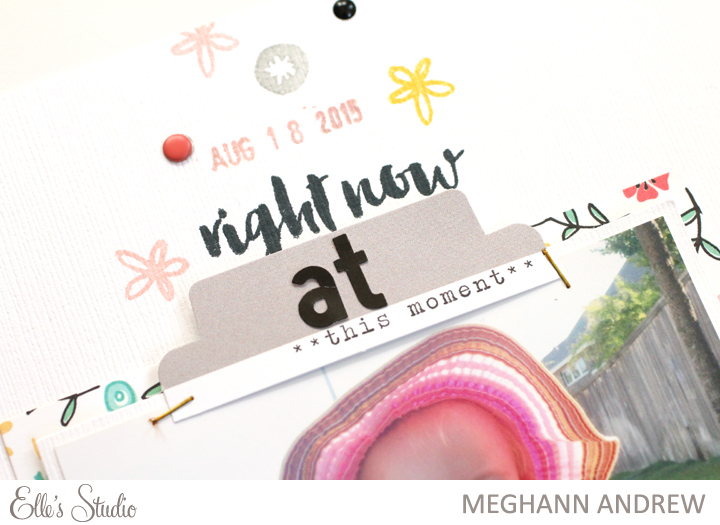
Possibly my favorite part of the layout is the title. Those outline and solid Jordan alphabet stamps are the perfect font for this playful layout. A bit of stitching on the rays of the sun and underneath the stamped title added the perfect finishing touch to the page! 

Thanks for stopping by! Be sure to check out these awesome ES products so that you can create your own sunny layout! 

Jot Magazine Issue 13: 90 Days

The latest issue of Jot Magazine, Issue 13, included a numbers gallery, and today I'd like to share my numbers layout with you! 

90Days_blog.jpg

"90 Days" supplies | Cardstock: Bazzill. Patterned paper: Amy Tangerine Finder's Keepers (pink & orange stripe), Dear Lizzy for American Crafts (pink polka dot), Studio Calico (numbers vellum.) Embellishments: Project Life card, Amy Tangerine Finder's Keepers cardstock die-cuts, Finder's Keepers rub-ons, Amy Tangerine Stitched enamel dot shapes & Thickers, Mark Richards metal dots. Other: sequins.

When the idea of creating a layout around numbers came up, I immediately thought back to our time in the NICU. EVERYTHING in there is about numbers- the oxygen levels in my daughter's blood, her temperature, test results, etc. The other big number from our time there was 90, the number of days that we called the NICU our home, so I decided to make that number the focal point of my layout, die-cut the number with my Silhouette Cameo, and placed my photo inside the "0." I had the perfect vertical photo- me sitting at the side of the isolette, with my hand on my girl, probably only days after she had been born.

The font I chose, Bebas Neue, was tall and clean, so I decided to go with a vertical design on my layout, adding strips of patterned paper, vellum and washi along the left side of the 8-1/2" x 11" page. 

I knew I would want to write quite a bit about this photo, so I chose to type my journaling (in Rough Typewriter font) and print it onto a trimmed Project Life card. I placed this at the bottom left, along with a few simple embellishments from the Amy Tangerine Finder's Keepers cardstock die-cuts

Since I had quite a bit of weight on the left side of my page, I wanted to add a bit more to the center and the right, so I placed the word, "days" from the Amy Tangerine Stitched Thickers right below my die-cut numbers, and to the right of that, a cardstock die-cut flower group, which balanced the rub-on flowers at the top left of the page. 

Be sure to check out the rest of the numbers gallery in Issue 13 of Jot Magazine! 

Sweet Child of Mine Kits: Love You

Today I have one more layout to share with you using the Sweet Child of Mine kit (sold out) and girl add-on (sold out) from Scraptastic Club. This layout documents a favorite photo from our trip to Boston last September, when we visited the Boston Public Garden, and this momma wanted a photo with the Make Way for Ducklings statue.

I wanted this 8-1/2" x 11" layout to be girly and playful, just like my photo, and these kits were perfect to achieve that. 

To balance out the bold pattern on the right side of the layout, I placed my photo on the left side, and cut out the fun "love" word from one of the Crate Paper Little You papers included in the add-on kit, and adhered it directly to the left side of my photo. I created a shelf across the bottom of my photo with two strips of patterned paper that started the base for a large grouping of embellishment. 

The "this is so you" stamp from the Drops of Jupiter stamp set was absolutely perfect for stamping onto my journaling card, since this photo of my daughter is so totally her! 

Thanks for stopping by! Don't miss another fantastic Scraptastic Club kit- subscribe today

A Sale for a Cause- Support March of Dimes!

Hi there! My family is walking in the March for Babies in Houston this Sunday, April 24th. If you are reading this blog, chances are you are a scrapbooker or paper crafter of some sort, so I'd like to let you in on an Instagram sale to support our walk, and get some awesome scrapbooking goodies! 

I've set up an Instagram account, @scrapstash4mod, and, so far, I've listed 10 boxes of awesome product, all grouped into different themes, including: girly, boy, floral, travel, love, autumn, and more! I'd love for you to take a look and pick up a deal to support a great cause! 

The work of the March of Dimes really hits home for us. Our daughter, Elizabeth, was born at 25 weeks gestation and 1 lb. 4 oz. because I developed HELLP syndrome, an extreme form of preeclampsia. She was a fighter, and was able to come home after 90 days in the NICU, but we are still dealing with the effects of her prematurity, especially with her lungs. Please help us to raise money for this awesome foundation that helps moms have healthy pregnancies, and is fighting to end premature birth around the world.

If you're not interested in purchasing product, but would like to donate to our walk, please visit my March for Babies page, and donate any amount that you can. Every dollar helps! 

Principle Power at Big Picture Classes (With a Free Trial Offer!)

It feels just like yesterday that my class, Principle Power, was launched at Big Picture Classes, so it is hard to believe that we are three months in! I have loved seeing the projects and comments on the lessons from students who are working through this 5 lesson course at their own pace. You can easily drop the class when life gets busy and pick it back up at any time.

Some of the layouts that I created for the class are my absolute favorite layouts of all time. There are 14 layouts shared, with 5 process videos- each one explaining a design principle in layman's terms so that you too can use these concepts to make your layouts shine, and emphasize what is really important on your page. To get a great idea of the type of content and a quick preview of my scrapbooking process, check out this video: 

Probably the most exciting aspect of teaching this course has been the feedback that I have received. These are just a few comments that have me "feeling all the feels!"

I especially love the comment from @Romie above, "I have been scrapbooking for a long time, but still learned such lot from this excellent class." So, if you're a new scrapbooker, or a seasoned veteran like me, there is still useful information to gain! 

If you'd like to take your layouts to the next level and harness the principles of design to work for your pages, I have a special offer just for you! New members to BPC can use the code 

BPCMEGHANN

to sign up for a free month trial membership, 2 weeks longer than the typical trial. Just go to the Principle Power class page, then click the "start your free trial" button and follow the steps to get your free trial.*

I am looking forward to seeing your questions, feedback and projects in the classroom! Click over to the Principle Power homepage to learn more about the class, see more sneaks and to get your free month trial! 

* Free month trial promotion ends June 1, 2016 at 11:59pm EST. First month free offer valid only on new memberships and is not valid for current or previous members. Click the "start your free trial" button and follow the steps to begin your trial. Enter promo code in promo box and continue checkout process. Not valid on previous purchases. Must enter promo code at checkout. Refunds will not be issued for misused or non-entered codes. 


Elle's Studio April Kit Reveal!

Hooray! The 10th is here, which means the Elle's Studio April exclusive kit is live in the shop! This happy kit will have you wanting to document those sunny spring moments in your life.

If you're like me, and you love to see your stash grouped by color, I've filmed a quick video of the kit contents just for you! This kit is so full of useful tags for scrapbooking or Project Life, and you can see all of them in this video: 

For the first time, Elle's Studio is offering puffy stickers to coordinate with this month's kit, in addition to the "Perfect Weekend" stamp, "Today" acrylic, "True Story" acrylic, "Days of the Week" acrylic and wood veneer labels

The April cut files and "Yes" printables will be the perfect addition to your digital stash!  

My first project, "Favorite Park," plays off of the colors in the photo of my daughter at her favorite neighborhood hangout. I love that no matter what I want to document, these kits have colors to coordinate. Watch the blog tomorrow for a process video of how I created this layout! 

"Favorite Park" supplies | Elle's Studio April exclusive kitApril cut files"Perfect Weekend" stampwood veneer labels, "Good Stuff" puffy stickersLittle Moments 12" x 12" paper collection, Little Moments 6" x 6" paper stack

The next layout is my favorite ES layout this month, possibly this entire year! I've never actually used a rainbow of supplies on a page, but with a kit this colorful, why not?

"Today You" supplies | Elle's Studio April exclusive kit"Perfect Weekend" stamp, "Good Stuff" puffy stickersLittle Moments 12" x 12" paper collection, Little Moments stamp, Little Moments bits & pieces, Jonah alphabet stamp <<< a must have for this perfect font! Other supplies: brad, enamel dots, wood button.

Be sure to purchase your exclusive kit today before midnight PST to be sure to get yours for the reveal day price of only $9.99, and check out all of today's NEW offerings in the Elle's Studio shop, and how you can use them in the Elle's Studio design team gallery

Scraptastic Club Sweet Child of Mine Kits: Going Home

So far with Scraptastic Club's Sweet Child of Mine kit + girl add-on, I've documented photos of my daughter as a toddler, and a girly photo, but I had yet to use the kits for and baby photos. That had to change, so I printed a photo of Lizzy's first car ride on the day we took her home from the NICU.

The majority of the pattern in this layout comes from Crate Paper's Little You collection, which make up a lot of the kits and are so lovely for scrapbooking those sweet baby moments. I wanted the layout to be a bit whimsical, and it was easy to achieve that look with these kits, which included the cute little animal stickers, flair, and sweet vellum clouds, one of my favorite exclusives this month. 

The "itty bitty" cut-apart tag from the girl add-on was so perfect for this layout, as we were able to take my daughter home at 34 weeks, adjusted, so she still only weighed about 5 pounds. It also added the perfect pop of yellow to the bottom corner of my photo.

Is there anything cuter than these Crate Paper Little You clips? I think not! This sweet little embellishment grouping balanced the other group in the bottom corner of my photo, and hid the unsightly "warning label" from the photo of the carseat. Win-win!

I added my journaling directly onto a piece of patterned paper- one that wasn't too busy so that it would be legible. While typing my journaling in PSE, I made sure to leave a small space for a few more embellishments, using a sticker tab from the Maggie Holmes Bloom accent stickers in the main kit, as well as a print and cut label from the Sweet Child of Mine digital files. Those things are SO versatile! 

Thanks for stopping by! I hope you have time to push some paper around this weekend! 

Elle's Studio Travelogue: Go See Do Disney

I am having so much fun with the Elle's Studio mid-release, Travelogue, that I created another layout using the fun, versatile supplies! While creating this layout, I decided that it was the perfect way to start an entire 8-1/2" x 11" album dedicated to our Disneyland trip last December. The colors I used- teal, red, yellow, black and white will be my color scheme throughout the album.

To begin the layout, I grabbed a few patterned papers from the Little Moments collection. The large teal and white polka-dot came from the Little Moments 12" x 12" paper collection pack, and reminded me of Minnie Mouse. To add some contrast, I put just a corner of the black and white stripe from the Little Moments 6" x 6" paper stack at the top left, then tucked underneath it, added the yellow pattern from the same paper stack at an angle, to keep the layout fun and relaxed. On top of those two layers, I added the "adventure" label from the Travelogue labels.

I used the incredibly useful Travelogue journaling tags in a couple of different ways- as a journaling tag which I typed my journaling on, as embellishment with the "enjoying every moment" tag, punched out onto a cardstock die-cut Mickey silhouette with the "happiness found" tag, and then as a photo mat with the white and yellow diagonal striped 4" x 6" tag. These tags formed the foundation for my layout design, and since they were so bright and bold, I layered them all onto a piece of white cardstock.

My title began with the "Go See Do" acrylic, which I loved in white so that it didn't distract from my photo above. To offset the black in the upper left hand corner, I added "Disney" in black alpha stickers below. 

I couldn't finish my layout without using the Travelogue stamp, my favorite item from this release! I stamped "love this place" in black under "Disney," then the "these pages" stamp in the upper right corner, above the red tag. To start adding small embellishments on the page, I stamped the tiny star from the stamp set around the page in a visual triangle, then added a few enamel dots in yellow and red in those same areas.

I also included a couple of items on the layout releasing on the 10th with the April exclusive kit release- so be sure to check out the Elle's Studio shop on Sunday! Don't forget to add your Travelogue supplies to the cart- since the supplies are exclusive, once they're gone, they're gone for good! 

Jot Magazine April Mood Board

I love the beginning of the month. It brings a fresh start to my goals, as well as a new mood board at the Jot Magazine blog. This month's board is simply stunning.

These colors are just what I love to use in my daily life anyway, so my layout came together quite quickly. 

"Watching" supplies | Paper: Bazzill Basics (cardstock), Studio Calico (pink, birds and red), Crate Paper (floral), October Afternoon (feathers); tags: Crate Paper; transparency: Studio Calico (bird); stamps: Elle's Studio; stickers: Studio Calico (hearts); thread: Stampin' Up!; kits: Arendal scrapbook kit and Brimfield scrapbook kit from Studio Calico. 

I recently picked up the Arendal and Brimfield scrapbook kits in the Studio Calico last call sale, and as soon as I saw the bird print in the Brimfield kit, I knew that I wanted to use it for this photo. The colors used in the bird patterned paper matched with the mood board perfectly, so I pulled other patterned papers that would match those colors, all with various patterns. I also grabbed my Crate Paper Wonder stash, because I knew the colors would line up, and the childlike sentiments would work for what I was documenting.  

You know that piece of patterned paper in your stash that you just keep using over and over again? Well, that is this single piece of feather patterned October Afternoon paper from the Daily Flash- Girl Talk collection. I have cut feathers out of it maybe a dozen times, and I still love using it on my pages.

All together, I loved this mood board, and loved creating this layout. Be sure to link up your creation inspired by the mood board to the mood board post by the end of the month for a chance to win an awesome prize! 

Scraptastic Club Sweet Child of Mine Kits: Love These Girls

When I received my Sweet Child of Mine kit and girl add-on from Scraptastic Club last month, I initially thought that I would have to pull out baby photos to make the colors and phrases work with the kit. However, this week, I challenged myself to use some photos that I already had printed and on hand, and I was excited at how versatile these kits were. They're not just for baby photos! 

Since I received the girl add-on, (a boy add-on is available too!) this photo of me with my friend, daughter and goddaughters was perfect to coordinate with the kit. The photograph was already printed in color, so a colorful layout was in order. The Maggie Holmes plus-sign paper in the girl add-on was my starting point for the page, and I based the other colors that I chose from it. 

The big "sugar and spice" pennant was actually a cut-apart 3" x 4" tag from the girl add-on, and there was enough room at the bottom to cut the triangle out and form a pennant. Not only is this a design element in itself, it also grounded the other smaller labels, tabs and pennants that I added next to it. 

To balance out the large embellishment grouping on the left side of my page, I decided to add another grouping to the bottom right corner of my photo. I couldn't resist pulling a few stickers from the Amy Tangerine Better Together sticker book, located in the March 2016 This Life Noted kit, just because I wanted to add a bit more yellow and green to the page. The green "1-5" sticker is from that book, as is the yellow notebook strip sticker. I also had to get a stamp on the page, so I chose to stamp "this moment" from the Drops of Jupiter stamp set onto a printable label. (If you subscribe to the kits, these digital files come free with your kit subscription!)

So I guess the moral of the blog post today is to not take something on face value! Be sure to look at your kit from different angles to get the most use out of it! Have a great day!

Off the Cuff Video Series: Little Sunshine

Hi there! I'm really excited to bring you video two of my "Off the Cuff" video series where I design an entire layout on the spot, and you get to walk through my decision making process, as well as my hesitation! This month, I'm working with Scraptastic Club's Sweet Child of Mine main kit, digital files and stamp to create a new favorite layout about my daughter's happy moment during story time at our local library.

The lovely, peach vellum bag that I included on the layout was actually part of the kit packaging, but I couldn't resist pairing it with the lovely teal patterned papers from Crate Paper's Little You collection, included in the main kit.

It could be that the colors in the kit were made for me, but I had such an easy time putting this layout together. The entire process took me about 30 minutes, but I've reduced that time a bit in this video, so put up your feet for a few minutes and grab a cuppa to see my complete process:

Thanks so much for joining me today. If you like my video and want to see more from me in the future, be sure to follow my YouTube feed for more in my Off the Cuff series next month! Have a great weekend!

Elle's Studio Travelogue Release!

I'm pretty excited that Elle's Studio is now releasing product in-between the exclusive kit reveals on the 10th of each month, and this month, the Travelogue release is sure to get you excited for road trips and high flying adventures!

This series includes journaling tags, labels, "go, see, do" acrylic, the "adventure" wood veneer tag and an awesome stamp set and matching tab die, which you can see in action here: 

I also created a fun layout recording a road trip I took with a friend in the fall. I was just waiting for the perfect product to scrap this photo, and the Travelogue items certainly made the cut! 

I had so much fun creating this layout! I rarely ever stamp on my photos, but the "here we go" stamp was perfect for this photo at the start of a road trip to New Orleans. I created the tab by stamping the shape in yellow, cutting it out with the tab die and stamping the tiny star 5 times at the top. On the "adventure" wood veneer, I simply backed it with a piece of yellow patterned paper from the Little Moments 6" x 6" paper stack.

The "live, travel" tag was cut down from a Travelogue journaling tags and punched on the side, to resemble a ticket edge. I used a bit that I cut off below my journaling to stamp "notes from this day," and placed it underneath my journaling. I framed it at the top with a Little Moments blank label, which I stamped "details please" from the Travelogue stamp set. A few Crate Paper travel-themed chipboard pieces coordinated perfectly with the Travelogue items to finish off my layout!

Be sure to stop by the Elle's Studio shop and check out the Travelogue release today, so that you can get your road trips and travels documented!  

Jot Magazine Issue 13: Project Life Spread

In the latest issue of Jot Magazine, I had a Project Life spread featured in the pocket page section, and it may be my favorite spread, EVER. 

August spread supplies | Cards, flair, wood veneer, stamps and acrylic: Scraptastic Club's This Life Noted kits, Die cuts: Shimelle True Stories for American Crafts, Chipboard: Crate Paper Wonder; alphabet chipboard: Making Memories; chipboard frame: Simple Stories I Am; yellow alphabet: October Afternoon Daily Flash. Other: striped washi tape, chipboard stars, wood veneer people.

Starting out, I had originally decided to use teal and yellow for this spread, but once I picked up the Shimelle True Stories die-cuts tag that said "look on the sunny side," I knew I had to add pink in, too. This month was especially hard for me because I was dealing with a cancer scare while planning a big birthday party and tackling life in general, so this tag was needed, as well as the "embrace life" flag from the same die-cut pack.

The right side was filled with exciting occasions, including my husband's induction as an American citizen, and my goddaughter's birthday. 

This "Oh Happy Day" 3" x 4" card from Scraptastic Club is my favorite in the spread. I added the "fave" acrylic word to add something different than just my handwriting.

Be sure to check out Jot Magazine issue 13 for more pocket page inspiration from the Jot Girls! 

Elle's Studio Highlight on Stamping: Picture Perfect

Today on the Elle's Studio blog, I'm sharing a new layout that focuses on stamping. If you know my style, you know that I use stamps on almost every layout, but on this layout, I decided to create my title and embellishment with stamps, and make stamped images the highlight of the design on my layout.

"Picture Perfect" Elle's Studio supplies | March exclusive kitNoteworthy stampLittle Moments 12” x 12” paper collectionLittle Moments bits and piecesLittle Moments stampJonah alphabet stampLabel It stampThe Story Of stampletter and number stickers- black.

After printing my photo at 4" x 4", backing it with white cardstock and the Bloom paper from the Little Moments collection, I placed in the horizontal center of the 8-1/2" x 11" paper. I then stamped "right now" from the The Story Of stamp, which has so many useful phrases for scrapbook layouts! The grey tab that said "this moment" from the March exclusive kit was perfect for my title, but I just needed to add "at" with the black letter and number stickers

The second half of my title was placed underneath my photo. I started with "you are" using the The Story Of stamp, and adding the label frame from the Label It stamp around it. I then stamped "absolutely" using the Jonah alphabet stamp, and to keep it centered on my layout, I have some techniques that I use often when stamping titles. You can check out my tricks for that over at the Elle's Studio blog

The adorable camera image was cut from a 3" x 4" tag in the March exclusive kit, and underneath, I added the phrase "picture perfect" from the Noteworthy stamp.  Once my title was in place, I stamped little flowers from the Little Moments stamp from the top to the bottom of my layout, creating an ethereal feel on my layout. 

To finish off my layout, I tucked a tag from the Little Moments bit and pieces pack, which held my journaling, behind my photo and stamped "favorite photo" in a similar colored ink from the Noteworthy stamp. This really is one of my favorite photos of my daughter, and now, this is one of my favorite layouts of all time. 

Thanks for stopping by! Be sure to check out the Elle's Studio blog for daily inspiration from the design team and monthly guests, and don't be afraid to stamp on your layouts! 

Scraptastic Club Sunday Morning Kits: The Sweetest Friends

I just received my Scraptastic Club March package in the mail, so I'm busy playing with the Sweet Child o' Mine kits! Until I have something to share from the new kits, I'm here to show you another layout created with the February Sunday Morning kits: The Sweetest Friends.

Supplies | Sunday Morning kit, Sunday Morning add-on, Sunday Morning stamp set, February 2016 This Life Noted stamp set.

I absolutely loved the pennants in the Sunday Morning stamp set, and wanted to base my layout design around them! Instead of hanging them across the page horizontally, I decided to hang them vertically like flags, and use other pieces from the kit to add in some different elements. 

Since I had such a bold black polka-dot paper on the right side, I wanted to echo that black on the left side of the page and stamped the outside of my pennants with black ink. Other pieces from the We R Memory Keepers Crush accent stickers and Crate Paper Hello Love chipboard stickers filled in the spaces between the pennants, and I stamped heart outlines from the February 2016 This Life Noted stamp set directly onto the Crate Paper woodgrain print from the main kit to crate my own tiny embellishments.

A 3" x 4" card from the cut-apart sheet in the add-on started my title, and I added the word "friends" from the Amy Tangerine Better Together Thickers just below it, adding a little strip of colored paper from a manufacturer's strip under the word to help it to stand out against my photo. I printed my journaling directly onto the background patterned paper, placing it just below my title. 

I love this sweet layout about my daughter and her bestie, and it came together so easily with the Sunday Morning kits! Thanks for stopping by! 

Tutorial Tuesday: Easter Egg Tree

Last year, while shopping in a high-end home store in my area, I found the cutest Easter egg trees, standing about 8" tall, planted in little terra cotta pots, with a big price tag of about $40 each. And I thought: 

I can totally make that.

And I totally did. 

So today, I'd like to share how you can make them too, at a price of way less than $40.

Supplies.jpg

First, gather your supplies. For each tree, you will need: 

  • Foam cone form: I used one 12" high, and one 9" high form, as I like the difference in height on my mantel, but they both fit snugly into the same pot.
  • 22 gauge wire & wire cutters: Look in the floral department of your craft store for this.
  • 3 different types of burlap ribbon: 4" wide wired burlap, 2-1/2" wide colored burlap, and 1" wide metallic burlap & scissors to cut them. I purchased all of my ribbon at Michaels. (Watch for ribbon to go on sale at this time of year.)
  • Decorative foam eggs: I used about 20 eggs for the 12" cone tree, in two different sizes. The tallest egg was 2-1/4" and the smaller egg was 1-1/2". (This is your most expensive supply for this project. I picked mine up at Michaels in the Easter sales last year, which have already begun. Also look at JoAnn Crafts and World Market for different colored eggs.)
  • 2 decorative pots: You will want to be sure that the bottom of your foam cone fits snugly at the top of the pot. (I bought one of these at a time, using a coupon at Michaels.)
  • Hot glue gun and hot glue.

Now, cut your ribbon according to the photo above. To get a good jump-start on your tree, cut about a dozen pieces of each ribbon, then you can cut more from there so that you do not waste any of your ribbon.

Cut the wire into 2-1/2" pieces, enough for the amount of ribbon you've already cut. Go ahead and bend the piece in half, like hairpins. Picking up a piece of ribbon, hold it in the center with your thumb and pointer finger, pinching the sides into the center to create a bow. 

While holding the ribbon bow tightly between your fingers in one hand, carefully slide the wire hairpin over the front of the bow with your other hand and squeeze to keep the bow in place, twisting the wire tightly at the back side, then twisting the length of the wire over itself to create one wire leg to stick into your foam cone.

Once you've created several burlap bows, you can begin pushing the wire end into your form, making a triangular shape with three different bows, so that you leave a space in the middle for a decorative egg. After a while, this process can start to hurt your fingertips, so gloves can be handy for this part. Because of this, I can only complete one tree per day. I need to let my fingers rest afterward! 

Use one of the bows from the first triangle to create another triangle, and then keep going until the entire cone is covered, from top to bottom.

Now, add a big daub of hot glue in the space between your ribbon bows, being sure not to attach your bow with the glue! Be aware of the colors that you are using, so that you don't put too much of the same colored egg in one space. 

Once you have all of your eggs glued on, fill in any gaps where you may be able to see the styrofoam with additional ribbon bows. In this photo, you can see the styrofoam right underneath the yellow egg, so I definitely filled that piece in. The widest burlap ribbon takes up the most space, so I typically used it to fill in any gaps.

Now that your tree is finished, add a large amount of hot glue to the inside edge of the decorative pot you've chosen. Quickly set the base of the cone in your pot to adhere the tree to the pot, being sure not to trap any of your ribbon bow ends between the foam and the pot. I had a hard time doing this fast enough before my glue began to harden, so I ended up squirting daubs of glue to secure the tree once I had it in place on the pot.

Lastly, fluff your ribbon. You can bend the ends of your wired ribbon to give it a pretty bow appearance. Leave your tree as is, or add a few wired floral butterflies flying out of the tree, to add extra springy-ness! 

This really is my favorite home decor DIY project to date. These egg trees look like they cost a fortune, and were picked up at an expensive store! 

Thanks for stopping by, and please share your egg trees with me if you make one! 

Elle's Studio March Reveal!

Hello! Today is the 10th, which means that Elle's Studio has a brand new set of supplies perfect for your memory-keeping in the shop! Let's start out with the March exclusive kit!

What a rainbow of beautiful colors, right? To coordinate with the kit, Elle is also offering the gorgeous acrylic stars, Noteworthy stamp, Easter acrylic, Spring acrylic, and the Easter and Flower Acrylic Mix.

And don't forget about the useful digital files! The March cut files and Lucky Clovers background cut file and Happy Easter can be sized and customized just for your project, and the Spring Break and Smile printables will bulk out your kit to help you document even more memories.

In addition to the new monthly exclusives, the Little Moments collection is also now available in the Elle's Studio shop, and I've been having so much fun creating with it! 

My first project is a layout that records my daughter's love for building blocks. The square stamp with the star inside from the Noteworthy stamp gave me the inspiration to create this layout, and I knew I would have to create my own building block towers with it.

"Block Star" ES supplies | March exclusive kitLittle Moments 12" x 12" paper collectionSmile printables, Jonah alphabet stamp set, "The Story Of" stamp, acrylic stars. Other supplies: Studio Calico silver puffy stars

My second project is a card, which I haven't created for a while! I loved the Lucky Clovers background cut file, and paired it with the "I'm so lucky to have you" tag from the kit to create a multi-layered card for someone special.

"Lucky card" ES supplies | March exclusive kitLucky Clovers background cut file, Little Moments Bits & Pieces, Little Moments 6" x 6" paper stack, Little Moments 12" x 12" paper collection. Other supplies: green & gold sequins, green & white striped ribbon, Studio Calico gold puffy heart, metallic gold paint pen (to outline some of the cutout clover.)

I just had to add a bit of glitter on this tag! 

Be sure to check out the design team gallery for all of the new, beautiful project inspiration, and watch the Elle's Studio blog for exciting special guests this month! 

Scraptastic Club February Sunday Morning Kits: So Much Love

I'm still working with the February Sunday Morning kit and add-on from Scraptastic Club, and I just received the notification that my March kits have shipped, so I'd better get on and share these with you, huh?

I struggled to figure out what to do with the Crate Paper photo frames paper in the kit. These lovely little squares are so great to look at, but when used them as a background on a layout, they completely took away from everything else. So, I decided to take a deep breath & cut each one individually! 

After cutting the squares out, I decided to arrange them in a shape, and since this month's kits are all about love, I decided to create a large heart, and sewed a heart shape around the outside.

I didn't want to throw too much embellishment on the heart, but I added a small cluster to the upper right side. I also added tiny stamped hearts from the February This Life Noted stamp set. 

This is one of those layouts where I don't have much to say in my journaling, but I wanted to get this favorite photo, taken by Donya Luana, printed and on a layout. I don't feel that you have to write a novel on every page.

I'll be sharing the rest of my Sunday Morning kit and add-on layouts here over the next few days. In the meantime, be sure to check out Scraptastic's March kits in the shop! 

Technique Tuesday: Creating a Stamped and Watercolored Floral Background

As promised, today on my YouTube feed, I'm sharing how I created this soft, stamped and watercolored background on my Jot Magazine March mood board layout, which you can find on yesterday's blog post below!

This technique is so easy and fun- all you need is a solid shaped stamp, some water-based ink pads, an inexpensive watercolor set and an inexpensive brush, as well as water, of course! There is no need to be an artist to create this lovely, custom background, because you are starting with the shapes you stamp first. 

Please leave a comment or a thumbs-up on my YouTube feed if you liked this Technique Tuesday post and be sure to follow me for more scrapbooking and papercrafting videos! 

Jot Magazine March Mood Board

Chase those Monday blues away with the beautiful March mood board from Jot Magazine! 

I can't believe how gorgeous this board is! It reminds me of a warm, spring day, and I began my creative process by choosing a photo that gave me the same feel.

Supplies | Cardstock: Bazzill Basics Avalanche. Patterned paper: Scraptastic Kit Club, Crate Paper (woodgrain). Embellishment: Crate Paper ("wild spirit" chipboard, flower die-cuts & tag), American Crafts (kraft Thickers), Pink Paislee (arrow), Studio Calico (journaling spot), Stampin' Up! (twine), enamel dots. Other: Stampin' Up ink, Elle's Studio "you are" stamp.

I knew I wanted to use a watercolor technique to match the board, and decided to do a partial stamped, partial watercolor border along the left side of the layout. I was surprised how much I loved this process, as I typically don't do things so "loose."

The "wild spirit" chipboard piece was absolutely perfect for what I wanted to document on this layout- my daughter's fearless attitude toward life. I layered it on top of my photos and topped it with floral die-cuts and the Pink Paislee arrow. With the floral border on the left side of the page, I really didn't want to go far with embellishment.

I'm pretty excited about the way this layout came out- it is exactly how I envisioned it, and to me, it really captures the feel of the mood board. Watch out on my YouTube feed this week for a video on how I created my floral stamped/watercolored border, and be sure to upload your own project to the mood board page for a chance to win!

Products used in this project: